“Are you sure you want to dump *all* that oil in there?” my friend asked, eyeing the skillet like I was about to commit some culinary crime. Honestly, I wasn’t even sure myself. But that moment, while whipping up this flavorful homemade chili crisp oil with garlic and sesame seeds, turned into a small kitchen epiphany. I’d been chasing the perfect chili oil forever, the kind that’s rich, smoky, and just fiery enough without knocking your socks off. This recipe wasn’t planned, really — more like a happy accident after I tried to simplify a complex takeout favorite.
It was late, the kitchen was dim except for the overhead light flickering as the garlic sizzled in the pan, releasing that nutty, toasty scent. I’d been craving something with a kick to brighten up my leftovers, but not that usual bottled chili oil with mystery ingredients. So I just started combining what I had on hand: toasted sesame seeds, a generous pile of minced garlic, crushed red pepper flakes, and a good quality neutral oil. The result? Pure magic.
That first spoonful on steamed rice felt like a warm, spicy hug—comforting but alive with flavor. And no, it doesn’t burn your mouth off like some fiery sauces do; instead, it lingers with a gentle heat and a deep, roasted aroma. I’ve made it multiple times since (at least twice a week, honestly), tweaking the heat and texture, but this version stuck because it’s just right: crunchy, garlicky, and nutty from the sesame seeds.
What I love most about this chili crisp oil is how it turns any simple meal into something memorable — drizzled over noodles, as a dip for dumplings, or even mixed into an egg fried rice. It’s a little jar of homemade goodness that feels both indulgent and wholesome. After a few attempts, I finally realized this recipe isn’t just a condiment; it’s a staple in my kitchen that brings life to everyday dishes without fuss.
So yeah, that night’s kitchen experiment didn’t just add spice to my food — it changed how I think about chili oil forever.
Why You’ll Love This Recipe
Coming from someone who’s tried countless chili oil recipes (some too bland, some too fierce), I can say this homemade chili crisp oil with garlic and sesame seeds hits the sweet spot. Here’s why this one stands out:
- Quick & Easy: Ready in under 20 minutes, it’s perfect for busy cooks who want big flavor fast.
- Simple Ingredients: No obscure spices or specialty items—just pantry staples you probably already own.
- Perfect for Any Meal: Whether it’s a midweek dinner or a weekend gathering, this chili crisp adds that crave-worthy punch.
- Crowd-Pleaser: Kids might shy away from the heat, but adults love the garlicky crunch and toasty sesame notes.
- Unbelievably Delicious: The balance of spicy, savory, and nutty flavors creates a comforting yet exciting taste experience.
What sets this chili crisp apart is the way the garlic is gently cooked to golden perfection, releasing its sweetness without bitterness, and the sesame seeds add a satisfying crunch and depth. Unlike many store-bought versions, this recipe skips the artificial preservatives and lets you control the heat level—so it’s truly your own blend of spicy goodness.
It’s not just a condiment; it’s a flavor booster that turns the simplest dishes into something special. Plus, I love that it pairs beautifully with other homemade favorites like my Japanese sesame spinach goma-ae, where the toasted sesame theme continues in a totally different way. Or even drizzled over a bowl of Moroccan couscous with seven vegetables for a spicy twist.
What Ingredients You Will Need
This recipe uses simple, wholesome ingredients to deliver bold flavor and satisfying texture without the fuss. Most of these are pantry staples, but if you want to swap a few things out, I’ll mention those options below.
- Neutral Cooking Oil (1 cup / 240 ml): Canola, vegetable, or peanut oil works best for its high smoke point and clean flavor. I prefer peanut oil for a subtle nutty undertone.
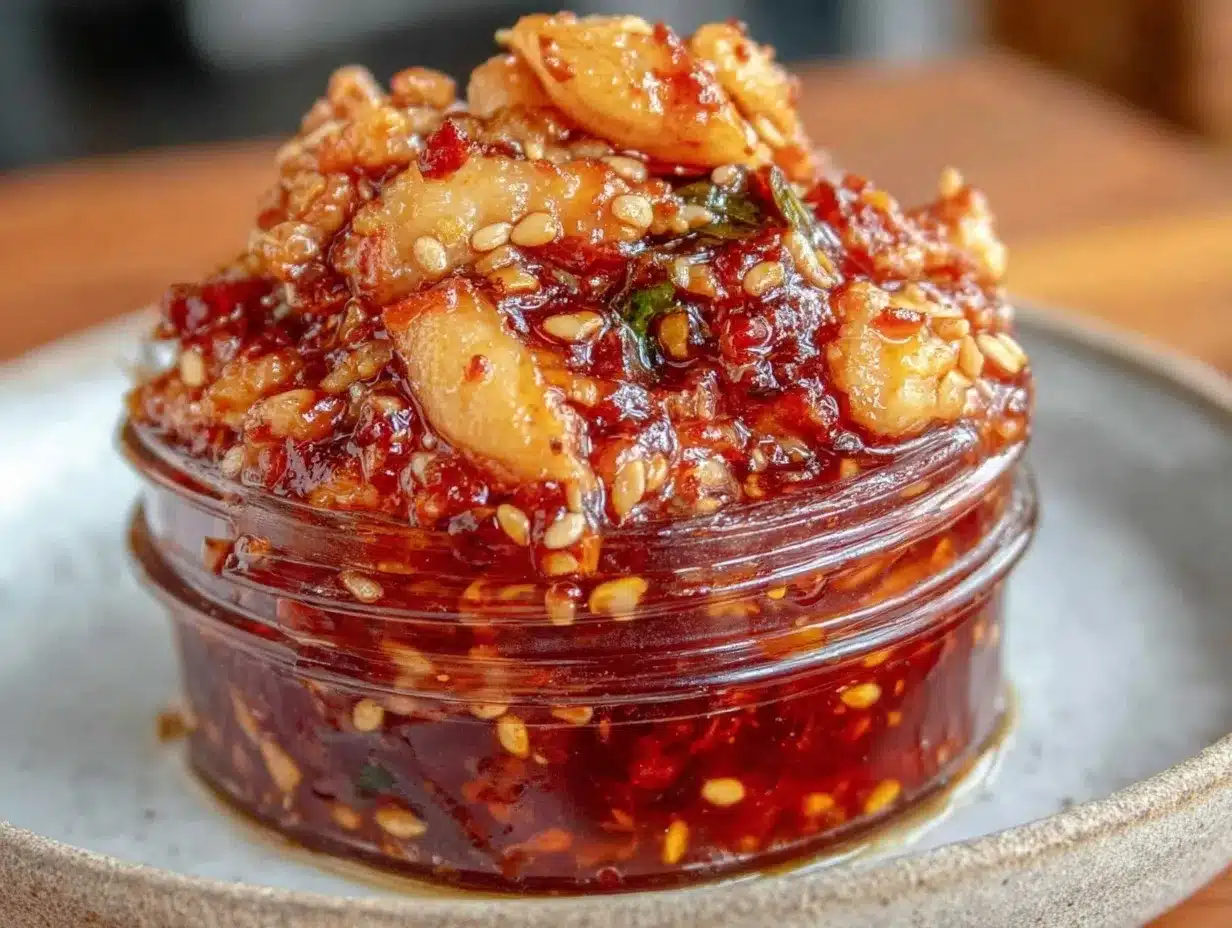
- Garlic (6-8 cloves, finely minced): The star of the show! Fresh, peeled cloves give the best aroma and flavor.
- Dried Red Chili Flakes (2-3 tablespoons): Adjust based on your heat preference. Use Korean gochugaru for a smoky, mild spice or crushed red pepper flakes for a sharper kick.
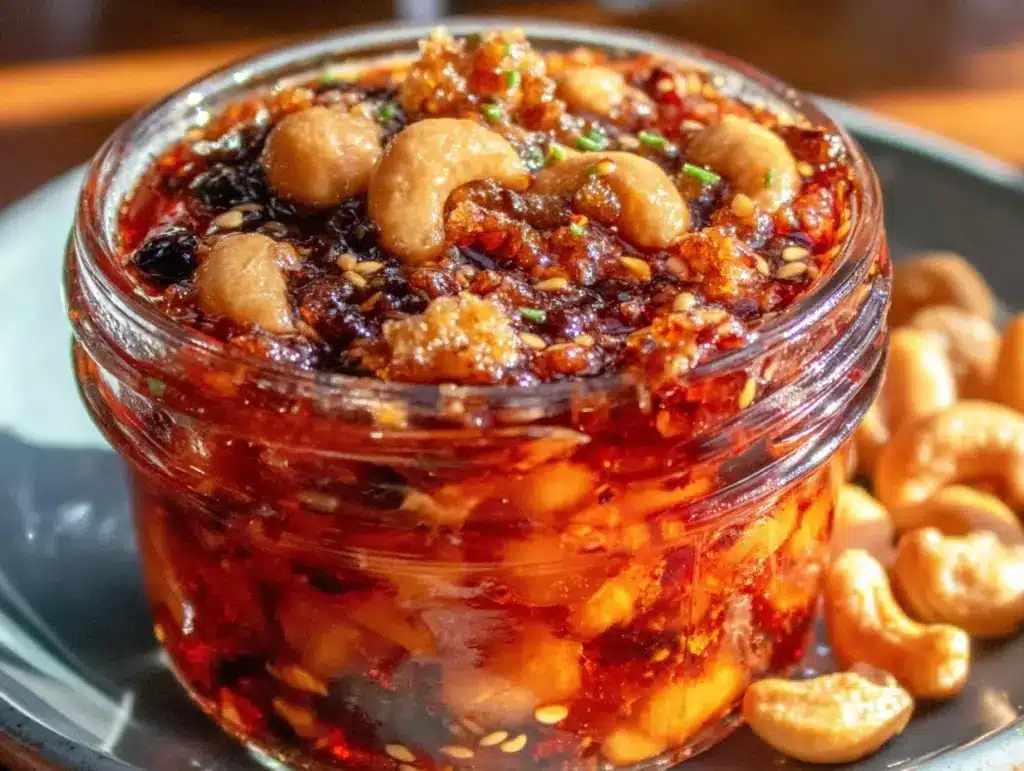
- Toasted Sesame Seeds (3 tablespoons): Adds crunch and nuttiness. Toast your own lightly in a dry pan for best flavor.
- Soy Sauce (1 teaspoon, optional): For a touch of umami depth (can omit for gluten-free).
- Sugar (1 teaspoon): Balances the heat and savory elements with a slight sweetness.
- Salt (to taste): Enhances all the flavors.
Ingredient tips: I recommend using organic garlic if possible—the flavor is noticeably brighter. For chili flakes, avoid super old or dusty packages; fresher flakes pack more punch and color. If you want a gluten-free version, swap soy sauce for tamari or coconut aminos. And if you’re short on time, pre-minced garlic jars can work, but fresh is always worth the extra peel and chop.
Equipment Needed
- Small saucepan or skillet: For gently heating the oil and frying the garlic. A heavy-bottomed pan helps prevent burning.
- Heatproof bowl or jar: To combine and store the chili crisp oil.
- Fine mesh strainer (optional): If you prefer a smoother oil without larger bits.
- Spoon or spatula: For stirring the ingredients together.
- Measuring spoons and cups: For accurate ingredient amounts.
Personal note: I love using a small cast iron skillet for the garlic because it holds heat evenly and gives a nice even color. But a non-stick pan works just fine and is easier to clean up. When making this, keep a close eye on the garlic—burnt garlic means bitter oil, so patience is key! And if you don’t have a fancy jar, a clean mason jar works wonders for storage and can even be gifted.
Preparation Method
- Toast the sesame seeds: Place 3 tablespoons of sesame seeds in a dry skillet over medium heat. Stir frequently for about 2-3 minutes or until lightly golden and fragrant. Remove from heat and set aside.
- Prepare the garlic: Finely mince 6-8 cloves of garlic. The smaller the pieces, the better they crisp up.
- Heat the oil: Pour 1 cup (240 ml) of your chosen neutral oil into a small saucepan or skillet. Warm over medium-low heat until the oil reaches around 250°F (120°C) if you have a thermometer, or until it’s shimmering but not smoking. This usually takes about 4-5 minutes.
- Add the garlic: Carefully add the minced garlic to the warm oil. Stir gently to separate the pieces. Cook for about 5-7 minutes, stirring occasionally to prevent burning. You want the garlic to turn golden brown and crispy, releasing that nutty aroma. If it starts to brown too fast, lower the heat immediately.
- Add the chili flakes: Remove the pan from heat and stir in 2-3 tablespoons of dried chili flakes (adjust to your spice tolerance). The residual heat will toast the flakes gently, releasing their color and flavor without burning.
- Season the oil: Add 1 teaspoon sugar, 1 teaspoon soy sauce (optional), and salt to taste. Stir well to combine all the flavors.
- Combine with toasted sesame seeds: Transfer the oil mixture to a heatproof bowl or jar. Stir in the toasted sesame seeds evenly.
- Cool and store: Let the chili crisp oil cool to room temperature before sealing. It will thicken and the flavors will meld after sitting for a few hours or overnight.
Pro tip: If you want extra crunch, add a tablespoon of crushed peanuts or fried shallots after the oil cools. Also, if you prefer a less chunky texture, strain the oil through a fine mesh strainer before adding the sesame seeds.
Cooking Tips & Techniques
Making chili crisp oil isn’t rocket science, but a few key tricks save you headaches and bitter bites:
- Low and slow with the garlic: Rushing this step or turning the heat too high cooks the garlic unevenly or scorches it. Patience here is your best friend.
- Oil temperature matters: Too hot and the chili flakes burn, turning bitter. Too cool and the chili and garlic won’t infuse properly. Aim for a gentle shimmer, roughly 250°F (120°C).
- Freshness counts: Use fresh garlic and chili flakes for vibrant flavor. Old spices lose potency and color.
- Toast sesame seeds yourself: Pre-toasted seeds can be stale. A quick toast in a dry pan revives their nuttiness and crunch.
- Storage safety: Store your chili crisp oil in a sealed jar in the fridge. It keeps well for up to 2 weeks. The oil might solidify slightly when cold; just bring it to room temp before use.
Once, I got impatient and cranked the heat, turning my garlic black within seconds. The oil tasted burnt and bitter—lesson learned the hard way! Now, I watch the garlic closely and keep a little bowl nearby to scoop out any pieces that brown too fast. Also, multitasking works well here; while the oil warms, I prep the garlic and measure spices to keep things moving smoothly.
Variations & Adaptations
This homemade chili crisp oil with garlic and sesame seeds is a canvas you can tweak to match your preferences or dietary needs:
- Heat level: Swap out chili flakes for milder smoked paprika or add more for a fiery punch. You can also use fresh chopped chilies for a fresher, sharper heat.
- Nut-free option: Omit sesame seeds and replace with crunchy fried shallots or roasted sunflower seeds for texture.
- Oil choice: Try using extra virgin olive oil for a fruitier flavor, but keep the temperature lower to avoid burning.
- Umami boost: Add a teaspoon of fermented black bean paste or a splash of fish sauce for deeper savoriness.
- Herbal twist: Toss in some dried herbs like thyme or oregano for a unique spin (works surprisingly well with pasta dishes).
Personally, I once made a batch swapping in toasted pine nuts instead of sesame seeds—unexpected but delicious. Another time, I stirred in a bit of Vietnamese pickled vegetables on the side, and that tang paired beautifully with the spicy oil.
Serving & Storage Suggestions
This chili crisp oil is incredibly versatile and can be used in countless ways. Serve it drizzled over steamed rice, noodles, grilled meats, or roasted vegetables. It’s fantastic stirred into soups or as a dipping sauce for dumplings. The crunchy garlic and sesame bits add texture and flavor that keep you coming back for more.
Serve it at room temperature for the best texture and flavor. If refrigerated, bring it back to room temp before using to let the oil loosen up.
Store your chili crisp oil in a clean, airtight jar in the fridge for up to 2 weeks. The flavors deepen over time, so if you can resist, let it sit overnight before using. For longer storage, you can freeze it in small portions, though the texture of garlic bits may change slightly.
When reheating leftovers like fried rice or roasted veggies, adding a spoonful of this chili oil right before serving brings everything alive. It pairs especially well with dishes like my Mexican rice with fresh tomatoes and cilantro, where the chili crisp oil adds a surprising kick.
Nutritional Information & Benefits
Per tablespoon, this chili crisp oil contains approximately:
| Calories | 120 kcal |
|---|---|
| Fat | 14 g (mostly unsaturated) |
| Carbohydrates | 1 g |
| Protein | 0.3 g |
| Sodium | 90 mg (variable with soy sauce) |
Key health benefits come from the garlic, which is known for its anti-inflammatory and immune-supporting properties, and sesame seeds, which provide healthy fats, fiber, and essential minerals like calcium and magnesium. Using a neutral oil with a high smoke point keeps harmful oxidation at bay.
This recipe is naturally gluten-free if you swap soy sauce for tamari and vegan if you keep it simple. Just watch out if you have a sesame allergy.
From a wellness perspective, this chili crisp oil adds flavor without relying on processed sauces or excessive salt, making it a smart way to bring excitement to clean eating.
Conclusion
This flavorful homemade chili crisp oil with garlic and sesame seeds has become a kitchen essential I reach for constantly. It’s more than just heat—it’s the perfect balance of crispy, garlicky, and nutty all in one spoonful. The fact that it’s easy to make, uses simple ingredients, and transforms everyday meals into something memorable is why I keep coming back to it.
Feel free to tweak the heat or add your own spin, but trust me when I say this recipe gets it right. It’s the kind of condiment that makes your cooking feel personal and special, even on hectic nights.
Give it a try and let me know how you use yours—whether drizzled over roasted veggies, mixed into noodles, or alongside a batch of crispy samosa spiced potatoes like these roasted potatoes. I’d love to hear your twists and favorite pairings!
FAQs About Homemade Chili Crisp Oil
Can I use fresh chilies instead of dried chili flakes?
Yes! Finely chop fresh chilies and add them towards the end of cooking for a fresher, brighter heat. Just be mindful of moisture, which can reduce shelf life.
How long does homemade chili crisp oil last?
Stored in an airtight jar in the refrigerator, it keeps well for about 2 weeks. The flavors deepen over time but watch for any off smells or mold.
Can I make this chili crisp oil vegan and gluten-free?
Absolutely. Skip the soy sauce or replace it with tamari or coconut aminos to keep it gluten-free and vegan.
What dishes pair best with chili crisp oil?
It’s great on rice, noodles, dumplings, roasted vegetables, soups, and even as a topping on salads like sesame spinach goma-ae.
Why did my garlic turn bitter?
Burnt garlic is the culprit. Cook the garlic low and slow, watching closely, and remove from heat once golden brown to avoid bitterness.
Pin This Recipe!
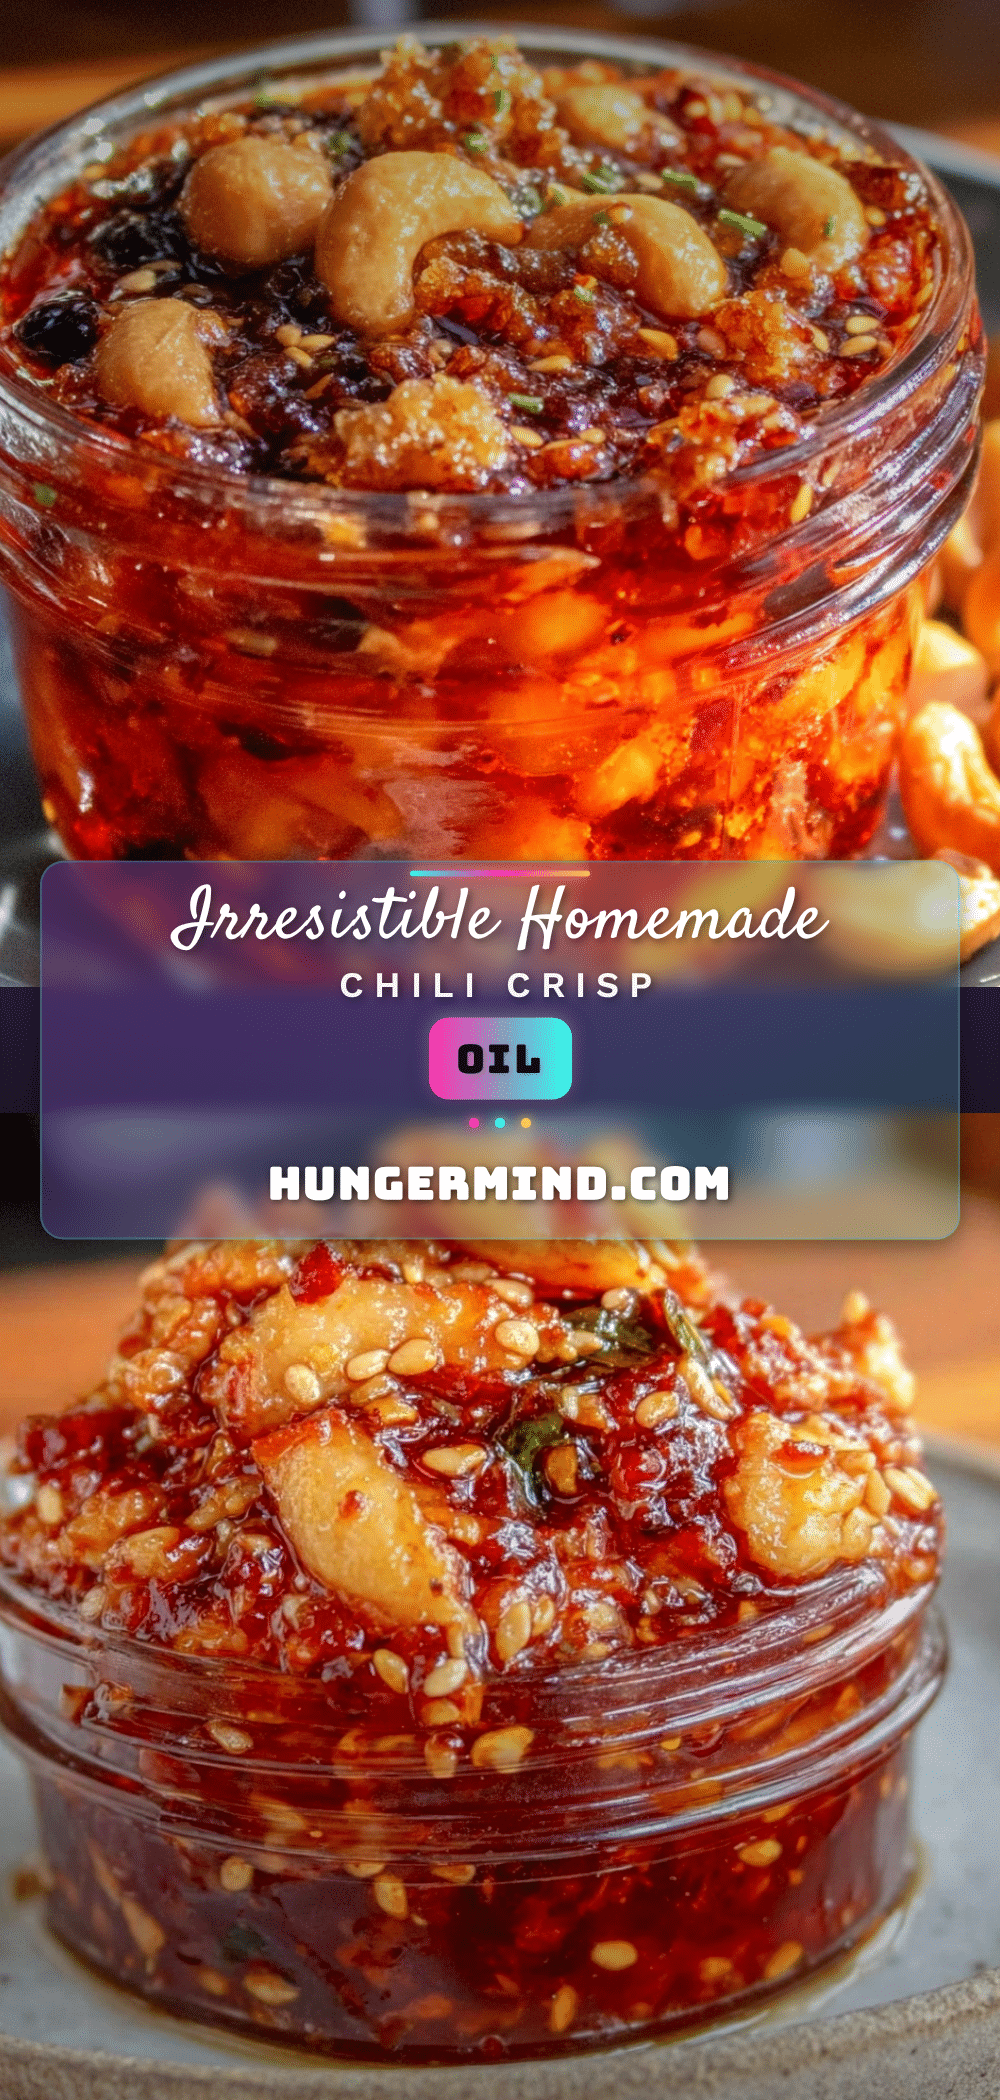
Flavorful Homemade Chili Crisp Oil Recipe with Garlic and Sesame Seeds

A rich, smoky, and mildly spicy homemade chili crisp oil featuring golden garlic and toasted sesame seeds, perfect for drizzling over rice, noodles, or as a dip.
- Prep Time: 10 minutes
- Cook Time: 10 minutes
- Total Time: 20 minutes
- Yield: About 1 cup (approximately 16 tablespoons) 1x
- Category: Condiment
- Cuisine: Asian
Ingredients
- 1 cup (240 ml) neutral cooking oil (canola, vegetable, or peanut oil)
- 6–8 cloves garlic, finely minced
- 2–3 tablespoons dried red chili flakes (Korean gochugaru or crushed red pepper flakes)
- 3 tablespoons toasted sesame seeds
- 1 teaspoon sugar
- 1 teaspoon soy sauce (optional, can omit for gluten-free)
- Salt to taste
Instructions
- Toast the sesame seeds in a dry skillet over medium heat for 2-3 minutes until lightly golden and fragrant. Remove and set aside.
- Finely mince the garlic cloves.
- Heat the oil in a small saucepan or skillet over medium-low heat until shimmering but not smoking, about 4-5 minutes (around 250°F / 120°C).
- Add the minced garlic to the warm oil and cook gently for 5-7 minutes, stirring occasionally, until golden brown and crispy. Lower heat if garlic browns too fast.
- Remove the pan from heat and stir in the dried chili flakes.
- Add sugar, soy sauce (if using), and salt to taste. Stir to combine.
- Transfer the oil mixture to a heatproof bowl or jar and stir in the toasted sesame seeds.
- Let the chili crisp oil cool to room temperature before sealing. Allow flavors to meld for a few hours or overnight.
Notes
Cook garlic low and slow to avoid bitterness. Use fresh garlic and chili flakes for best flavor. Store in an airtight jar in the refrigerator for up to 2 weeks. Bring to room temperature before use. Optional additions include crushed peanuts or fried shallots for extra crunch. For gluten-free, replace soy sauce with tamari or coconut aminos.
Nutrition
- Serving Size: 1 tablespoon
- Calories: 120
- Sugar: 0.5
- Sodium: 90
- Fat: 14
- Saturated Fat: 2
- Carbohydrates: 1
- Fiber: 0.3
- Protein: 0.3
Keywords: chili crisp oil, homemade chili oil, garlic chili oil, sesame chili oil, spicy condiment, chili oil recipe, easy chili oil


