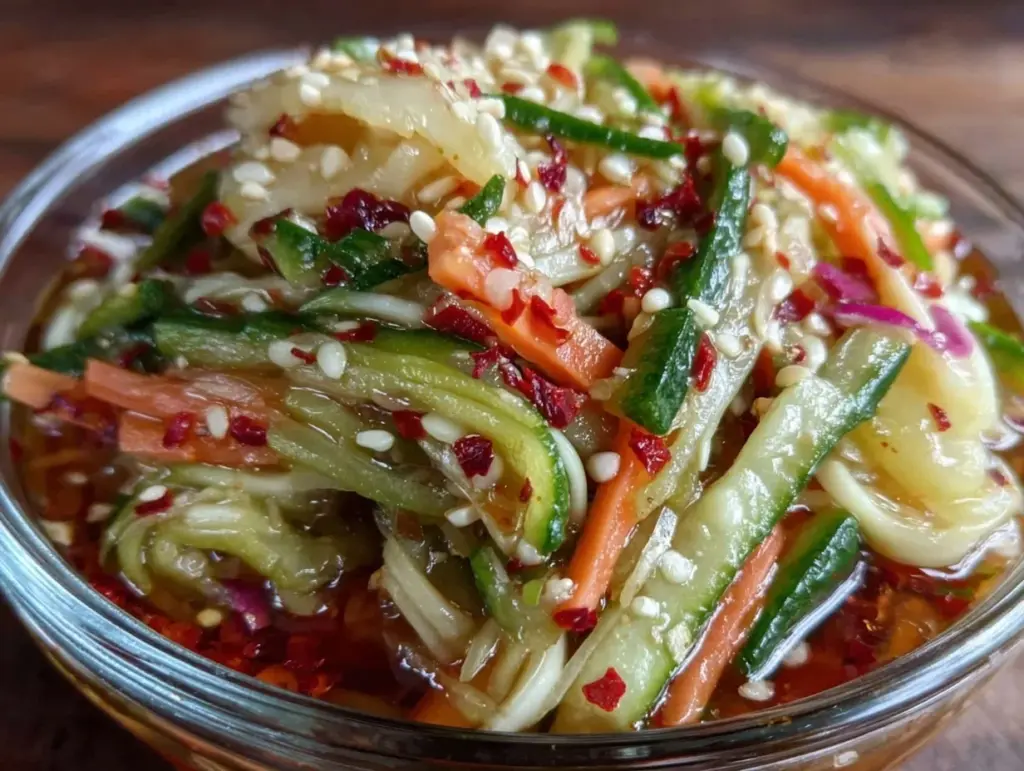
Let me paint you a quick picture: the tangy, sweet aroma of freshly pickled daikon and carrots floats through my kitchen, mingling with the sharp snap of vinegar and the subtle sweetness of sugar. I swear, every time I pop open a jar of these fresh Vietnamese pickled vegetables, it’s like instant sunshine on the table. The colors alone are enough to make your Pinterest board jealous—crisp orange, snowy white, and those tiny flecks of red chili that promise just a whisper of heat. The first time I made this recipe, I was standing in my mom’s kitchen, elbows deep in vegetables, laughing as she told stories about her own Friendsgiving adventures (back when it was just called “potluck” in our neighborhood).
Honestly, I was hooked after that first bite. The crunch, the brightness, the way the acidity cuts through rich holiday dishes—it’s the kind of moment where you pause, take a deep breath, and smile because you know you’re onto something truly special. There’s a certain nostalgia wrapped up in these jars for me. When I was knee-high to a grasshopper, I’d sneak extra pickles from the family fridge, and now my own kids do the same. My family can’t resist snatching these vegetables straight off the cooling rack (and I can’t really blame them).
These pickled veggies are dangerously easy, pure comfort, and absolutely perfect for Friendsgiving. Imagine them tucked next to your turkey, brightening up a roast veggie platter, or even layered atop sandwiches for those post-holiday leftovers. Whether you stumbled on this recipe searching for that little extra something for your feast or you just love fresh, crunchy sides, you’re going to want to bookmark this one. I’ve tested it more times than I care to admit (in the name of research, of course), and now it’s a staple for every family gathering, gift basket, and—let’s face it—for when I just need a pickled snack that feels like a warm hug.
Why You’ll Love This Vietnamese Pickled Vegetables Recipe
If you’ve ever tried to bring something unique yet crowd-pleasing to Friendsgiving, you know the struggle. Over the years, as a recipe developer and food lover, I’ve tested batches and tweaked ratios until this Vietnamese pickled vegetables recipe hit that sweet spot. Here’s why it’s become my go-to (and why you’ll love it too):
- Quick & Easy: Comes together in under 30 minutes—most of the time is just letting those vibrant veggies soak up the flavors.
- Simple Ingredients: No fancy grocery trips needed; you probably have everything you need in your kitchen already (or just a quick stop at any market).
- Perfect for Friendsgiving: These pickled veggies cut through the richness of the usual holiday fare, adding crunch, color, and zing to your table.
- Crowd-Pleaser: Seriously—kids, grown-ups, and even the “I-don’t-like-pickles” crowd end up reaching for seconds.
- Unbelievably Delicious: It’s the combo of sweet, sour, and a little spicy that makes your taste buds dance. Plus, the crunch is unbeatable!
What sets this recipe apart? For starters, I use a touch of rice vinegar for mellow acidity, and a slight tweak in the sugar-vinegar ratio that keeps things balanced. The classic daikon and carrot mix gets a little extra magic from fresh garlic and red chili slices—no bland pickles here. It’s not just another version; it’s the best version I’ve made after plenty of taste tests (and a few failed batches, trust me).
And let’s talk about the feels. This recipe isn’t just good—it’s memorable. The kind that makes you close your eyes after the first bite and just savor. It’s comfort food, but fresh and lighter—perfect for impressing guests without stress, and for transforming even a simple sandwich into something special. Whether you’re hosting Friendsgiving or just need a pop of brightness in your week, these pickled veggies fit right in.
What Ingredients You Will Need
This Vietnamese pickled vegetables recipe uses simple, wholesome ingredients to deliver bold flavor and a satisfyingly crisp texture—no fuss, just results. Most are pantry staples, and you’ll find substitutions are easy if you want to mix things up or accommodate dietary needs.
- For the vegetables:
- 1 large daikon radish (about 12 oz / 340 g), peeled and cut into matchsticks
- 2 large carrots (about 8 oz / 225 g), peeled and cut into matchsticks
- 1 small cucumber (about 6 oz / 170 g), seeded and cut into thin strips (optional, adds extra crunch)
- 2-3 red Thai chili peppers, thinly sliced (optional, for a touch of heat)
- 2 garlic cloves, peeled and thinly sliced
- For the brine:
- 1 cup (240 ml) rice vinegar (I like to use Marukan for its mellow flavor)
- 1 cup (240 ml) filtered water
- 1/2 cup (100 g) granulated sugar (adjust to taste)
- 2 teaspoons (10 g) sea salt
Ingredient Tips:
- Look for firm, fresh daikon and carrots—the crunchier the better.
- You can swap rice vinegar for apple cider vinegar if needed, but rice vinegar gives that classic, gentle tang.
- Don’t love heat? Simply skip the chili, or use a milder pepper.
- If you need a lower-sugar version, substitute half the sugar with honey (the flavor will be slightly different, but still tasty).
- For a gluten-free option, double-check your vinegar—most rice vinegars are naturally gluten-free, but some brands add wheat.
- Seasonal swaps: Try adding sliced radishes or turnips in the spring, or toss in a handful of fresh herbs like cilantro for a summer twist.
I’ve experimented with plenty of brands and veggie combos—honestly, the best results come from fresh, crisp produce and a balanced brine. If you’re prepping for a crowd, just double or triple the quantities. And don’t be afraid to get creative with your own mix-ins!
Equipment Needed
You don’t need fancy gadgets for this Vietnamese pickled vegetables recipe—just a few basics and maybe a couple of handy alternatives:
- Sharp chef’s knife (for slicing veggies into matchsticks)
- Cutting board (a sturdy one—believe me, matchstick cutting gets easier with practice)
- Vegetable peeler (makes peeling daikon and carrots quick and easy)
- Mixing bowl (for tossing veggies with salt)
- Measuring cups and spoons (for precise brine ratios)
- Small saucepan (to heat the brine)
- 2-3 glass jars with lids (16 oz / 470 ml size works well, but you can use any clean, heat-safe jars)
If you don’t have a mandoline slicer, don’t sweat it—a knife works just fine. I’ve used everything from old pasta sauce jars to fancy Weck jars (just make sure they’re clean). For maintenance, run your jars through a hot rinse before filling, and invest in a good knife sharpener—dull blades make matchsticks a pain.
Budget-friendly tip: Save up old pickle or jam jars for your homemade pickles. They work just as well and add a little rustic charm to your Friendsgiving spread.
Preparation Method
- Prep the vegetables: Peel the daikon radish and carrots. Slice them into thin matchsticks (about 1/4 inch / 0.6 cm thick). If using cucumber, remove seeds and slice into similar strips. Place all veggies in a large mixing bowl.
- Add salt and toss: Sprinkle 2 teaspoons (10 g) sea salt over the vegetables. Toss well to coat, then let sit for 10 minutes. This draws out excess moisture and keeps the pickles crisp.
- Rinse and drain: After 10 minutes, rinse the salted veggies under cold water to remove excess salt. Drain well and gently squeeze to remove extra liquid. Set aside.
- Make the brine: In a small saucepan, combine 1 cup (240 ml) rice vinegar, 1 cup (240 ml) water, and 1/2 cup (100 g) sugar. Heat over medium, stirring until sugar dissolves—about 2-3 minutes. Remove from heat and let cool slightly (to just warm).
- Pack the jars: Layer the drained vegetables, garlic slices, and chili peppers evenly into clean jars. Don’t pack too tightly—you want the brine to flow around the veggies.
- Pour the brine: Pour the warm brine over the vegetables in each jar, making sure they’re fully submerged. Use a spoon to gently press down if needed.
- Seal and chill: Close jars tightly with lids. Allow to cool to room temperature, then refrigerate at least 1 hour before serving (overnight yields the best flavor and crunch).
- Troubleshooting: If veggies float to the top, place a piece of parchment or small weight to keep them submerged. If brine looks cloudy, it’s usually just veggie starch—no worries. If the pickles taste too salty or sour, adjust the next batch by reducing salt or vinegar slightly.
- Final sensory check: When ready, veggies should be crisp, bright, and tangy with a subtle sweetness. The color should pop, and the aroma will be mouthwatering—trust your senses!
- Personal tip: For faster prep, use a food processor with a julienne blade. For more flavor, add a slice of fresh ginger to each jar.
From start to finish, you’re looking at about 30 minutes hands-on time, plus chilling. It’s hands-down one of the easiest, most rewarding recipes for Friendsgiving—or any gathering, really.
Cooking Tips & Techniques
After making hundreds of jars of Vietnamese pickled vegetables over the years, I’ve picked up a few tricks (and, let’s be honest, learned from a couple of kitchen disasters!).
- Uniform cuts matter: Try to keep your veggie matchsticks the same size for even brining and crunch. I once went rogue with chunky pieces—result: uneven texture and soggy bits. Lesson learned!
- Brine temperature: Pour the brine while it’s warm, not hot. Too hot and your veggies lose crunch; too cold and the flavors don’t infuse as well.
- Don’t skip the salt soak: This step keeps your vegetables crisp. If you skip it, you’ll end up with floppy pickles (not what we’re going for).
- Timing is everything: If you’re short on time, you can chill for just 1 hour, but overnight is best for full flavor and crunch.
- Taste and adjust: Everyone’s brine preference is different—taste before packing your jars and tweak sugar or vinegar as needed.
- Multitasking: While veggies are soaking, prep your brine and jar setup to save time.
- Consistency: Always use the same ratio of vinegar, water, and sugar for repeat success. Scribble it on a sticky note—I do!
- Common mistakes: Over-packing jars or under-filling with brine. Make sure veggies are submerged and jars aren’t stuffed tight.
I’ve had batches go soft when I rushed or skipped a step. Now, with these pointers, it’s reliable every time. If you like your pickles extra tangy, up the vinegar by a tablespoon or two. If you want them sweeter, add a splash more sugar. That’s the beauty of homemade—you can always tweak to suit your taste.
Variations & Adaptations
There’s so much room for creativity with Vietnamese pickled vegetables, especially for Friendsgiving—here are my favorite ways to switch things up:
- Low-Sugar Version: Swap half the sugar for stevia or honey. I’ve tried this for my uncle, who keeps an eye on his sugar intake, and it works surprisingly well!
- Allergy-Friendly: Omit garlic for those sensitive, or use shallots for a milder, sweeter flavor. For gluten-free, double-check your vinegar source.
- Seasonal Twist: Add thinly sliced radishes in the spring or fennel bulb in the fall. For Friendsgiving, I like to toss in a handful of fresh herbs—cilantro or mint gives it a vibrant lift.
- Spicy Option: More chili equals more heat, obviously. You can also add a few black peppercorns for a savory kick.
- Alternative Prep: Don’t have glass jars? Use a food-safe plastic container. For a quick pickle, slice everything super thin and marinate for just 30 minutes.
My personal favorite? Swapping half the carrots for rainbow carrots or purple daikon. The colors are stunning, and it’s a fun way to get kids excited about veggies. Try mixing and matching—there’s no wrong way to pickle!
Serving & Storage Suggestions
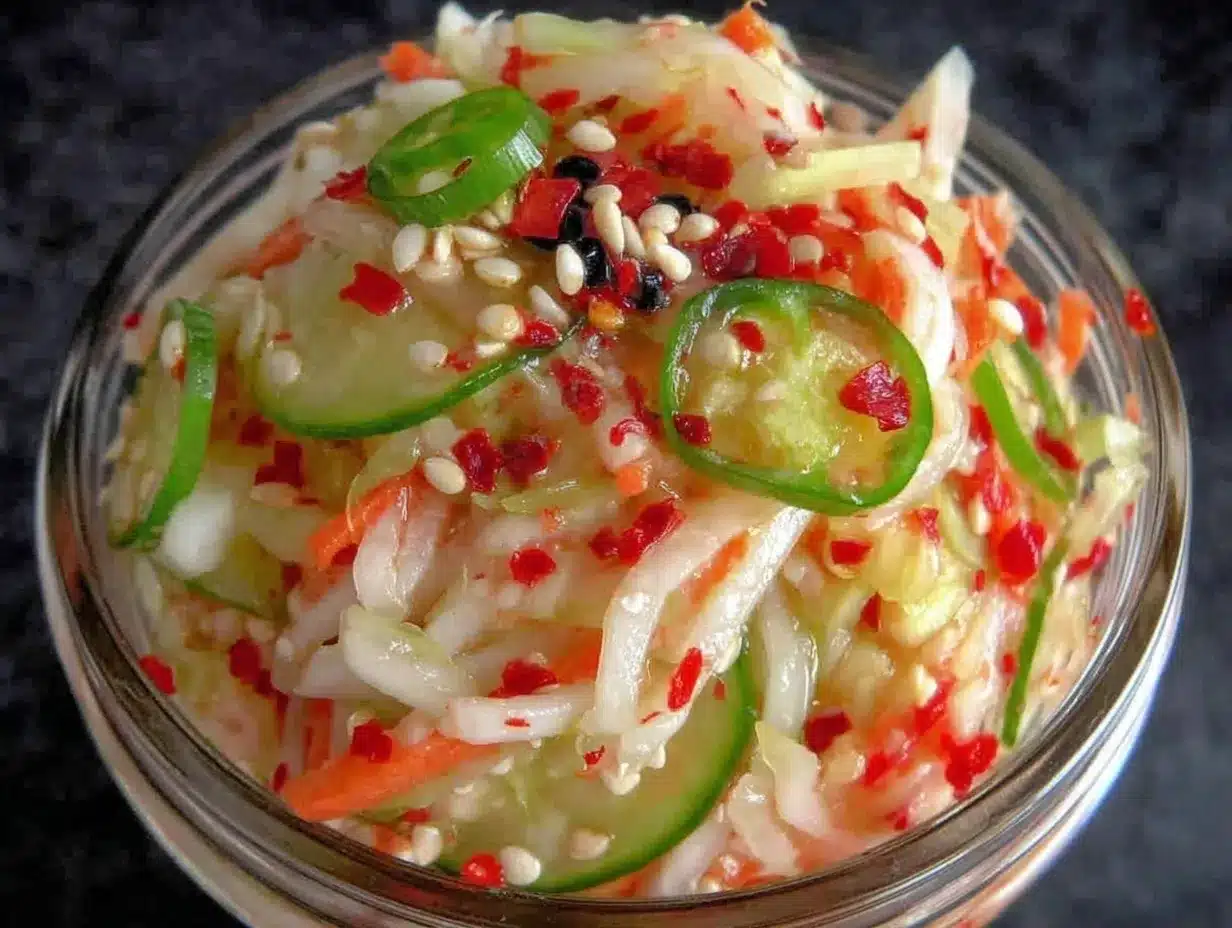
Serve these Vietnamese pickled vegetables cold, straight from the fridge—crisp and refreshing. They look gorgeous piled up in a rustic bowl or lined up in little jars (great for Pinterest photos, honestly). Sprinkle with a few extra chili slices or fresh herbs for that final flourish.
Complementary dishes? Pair these pickles with roasted turkey, grilled chicken, or alongside a cheese board for a bright, tangy contrast. They’re also perfect tucked into sandwiches, wraps, or as a topping for noodle bowls.
Storage: Keep sealed jars in the refrigerator for up to 2 weeks. The flavor develops and deepens after the first day, so don’t be surprised if they taste even better on day three. If making ahead for Friendsgiving, prep a few days early for maximum flavor.
Reheating: Not needed—these are served cold. If you want to revive the crunch after a week, drain and toss with a splash of fresh vinegar.
Pro tip: The brine can be reused for a second batch if you strain it and bring it to a boil first. Waste not, want not!
Nutritional Information & Benefits
For each serving (about 1/2 cup / 120 g), expect roughly:
- Calories: 40
- Carbohydrates: 9 g
- Sugar: 6 g
- Fiber: 2 g
- Sodium: 300 mg
Daikon and carrots are rich in vitamin C, potassium, and antioxidants. The recipe is naturally low-calorie, gluten-free (if you check your vinegar), and vegan. For those watching their carb intake, simply reduce the sugar or swap in a low-carb sweetener.
Potential allergens? Garlic and chili, which you can easily omit or substitute. From my experience, this recipe is a refreshing side that fits a wide range of dietary needs—plus, it packs a punch of probiotics if left to ferment a little longer.
Conclusion
If you’re looking for a fresh, vibrant side dish for Friendsgiving, this Vietnamese pickled vegetables recipe is absolutely worth trying. It’s crisp, tangy, and a real showstopper on any holiday table. Customize it to suit your own tastes—swap veggies, play with herbs, or turn up the heat.
Personally, this recipe brings me back to family gatherings, laughter in the kitchen, and the simple joy of sharing good food. It’s the kind of dish that makes people ask for the recipe, then sneak another helping when no one’s looking.
So go ahead—make a batch, share it with friends, and let me know how you put your own spin on it. Leave a comment below, share your best Friendsgiving photos, or tag me with your beautiful pickle jars. Here’s to bright flavors, happy gatherings, and recipes that feel like a warm hug!
FAQs
Can I make Vietnamese pickled vegetables ahead of time?
Absolutely! Prep them up to 3 days in advance. The flavors get better the longer they sit in the fridge.
What vegetables can I pickle besides daikon and carrots?
You can use cucumbers, radishes, turnips, or even thinly sliced bell peppers. Experiment with your favorites!
How long do these pickled vegetables last?
Stored in the fridge, they’ll stay fresh and crunchy for up to 2 weeks.
Are Vietnamese pickled vegetables spicy?
Only if you add chili peppers. Skip them for a mild pickle, or use more for extra heat.
Can I reuse the pickling brine?
Yes, just strain and bring it to a boil before using again. The flavor will be a bit milder on the second batch.
Pin This Recipe!
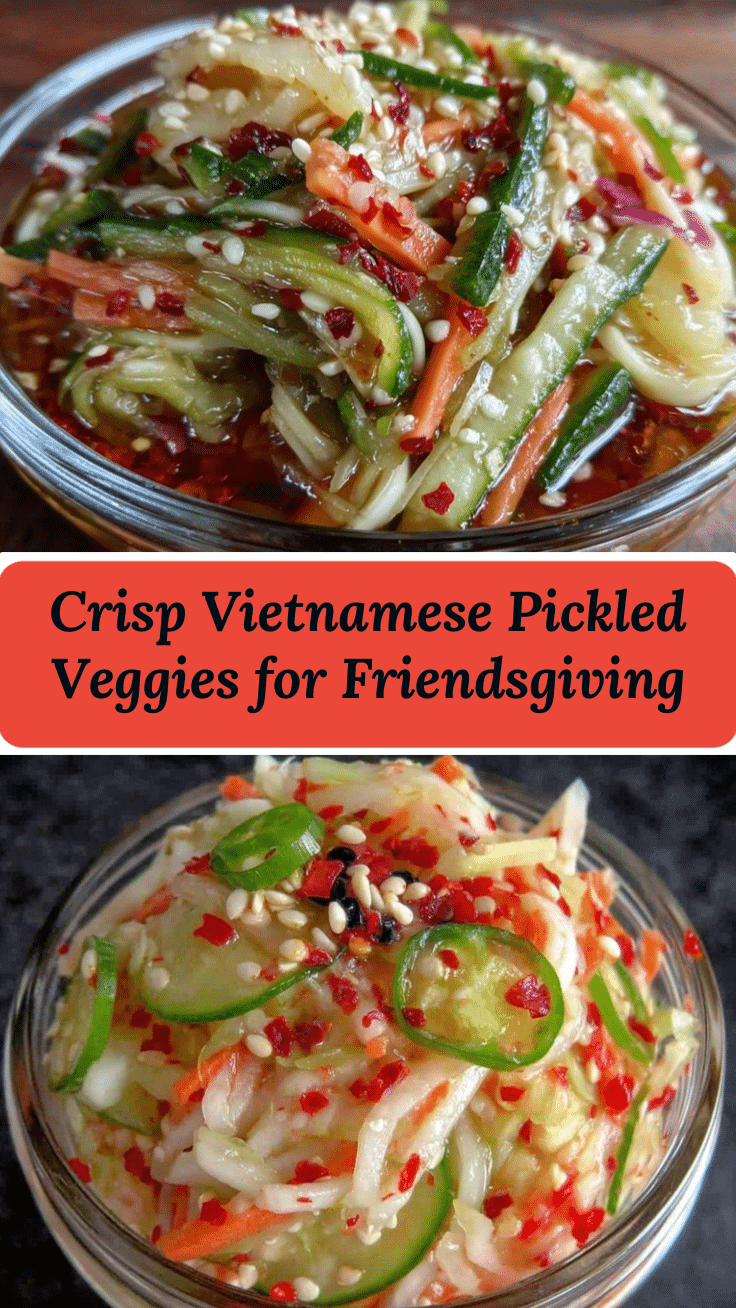
Vietnamese Pickled Vegetables
Crisp, tangy, and slightly sweet Vietnamese pickled vegetables made with daikon, carrots, and a balanced rice vinegar brine. This easy, crowd-pleasing side is perfect for Friendsgiving or any gathering, adding vibrant color and refreshing crunch to your table.
- Prep Time: 15 minutes
- Cook Time: 5 minutes
- Total Time: 30 minutes
- Yield: 6 servings 1x
- Category: Side Dish
- Cuisine: Vietnamese
Ingredients
- 1 large daikon radish (about 12 oz), peeled and cut into matchsticks
- 2 large carrots (about 8 oz), peeled and cut into matchsticks
- 1 small cucumber (about 6 oz), seeded and cut into thin strips (optional)
- 2–3 red Thai chili peppers, thinly sliced (optional)
- 2 garlic cloves, peeled and thinly sliced
- 1 cup rice vinegar
- 1 cup filtered water
- 1/2 cup granulated sugar
- 2 teaspoons sea salt
Instructions
- Peel the daikon radish and carrots. Slice them into thin matchsticks (about 1/4 inch thick). If using cucumber, remove seeds and slice into similar strips. Place all veggies in a large mixing bowl.
- Sprinkle 2 teaspoons sea salt over the vegetables. Toss well to coat, then let sit for 10 minutes to draw out excess moisture.
- Rinse the salted veggies under cold water to remove excess salt. Drain well and gently squeeze to remove extra liquid. Set aside.
- In a small saucepan, combine rice vinegar, water, and sugar. Heat over medium, stirring until sugar dissolves (about 2-3 minutes). Remove from heat and let cool slightly.
- Layer the drained vegetables, garlic slices, and chili peppers evenly into clean jars. Don’t pack too tightly.
- Pour the warm brine over the vegetables in each jar, making sure they’re fully submerged. Use a spoon to gently press down if needed.
- Close jars tightly with lids. Allow to cool to room temperature, then refrigerate at least 1 hour before serving (overnight yields the best flavor and crunch).
- If veggies float to the top, place a piece of parchment or small weight to keep them submerged.
- When ready, veggies should be crisp, bright, and tangy with a subtle sweetness.
Notes
For best crunch, keep veggie cuts uniform and don’t skip the salt soak. Brine should be poured warm, not hot. Customize with herbs, swap veggies, or adjust sugar/vinegar to taste. Pickles are best after chilling overnight and last up to 2 weeks in the fridge. For a gluten-free version, double-check your vinegar brand.
Nutrition
- Serving Size: About 1/2 cup (120 g
- Calories: 40
- Sugar: 6
- Sodium: 300
- Carbohydrates: 9
- Fiber: 2
- Protein: 1
Keywords: Vietnamese pickles, pickled vegetables, daikon, carrots, Friendsgiving, easy side dish, holiday recipes, vegan, gluten-free, refrigerator pickles


