“You really think this will work?” my friend asked, eyeing the mix of pudding and crumbled vanilla wafers sitting in my hands. Honestly, I was skeptical too. It started as a quick fix after I realized I’d forgotten to buy dessert for an impromptu get-together. With just a few bananas, a box of instant pudding, and a jar sitting empty on the counter, I tossed together what I thought was a simple snack. But as everyone spooned it up, those doubts melted away. There was something about the creamy layers and crunchy wafers in those little mason jars that turned this into a conversation starter.
It’s funny how the most unplanned kitchen moments can lead to a recipe you end up making repeatedly. I found myself whipping up this creamy mason jar banana pudding with vanilla wafer layers not once, but a few times that week—each time tucking in more ripe bananas and experimenting with the texture. It’s that kinda dessert that feels like a cozy hug after a long day (or, you know, last-minute hosting panic).
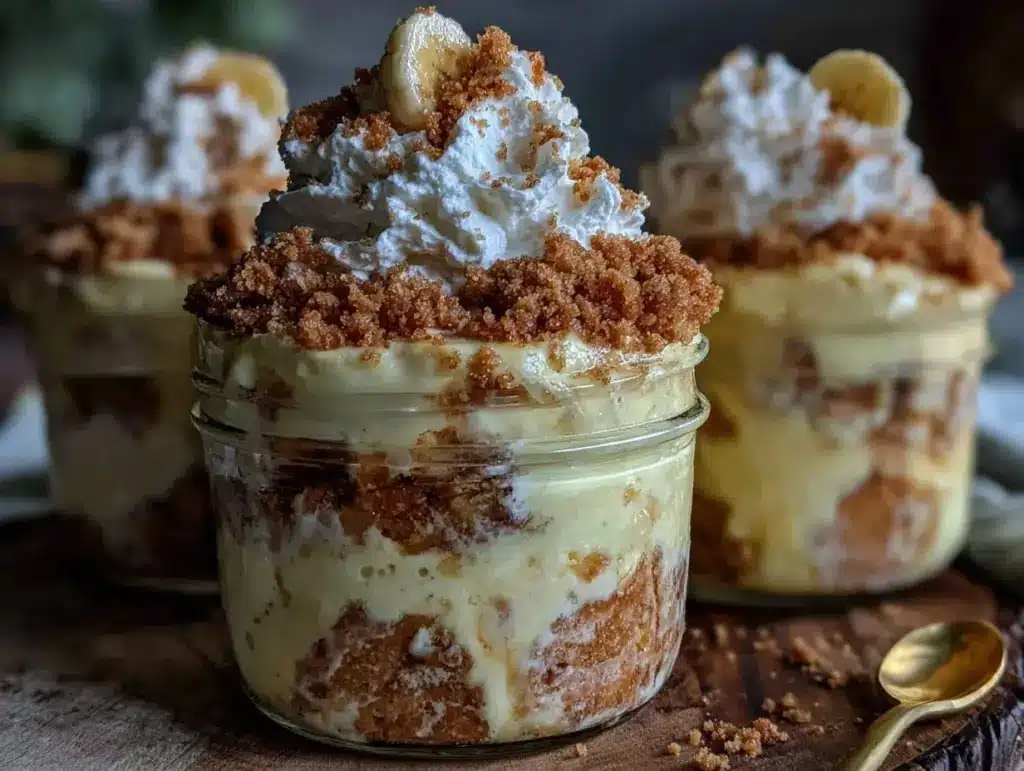
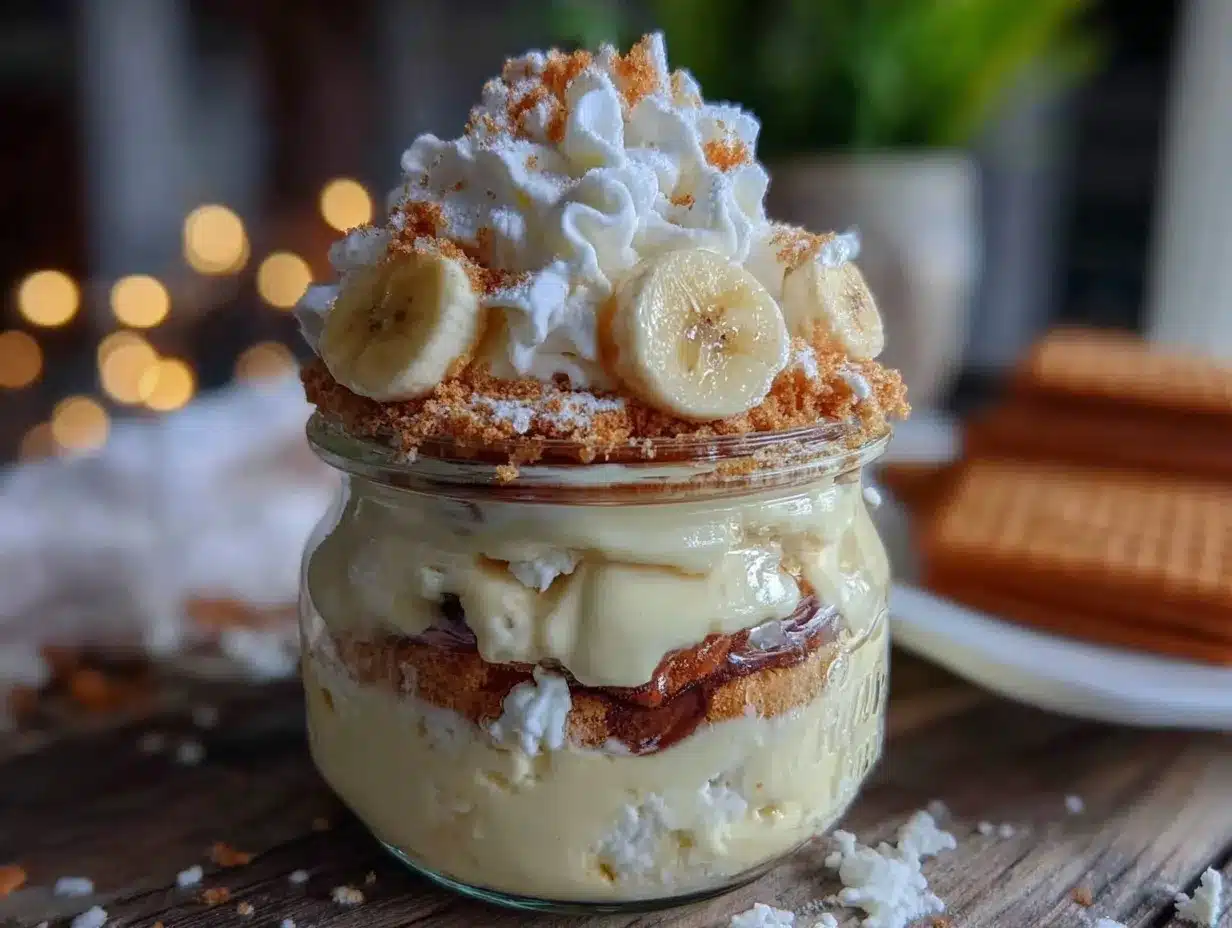
The best part? It’s all about the layers—the silky pudding, soft bananas, and those nostalgic vanilla wafers breaking up the creaminess just so. No fancy equipment, no hours of stirring. Just a few simple ingredients stacked carefully in a jar, ready to impress. Somehow, that tiny jar of sweet magic stuck with me, not just because it’s easy, but because it tastes like comfort you can hold.
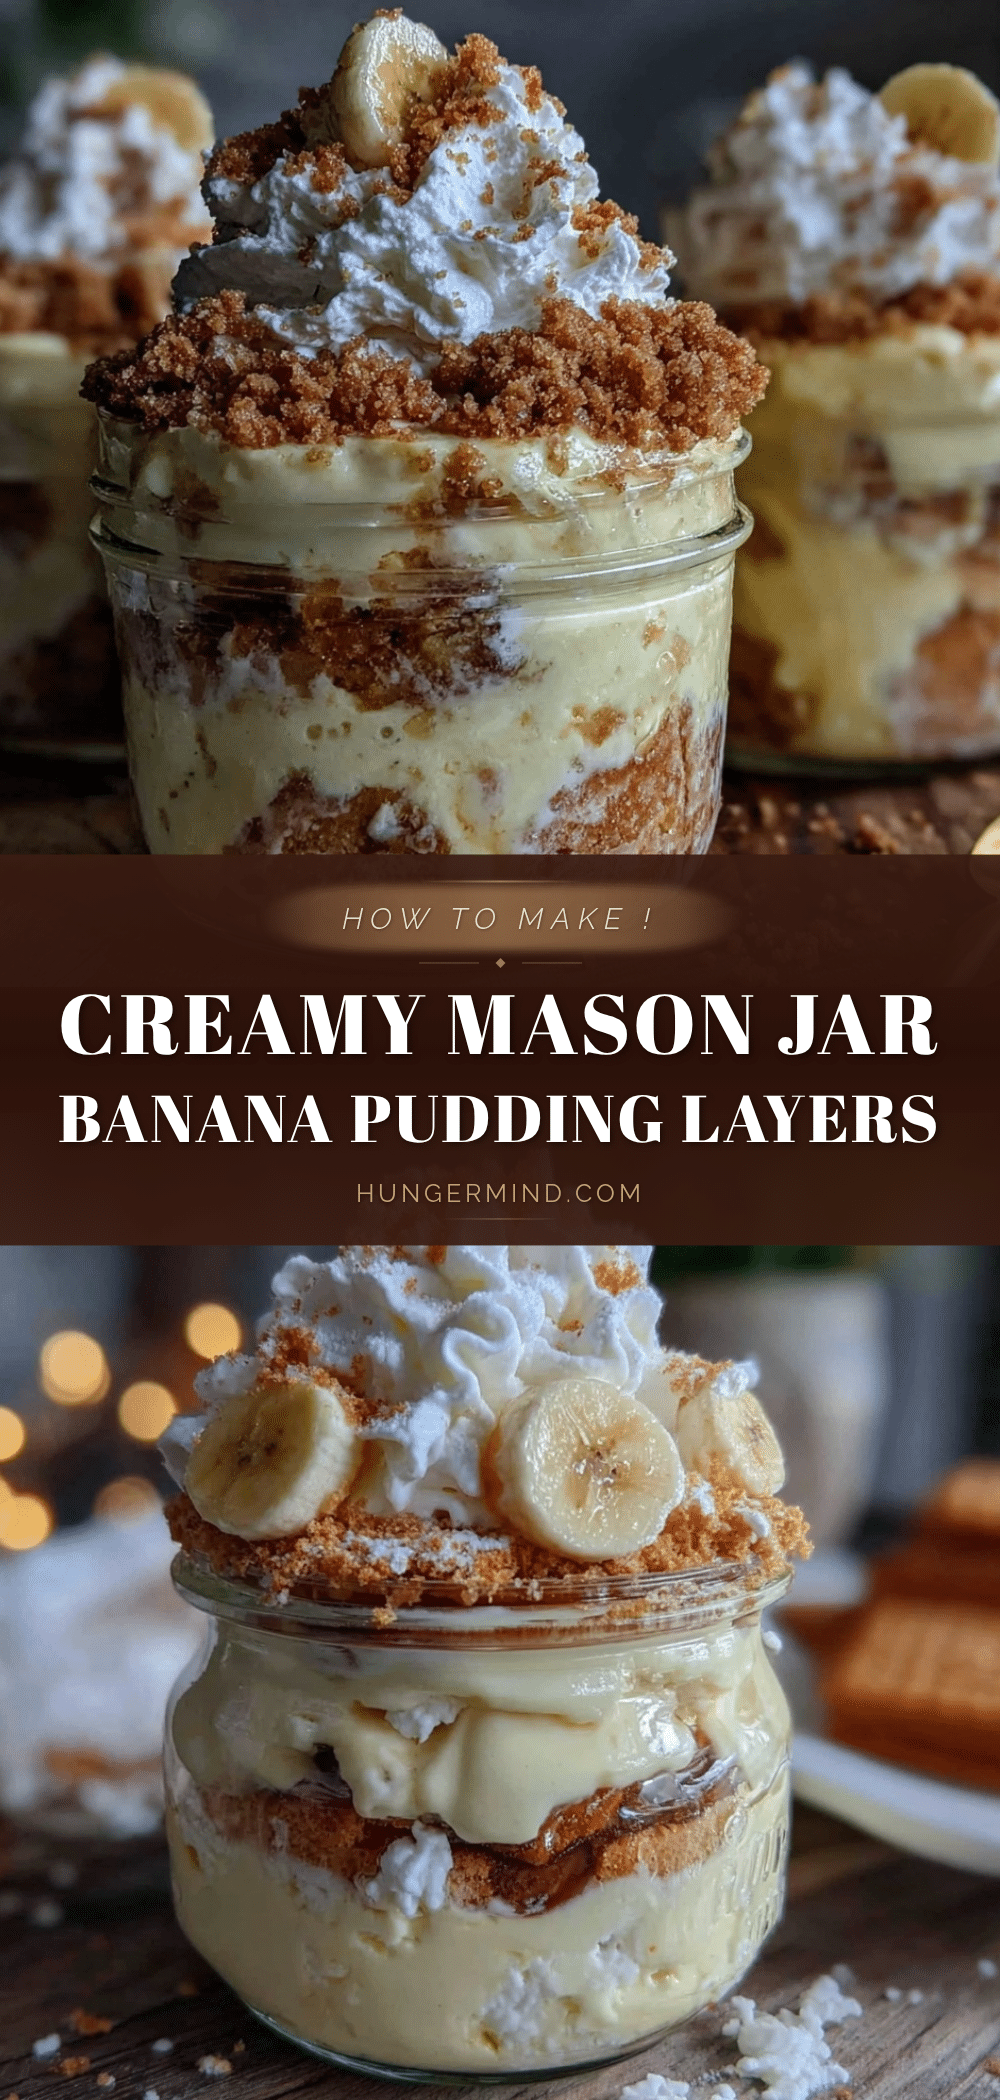
Why You’ll Love This Creamy Mason Jar Banana Pudding Recipe
This recipe isn’t just your usual banana pudding—it’s been tested and tweaked enough times to feel like second nature in my kitchen. Here’s why it stands out:
- Quick & Easy: Ready in under 20 minutes, perfect for busy evenings or last-minute guests.
- Simple Ingredients: No need for specialty stores; pantry staples and fresh bananas are all you need.
- Perfect for Casual Gatherings: Great for potlucks, picnics, or even a sweet treat after dinner.
- Crowd-Pleaser: Kids love the creamy texture layered with crunchy wafers, and adults keep sneaking second servings.
- Unbelievably Delicious: The way the vanilla wafers soften just enough but still hold a little crunch creates the perfect balance.
This recipe is different because it layers the pudding and wafers in individual mason jars, making portion control a breeze and presentation super charming. Plus, using instant pudding mix saves time while still delivering that rich, velvety texture. The secret trick I like to use is letting the jars chill a few hours or overnight—this lets the flavors meld and the wafers soak just right without turning mushy.
It’s a dessert that feels like a little celebration in a jar—comfort food without the fuss, and it always brings a smile. If you’ve ever made classic banana pudding but wished it was portable or prettier, this is your answer. And if you enjoy layering flavors and textures, you might appreciate how it pairs nicely with fresh, vibrant dishes like the Moroccan couscous with seven vegetables for a complete meal experience.
What Ingredients You Will Need
This recipe uses simple, wholesome ingredients to deliver that classic creamy banana pudding flavor with an easy layering twist. Most are pantry basics or fresh produce you can find year-round.
- Instant vanilla pudding mix (1 package, about 3.4 oz/96g) – provides the quick creamy base
- Cold whole milk (2 cups/480 ml) – for mixing with pudding powder; whole milk gives richness, but 2% works too
- Ripe bananas (3 medium, sliced) – the star fresh ingredient; look for bananas with bright yellow skin and a few brown spots for sweetness
- Vanilla wafers (about 40 wafers) – classic layering cookie; Nabisco or Keebler brands offer the perfect crunch
- Sweetened whipped cream (1 cup/240 ml) – adds lightness and a touch of sweetness; you can use store-bought or homemade
- Vanilla extract (1 tsp) – boosts the overall vanilla flavor, making it more aromatic
- Powdered sugar (2 tbsp) – to sweeten the whipped cream slightly (optional)
You can swap the whole milk for almond or oat milk if you want a dairy-free option, but the texture might be slightly less creamy. For a gluten-free twist, look for gluten-free vanilla wafers or substitute with crushed gluten-free cookies. If you’re feeling fancy, a sprinkle of toasted coconut on top adds a lovely nutty note.
Equipment Needed
- Mason jars or small glass containers: These are perfect for layering and serving individual portions. I love using half-pint (8 oz/240 ml) jars for just the right size.
- Mixing bowl: For whisking the pudding and milk together.
- Whisk or hand mixer: A whisk works fine, but a hand mixer speeds things up and ensures a smooth pudding.
- Measuring cups and spoons: Precise measurements help keep the pudding consistency just right.
- Knife and cutting board: For slicing the bananas evenly.
You don’t need any fancy tools here. If you don’t have mason jars, small clear bowls or even sturdy cups work, though jars make it extra charming. When it comes to whisking, I sometimes use a fork if I’m in a hurry, but the hand mixer really makes the pudding silky smooth. Keeping your pudding mixture cold in the fridge before layering helps it set better, so a quick chilling step is a good idea.
Preparation Method
- Whisk the pudding: In a mixing bowl, combine the instant vanilla pudding mix with 2 cups (480 ml) of cold whole milk. Whisk vigorously for about 2 minutes until the mixture thickens and is smooth. If you’re using a hand mixer, blend on medium speed for about 1-2 minutes. Set aside to let it firm up slightly while you prep the rest.
- Prepare the whipped cream: In a separate bowl, whip 1 cup (240 ml) of sweetened whipped cream with 2 tablespoons of powdered sugar and 1 teaspoon vanilla extract until soft peaks form. This adds a fluffy, light texture that balances the pudding’s richness.
- Slice the bananas: Peel and slice 3 medium ripe bananas into 1/4-inch (0.5 cm) thick rounds. Try to slice evenly so the layers look uniform in the jars.
- Crush the vanilla wafers: Gently crush about 40 wafers into bite-sized pieces. I like to keep some wafers whole for that satisfying crunch, but breaking most into smaller chunks helps with layering.
- Layer the pudding jars: Start with a spoonful of pudding at the bottom of each jar (about 2 tablespoons/30 ml), then add a layer of vanilla wafers (around 6-8 pieces), followed by a layer of banana slices (5-6 slices). Repeat the layers until the jar is nearly full, finishing with a layer of pudding on top.
- Add whipped cream topping: Spoon or pipe the whipped cream over the final pudding layer. Garnish with a few whole vanilla wafers or banana slices if you like.
- Chill: Cover the jars with lids or plastic wrap and refrigerate for at least 2 hours, preferably overnight. This resting time lets the wafers soften slightly, bananas infuse flavor, and the pudding set beautifully.
One trick I learned the hard way is not to assemble these too early without chilling because the wafers can get soggy and lose their texture. Also, slicing the bananas just before layering helps them stay fresh and prevents browning.
Cooking Tips & Techniques
While this recipe is straightforward, a few tips can make a big difference:
- Use ripe bananas: The sweeter and softer, the better. They add natural sweetness and creaminess, balancing the pudding’s vanilla flavor.
- Don’t overmix the pudding: Whisk until thick but still smooth. Overmixing can make it grainy.
- Layer gently: Pressing too hard on the wafers can make them crumble excessively and turn the texture mushy.
- Chill for flavor melding: Resist the urge to dig in immediately. The best texture comes after resting in the fridge at least a couple of hours.
- Add whipped cream last: This keeps it light and fluffy, rather than mixing it into the pudding where it might deflate.
I remember the first time I didn’t chill the jars long enough—and the wafers turned into a soggy mess. Lesson learned: patience really pays off with this dessert. If you’re short on time, even 30 minutes in the freezer (covered!) helps speed up firmness without compromising texture.
Also, if you’re interested in other quick, fresh sides to pair with this sweet treat for a full meal, the Vietnamese pickled vegetables bring a bright, crunchy contrast that’s hard to beat.
Variations & Adaptations
This banana pudding recipe is a great base to customize according to diet, season, or taste preferences:
- Chocolate Twist: Add a layer of chocolate pudding instead of vanilla for a chocolate-banana combo. You can also sprinkle mini chocolate chips between the layers.
- Gluten-Free Option: Swap vanilla wafers for gluten-free cookies or crushed rice crackers for a similar crunch without gluten.
- Dairy-Free Version: Use coconut or almond milk pudding mix and substitute whipped cream with coconut whipped cream for a tropical flair.
- Berry Boost: Mix fresh strawberries or blueberries with the banana layers for a fruity burst. This works especially well in summer when berries are in season.
- Nutty Crunch: Sprinkle chopped toasted pecans or walnuts on top of the whipped cream for texture and a nutty aroma.
One variation I love is adding a little cinnamon to the pudding mix before assembling—gives a warm hint that complements the bananas beautifully. Also, if you want to make it more indulgent, a drizzle of caramel sauce over the whipped cream is pure heaven.
Serving & Storage Suggestions
Serve this creamy mason jar banana pudding chilled straight from the refrigerator. The contrast of cold pudding and soft bananas with crisp wafers is what makes it so addictive.
For presentation, tying a small ribbon around each jar or adding a decorative spoon makes them perfect for gifting or parties. These jars travel well, so they’re great for picnics or potlucks.
Store leftovers in the fridge, tightly covered, for up to 3 days. The flavors actually deepen after a day, but the wafers will continue to soften—still delicious, just more pudding-like. Avoid freezing as the texture may suffer.
To reheat (if you prefer it warm), remove the whipped cream topping and microwave the pudding portion for 20-30 seconds. Then add fresh whipped cream or a dollop of vanilla ice cream for a cozy twist.
Nutritional Information & Benefits
This dessert offers a reasonable balance of indulgence and nutrition—especially if you use whole milk and fresh bananas. Here’s an estimate per serving (one 8 oz jar):
| Calories | 280-320 kcal |
|---|---|
| Carbohydrates | 45g (mainly from bananas and wafers) |
| Protein | 4g |
| Fat | 8g (mostly from milk and whipped cream) |
| Fiber | 2g |
Bananas add potassium and vitamin C, while milk contributes calcium and vitamin D. If you’re mindful of allergens, note that this contains dairy and gluten (from wafers), but substitutions can address these needs.
Personally, I appreciate that this recipe feels like a treat without being over-the-top heavy. It’s a nice way to end a meal on a sweet but fresh note, especially after something hearty like Mexican rice with fresh tomatoes and cilantro.
Conclusion
This creamy mason jar banana pudding with vanilla wafer layers is a sweet little surprise that’s easy to pull off anytime. Whether you’re scrambling for a last-minute dessert or planning a casual gathering, it’s a recipe that feels thoughtful without the stress.
Feel free to tweak the layers, add your favorite toppings, or switch up the cookies to suit your taste. For me, it’s a recipe that’s stuck around because it’s simple, comforting, and just the right mix of creamy and crunchy—a classic done my way.
If you try this recipe, I’d love to hear how you made it your own or what your favorite twists are. Sharing food stories always makes the kitchen feel a little cozier, don’t you think?
Frequently Asked Questions about Creamy Mason Jar Banana Pudding
Can I make this banana pudding ahead of time?
Absolutely! In fact, chilling the pudding jars for at least 2 hours or overnight improves the flavor and texture. Just keep them covered in the fridge.
What can I substitute for vanilla wafers?
Gluten-free cookies, graham crackers, or even crushed shortbread work well. Just choose something that offers a bit of crunch without overpowering the pudding.
Can I use homemade pudding instead of instant mix?
Yes, homemade pudding can be used but it may require a longer chilling time to set. The instant mix keeps things quick and consistent.
How do I prevent the bananas from browning?
Slice bananas just before layering and assemble the jars promptly. You can also toss the slices briefly in lemon juice to slow browning.
Is this recipe suitable for kids?
Definitely! It’s a kid-friendly dessert that’s sweet but not overly sugary, and the jar presentation makes it fun to eat.
Pin This Recipe!
Creamy Mason Jar Banana Pudding Recipe with Vanilla Wafer Layers Easy and Delicious

A quick and easy layered banana pudding dessert served in mason jars, combining creamy instant vanilla pudding, ripe bananas, and crunchy vanilla wafers for a comforting treat.
- Prep Time: 10 minutes
- Cook Time: 0 minutes
- Total Time: 2 hours 10 minutes
- Yield: 4 servings 1x
- Category: Dessert
- Cuisine: American
Ingredients
- 1 package (3.4 oz/96g) instant vanilla pudding mix
- 2 cups (480 ml) cold whole milk
- 3 medium ripe bananas, sliced
- About 40 vanilla wafers
- 1 cup (240 ml) sweetened whipped cream
- 1 teaspoon vanilla extract
- 2 tablespoons powdered sugar (optional)
Instructions
- Whisk the pudding: In a mixing bowl, combine the instant vanilla pudding mix with 2 cups (480 ml) of cold whole milk. Whisk vigorously for about 2 minutes until thick and smooth. Set aside to firm up slightly.
- Prepare the whipped cream: In a separate bowl, whip 1 cup (240 ml) of sweetened whipped cream with 2 tablespoons powdered sugar and 1 teaspoon vanilla extract until soft peaks form.
- Slice the bananas: Peel and slice 3 medium ripe bananas into 1/4-inch (0.5 cm) thick rounds.
- Crush the vanilla wafers: Gently crush about 40 wafers into bite-sized pieces, keeping some whole for crunch.
- Layer the pudding jars: Spoon about 2 tablespoons (30 ml) pudding into the bottom of each jar, add 6-8 vanilla wafer pieces, then 5-6 banana slices. Repeat layers until jars are nearly full, finishing with pudding on top.
- Add whipped cream topping: Spoon or pipe whipped cream over the final pudding layer and garnish with whole wafers or banana slices.
- Chill: Cover jars and refrigerate for at least 2 hours or overnight to let flavors meld and wafers soften slightly.
Notes
Use ripe bananas for natural sweetness. Chill jars for at least 2 hours or overnight for best texture. Slice bananas just before layering to prevent browning. For gluten-free, substitute vanilla wafers with gluten-free cookies. For dairy-free, use almond or oat milk and coconut whipped cream.
Nutrition
- Serving Size: One 8 oz (240 ml) ja
- Calories: 300
- Fat: 8
- Carbohydrates: 45
- Fiber: 2
- Protein: 4
Keywords: banana pudding, mason jar dessert, vanilla wafers, easy dessert, layered pudding, quick dessert, creamy pudding


