I ruined pumpkin donuts three times before I got them right. The first batch came out like hockey pucks—dense, sad, and completely unworthy of the cinnamon sugar coating I’d so carefully prepared. The second time, they were so greasy I might as well have fried them. And the third? They collapsed in the middle. Honestly, I almost gave up. But there’s something about fall that makes you stubborn. You want that warm, spiced smell in your kitchen. You want something that tastes like October mornings and cozy sweaters. So I kept tweaking, kept testing, and eventually landed on this recipe for perfect cinnamon sugar baked pumpkin donuts. It wasn’t a sudden breakthrough. It was more like a slow realization that I was overcomplicating things. These donuts don’t need fuss. They just need the right balance of moisture, spice, and heat. Now I make them every time the leaves start turning. They’re the reason I look forward to sweater weather.
Why You’ll Love This Recipe
Let me tell you why these baked pumpkin donuts are different from every other recipe you’ve tried. They’re not dry. They’re not bland. And they definitely don’t taste like “healthy” pumpkin bread shaped into a ring.
- Quick & Easy: From start to finish, you’re looking at about 30 minutes. No yeast, no rising time, no deep-frying mess. Just mix, bake, and coat.
- Simple Ingredients: You probably have most of these in your pantry right now. Canned pumpkin, flour, sugar, eggs, butter, and a few spices. No specialty trips required.
- Perfect for Fall Mornings: These are great for Thanksgiving brunch, a cozy weekend breakfast, or even a surprise treat for coworkers. They travel well and stay soft for days.
- Crowd-Pleaser: I’ve brought these to potlucks and watched them disappear before the savory dishes. Kids love them. Adults love them. Even my friend who “doesn’t like pumpkin” ate three.
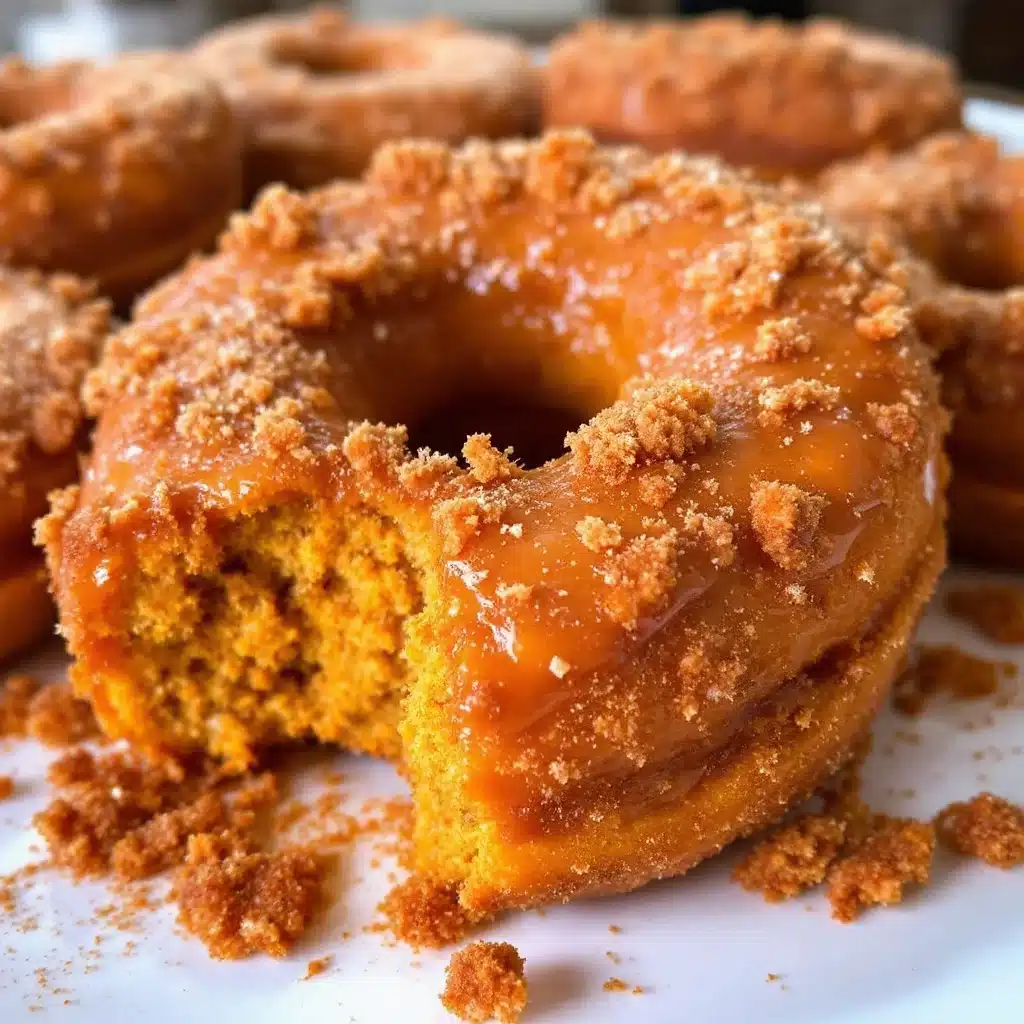
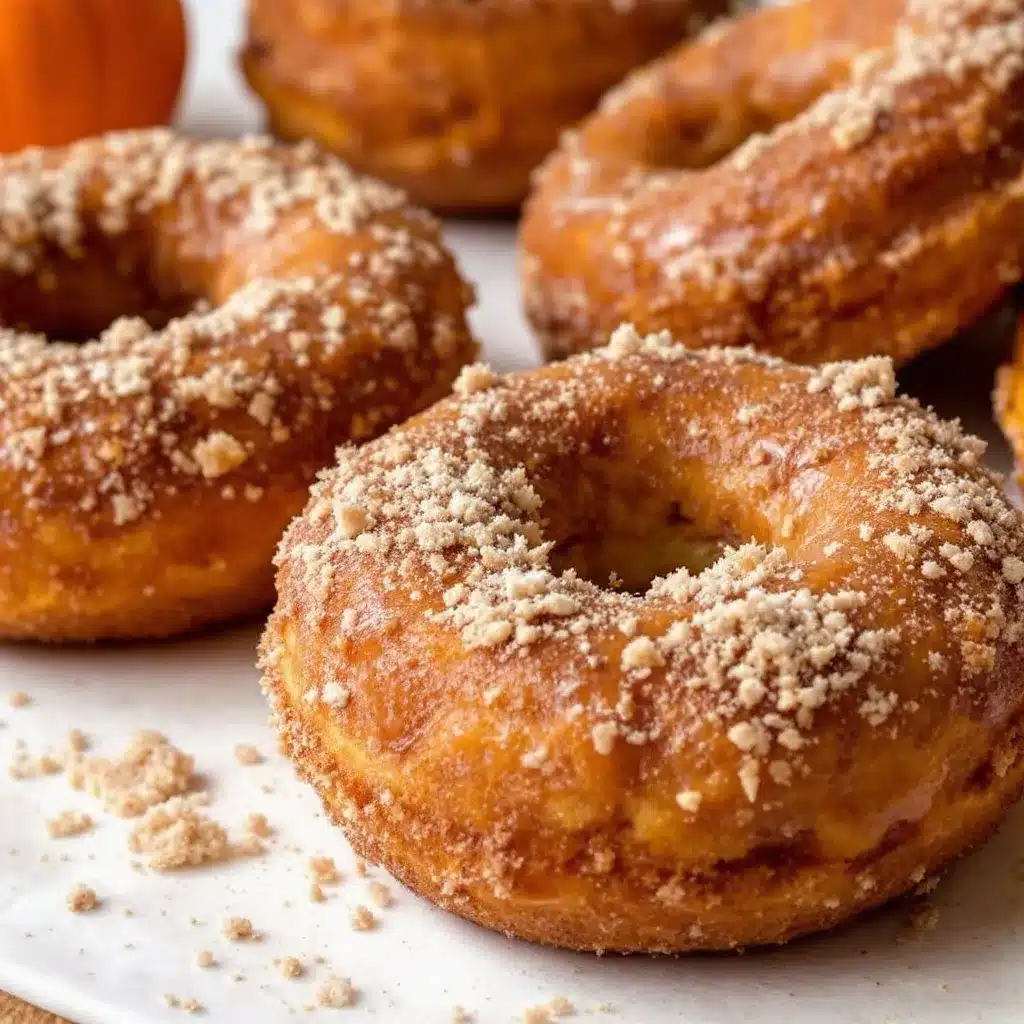
- Unbelievably Delicious: The texture is what gets you. Light, tender, almost cake-like, with a crunchy cinnamon sugar crust that shatters when you bite into it. It’s comfort food at its finest.
What makes this recipe stand out is the technique. Instead of using oil, I use melted butter for richness. I also blend the pumpkin with brown sugar and a touch of vanilla to deepen the flavor. And the cinnamon sugar coating? You roll the donuts while they’re still warm so the sugar sticks perfectly. It’s a small step that makes a huge difference. This isn’t just another pumpkin donut recipe. It’s the one you’ll come back to every single fall.
What Ingredients You Will Need
This recipe uses straightforward ingredients that work together to create something special. Here’s what you’ll need and why each one matters.
For the Donuts
- All-purpose flour (1 ¾ cups / 220g): This gives the donuts structure. Spoon and level your flour for the best results. Scooping directly from the bag can pack in too much flour and make the donuts dense.
- Baking powder (1 ½ teaspoons): The leavening agent that helps the donuts rise. Make sure it’s fresh—old baking powder won’t give you that light texture.
- Baking soda (½ teaspoon): Works with the acidity in the pumpkin and brown sugar to create a tender crumb.
- Pumpkin pie spice (2 teaspoons): I use store-bought for convenience, but you can make your own with cinnamon, nutmeg, ginger, and cloves. I personally like the blend from McCormick for consistency.
- Cinnamon (1 teaspoon): Adds warmth and depth. I prefer Saigon cinnamon for its stronger, slightly sweeter flavor.
- Salt (½ teaspoon): Balances the sweetness and enhances the spices.
- Pumpkin purée (1 cup / 245g): Not pumpkin pie filling. Make sure you’re using 100% pumpkin purée. Libby’s is my go-to because it’s consistently thick and not watery.
- Brown sugar (¾ cup / 150g, packed): Adds moisture and a deeper, molasses-like sweetness. Light or dark brown sugar both work. Dark gives a richer flavor.
- Granulated sugar (¼ cup / 50g): Helps with browning and structure.
- Large eggs (2, room temperature): Bind everything together and add richness. Room temperature eggs mix more evenly into the batter.
- Melted butter (½ cup / 113g, cooled): Adds flavor and tenderness. Unsalted butter is best so you control the salt level.
- Vanilla extract (2 teaspoons): Enhances the pumpkin and spice flavors. Use pure vanilla extract if you can.
- Buttermilk (¼ cup / 60ml, room temperature): Adds tanginess and helps activate the baking soda. If you don’t have buttermilk, add 1 teaspoon of lemon juice or vinegar to regular milk and let it sit for 5 minutes.
For the Cinnamon Sugar Coating
- Granulated sugar (½ cup / 100g): Creates the crunchy coating.
- Ground cinnamon (1 ½ tablespoons): The star of the show. Don’t skimp here.
- Melted butter (3 tablespoons / 42g): Brushed on the warm donuts to help the sugar stick.
That’s it. Nothing fancy, nothing hard to find. Just good, honest ingredients that come together beautifully.
Equipment Needed
You don’t need a professional bakery setup for these donuts. Here’s what you’ll need:
- Donut pan (standard 6-cavity or mini): This is non-negotiable. You can’t make baked donuts without one. I use a Wilton non-stick pan and it works perfectly. They’re available at most kitchen stores or online for around $10-15.
- Two mixing bowls (medium and large): One for dry ingredients, one for wet. Glass or stainless steel works best.
- Whisk: For mixing the batter. A hand whisk is fine, but an electric mixer isn’t necessary—overmixing can make the donuts tough.
- Piping bag or zip-top bag: For filling the donut cavities neatly. A zip-top bag with the corner snipped off works just as well and saves you a trip to the store.
- Cooling rack: Lets air circulate around the donuts so they cool evenly. If you don’t have one, a wire rack from a baking sheet works.
- Pastry brush: For brushing melted butter onto the donuts. A silicone brush is easier to clean.
- Shallow bowl or plate: For the cinnamon sugar mixture. Wide enough to roll the donuts in.
If you’re new to baking donuts, I recommend starting with a standard-size pan. Mini donuts are cute but they bake faster and can be trickier to get right. The standard size gives you a more satisfying donut-to-coating ratio anyway.
Preparation Method
Follow these steps carefully and you’ll have perfect donuts every time. I’ve included time estimates and sensory cues so you know exactly what to look for.
Step 1: Preheat and Prep (5 minutes)
Preheat your oven to 350°F (175°C). Spray your donut pan generously with non-stick cooking spray. Don’t skip this step—even non-stick pans need a little help. I use a spray with flour in it for extra insurance.
Step 2: Mix Dry Ingredients (3 minutes)
In a medium bowl, whisk together the flour, baking powder, baking soda, pumpkin pie spice, cinnamon, and salt. Whisk for about 20 seconds to aerate the flour and distribute the spices evenly. Set aside.
Step 3: Mix Wet Ingredients (5 minutes)
In a large bowl, whisk together the pumpkin purée, brown sugar, granulated sugar, eggs, melted butter, vanilla extract, and buttermilk. Whisk until smooth and fully combined. The mixture should be thick, glossy, and smell like fall. Don’t worry if it looks a little curdled—that’s just the butter and buttermilk doing their thing.
Step 4: Combine Wet and Dry (2 minutes)
Pour the dry ingredients into the wet ingredients. Fold gently with a spatula until just combined. You want to see a few streaks of flour still—overmixing will make the donuts tough. The batter should be thick but scoopable, like a muffin batter.
Step 5: Fill the Pan (5 minutes)
Transfer the batter to a piping bag or zip-top bag. Snip off the corner (about ½ inch wide). Pipe the batter into the donut cavities, filling each one about ⅔ full. Don’t overfill—the donuts will rise and you want that classic donut shape with a hole in the middle. Tap the pan gently on the counter to release any air bubbles.
Step 6: Bake (10-12 minutes)
Bake for 10-12 minutes, or until the donuts spring back when lightly touched. A toothpick inserted into the thickest part should come out clean or with a few moist crumbs. The edges should be golden brown and the tops should look set. Every oven is different, so start checking at 10 minutes.
Step 7: Cool and Coat (10 minutes)
Let the donuts cool in the pan for 2 minutes. Then transfer them to a cooling rack. While they’re still warm (but not hot), brush each donut with melted butter on all sides. Immediately roll them in the cinnamon sugar mixture. The butter helps the sugar stick and creates that irresistible crunchy coating. Work quickly—once the donuts cool completely, the sugar won’t adhere as well.
Repeat with any remaining batter. You should get about 12 standard-sized donuts from this recipe.
Cooking Tips & Techniques
After three failed batches, I learned a few things the hard way. Here’s what I wish I’d known from the start.
Don’t overmix the batter. This is the number one mistake I made. Overmixing develops gluten, which makes the donuts dense and tough. Mix until you don’t see dry flour anymore, then stop. A few lumps are fine.
Use room temperature ingredients. Cold eggs and buttermilk can seize the melted butter and create a lumpy batter. Take them out of the fridge 30 minutes before you start. If you’re in a hurry, place the eggs in a bowl of warm water for 5 minutes.
Don’t overfill the cavities. I learned this the hard way when my donuts rose and merged together, creating a giant pumpkin blob. Fill each cavity only ⅔ full. It’s better to have a little extra batter than to deal with overflow.
Brush, don’t dip. Some recipes tell you to dip the donuts directly into melted butter. This makes them soggy. Brushing gives you a thin, even layer that crisps up beautifully.
Double coat for extra crunch. If you want a thicker cinnamon sugar crust, brush the donuts with butter, roll them in the sugar, then brush again and roll a second time. It’s decadent but worth it for special occasions.
Bake in batches if needed. If you only have one donut pan, let it cool completely between batches. A hot pan can cause the batter to spread before it sets, leading to flat donuts.
Variations & Adaptations
One of the best things about this recipe is how adaptable it is. Here are some variations I’ve tried and loved.
Gluten-Free: Substitute the all-purpose flour with a 1:1 gluten-free baking flour. I’ve used Bob’s Red Mill with great results. The texture is slightly more delicate, so handle the donuts gently when coating.
Dairy-Free: Use melted coconut oil or vegan butter instead of regular butter. For the buttermilk, mix ¼ cup of almond milk with 1 teaspoon of lemon juice and let it sit for 5 minutes. The donuts will be slightly less tender but still delicious.
Spice It Up: Add ¼ teaspoon of ground cardamom or cloves to the spice mix for a more complex flavor. I once added a pinch of cayenne pepper for a sweet-heat combo that was surprisingly addictive.
Chocolate Pumpkin Donuts: Replace ¼ cup of the flour with unsweetened cocoa powder. The chocolate and pumpkin flavors complement each other beautifully. Use the same cinnamon sugar coating or try a powdered sugar dusting instead.
Maple Glaze: Skip the cinnamon sugar coating and drizzle the donuts with a simple maple glaze instead. Mix 1 cup of powdered sugar with 2 tablespoons of maple syrup and 1 tablespoon of milk. Drizzle over cooled donuts and let set for 10 minutes.
Mini Donuts: Use a mini donut pan and reduce the baking time to 6-8 minutes. These are perfect for parties or brunch buffets. You’ll get about 24 mini donuts from this recipe.
Serving & Storage Suggestions
These donuts are best served warm, right after coating. The cinnamon sugar crust is at its crispiest within the first hour. But they’re still good at room temperature for a day or two.
For serving, arrange the donuts on a platter and dust with a little extra cinnamon for presentation. They pair beautifully with a hot cup of coffee, spiced chai, or a cold glass of milk. If you’re serving them for brunch, add a bowl of fresh fruit or a simple yogurt parfait to balance the sweetness.
For storage, place the donuts in an airtight container at room temperature. They’ll stay fresh for up to 2 days. After that, the coating can get sticky and the texture softens. I don’t recommend refrigerating them—it dries them out.
To freeze, place the uncoated donuts in a single layer on a baking sheet and freeze for 1 hour. Then transfer them to a freezer-safe bag. They’ll keep for up to 2 months. When you’re ready to eat, thaw at room temperature, then reheat in a 300°F oven for 5 minutes. Brush with melted butter and coat with cinnamon sugar fresh. Honestly, this is my favorite method for having fresh donuts on demand.
Flavors actually develop over time. Day-old donuts have a deeper pumpkin spice taste, though the texture won’t be as light. If you can resist eating them all on day one, they’re still a treat on day two.
Nutritional Information & Benefits
Here’s the estimated nutritional breakdown for one standard-sized donut (based on 12 servings):
| Nutrient | Amount per Donut |
|---|---|
| Calories | 245 |
| Total Fat | 12g |
| Saturated Fat | 7g |
| Carbohydrates | 33g |
| Sugar | 20g |
| Protein | 4g |
| Fiber | 1g |
| Vitamin A | 80% DV |
These donuts aren’t health food, but they do have some redeeming qualities. Pumpkin is packed with vitamin A, which supports eye health and immunity. The cinnamon may help regulate blood sugar levels. And since they’re baked instead of fried, you’re saving a significant amount of fat and calories compared to traditional donuts.
If you’re watching your sugar intake, you can reduce the brown sugar to ½ cup and use a sugar substitute for the coating. I’ve tested this with monk fruit sweetener and it works, though the texture is slightly less tender.
For a lower-calorie option, make mini donuts and enjoy two for the same calorie count as one standard donut. Portion control without the sacrifice.
Conclusion
These baked pumpkin donuts are everything I want in a fall treat—warm, spiced, and covered in crunchy cinnamon sugar. They’re easy enough for a weekday morning but special enough for Thanksgiving brunch. I’ve made them for family gatherings, cozy weekends, and even as gifts for neighbors. Every time, they disappear fast.
I hope you give this recipe a try. Don’t be afraid to make it your own. Add extra cinnamon if that’s your thing. Swap the coating for a glaze. Make them mini. The beauty of this recipe is how forgiving it is once you get the basics right.
If you make these donuts, I’d love to hear about it. Leave a comment below and tell me how they turned out. Did you try a variation? Did your family love them? Share your photos and tag me—I want to see your cinnamon sugar creations. And if you’re looking for more fall baking inspiration, check out my pumpkin dinner rolls or these cranberry orange bread for another seasonal favorite.
Happy baking, friends. And remember—the first batch might not be perfect, but the second one will be.
Frequently Asked Questions
Can I make these donuts without a donut pan?
Technically, yes, but the results won’t be the same. You can use a muffin tin to make donut muffins, but you’ll lose the classic ring shape and the coating-to-donut ratio won’t be as balanced. If you’re serious about baked donuts, a donut pan is worth the investment. They’re inexpensive and open up a world of possibilities.
Why did my donuts come out dry?
Dry donuts usually mean one of three things: overmixing, overbaking, or too much flour. Make sure you’re measuring your flour correctly (spoon and level, don’t scoop). Check your donuts at the 10-minute mark. And mix until just combined—no more.
Can I use fresh pumpkin instead of canned?
Yes, but you’ll need to roast and purée the pumpkin first, then drain off any excess liquid. Fresh pumpkin purée is more watery than canned, which can throw off the recipe. If using fresh, reduce the buttermilk by 2 tablespoons to compensate.
How do I get the cinnamon sugar to stick better?
The key is brushing the donuts with melted butter while they’re still warm. Not hot, not cold—warm. The butter melts into the surface and creates a tacky layer that grabs the sugar. Work in small batches and roll the donuts immediately after brushing.
Can I make the batter ahead of time?
I don’t recommend it. The baking powder and baking soda start reacting as soon as they hit the wet ingredients, so the batter loses its leavening power over time. If you need to prep ahead, make the dry and wet mixtures separately and combine them right before baking. Or bake the donuts fully and reheat them as needed.
Pin This Recipe!
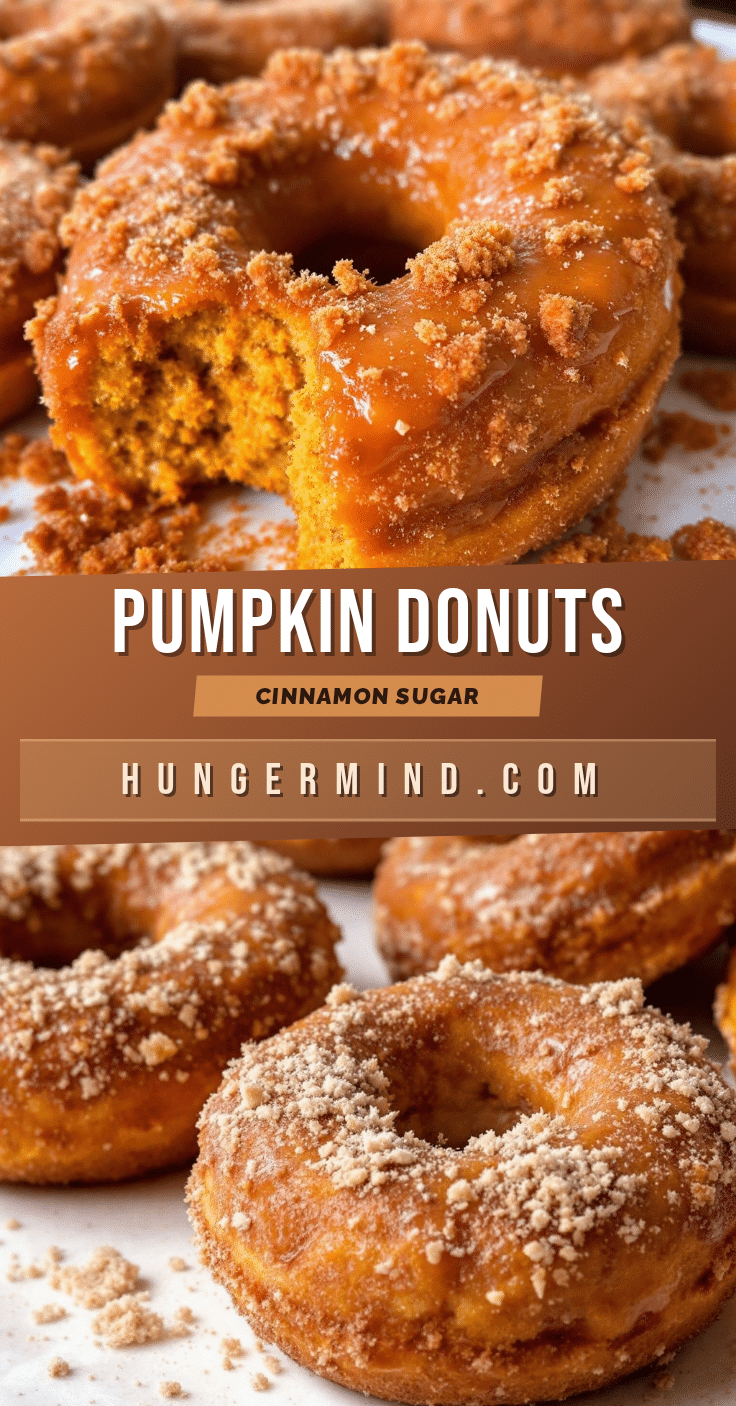
Best Easy Pumpkin Donuts Recipe – Perfect Cinnamon Sugar

These baked pumpkin donuts are light, tender, and coated in a crunchy cinnamon sugar crust. They’re quick to make with simple ingredients and perfect for fall mornings.
- Prep Time: 15 minutes
- Cook Time: 12 minutes
- Total Time: 27 minutes
- Yield: 12 servings 1x
- Category: Dessert
- Cuisine: American
Ingredients
- 1 ¾ cups (220g) all-purpose flour
- 1 ½ teaspoons baking powder
- ½ teaspoon baking soda
- 2 teaspoons pumpkin pie spice
- 1 teaspoon ground cinnamon
- ½ teaspoon salt
- 1 cup (245g) pumpkin purée
- ¾ cup (150g) packed brown sugar
- ¼ cup (50g) granulated sugar
- 2 large eggs, room temperature
- ½ cup (113g) unsalted butter, melted and cooled
- 2 teaspoons vanilla extract
- ¼ cup (60ml) buttermilk, room temperature
- ½ cup (100g) granulated sugar (for coating)
- 1 ½ tablespoons ground cinnamon (for coating)
- 3 tablespoons (42g) unsalted butter, melted (for coating)
Instructions
- Preheat oven to 350°F (175°C). Spray a standard 6-cavity donut pan generously with non-stick cooking spray.
- In a medium bowl, whisk together flour, baking powder, baking soda, pumpkin pie spice, cinnamon, and salt for about 20 seconds.
- In a large bowl, whisk together pumpkin purée, brown sugar, granulated sugar, eggs, melted butter, vanilla extract, and buttermilk until smooth and glossy.
- Pour dry ingredients into wet ingredients. Fold gently with a spatula until just combined (a few streaks of flour are okay).
- Transfer batter to a piping bag or zip-top bag. Snip off the corner and pipe batter into donut cavities, filling each about ⅔ full. Tap pan gently to release air bubbles.
- Bake for 10-12 minutes, until donuts spring back when lightly touched and a toothpick inserted comes out clean or with a few moist crumbs.
- Let donuts cool in pan for 2 minutes, then transfer to a cooling rack.
- While still warm, brush each donut with melted butter on all sides. Immediately roll in cinnamon sugar mixture (½ cup granulated sugar + 1 ½ tablespoons cinnamon).
- Repeat with remaining batter. Makes about 12 standard donuts.
Notes
Don’t overmix the batter to avoid dense donuts. Use room temperature ingredients for best results. Brush donuts with butter while warm for the coating to stick. For extra crunch, double coat the donuts. Store in an airtight container at room temperature for up to 2 days. Freeze uncoated donuts for up to 2 months.
Nutrition
- Serving Size: 1 donut
- Calories: 245
- Sugar: 20
- Fat: 12
- Saturated Fat: 7
- Carbohydrates: 33
- Fiber: 1
- Protein: 4
Keywords: pumpkin donuts, baked donuts, cinnamon sugar donuts, fall baking, easy donut recipe