“You really don’t need an ice cream maker for this,” my roommate said, waving off my skeptical glance as she pulled a container from the freezer. It was the first time I’d tried homemade no-churn cookies and cream ice cream, and honestly, I thought it was going to be a sticky, icy mess. But that night, as the cool, creamy sweetness melted on my tongue with crunchy cookie bits scattered throughout, I had to admit—I was wrong. This recipe turned out to be an accidental win born from a lazy summer evening when we didn’t feel like fussing with fancy equipment.
What surprised me most was how simple it was to get that indulgent, smooth texture without churning. The cookies gave it this playful crunch that felt like a little celebration in every bite. Since then, I’ve made this no-churn ice cream more times than I can count, especially on nights when I crave something sweet but don’t want to deal with a complicated process—or a trip to the store. It’s become my go-to treat for calming down after a hectic day or impressing friends who drop by unexpectedly.
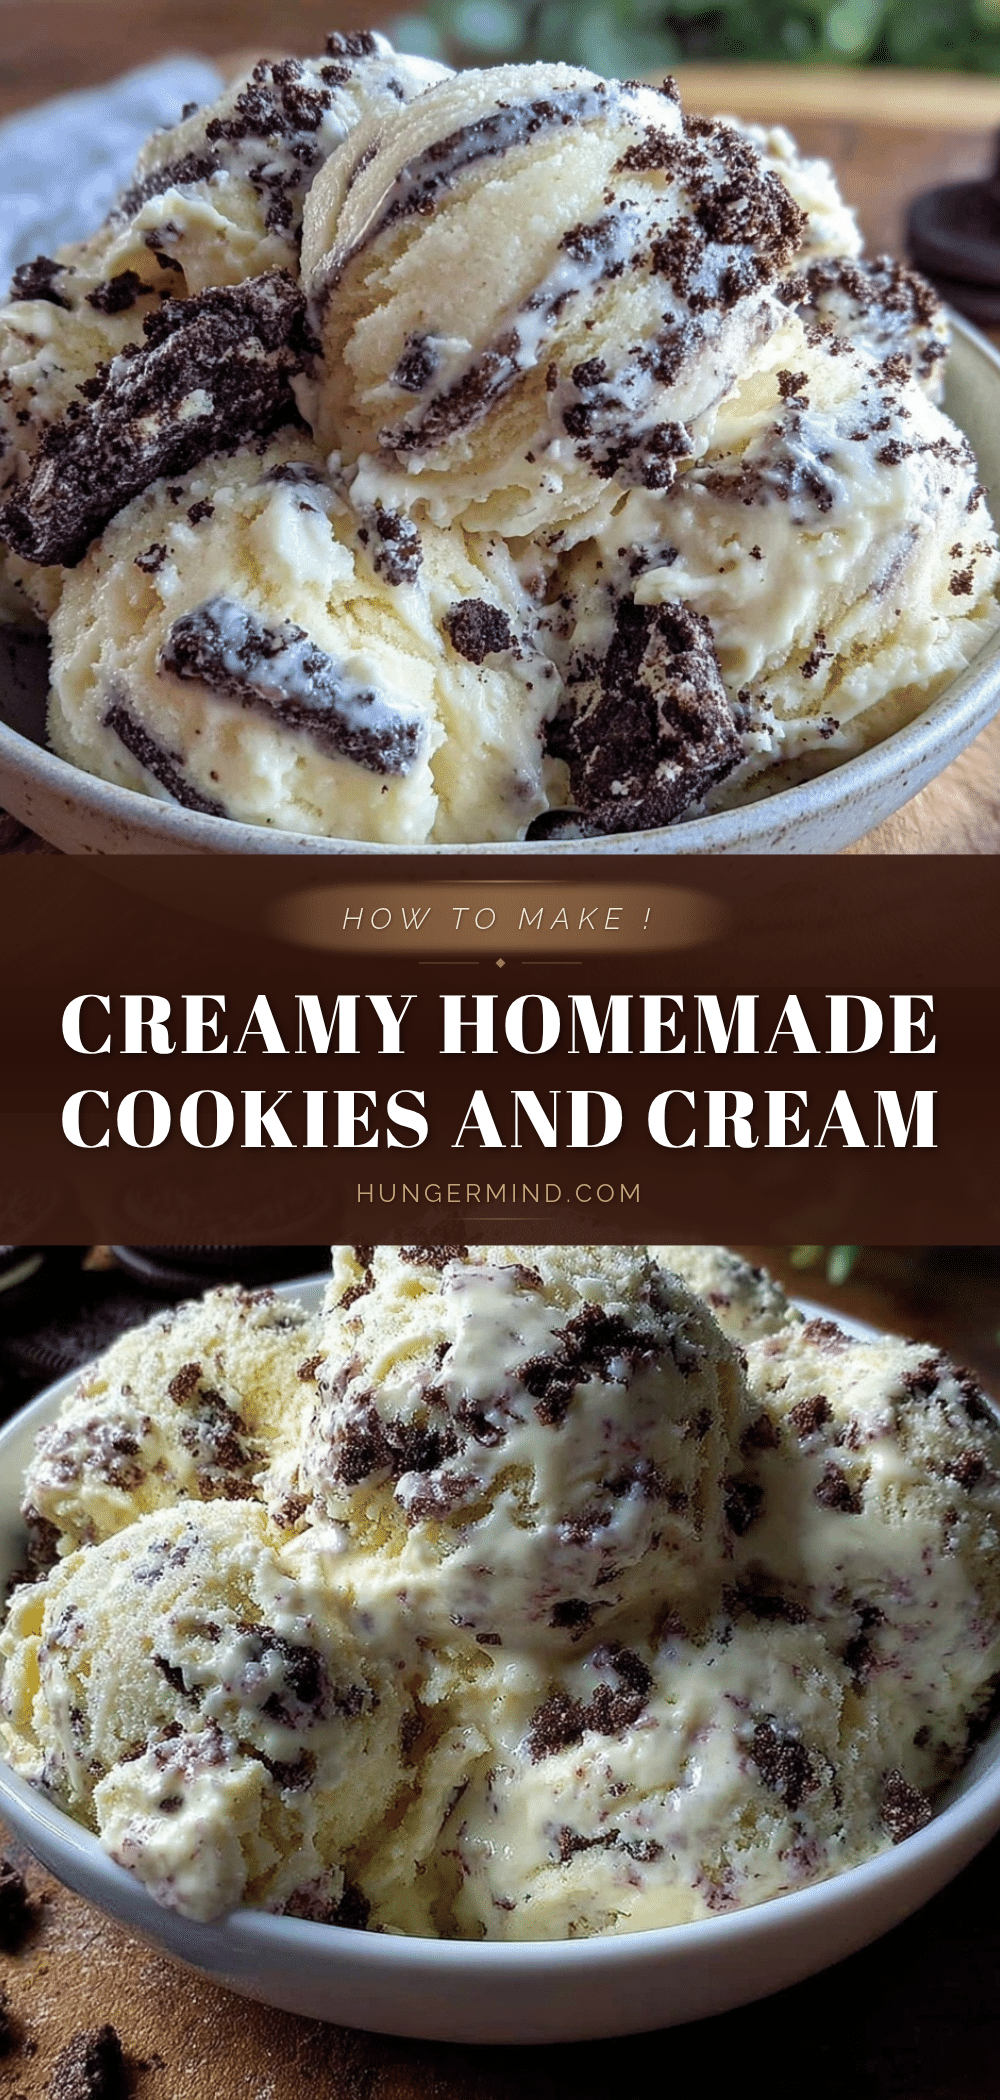
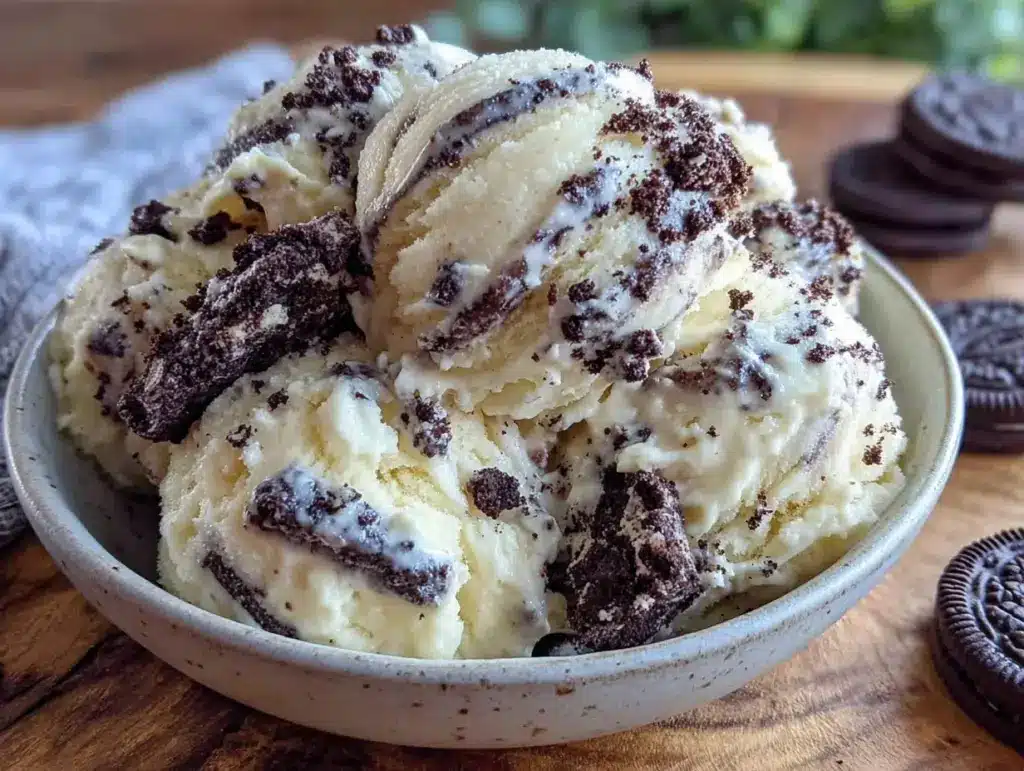
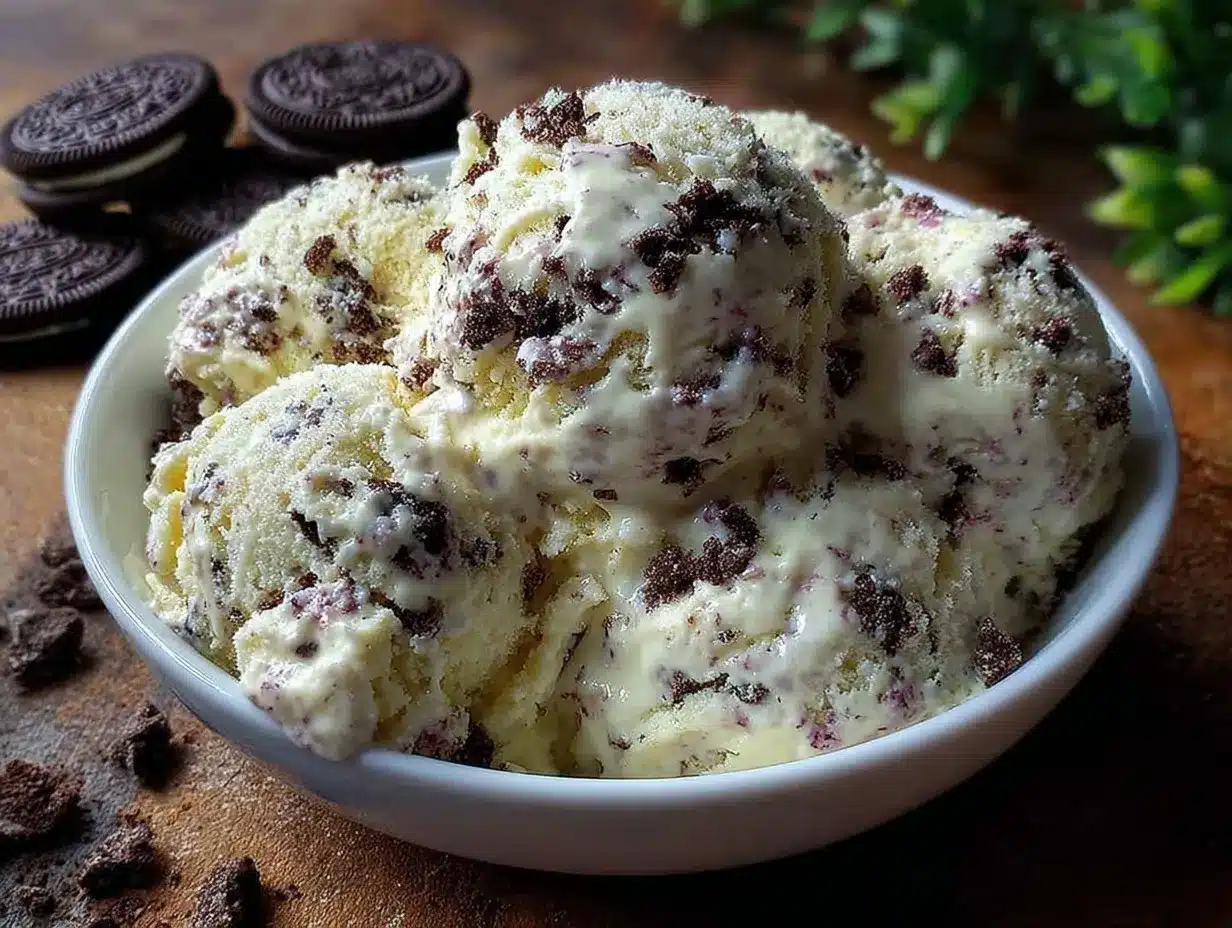
There’s something quietly satisfying about scooping up a bowl of this creamy homemade no-churn cookies and cream ice cream—like a small moment of joy that doesn’t ask for much in return. Maybe it’s the way the vanilla base wraps around the chocolate cookie pieces or how the texture stays soft enough to scoop straight from the freezer. Whatever it is, it’s the kind of recipe that keeps me coming back, no matter how many times I make it.
Why You’ll Love This Recipe
From my many attempts and tweaks, this creamy homemade no-churn cookies and cream ice cream recipe stands out because it’s:
- Quick & Easy: Ready in under 15 minutes of prep—no ice cream machine or complicated steps needed.
- Simple Ingredients: Mostly pantry staples like sweetened condensed milk, heavy cream, and classic sandwich cookies.
- Perfect for Any Occasion: Whether it’s a last-minute dessert for a casual dinner or a fun treat during warm weather, this recipe fits the bill.
- Crowd-Pleaser: Kids and adults alike can’t get enough of the creamy texture combined with crunchy cookie bits.
- Unbelievably Delicious: The balance of rich vanilla cream and chocolate cookie crunch is honestly next-level comfort food.
What sets this apart from other no-churn ice creams is the way the cookies hold up. Instead of turning into soggy chunks, they keep a just-right crunch, which I attribute to folding them in gently at the end rather than mixing aggressively. Plus, I prefer using a trusted brand of sandwich cookies with smaller crumbs for that perfect bite-sized texture. This isn’t just any no-churn cookies and cream ice cream—it’s the one I trust to satisfy every craving without fuss or mess.
What Ingredients You Will Need
This recipe uses simple, wholesome ingredients to deliver bold flavor and satisfying texture without the fuss. Most are pantry staples or easy to find in any grocery store, and substitutions are straightforward.
- Sweetened Condensed Milk – 1 can (14 oz / 396 g). This adds the perfect sweetness and creamy density without extra sugar.
- Heavy Whipping Cream – 2 cups (480 ml), cold. The foundation for that smooth, airy texture.
- Vanilla Extract – 1 ½ teaspoons. Use pure vanilla for the best flavor depth.
- Chocolate Sandwich Cookies – 15-20 cookies, roughly chopped. I recommend classic Oreo-style cookies, but feel free to try gluten-free brands if needed.
Optional:
- Pinch of Salt – To balance the sweetness and enhance flavor.
- Mini Chocolate Chips – ¼ cup (50 g) for extra chocolate bursts (if you’re feeling extra indulgent).
If you want a dairy-free version, swap heavy cream for full-fat coconut cream and use a dairy-free sweetened condensed milk alternative. The cookies can also be replaced with any crunchy chocolate cookies to match your preference or dietary needs.
Equipment Needed
- Mixing Bowl: A large bowl for whipping the cream comfortably. Glass or metal bowls work best because they stay cold longer.
- Electric Hand Mixer or Stand Mixer: Whipping the cream by hand is possible but takes a good amount of elbow grease. I’ve found an electric mixer saves time and ensures fluffy peaks.
- Spatula: For folding in the cookies gently without deflating the cream.
- Freezer-Safe Container: An airtight container or loaf pan lined with parchment paper works well for freezing the ice cream.
- Measuring Cups and Spoons: Accuracy makes a difference here, especially for the condensed milk and cream.
If you don’t have an electric mixer, a whisk and patience will do, but expect a longer prep time. For budget-friendly options, I recommend using silicone spatulas and glass bowls that can double for other kitchen tasks. Keeping your bowl and beaters chilled before whipping can help speed up the process and improve results.
Preparation Method
- Chill your mixing bowl and beaters. Pop your mixing bowl and beaters into the freezer for about 10–15 minutes before starting. This helps whip the cream faster and achieve better volume.
- Whip the heavy cream. Pour the cold heavy cream into the chilled bowl. Using an electric mixer on medium-high speed, whip the cream until soft peaks form—about 3 to 5 minutes. You want it fluffy but not overwhipped or it will turn grainy.
- Mix in sweetened condensed milk and vanilla. Gently fold in the entire can of sweetened condensed milk and the vanilla extract with a spatula. The mixture should be smooth and slightly thickened but still pourable.
- Fold in the cookie pieces. Roughly chop your chocolate sandwich cookies into bite-sized chunks. Using a spatula, gently fold about ¾ of the cookie pieces into the cream mixture. Be careful not to overmix or crush the cookies too much.
- Transfer to freezer-safe container. Spoon the mixture into your prepared container. Sprinkle the remaining cookie pieces on top for a pretty, crunchy finish.
- Freeze for at least 6 hours (preferably overnight). Cover tightly with a lid or plastic wrap to avoid freezer burn. When ready, scoop and enjoy straight from the freezer!
Pro tip: If your ice cream feels too hard after freezing, let it sit at room temperature for 5 to 10 minutes before scooping. This softens it just enough for easy serving without melting too fast.
Cooking Tips & Techniques
One key to getting creamy no-churn ice cream is whipping the cream to the right consistency. I’ve learned the hard way that under-whipping leads to a dense, icy texture while over-whipping can turn your cream buttery and ruin the smoothness. Aim for soft peaks that hold their shape but still move easily.
When folding in the cookies, gentle is the name of the game. You want to preserve those crunchy chunks rather than pulverize them into crumbs. This step adds texture contrast that makes every bite interesting.
Freezing time matters too. I recommend freezing overnight if you can; it gives the ice cream a chance to set fully and develop flavors. But if you’re in a rush, 6 hours will do the trick.
Lastly, avoid opening the freezer too often during freezing to prevent ice crystals from forming. If you have a container with a tight seal, use it to keep the ice cream creamy longer.
Variations & Adaptations
- Mint Cookies and Cream: Add a few drops of peppermint extract to the base and use mint-flavored sandwich cookies for a refreshing twist.
- Peanut Butter Swirl: Gently swirl in some peanut butter before freezing for a nutty surprise in every scoop.
- Vegan Version: Use coconut cream instead of heavy cream, sweetened condensed coconut milk, and dairy-free cookies to make a plant-based treat.
For a seasonal adaptation, try swapping the cookies with crushed ginger snaps or cinnamon-spiced cookies during fall and winter. It adds a cozy warmth to the creamy texture.
In one of my experiments, I added a handful of chopped toasted nuts for extra crunch, which was a hit with friends who love texture variety. Feel free to customize toppings or mix-ins based on your mood or pantry stash.
Serving & Storage Suggestions
This ice cream is best served straight from the freezer after a brief 5-minute rest at room temperature to soften slightly. Scoop into bowls or cones and enjoy the creamy, crunchy contrast.
Pair it with a warm dessert like a creamy Japanese sesame spinach goma-ae or a fresh fruit salad for balance. It also makes a fun finish to a spicy meal, such as Mexican rice dishes or Moroccan couscous, offering a cool, sweet counterpoint.
Store leftovers tightly sealed in the freezer for up to 2 weeks. Avoid repeated thawing and refreezing to keep that silky texture. Reheat by letting the container sit at room temperature for 10 minutes before scooping.
Over time, the flavors meld beautifully, and the cookies soften just enough to create a luscious, almost fudge-like swirl inside the ice cream.
Nutritional Information & Benefits
A typical serving (about ½ cup / 120 ml) of this no-churn cookies and cream ice cream provides approximately 250 calories, with 15 grams of fat and 25 grams of carbohydrates. It’s a treat best enjoyed in moderation but is free of artificial additives and preservatives often found in store-bought ice cream.
The heavy cream supplies calcium and fat-soluble vitamins, while the cookies add a bit of fiber and iron. For those watching sugar intake, you can adjust by using reduced-sugar cookies or experimenting with sugar-free sweetened condensed milk alternatives.
From a wellness perspective, making this at home means control over ingredients and the satisfaction of a homemade dessert that feels indulgent without unnecessary fillers.
Conclusion
This creamy homemade no-churn cookies and cream ice cream recipe has become a quiet favorite in my kitchen because it’s simple, satisfying, and surprisingly indulgent without the hassle. It’s one of those recipes that welcomes customization and invites you to play around with flavors and textures. Whether you’re a seasoned cook or a casual dessert maker, this ice cream delivers consistently delicious results.
I love that it’s the kind of easy recipe that feels special enough for guests but relaxed enough for any night of the week. If you try it, I’d be thrilled to hear about your favorite variations or how you served it alongside other dishes like the fresh Mexican rice or Moroccan couscous with seven vegetables.
Happy scooping and savoring!
FAQs About Creamy Homemade No-Churn Cookies and Cream Ice Cream
Can I use any kind of cookies for this recipe?
Yes! Classic chocolate sandwich cookies are traditional, but you can use gluten-free, mint, or even peanut butter cookies depending on your taste. Just chop them into bite-sized pieces for best texture.
How long can I store this ice cream in the freezer?
Store it in an airtight container for up to 2 weeks. Beyond that, texture and flavor may degrade, so it’s best enjoyed within that timeframe.
Is it possible to make this recipe vegan?
Definitely. Use full-fat coconut cream instead of heavy cream, dairy-free sweetened condensed milk, and vegan cookies to create a plant-based version that’s just as creamy and delicious.
What if I don’t have sweetened condensed milk?
You can try making your own by simmering milk and sugar until thickened, but it’s easier and more reliable to buy canned sweetened condensed milk. It’s key to the creamy texture and sweetness.
Can I add other mix-ins besides cookies?
Absolutely! Mini chocolate chips, nuts, or swirls of peanut butter or fudge sauce work great. Just fold them in gently at the end to preserve texture.
Pin This Recipe!