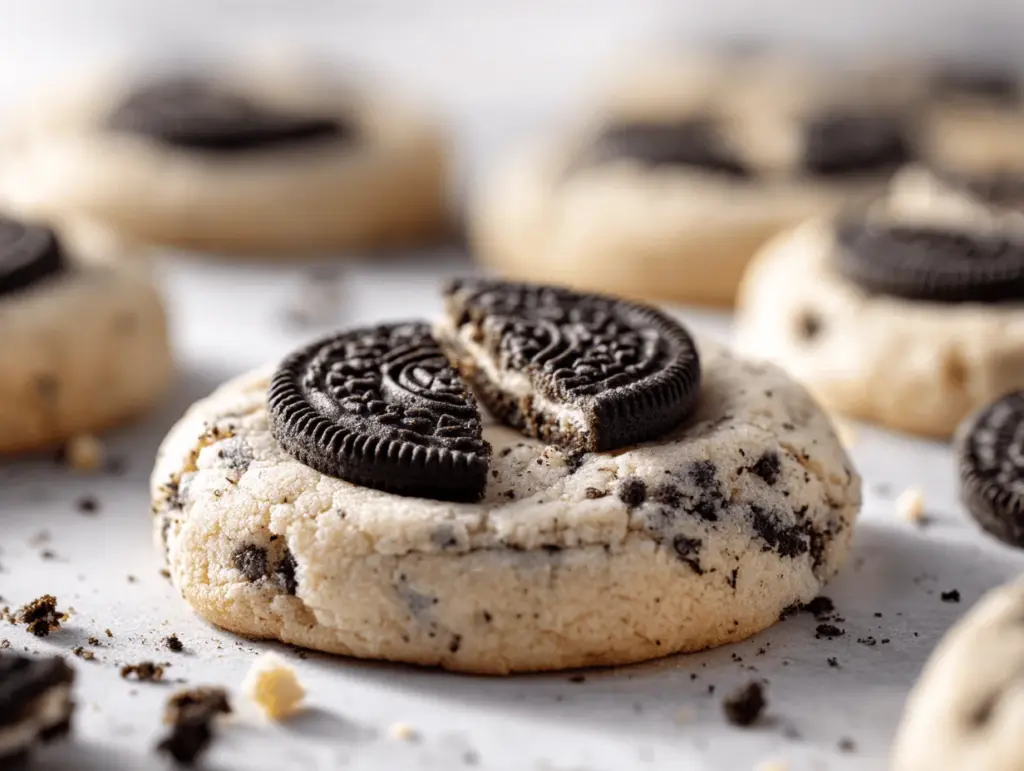
The scent of freshly baked cookies and cream cookies swirling around my kitchen is enough to make anyone’s mouth water—seriously, it’s like nostalgia meets pure chocolatey bliss. I remember the first time I tried combining classic chocolate chip cookie dough with crushed Oreo cookies. I was skeptical, but let’s be real: cookies inside cookies? That’s just genius. These soft and chunky homemade treats have become my family’s go-to for birthdays, movie nights, and, honestly, any day that needs a little pick-me-up.
Here’s the thing—cookies and cream cookies aren’t just your average cookie. They’re loaded with chunks of real Oreo cookies, creamy white chocolate chips, and a dough that bakes up ultra-soft every time. I’ve tested this recipe more times than I can count (my neighbors love me for it), and it never disappoints. Whether you’re baking for picky kids, a party, or just chilling with a cup of coffee, this recipe brings everyone together. Plus, there’s something about biting into those black-and-white cookie chunks that makes each bite a surprise. If you love Oreos and crave bakery-style cookies, you’re in for a treat.
As someone who’s obsessed with cookies (I literally have a cookie jar that’s never empty), I can tell you these cookies and cream cookies hit that sweet spot between classic and creative. They’re easy enough for beginner bakers and impressive enough to bring to a potluck. So, if you’re ready to fill your kitchen with the warm aroma of vanilla, chocolate, and Oreo goodness, keep reading—these cookies are about to become your new favorite!
Why You’ll Love This Cookies and Cream Cookies Recipe
- Quick & Easy: You can whip up a batch of cookies and cream cookies in under 30 minutes—perfect for spontaneous cravings or when you need a last-minute dessert. No fancy techniques required!
- Simple Ingredients: Most of what you need is probably already in your pantry. Just grab some Oreos, chocolate chips, and your usual baking basics.
- Perfect for Any Occasion: These cookies shine at birthday parties, bake sales, or cozy weekend afternoons. They’re also ideal for gifting—who wouldn’t love a box of homemade cookies packed with Oreos?
- Crowd-Pleaser: I’ve served these to adults, teens, and toddlers—every single person goes back for seconds. The combo of soft dough and crunchy cookie bits is irresistible.
- Unbelievably Delicious: Think decadent, chunky, and melt-in-your-mouth texture. The crushed Oreos add just the right amount of crunch, while white chocolate chips offer creamy sweetness.
What sets these cookies and cream cookies apart is the technique: I always gently fold in the Oreo chunks at the end, so they stay big and bold. Plus, chilling the dough for just 15 minutes gives you bakery-style thickness without all the waiting. The balance between sweetness and chocolate makes them comforting yet exciting—food that feels like a hug.
Honestly, if you’ve ever wanted a cookie that’s soft, chunky, and packed with surprises in every bite, this is it. It’s not just a dessert—it’s a memory maker. Whether you’re impressing guests or turning a quiet night into something special, these cookies deliver every time. (And yes, they freeze beautifully, so you can enjoy them anytime!)
What Ingredients You Will Need
This recipe uses simple, wholesome ingredients to deliver bold flavor and satisfying texture without the fuss. Most of these are pantry staples, but I’ll share a few tips along the way that I’ve learned after many batches!
- For the Cookie Dough:
- All-purpose flour (240g, about 2 cups) – Gives the cookies their structure and chew.
- Baking soda (1/2 teaspoon) – Helps the cookies puff up just right.
- Salt (1/4 teaspoon) – Balances the sweetness and brings out flavors.
- Unsalted butter (113g, 1/2 cup, softened) – I prefer European-style butter for extra richness.
- Granulated sugar (100g, 1/2 cup) – Adds crisp edges.
- Light brown sugar (110g, 1/2 cup, packed) – For that chewy, caramelly center.
- Large egg (1, room temperature) – Holds everything together and keeps it moist.
- Vanilla extract (2 teaspoons) – Go for pure vanilla for best flavor.
- Add-Ins:
- Oreo cookies (10-12, roughly chopped) – I use classic Oreos, but double-stuffed or flavored ones work if you’re feeling adventurous.
- White chocolate chips (120g, 3/4 cup) – Adds creamy sweetness that pairs perfectly with the Oreos.
- Semi-sweet chocolate chips (optional, 60g, 1/3 cup) – For extra bursts of chocolate.
Ingredient Selection Tips: Stick with regular Oreos for that iconic cookies and cream cookie taste, but if you’re gluten-free, try using gluten-free chocolate sandwich cookies. For the butter, I love using Kerrygold; it makes the cookies super tender. If you want to lower the sugar, you can swap half of the white sugar with coconut sugar (I’ve tried it—it works!).
Substitution Suggestions: Use plant-based butter if you’re dairy-free, and swap the egg for a flaxseed egg (1 tablespoon ground flaxseed mixed with 2.5 tablespoons water) if you need a vegan version. Almond flour works for a gluten-free adaptation, though the cookies will be a bit softer.
Honestly, these ingredients are flexible, and you can adapt based on what’s in your pantry. Just don’t skip the Oreos—they’re the heart of this cookies and cream cookies recipe!
Equipment Needed
- Mixing bowls: You’ll need at least two—one for dry ingredients, one for wet. Any sturdy bowl will do.
- Hand mixer or stand mixer: A hand mixer is my go-to for small batches, but a stand mixer is great if you’re doubling the recipe.
- Rubber spatula: For scraping the bowl and gently folding in those Oreo chunks.
- Baking sheet: Standard rimmed sheets work best. If you’ve got a well-seasoned one, use it for extra crisp edges.
- Parchment paper: Makes cleanup a breeze and helps cookies bake evenly.
- Cookie scoop (optional): I use a medium-size scoop for perfectly round, chunky cookies. A spoon works in a pinch!
- Wire cooling rack: Essential for cooling—prevents soggy bottoms.
If you don’t have parchment, lightly grease your baking sheet. No mixer? Just use a sturdy whisk and some elbow grease—I’ve done it, and the cookies still turn out great. For budget-friendly options, I’ve found that even dollar-store spatulas and bowls do the trick. Just treat your tools well—wash them right after using to avoid sticky dough residue!
Preparation Method
- Prep the Oven & Ingredients: Preheat your oven to 350°F (175°C). Line a baking sheet with parchment paper. Soften your butter (either leave it out for 30 minutes or zap it for 10 seconds).
- Mix Dry Ingredients: In a medium bowl, whisk together 240g (2 cups) all-purpose flour, 1/2 teaspoon baking soda, and 1/4 teaspoon salt. Make sure there are no lumps—sometimes flour gets clumpy!
- Cream Butter & Sugars: In a large bowl, cream 113g (1/2 cup) unsalted butter, 100g (1/2 cup) granulated sugar, and 110g (1/2 cup) light brown sugar using a hand mixer or stand mixer. Beat for about 2-3 minutes until light and fluffy. If your butter isn’t fully soft, scrape down the bowl and keep mixing. The mixture should look pale and creamy.
- Add Egg & Vanilla: Crack in 1 large egg (room temp) and add 2 teaspoons vanilla extract. Beat again for 30 seconds. If your egg is cold, place it in warm water for 5 minutes before cracking—helps prevent curdling!
- Combine Wet & Dry: Slowly add the dry ingredients into the wet mixture, mixing on low. Stop as soon as the flour disappears. Overmixing can make cookies tough, so go gentle—some streaks are okay.
- Fold in Goodies: Using a spatula, gently fold in 10-12 chopped Oreo cookies and 120g (3/4 cup) white chocolate chips. If using semi-sweet chips, add those too. Tip: Fold just enough so the Oreo chunks stay big and don’t get crushed into dust.
- Chill the Dough (Optional but Recommended): Cover the bowl and chill dough for 15 minutes in the fridge. This helps prevent spreading and makes cookies thick and chunky. If you’re in a rush, skip this step, but expect slightly thinner cookies.
- Scoop & Shape: Use a medium cookie scoop (about 2 tablespoons) or a spoon to drop dough onto the lined baking sheet, spacing cookies about 2 inches apart. For extra bakery-style look, press a few more Oreo pieces and chips on top of each dough ball.
- Bake: Bake for 10-12 minutes until edges are set and centers look slightly underbaked. They’ll firm up as they cool. If you like crispier cookies, bake 1-2 minutes longer. Watch closely—Oreo bits can burn if left too long.
- Cool: Let cookies sit on the baking sheet for 5 minutes, then transfer to a wire rack. They’ll be soft (almost gooey!) at first but set up nicely within 20 minutes.
Troubleshooting: If your cookies spread too much, chill the dough longer or add a tablespoon more flour. If cookies are too crumbly, check your butter measurements—too little fat can cause dry cookies. The dough should smell rich and buttery, and look thick but scoopable.
My trick: Always save a handful of chopped Oreos to press into the tops right before baking. It makes the cookies look extra chunky and Pinterest-worthy!
Cooking Tips & Techniques
- Chill the Dough: Even 15 minutes in the fridge makes a big difference for thickness and texture. I skipped this step once—my cookies were tasty, but a bit flat. Lesson learned!
- Don’t Overmix: Once you add the flour, mix just until combined. Too much mixing leads to tough cookies. (I’ve made that mistake more than once!)
- Keep Oreo Chunks Big: Roughly chop your Oreos instead of crushing them to dust. Bigger chunks mean more crunch and visual appeal.
- Watch Baking Time: Cookies and cream cookies bake fast. Pull them when edges are set but centers are still soft. They firm up as they cool.
- Multi-tasking: While dough chills, clean up your bowls and measure out chips and Oreos for topping. Makes post-bake cleanup easier.
- Consistency Hacks: If you want every cookie to look perfect, save a few chips and cookie pieces to press into the tops before baking. It’s a small step that pays off big in presentation!
I’ve had batches come out too dry—usually from accidentally packing my flour. Always fluff your flour and spoon it into the measuring cup, then level off. And if you’re baking in a hot kitchen, chill the dough longer to prevent spreading. Honestly, little tweaks make a huge difference!
Variations & Adaptations
- Gluten-Free Version: Swap all-purpose flour for a 1:1 gluten-free blend and use gluten-free chocolate sandwich cookies. The texture is a little more delicate but still delicious.
- Vegan Cookies and Cream Cookies: Use plant-based butter, a flaxseed egg (1 tablespoon ground flaxseed + 2.5 tablespoons water), and vegan chocolate chips. For Oreos, double-check—they’re usually vegan, but check for cross-contact warnings if you’re strict.
- Seasonal Twist: Around the holidays, I swap in peppermint sandwich cookies and add a handful of crushed candy canes. In summer, lemon or golden Oreos give a fun, bright spin.
- Flavor Boost: Add 1/2 teaspoon almond extract for a nutty kick, or mix in chopped nuts for extra crunch.
- Alternative Baking Methods: These cookies can be baked in an air fryer for small batches—350°F (175°C) for 7-8 minutes. They come out thicker and slightly crispier.
I once made a batch with peanut butter chips and mini marshmallows—honestly, not traditional, but it was a hit! Don’t be afraid to customize to your family’s tastes or dietary needs. There’s plenty of room to play with flavors and textures in this cookies and cream cookies recipe.
Serving & Storage Suggestions
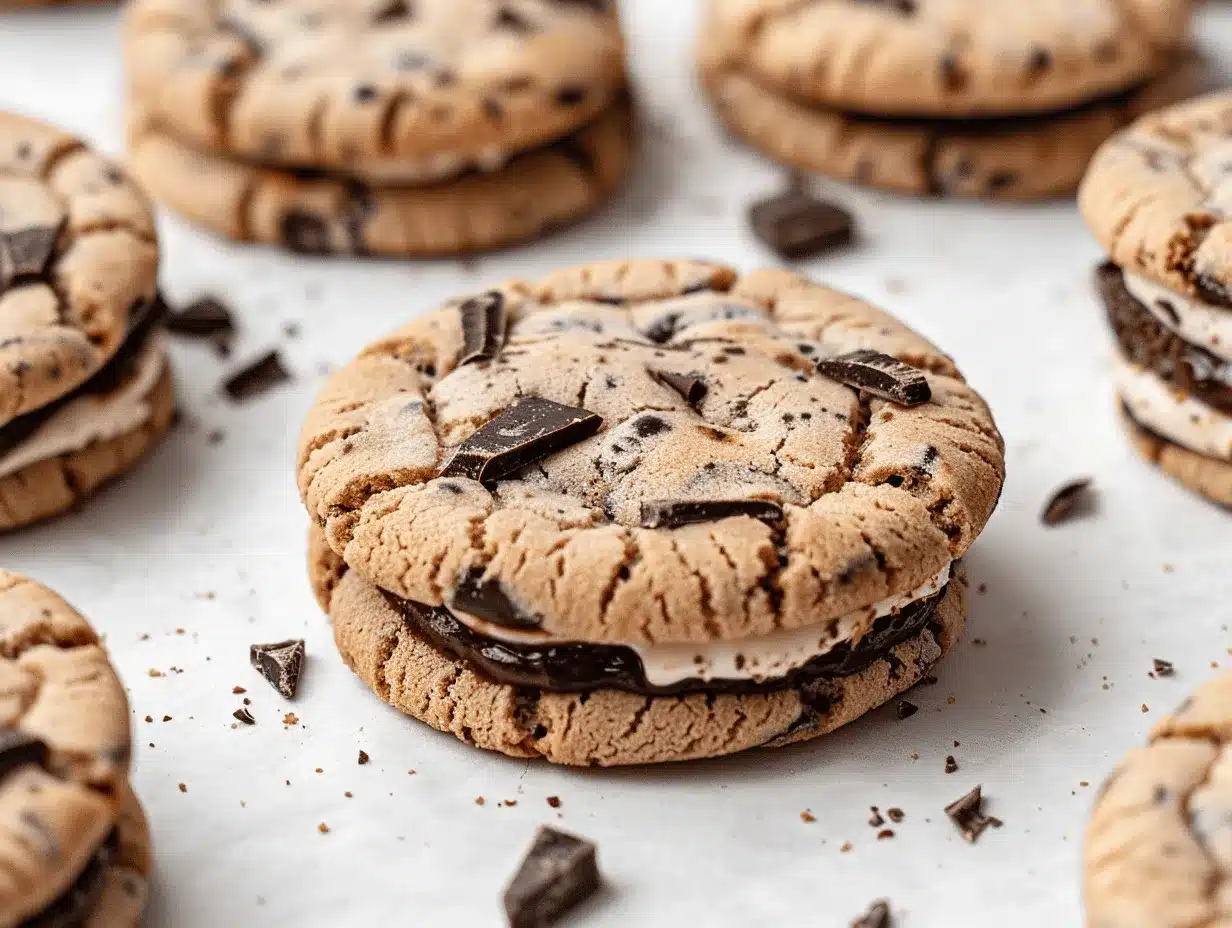
I love serving cookies and cream cookies slightly warm, straight from the oven. The chocolate gets a little melty and the cookies are just soft enough to break in half. They look gorgeous stacked on a platter (bonus points if you sprinkle a few extra Oreo crumbs on top for effect!).
Pair these cookies with a cold glass of milk, hot cocoa, or even an iced coffee. They’re fantastic as a dessert with vanilla ice cream—just crumble a cookie on top. If you’re packing them for a party, wrap each cookie in parchment for grab-and-go snacking.
- Storage: Store cooled cookies in an airtight container at room temperature for up to 5 days. They stay soft and chunky.
- Freezing: Freeze baked cookies for up to 2 months. Thaw at room temperature or microwave for 10 seconds for that fresh-baked warmth.
- Dough Storage: You can freeze unbaked dough balls, then bake straight from frozen. Just add 1-2 minutes to the baking time.
- Flavor Development: The cookies actually taste even better on day two—Oreos soften and the flavors meld together.
Honestly, I’ve never had a batch last more than a couple days in my house. If you want to make them ahead, just store the dough and bake fresh for maximum wow factor.
Nutritional Information & Benefits
For one cookies and cream cookie (based on a batch of 16):
- Calories: ~180
- Fat: 9g
- Carbohydrates: 24g
- Protein: 2g
- Sugar: 15g
Key Benefits: These cookies offer a fun way to enjoy classic flavors with a homemade touch. Using real butter and eggs provides a bit of protein, and you can adjust the sugar or swap in healthier chips for a lighter treat. If you’re gluten-free or dairy-free, simple subs make these cookies accessible to all.
Allergen Notes: Contains wheat, dairy, eggs, and soy (from Oreos and some chips). Always check labels if baking for allergies. In my house, I swap for allergy-friendly alternatives—my kids’ friends never notice the difference!
Cookies and cream cookies aren’t health food, but they’re a joyful, occasional treat that brings people together. And sometimes, that’s the best kind of wellness.
Conclusion
If you’re searching for a cookie recipe that’s easy, fun, and totally irresistible, these cookies and cream cookies are the answer. They’re soft, chunky, and packed with flavor—perfect for parties, family nights, or just treating yourself. I love how flexible the recipe is, letting you customize ingredients to fit your taste or dietary needs.
Every time I bake these, I’m reminded why homemade cookies matter. It’s not just about the taste—it’s about memories, sharing, and a little bit of kitchen magic. So go ahead, try your own twist, swap flavors, or make them extra chunky. I’d love to hear which variation you create!
Leave a comment below if you try the recipe, or share your photos and swaps—I genuinely love seeing what you come up with. Happy baking, and may your cookie jar always be full!
Frequently Asked Questions
How do I keep cookies and cream cookies soft?
Let them bake until the edges are set and the centers look slightly underdone. The cookies firm up as they cool, staying soft and chewy. Store them in an airtight container to retain moisture.
Can I use different types of Oreos?
Absolutely! Golden Oreos, birthday cake, or even peppermint Oreos work well. Just chop them roughly and fold in as directed.
What if I don’t have a mixer?
No worries. Use a sturdy whisk or even a fork to cream the butter and sugars. It’ll take a little more effort, but the cookies will still turn out great.
Can I freeze cookies and cream cookies?
Yes! Freeze baked cookies in a zip-top bag for up to 2 months. You can also freeze unbaked dough balls and bake straight from frozen with a couple extra minutes added to the baking time.
How do I make these cookies gluten-free?
Swap the flour for a 1:1 gluten-free blend and use gluten-free chocolate sandwich cookies. The texture will be a bit softer, but the flavor is just as delicious!
Pin This Recipe!

Cookies and Cream Cookies

These easy, soft, and chunky cookies and cream cookies combine classic chocolate chip cookie dough with crushed Oreo cookies and white chocolate chips for a nostalgic, bakery-style treat. Perfect for parties, family nights, or whenever you need a sweet pick-me-up.
- Prep Time: 15 minutes
- Cook Time: 12 minutes
- Total Time: 27 minutes
- Yield: 16 cookies 1x
- Category: Dessert
- Cuisine: American
Ingredients
- 2 cups all-purpose flour (240g)
- 1/2 teaspoon baking soda
- 1/4 teaspoon salt
- 1/2 cup unsalted butter, softened (113g)
- 1/2 cup granulated sugar (100g)
- 1/2 cup light brown sugar, packed (110g)
- 1 large egg, room temperature
- 2 teaspoons vanilla extract
- 10–12 Oreo cookies, roughly chopped
- 3/4 cup white chocolate chips (120g)
- 1/3 cup semi-sweet chocolate chips (optional, 60g)
Instructions
- Preheat oven to 350°F (175°C). Line a baking sheet with parchment paper. Soften butter if needed.
- In a medium bowl, whisk together flour, baking soda, and salt until well combined.
- In a large bowl, cream together the softened butter, granulated sugar, and light brown sugar with a hand mixer or stand mixer for 2-3 minutes until light and fluffy.
- Add the egg and vanilla extract to the butter mixture and beat for 30 seconds until combined.
- Gradually add the dry ingredients to the wet mixture, mixing on low speed until just combined. Do not overmix.
- Gently fold in the chopped Oreo cookies and white chocolate chips (and semi-sweet chips if using) with a spatula, being careful not to crush the Oreos too much.
- Cover the bowl and chill the dough for 15 minutes in the refrigerator (optional but recommended for thicker cookies).
- Scoop dough (about 2 tablespoons per cookie) onto the prepared baking sheet, spacing cookies about 2 inches apart. Press extra Oreo pieces and chips on top if desired.
- Bake for 10-12 minutes, until edges are set and centers look slightly underbaked. For crispier cookies, bake 1-2 minutes longer.
- Let cookies cool on the baking sheet for 5 minutes, then transfer to a wire rack to cool completely.
Notes
For best results, chill the dough for at least 15 minutes. Roughly chop Oreos for big chunks and visual appeal. Store cookies in an airtight container for up to 5 days or freeze for up to 2 months. For gluten-free or vegan adaptations, see substitution suggestions in the blog post.
Nutrition
- Serving Size: 1 cookie
- Calories: 180
- Sugar: 15
- Sodium: 90
- Fat: 9
- Saturated Fat: 5
- Carbohydrates: 24
- Fiber: 1
- Protein: 2
Keywords: cookies and cream cookies, Oreo cookies, white chocolate chip cookies, easy cookie recipe, homemade cookies, soft cookies, chunky cookies, dessert, party cookies, bakery style cookies


