Introduction
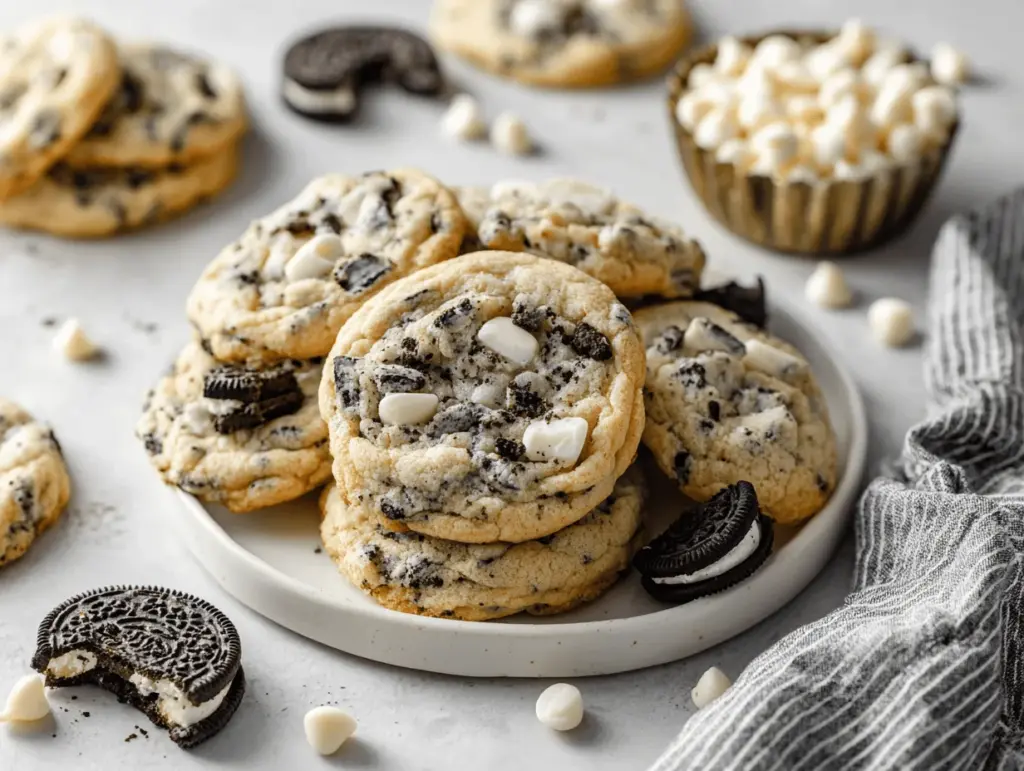
Cracking into a fresh batch of cookies and cream cookies, you’re hit with the sweet scent of vanilla and chocolate—it’s the kind of aroma that makes the whole house feel like a bakery. I still remember the first time I made these: my kitchen was a glorious mess, with cookie crumbs and chocolate chips everywhere, but as soon as I took that first bite, I knew they’d be an instant classic. There’s just something magical about creamy white chocolate and crunchy cookie bits swirled through soft, chewy dough.
My love affair with cookies and cream cookies started years ago when I was trying to recreate a bakery treat for my kids. Honestly, nothing beats the big, chunky cookies you get at your favorite bakery, but I was determined to make them even better at home. After way too many test batches (and quite a few “oops” moments), I landed on this recipe that checks all the boxes: thick, soft centers, crispy edges, and loads of that classic cookies-and-cream flavor.
If you’re after a bakery-style cookies and cream cookie recipe that’s easy enough for a weeknight but special enough for celebrations, you’re in the right place. These cookies are perfect for anyone who loves a twist on the classic chocolate chip cookie, and they’re a hit with both kids and grown-ups. Plus, with ingredients you probably have on hand, you won’t need any fancy trips to the store. Whether you’re baking for a crowd, a school treat, or just to treat yourself (no judgment!), these cookies and cream cookies are about to become your new favorite go-to. Trust me, after baking these dozens of times, I can say they’re a total keeper.
Why You’ll Love This Cookies and Cream Cookies Recipe
I’ve baked more batches of cookies and cream cookies than I can count, and each time, they disappear in record time (seriously, sometimes before they even cool). Here’s why you’ll find yourself coming back to this recipe over and over:
- Quick & Easy: No complicated steps or chilling required—just mix, scoop, and bake. You’ll have bakery-style cookies on your table in under 30 minutes.
- Simple Ingredients: Everything you need is probably already in your pantry—no specialty flours or hard-to-find items.
- Perfect for Any Occasion: These cookies work for birthday parties, lunchboxes, potlucks, or even late-night cravings (ask me how I know!).
- Crowd-Pleaser: Kids love the cookie chunks, adults can’t resist the creamy chocolate, and everyone asks for the recipe.
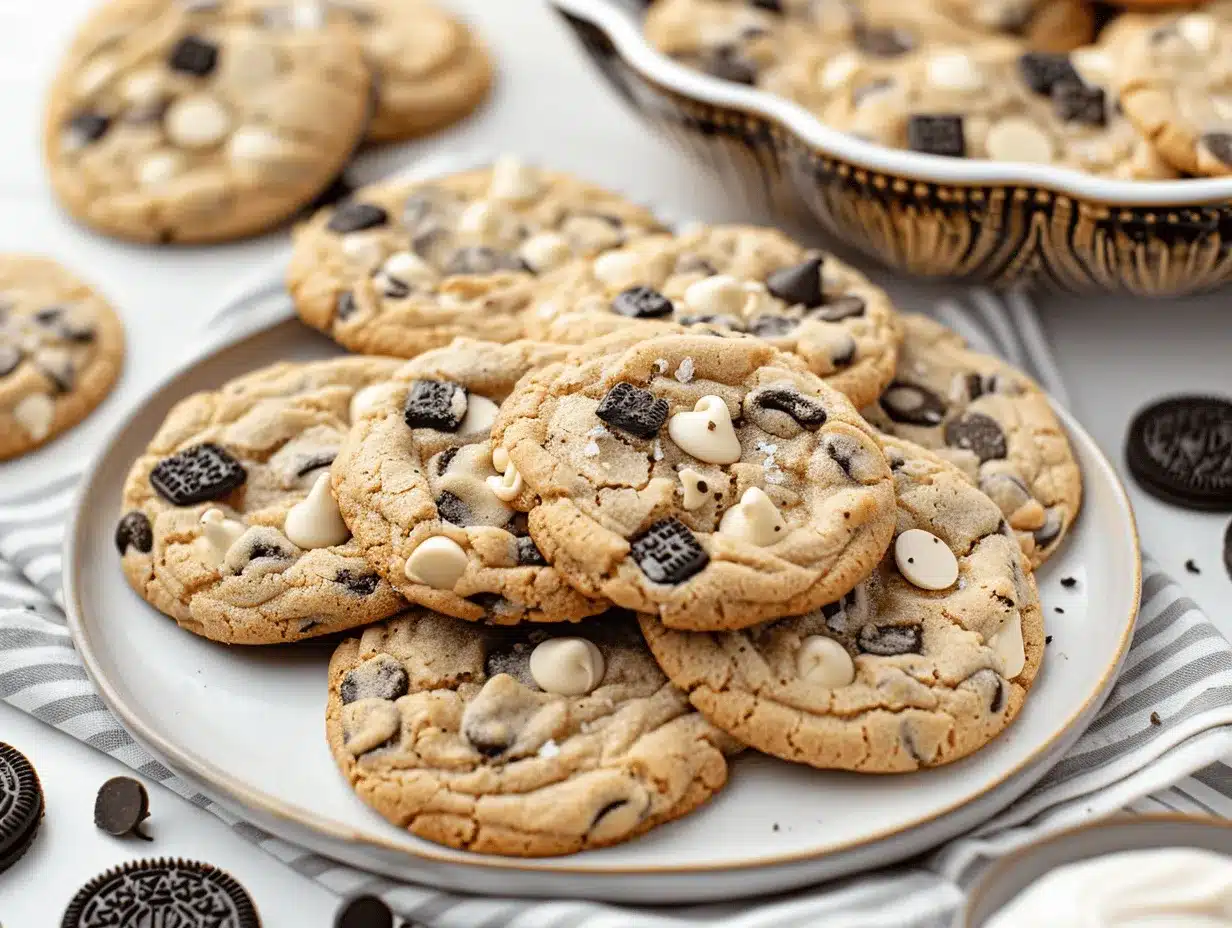
- Bakery-Style Texture: Think thick, chewy centers with just the right amount of crunch on the edges—seriously, they rival any bake shop.
- Loaded with Flavor: Every bite bursts with creamy white chocolate and crunchy cookie pieces—none of those sad, barely-there add-ins here.
What sets my cookies and cream cookies recipe apart from the rest? For starters, I use a secret trick—crushing the sandwich cookies just enough so you get both big chunks and fine crumbs. This means every bite is packed with that classic cookies-and-cream flavor. I also blend in white chocolate chips for creaminess, and a touch of cornstarch for that soft, pillowy bakery-style texture.
These cookies aren’t just another spin on chocolate chip—they’re next-level comfort food, but with a fun, nostalgic twist. I’ve shared these at bake sales, family picnics, and even as holiday gifts, and there’s never a crumb left over. If you’re looking for a cookie that’s as impressive as it is easy, this recipe is for you. Trust me, you’ll want to keep this one in your regular rotation!
What Ingredients You Will Need
This cookies and cream cookies recipe is all about simple, familiar ingredients coming together to make something absolutely irresistible. The best part? You probably have most of these in your pantry already. Here’s what you’ll need (plus a few tips from my own baking adventures):
- Unsalted Butter, softened (1 cup / 226g): Soft butter blends smoothly and gives the cookies that rich, bakery-style flavor. If you only have salted butter, just dial back the added salt a tad.
- Granulated Sugar (3/4 cup / 150g): For sweetness and those pretty golden edges.
- Light Brown Sugar, packed (3/4 cup / 160g): Adds that chewy, caramel-y touch you get in the best cookies. I’ve tried both light and dark brown sugar here—either works, but light keeps the flavor a little more subtle.
- Large Eggs (2, room temperature): They bind everything together and keep the dough rich. If you forget to set them out, pop them in warm water for a few minutes—it works in a pinch.
- Pure Vanilla Extract (2 tsp): I swear by good-quality vanilla. It makes all the difference in flavor.
- All-Purpose Flour (2 3/4 cups / 345g): Gives the cookies structure. I’ve tried swapping in a 1:1 gluten-free flour blend and it works great if you’re baking for allergies.
- Cornstarch (2 tsp): The secret to soft, thick cookies. Don’t skip it!
- Baking Soda (1 tsp): Helps the cookies rise just the right amount.
- Salt (1/2 tsp): Balances out all the sweetness and brings the flavors together.
- Sandwich Cookies (like Oreo), crushed (18 cookies / about 180g): I like to break them up by hand so you get some big bits and some fine crumbs. Any chocolate sandwich cookie works, but classic Oreos are my go-to for that nostalgic flavor.
- White Chocolate Chips (1 cup / 170g): These add creamy pops of sweetness that pair perfectly with the cookie chunks. I’ve used both regular and mini chips—both are delicious!
If you want to mix things up, swap half the white chocolate chips for milk or dark chocolate chips. For a fun twist, try using golden sandwich cookies or even peanut butter-filled ones. Feel free to use dairy-free butter and chocolate if you need a vegan version—my plant-based friends say it works like a charm.
I usually stick with store-brand ingredients for everyday baking, but when I’m making these as gifts, I’ll go for a quality European-style butter or premium vanilla. It’s a little splurge that pays off in flavor!
Equipment Needed
- Large Mixing Bowl: Essential for creaming the butter and sugars together. If you’re doubling the recipe (which I often do), use an extra-big bowl to avoid flour clouds on your counter.
- Electric Mixer (Hand or Stand): Makes creaming butter a breeze, but you can use a sturdy wooden spoon and some elbow grease if needed. I started out mixing by hand—totally doable, but takes a bit of muscle!
- Measuring Cups and Spoons: Accurate measurements mean perfect cookies every time. If you bake a lot, consider investing in a digital kitchen scale for even more consistency.
- Rubber Spatula: Great for scraping down the bowl and folding in cookie bits and chocolate chips.
- Baking Sheets (2 standard size): Lined with parchment paper or silicone baking mats for easy cleanup.
- Cookie Scoop (Optional): For uniform, bakery-style cookies. I use a medium (2-tbsp) scoop, but spoons work just fine.
- Wire Cooling Rack: Cools the cookies quickly and keeps the bottoms from getting soggy.
If you don’t have a cookie scoop, two spoons work just as well—just try to keep the cookie dough mounds roughly the same size so they bake evenly. For easy cleanup, I always use parchment paper (you can even reuse it for multiple batches). If you’re new to baking, start with the basics—no fancy gear needed! And don’t forget to keep your mixer attachments and spatulas clean between batches—stuck-on dough can mess with your mixing.
Preparation Method
- Preheat Your Oven: Set your oven to 350°F (175°C). Line two baking sheets with parchment paper or silicone baking mats. (If your oven tends to run hot, check with an oven thermometer—burnt bottoms aren’t fun.)
- Cream the Butter and Sugars: In a large mixing bowl, combine 1 cup (226g) softened unsalted butter, 3/4 cup (150g) granulated sugar, and 3/4 cup (160g) packed light brown sugar. Beat on medium speed for 2-3 minutes, until pale and fluffy. (If mixing by hand, be patient—it’ll take a bit longer.)
- Add Eggs and Vanilla: Crack in 2 large eggs, one at a time, mixing well after each addition. Add 2 teaspoons pure vanilla extract. Scrape down the sides of the bowl with a spatula to make sure everything’s mixed in. The dough should look creamy and smooth.
- Mix Dry Ingredients: In a separate bowl, whisk together 2 3/4 cups (345g) all-purpose flour, 2 teaspoons cornstarch, 1 teaspoon baking soda, and 1/2 teaspoon salt. Gradually add the dry mixture into the wet, mixing on low speed just until combined. Don’t overmix—stop as soon as you don’t see any flour streaks.
- Fold in Goodies: Gently stir in 18 crushed sandwich cookies (about 180g) and 1 cup (170g) white chocolate chips. Make sure to get both big chunks and fine crumbs for the best flavor and texture. (If your dough feels super sticky, chill for 10-15 minutes—it makes scooping easier.)
- Scoop Dough: Using a medium cookie scoop or two spoons, scoop 2-tablespoon mounds of dough onto prepared baking sheets, spacing them about 2 inches (5 cm) apart. If you want picture-perfect cookies, press a few extra cookie chunks and chocolate chips on top.
- Bake: Bake in the preheated oven for 10-12 minutes, or until the edges are just set and lightly golden but the centers still look soft and puffy. (Don’t overbake—they’ll firm up as they cool!)
- Cool: Let cookies cool on the baking sheet for 5 minutes (they’ll finish setting up), then transfer to a wire rack to cool completely. If you’re impatient like me, sneak one while it’s warm—melty chocolate is the best part.
If your cookies spread too much, try chilling the dough for 30 minutes next time, or check if your butter was too soft. For thicker cookies, scoop taller mounds or bake on the upper oven rack. And don’t stress if some cookies look a little rustic—imperfections just mean they’re homemade!
Cooking Tips & Techniques
After dozens of batches (and more than a few burnt bottoms), I’ve picked up a few tricks to make these cookies and cream cookies foolproof every time:
- Room Temperature Ingredients: Let your butter and eggs come to room temperature for the smoothest dough. Cold butter won’t cream well, and cold eggs can make the mixture curdle. In a hurry? Dice your butter and set eggs in warm water for 10 minutes.
- Don’t Overmix: Once you add the dry ingredients, mix just until combined. Overmixing leads to tough cookies—learned this one the hard way!
- Crush, Don’t Pulverize: For the sandwich cookies, break them up by hand or use a rolling pin. You want some big pieces for crunch and some crumbs for flavor in every bite. A food processor makes the pieces too fine (I tried it once—never again!).
- Watch the Bake Time: Cookies will look slightly underdone in the center when you pull them out—that’s what you want! They’ll finish setting up as they cool. If you wait until they look fully baked, they’ll end up crunchy instead of chewy.
- Batch Baking: If you’re making multiple trays, rotate the pans halfway through for even baking. If your oven fits only one tray at a time, keep the unused dough in the fridge.
My biggest lesson: don’t stress about perfection. Cookies with lopsided tops or extra chunks sticking out are the ones people fight over! And if your cookies spread too much, the dough might be too warm—just chill it a bit next time. These little tweaks make all the difference!
Variations & Adaptations
One of the reasons I never get bored of this cookies and cream cookies recipe is how easy it is to tweak. Here are some fun ways to make it your own:
- Gluten-Free: Swap the all-purpose flour for a 1:1 gluten-free baking blend and use gluten-free sandwich cookies. I’ve done this for bake sales and the cookies still turn out thick and chewy.
- Chocolate Overload: Replace half of the white chocolate chips with semi-sweet or dark chocolate chips for a richer, double-chocolate vibe.
- Seasonal Fun: Use limited-edition sandwich cookies—think peppermint, red velvet, or even birthday cake—to match the season or your mood.
- Dairy-Free: Use vegan butter and dairy-free chocolate chips. I’ve made these for friends with allergies, and they’re just as delicious.
- Nutty Crunch: Stir in 1/2 cup (60g) chopped walnuts or pecans for some extra texture.
One of my favorite personal twists is using golden sandwich cookies and adding lemon zest for a summery, citrusy kick. You can also try baking the dough in a square pan for cookies and cream cookie bars—just increase the bake time by 5-7 minutes. Don’t be afraid to get creative—half the fun is making these cookies your own!
Serving & Storage Suggestions
Nothing beats cookies and cream cookies fresh out of the oven when the chocolate is melty and the centers are gooey. I love serving them slightly warm with a tall glass of cold milk or even sandwiched with a scoop of vanilla ice cream for the ultimate treat.
- Serving: These cookies are best at room temperature or slightly warm. For a “wow” factor at parties, stack them on a pretty plate or arrange with extra cookie pieces sprinkled on top.
- Pairings: Pair with coffee, hot chocolate, or a fruity iced tea for a bakery-style snack. They also make a killer dessert with a scoop of ice cream.
- Storage: Store in an airtight container at room temperature for up to 5 days. For longer storage, freeze baked cookies in a zip-top bag for up to 2 months. Thaw at room temp or microwave in 10-second bursts.
- Reheating: To revive the just-baked texture, pop cookies in a 300°F (150°C) oven for 2-3 minutes or microwave briefly. The flavors deepen as they sit, so they’re even better on day two!
If you like prepping ahead, you can freeze unbaked dough balls—just bake straight from the freezer, adding 1-2 extra minutes to the bake time. Handy for cookie emergencies (which, let’s face it, happen more than you’d think!).
Nutritional Information & Benefits
Each cookies and cream cookie (based on a batch of 24) has about 190 calories, 9g fat, 26g carbs, and 2g protein. They’re a sweet treat, but made with real butter, eggs, and a balance of white and brown sugar for that classic bakery texture.
The real star here is the sandwich cookies—providing that nostalgic flavor and a satisfying crunch. White chocolate chips add a creamy sweetness, while using all-purpose flour keeps these cookies soft and chewy. You can easily adjust for dietary needs: swap in gluten-free flour or dairy-free alternatives as needed.
If you’re watching allergens, remember these cookies contain wheat, eggs, dairy, and soy (from the sandwich cookies and chips). I like to remind readers that homemade means you control every ingredient—so you can tweak for your family’s needs. While these are definitely an indulgence, sharing homemade cookies with loved ones always feels good for the soul!
Conclusion
There’s just something about homemade cookies and cream cookies that makes any day feel special. Whether you’re baking for a celebration or just to satisfy a cookie craving, this recipe is one you’ll reach for again and again. It’s easy, customizable, and guaranteed to make everyone smile.
Don’t be afraid to put your own spin on these cookies—try new add-ins, go gluten-free, or make them extra chunky. Baking should be fun, not fussy! I keep coming back to this recipe because it always delivers those bakery-style results without the stress (and with way more love).
If you try these cookies and cream cookies, I’d love to hear how they turn out! Leave a comment below, tag me on social, or share your own twist. Happy baking—and remember, the best cookies are the ones you share!
Frequently Asked Questions
How do I keep my cookies and cream cookies soft and chewy?
The secret is not to overbake! Pull them from the oven when the centers still look a bit soft. They’ll finish setting as they cool. Also, storing them in an airtight container helps lock in moisture.
Can I use different types of sandwich cookies?
Absolutely! Classic Oreos are my favorite, but you can use golden, mint, or even peanut butter sandwich cookies for a fun twist. Just crush them up and fold them in the same way.
Can I make the dough ahead of time?
Yes, you can! Scoop the dough into balls and refrigerate for up to 48 hours, or freeze for up to 2 months. Bake straight from the fridge or freezer—just add a minute or two to the bake time.
What’s the best way to crush the sandwich cookies?
I like to use my hands or pop them in a zip-top bag and smash gently with a rolling pin. You want both big chunks and fine crumbs for the best texture—don’t crush them to dust!
How can I make these cookies allergy-friendly?
For gluten-free cookies, use a 1:1 gluten-free flour blend and gluten-free sandwich cookies. For dairy-free, use vegan butter and dairy-free chips. Always double-check ingredient labels for allergens.
Pin This Recipe!

Cookies and Cream Cookies

Bakery-style cookies and cream cookies loaded with creamy white chocolate chips and crunchy sandwich cookie pieces. These thick, chewy cookies are easy to make and perfect for any occasion.
- Prep Time: 15 minutes
- Cook Time: 12 minutes
- Total Time: 27 minutes
- Yield: 24 cookies 1x
- Category: Dessert
- Cuisine: American
Ingredients
- 1 cup unsalted butter, softened
- 3/4 cup granulated sugar
- 3/4 cup light brown sugar, packed
- 2 large eggs, room temperature
- 2 teaspoons pure vanilla extract
- 2 3/4 cups all-purpose flour
- 2 teaspoons cornstarch
- 1 teaspoon baking soda
- 1/2 teaspoon salt
- 18 chocolate sandwich cookies (like Oreo), crushed (about 180g)
- 1 cup white chocolate chips
Instructions
- Preheat oven to 350°F (175°C). Line two baking sheets with parchment paper or silicone baking mats.
- In a large mixing bowl, cream together the softened butter, granulated sugar, and light brown sugar on medium speed for 2-3 minutes until pale and fluffy.
- Add eggs one at a time, mixing well after each addition. Add vanilla extract and mix until creamy and smooth.
- In a separate bowl, whisk together flour, cornstarch, baking soda, and salt.
- Gradually add the dry ingredients to the wet mixture, mixing on low speed just until combined. Do not overmix.
- Fold in crushed sandwich cookies and white chocolate chips until evenly distributed.
- Using a medium cookie scoop or two spoons, scoop 2-tablespoon mounds of dough onto prepared baking sheets, spacing about 2 inches apart. Optionally, press extra cookie chunks and chips on top.
- Bake for 10-12 minutes, until edges are set and lightly golden but centers are still soft and puffy.
- Cool cookies on the baking sheet for 5 minutes, then transfer to a wire rack to cool completely.
Notes
For best texture, do not overbake—cookies should look slightly underdone in the center when removed from the oven. Chill dough for 10-15 minutes if it feels sticky. For gluten-free, use a 1:1 gluten-free flour blend and gluten-free sandwich cookies. Dough balls can be frozen and baked straight from the freezer, adding 1-2 minutes to bake time.
Nutrition
- Serving Size: 1 cookie
- Calories: 190
- Sugar: 16
- Sodium: 90
- Fat: 9
- Saturated Fat: 5
- Carbohydrates: 26
- Fiber: 1
- Protein: 2
Keywords: cookies and cream, bakery-style cookies, Oreo cookies, white chocolate chip cookies, easy cookie recipe, dessert, homemade cookies


