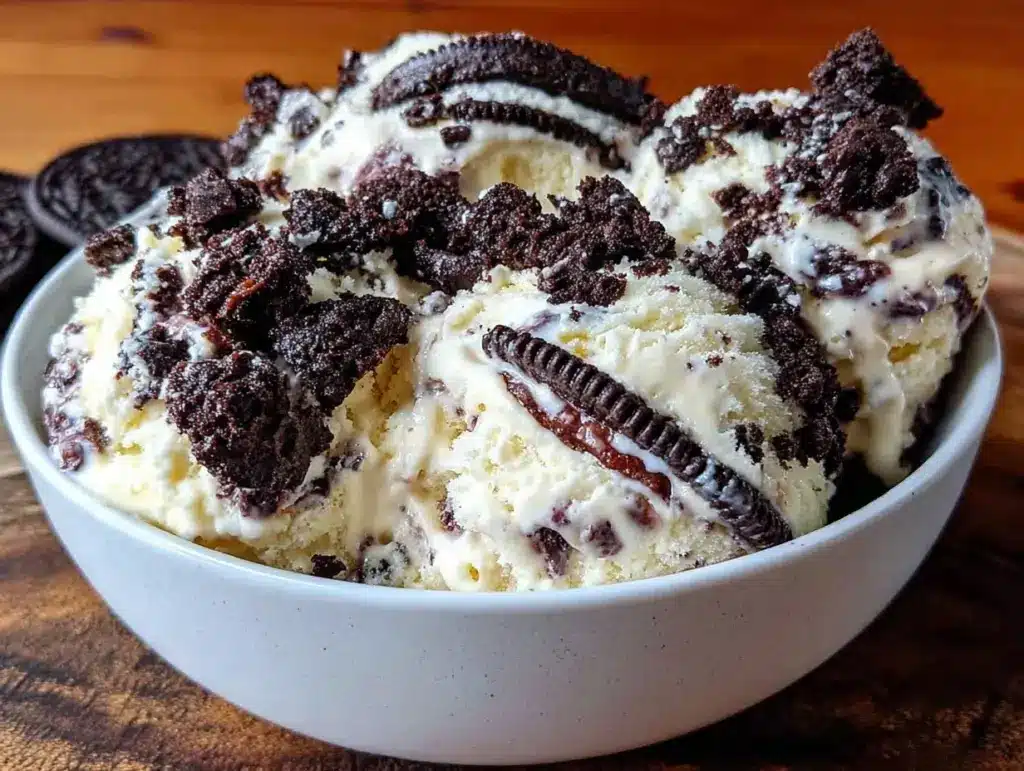
“Are you sure this is really ice cream?” my friend asked, eyeing the bowl suspiciously as I scooped out the first spoonful of creamy homemade no-churn cookies and cream ice cream. Honestly, I was a bit skeptical myself the first time I tried making this without an ice cream machine. You know, I wasn’t in the mood for fuss or waiting around for hours, and yet I was craving that classic cookies and cream vibe, the kind that melts slow and soft, with crunchy cookie bits sprinkled throughout.
That afternoon, I was rummaging through the freezer, half-heartedly hunting for dessert when a forgotten box of crushed cookies caught my eye. The idea sparked: why not whip up a no-churn version? I mixed heavy cream, sweetened condensed milk, and those crumbled cookies with a little vanilla, expecting a decent fix. But what I got was honestly better than I imagined—silky, rich, and the cookie chunks still held their snap perfectly. It felt like a bit of magic in a bowl, all without the usual ice cream equipment drama.
Since then, this recipe has quietly become my go-to treat. Whether it’s a quick pick-me-up after a long day or a surprise delight for friends dropping by, it’s simple, satisfying, and totally reliable. I love that it doesn’t demand fancy gadgets or hours of churning—just a bowl, a mixer, and some patience while it freezes. Plus, it’s endlessly adaptable, letting you sneak in your favorite cookies or even a drizzle of fudge if mood strikes.
So here we are, with a recipe that feels like a cozy little secret tucked between crunchy cookie bits and creamy swirls. It’s not just about making ice cream; it’s about that soft moment of calm, the joy of a homemade scoop that’s as easy as it is delicious. And honestly, it’s the kind of treat that makes you pause, close your eyes, and savor every bite—no apologies necessary.
Why You’ll Love This Creamy Homemade No-Churn Cookies and Cream Ice Cream Recipe
From my many experiments in the kitchen (and trust me, there have been a few flops), this creamy homemade no-churn cookies and cream ice cream recipe stands out for all the right reasons. It’s a bit of a crowd-pleaser and an absolute breeze to make, so you can whip it up without any stress.
- Quick & Easy: Comes together in about 15 minutes, perfect for last-minute ice cream cravings or unexpected guests.
- Simple Ingredients: Uses pantry staples like sweetened condensed milk and heavy cream, plus your favorite sandwich cookies—no obscure items needed.
- Perfect for Any Occasion: Whether it’s a cozy family night or a casual summer get-together, this ice cream fits right in.
- Crowd-Pleaser: Kids and adults alike rave about the creamy texture and crunchy cookie bits.
- Unbelievably Delicious: The balance between rich creaminess and cookie crunch is exactly what you want in cookies and cream ice cream.
What sets this recipe apart is the no-churn method that keeps things straightforward but doesn’t skimp on texture or flavor. I like to crush the cookies just enough to get chunks, not dust, so you get that satisfying bite every time. Plus, mixing in sweetened condensed milk gives it a smooth sweetness without added sugar fuss. It’s a homemade classic that feels indulgent but is super approachable.
Honestly, this recipe has become my secret weapon when I want to impress guests without spending hours in the kitchen. It’s the kind of dessert that feels thoughtful but comes together faster than any store-bought option. And if you’re curious about pairing it with a fresh side, I recently loved serving it after a vibrant Moroccan couscous with seven vegetables—the light spices balanced the creamy sweetness perfectly.
What Ingredients You Will Need
This recipe uses simple, wholesome ingredients to deliver bold flavor and satisfying texture without any fuss. Most are pantry staples, with just a few fresh items, and you can easily swap some based on what you have on hand.
- Heavy cream (2 cups / 480 ml) – for that rich, creamy base. I find using full-fat heavy cream gives the best texture.
- Sweetened condensed milk (1 can, 14 oz / 396 g) – adds sweetness and creaminess without needing extra sugar.
- Vanilla extract (1 ½ teaspoons) – a splash for depth and warmth.
- Chocolate sandwich cookies (about 15-20 cookies, crushed) – the star ingredient! I like using Oreos or a similar brand with plenty of cream filling for balance.
- Optional: a pinch of salt – just enough to sharpen the flavors.
If you’re in a pinch or want to tweak for dietary needs, here are some quick swaps:
- Use coconut cream instead of heavy cream for a dairy-free version.
- Swap sweetened condensed milk with a homemade mix of evaporated milk and sugar, but results vary.
- Try gluten-free sandwich cookies to keep it allergen-friendly.
When picking cookies, I recommend going for ones with a good balance of crispy texture and creamy filling. Crushing them by hand keeps the chunks irregular, which I prefer over finely ground crumbs. It gives the ice cream a real homemade feel.
Equipment Needed
- Mixing bowl: A large bowl to whip the cream and fold the ingredients together. Glass or stainless steel works best.
- Electric mixer or hand mixer: Essential for whipping heavy cream to soft peaks quickly and effortlessly. You could do it by hand, but honestly, your arm will thank you for the mixer.
- Spatula: For folding in the cookies gently without deflating the cream.
- Freezer-safe container: A loaf pan or plastic container with a lid works perfectly for freezing the ice cream.
- Measuring cups and spoons: For accuracy with liquids and vanilla extract.
If you don’t have an electric mixer, a sturdy whisk and some patience will do, but expect it to take a bit longer to reach the right cream consistency. For budget-friendly options, hand mixers can be found pretty cheap and save a lot of effort. Also, I always recommend chilling the mixing bowl beforehand if you want extra fluffy whipped cream—it’s a little trick that really makes a difference.
Preparation Method
- Chill your equipment: Start by placing your mixing bowl and beaters in the fridge for about 15 minutes. Cold tools help whip the cream faster and hold air better.
- Crush the cookies: Place about 15-20 chocolate sandwich cookies in a sealed plastic bag and crush them gently with a rolling pin or by hand. Aim for a mix of small chunks and crumbs, but avoid pulverizing them into dust. Set aside.
- Whip the heavy cream: Pour 2 cups (480 ml) of heavy cream into your chilled bowl. Using an electric mixer, whip on medium-high speed until soft peaks form—this usually takes 3 to 5 minutes. You’ll see the cream thicken and hold shape but still be smooth and fluffy.
- Mix in condensed milk and vanilla: Gently fold in 1 can (14 oz / 396 g) of sweetened condensed milk and 1 ½ teaspoons of vanilla extract into the whipped cream. Use a spatula and fold carefully to keep the airiness intact. This step adds sweetness and creaminess without overmixing.
- Add cookie pieces: Fold in your crushed cookies evenly but don’t overwork the mixture. You want the chunks scattered throughout, so every bite has a little crunch.
- Transfer to container: Pour the mixture into your freezer-safe container, spreading it out evenly. Smooth the top with your spatula.
- Freeze for at least 6 hours: Cover the container with a lid or plastic wrap and place it in the freezer. The ice cream will firm up nicely after about 6 hours, but overnight is best for texture.
- Serving tip: Let the ice cream sit out for 5-10 minutes before scooping to soften just enough for easy serving.
Pro tip: If you notice the cookie bits sinking to the bottom during freezing, give the ice cream a gentle stir after 2-3 hours to redistribute them. This keeps the texture balanced.
Cooking Tips & Techniques
Making no-churn cookies and cream ice cream is surprisingly forgiving, but a few tricks can make your batch shine:
- Whip to soft peaks, not stiff: You want the cream fluffy but not overbeaten. Overwhipping turns it grainy and buttery, which ruins the texture.
- Use cold ingredients: Chill the cream and bowl beforehand. Warm cream won’t whip properly and can lead to runny ice cream.
- Don’t crush cookies too fine: Larger cookie chunks give that satisfying crunch. Crushing by hand helps keep pieces uneven and interesting.
- Fold gently: Use a spatula to fold in condensed milk and cookies, preserving the whipped cream’s airiness for a light texture.
- Freeze in an airtight container: This prevents ice crystals and freezer burn, keeping your ice cream creamy.
- Allow to soften before serving: No-churn ice creams freeze pretty solid; a few minutes at room temp makes scooping easier.
One time, I got impatient and scooped it straight from the freezer—big mistake. The ice cream was hard as a rock and the cookie bits stuck to my scoop. Lesson learned: patience really pays off here.
Multitasking tip: While the ice cream freezes, it’s the perfect moment to prep a fresh salad or side. I often pair it with light dishes like the fresh autumn harvest salad with maple vinaigrette for a balanced meal.
Variations & Adaptations
One of the joys of this no-churn base is how easy it is to customize. Here are some variations I’ve tried and loved:
- Mint Cookies and Cream: Add ½ teaspoon peppermint extract and swap regular cookies for mint-flavored sandwich cookies for a refreshing twist.
- Peanut Butter Swirl: Fold in dollops of peanut butter before freezing for a creamy, nutty surprise alongside the cookies.
- Vegan/Dairy-Free: Use coconut cream instead of heavy cream and a dairy-free sweetened condensed milk alternative. Choose dairy-free sandwich cookies to keep it fully vegan.
- Chocolate Chunk Upgrade: Toss in chopped dark chocolate or chocolate chips with the cookies for extra richness.
- Salted Caramel Drizzle: Add a swirl of homemade or store-bought salted caramel sauce before freezing for a luscious contrast.
I once swapped the chocolate cookies for gluten-free vanilla sandwich cookies when a friend with allergies came over. The result was surprisingly delicious—lighter but still creamy and sweet. It just goes to show you can tweak this recipe for your needs without losing the magic.
Serving & Storage Suggestions
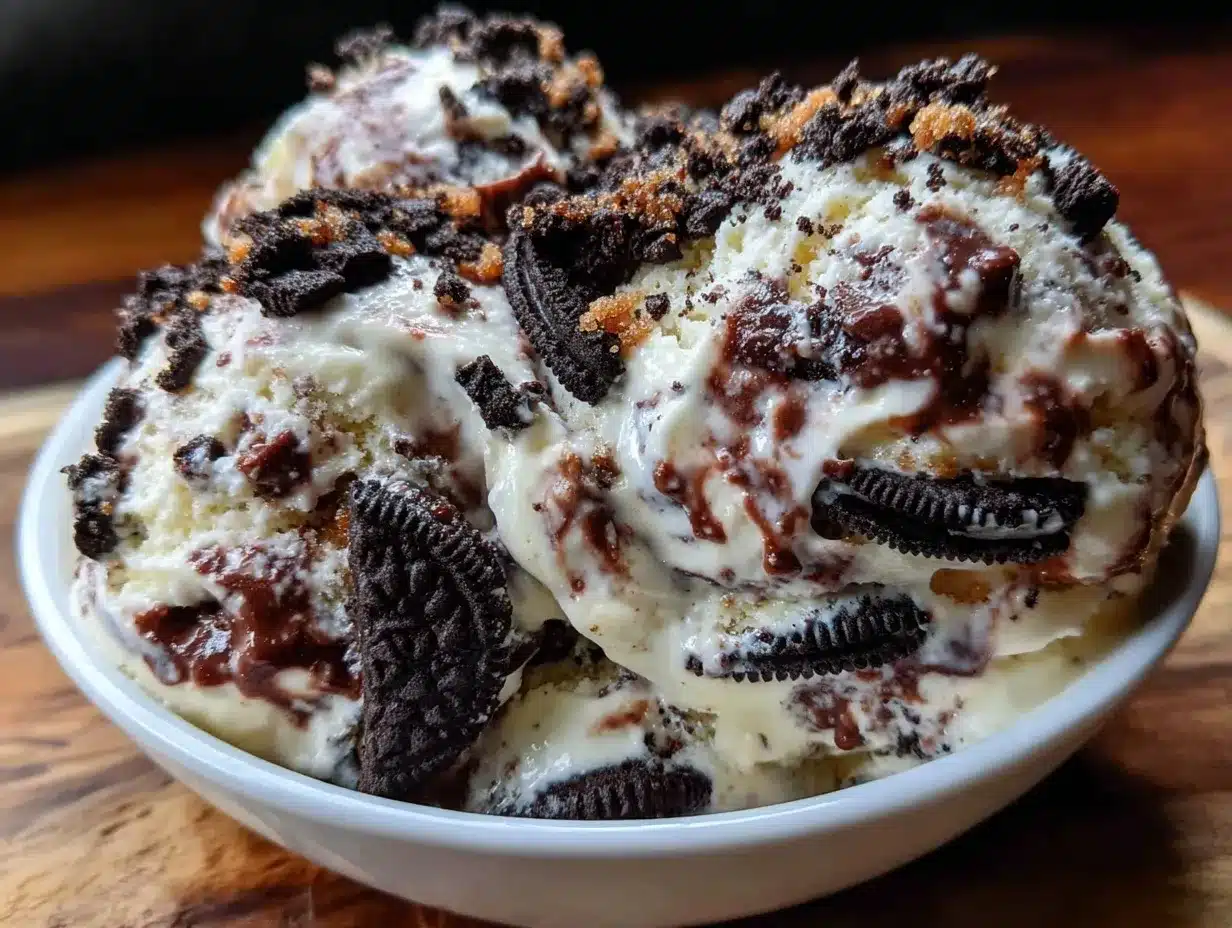
This creamy homemade no-churn cookies and cream ice cream is best served slightly softened—about 5 to 10 minutes at room temperature will give you a scoopable texture without melting into a puddle.
For presentation, try serving it in chilled bowls or waffle cones for a fun, casual vibe. A sprinkle of extra cookie crumbs on top adds a nice touch and invites people to dig in.
It pairs beautifully with fresh fruit or a simple chocolate drizzle. If you’re planning a full meal, a light side like the Vietnamese pickled vegetables balances the creaminess with a tangy crunch.
Storage: Keep leftovers tightly covered in the freezer. This ice cream holds well for up to 2 weeks without losing its creamy texture.
Reheating/Re-serving tip: When you’re ready for seconds, let it thaw on the counter for a few minutes before scooping to avoid hard, icy clumps.
Interestingly, the flavors mellow and deepen a bit after a day or two in the freezer, making it even tastier if you can wait that long!
Nutritional Information & Benefits
While this no-churn cookies and cream ice cream is definitely a treat, it’s made with simple ingredients that bring some nutritional perks:
- The heavy cream provides calcium and vitamin A, important for bone health and immune support.
- Sweetened condensed milk adds sweetness with some protein and calcium, cutting down on the need for extra sugar.
- Using real cookies delivers a familiar taste without artificial additives often found in processed ice creams.
This recipe is naturally gluten-free if you choose gluten-free cookies, and you can make it dairy-free by swapping in coconut cream and vegan cookies, making it flexible for different dietary needs.
I find this recipe strikes a good balance between indulgence and simplicity, letting me enjoy a homemade dessert without guilt or complicated prep.
Conclusion
Making creamy homemade no-churn cookies and cream ice cream is one of those small kitchen wins that feels special every time. It’s quick, easy, and deliciously satisfying—perfect for when you want a homemade dessert without the hassle of churning or fancy equipment.
Feel free to experiment with your favorite cookies or add mix-ins to make it your own. This recipe’s forgiving nature means you can’t really go wrong, and every batch tastes like a little celebration.
Personally, I love how it brings a comforting sweetness with a bit of crunch, perfect for sharing on a warm afternoon or after a cozy dinner. If you try it, I’d love to hear what cookie combos or twists you come up with.
Let’s keep the homemade treats coming—because good food is meant to be shared and savored.
FAQs about Creamy Homemade No-Churn Cookies and Cream Ice Cream
Can I use any cookies for this ice cream?
Yes! While classic chocolate sandwich cookies are traditional, you can use your favorite cookies like chocolate chip, peanut butter, or gluten-free varieties. Just crush them to a similar chunk size.
Do I need an ice cream maker to make this recipe?
Nope. This is a no-churn recipe, which means you only need a bowl, mixer, and freezer. It’s perfect if you don’t have an ice cream machine.
How long does it take to freeze properly?
Allow the ice cream to freeze for at least 6 hours, but overnight is ideal for the best texture and firmness.
Can I make this recipe ahead of time for a party?
Absolutely! It’s great for making in advance. Just keep it tightly covered in the freezer, and bring it out about 10 minutes before serving.
Is there a way to make this recipe dairy-free?
Yes, use coconut cream instead of heavy cream and look for dairy-free sweetened condensed milk and vegan cookies to keep it fully dairy-free.
Pin This Recipe!

Creamy Homemade No-Churn Cookies and Cream Ice Cream

A quick and easy no-churn cookies and cream ice cream recipe that is creamy, rich, and full of crunchy cookie bits, made without an ice cream machine.
- Prep Time: 15 minutes
- Cook Time: 0 minutes
- Total Time: 6 hours 15 minutes
- Yield: 8 servings 1x
- Category: Dessert
- Cuisine: American
Ingredients
- 2 cups (480 ml) heavy cream
- 1 can (14 oz / 396 g) sweetened condensed milk
- 1 ½ teaspoons vanilla extract
- 15–20 chocolate sandwich cookies, crushed
- Optional: a pinch of salt
Instructions
- Chill your mixing bowl and beaters in the fridge for about 15 minutes.
- Crush 15-20 chocolate sandwich cookies in a sealed plastic bag with a rolling pin or by hand, leaving small chunks and crumbs.
- Pour 2 cups (480 ml) heavy cream into the chilled bowl and whip on medium-high speed with an electric mixer until soft peaks form (3-5 minutes).
- Gently fold in 1 can (14 oz / 396 g) sweetened condensed milk and 1 ½ teaspoons vanilla extract using a spatula.
- Fold in the crushed cookie pieces evenly without overmixing.
- Transfer the mixture into a freezer-safe container and smooth the top.
- Cover and freeze for at least 6 hours, preferably overnight.
- Before serving, let the ice cream sit at room temperature for 5-10 minutes to soften.
Notes
Chill the mixing bowl and beaters before whipping the cream for better volume. Fold ingredients gently to keep the cream airy. If cookie bits sink during freezing, stir gently after 2-3 hours to redistribute. Let ice cream soften 5-10 minutes before scooping for best texture.
Nutrition
- Serving Size: 1/2 cup (approximate
- Calories: 280
- Sugar: 22
- Sodium: 110
- Fat: 18
- Saturated Fat: 11
- Carbohydrates: 26
- Fiber: 1
- Protein: 3
Keywords: no-churn ice cream, cookies and cream, homemade ice cream, easy dessert, no ice cream machine, quick ice cream recipe


