“You know that moment when you open your oven and the smell of rich chocolate hits you like a warm hug? That’s exactly what happened one rainy Thursday afternoon when I decided to whip up these ultimate fudgy brownies with a gooey chocolate center. Honestly, I wasn’t even planning on making brownies that day—I’d meant to bake a simple chocolate cake but grabbed the wrong cocoa powder (classic kitchen chaos). Still, as the aroma filled my tiny kitchen, I couldn’t help but smile. The batter was thick, shiny, and almost daring me to dive in early.
That cracked ceramic mixing bowl (which I swear has seen better days) reminded me of my neighbor, Mrs. Jenkins, who once told me, “Sometimes the best recipes come from a little mess.” Maybe you’ve been there—spilled flour, a forgotten ingredient, or a last-minute substitution that turns out better than expected. This recipe stuck with me because it’s the kind of brownie you want to share, but also secretly hide away for yourself. The gooey center is like a little surprise that melts your worries away with every bite.
So, if you’re craving a brownie that’s rich, fudge-like, and just the right side of gooey, let me walk you through how these ultimate fudgy brownies came to be—and why they keep making their way onto my baking list (even when I’m short on time or ingredients!).
Why You’ll Love This Recipe
I’ve made my fair share of brownies over the years, but these ultimate fudgy brownies with a gooey chocolate center really stand out. After testing countless batches (and yes, sampling way too many pieces), I can confidently say this recipe hits all the right notes. Here’s why:
- Quick & Easy: You can have these brownies ready in under 40 minutes—perfect for those spontaneous dessert cravings or last-minute guests.
- Simple Ingredients: No need for fancy or obscure items. Chances are, you already have everything in the pantry, from cocoa powder to butter.
- Perfect for Any Occasion: Whether it’s a casual movie night or a weekend bake sale, these brownies always impress without the fuss.
- Crowd-Pleaser: Kids, adults, your picky in-laws—they all ask for seconds. Honestly, it’s hard to resist that gooey center!
- Unbelievably Delicious: The texture is just right—dense and fudgy on the edges, with a molten chocolate core that feels like a warm chocolate kiss.
What sets this recipe apart? It’s the balance. I blend high-quality cocoa with melted butter and a touch of coffee to deepen the chocolate flavor without overpowering it. The secret? A careful bake time that leaves the center perfectly gooey, not raw or cakey. I’ve also learned to gently fold the batter to keep it dense and moist—no dry or crumbly disappointments here. This recipe has become my go-to for impressing guests and satisfying my own sweet tooth without any stress.
What Ingredients You Will Need
This recipe uses simple, wholesome ingredients to deliver bold flavor and satisfying texture without the fuss. Most are pantry staples, but I’ll share tips to help you pick the best versions for ultimate fudginess and that gooey chocolate center.
- Unsalted Butter, 1 cup (227g), melted — I prefer using Plugrá for its rich creaminess.
- Granulated Sugar, 1 1/2 cups (300g) — balances the richness without being overly sweet.
- Brown Sugar, 1/2 cup (100g), packed — adds moisture and a hint of caramel flavor.
- Large Eggs, 3, room temperature — helps bind and give structure.
- Pure Vanilla Extract, 2 teaspoons — use good quality like Nielsen-Massey for best aroma.
- All-Purpose Flour, 1 cup (125g) — sifted to avoid lumps.
- Unsweetened Cocoa Powder, 3/4 cup (75g) — I recommend Valrhona or Ghirardelli for that deep chocolate punch.
- Salt, 1/2 teaspoon — balances sweetness and enhances chocolate notes.
- Instant Espresso Powder, 1 teaspoon (optional) — amplifies chocolate flavor without adding coffee taste.
- Chocolate Chips, 1 cup (175g), semi-sweet or bittersweet — for that gooey center and extra melty pockets.
Substitution tips: Use almond flour for gluten-free versions (texture will be a bit different), and swap brown sugar for coconut sugar for a subtle twist. If dairy-free, substitute butter with coconut oil and chocolate chips with dairy-free alternatives.
Equipment Needed
- 9×9-inch (23×23 cm) baking pan: I line mine with parchment paper for easy removal and clean edges.
- Mixing bowls: One large for wet ingredients, one medium for dry ingredients.
- Whisk and spatula: For smooth batter mixing and folding.
- Measuring cups and spoons: Accurate measuring is key for consistent fudgy results.
- Cooling rack: Helps brownies cool evenly and keeps the bottom from getting soggy.
Don’t have a 9×9 pan? An 8×8-inch pan works, but the brownies will be thicker and may need a few extra minutes in the oven. No parchment paper? Lightly grease the pan instead, but watch carefully to prevent sticking. I’ve used a silicone spatula for folding—makes the job easier and keeps the batter intact.
Preparation Method

- Preheat your oven to 350°F (175°C). Line your 9×9-inch pan with parchment paper, leaving some overhang on the sides. This makes lifting the brownies out easier. (5 minutes)
- Melt the butter gently. I usually do this in a microwave-safe bowl in 30-second bursts or on the stovetop over low heat. Let it cool slightly while you prep other ingredients. (5 minutes)
- Mix sugars and eggs. In a large bowl, combine granulated sugar, brown sugar, and eggs. Whisk vigorously until thick and pale—this usually takes about 2 minutes. You’ll notice the mixture become glossy and smooth, which is a good sign for fudginess. (3 minutes)
- Add melted butter and vanilla. Slowly pour in the cooled melted butter while stirring gently. Then add vanilla extract and espresso powder, if using. The batter will look rich and shiny. (2 minutes)
- Combine dry ingredients. In a separate bowl, sift together flour, cocoa powder, and salt. Gradually fold these into the wet mixture using a spatula. Be gentle—overmixing can toughen brownies. Fold just until combined; the batter should be thick and fudgy. (5 minutes)
- Fold in chocolate chips. Stir in about 3/4 cup (130g) of the chips, reserving the rest for topping. This creates pockets of melted chocolate in the finished brownies. (1 minute)
- Pour batter into prepared pan. Spread evenly using a spatula. Sprinkle the remaining chocolate chips on top for a glossy, chocolate-studded finish. (2 minutes)
- Bake for 25–30 minutes. Start checking at 25 minutes by inserting a toothpick near the center. It should come out with a few moist crumbs attached, but not wet batter. The edges will look set and slightly pulled away from the pan. (25-30 minutes)
- Cool completely on a wire rack. This is important—cutting too soon will make the gooey center runny. Wait at least one hour for best results. (60 minutes)
- Slice and enjoy! Use the parchment overhang to lift the brownies out. Cut into squares with a sharp knife, wiping it clean between cuts for neat edges. (5 minutes)
Pro tip: If your kitchen is humid, try refrigerating the brownies for 20 minutes after cooling to firm up the center before slicing. I learned this the hard way when my first batch turned into a fudgy puddle—oops!
Cooking Tips & Techniques
Achieving that perfect fudgy texture with a gooey center takes a little finesse, but I promise it’s doable. Here are some tips I’ve picked up through trial, error, and a few happy accidents:
- Measure flour carefully: Too much flour makes brownies cakey. Spoon the flour into your measuring cup and level it off with a knife, instead of scooping directly.
- Don’t overmix: Once you add dry ingredients, fold gently until just combined. Overmixing develops gluten and leads to a tougher texture.
- Use high-quality cocoa powder: It makes a noticeable difference in flavor. Dutch-processed cocoa is smoother and less acidic, which works beautifully here.
- Watch your bake time: Oven temperatures vary, so start checking early. It’s better to err on underbaking slightly for a gooey center.
- Room temperature eggs: They blend more easily and create a better batter texture.
- Incorporate espresso powder: It’s subtle but boosts the chocolate’s depth—don’t skip if you want that wow factor.
- Let brownies cool fully: Cutting too soon ruins the gooey magic. Patience is key here, even if it’s tempting to sample early.
I remember the first time I ignored the cooling step and ended up with a chocolate mess on my counter. Now, I set a timer and use that wait to clean up or prep toppings—turns out, multitasking in the kitchen is a lifesaver.
Variations & Adaptations
Want to mix things up? These ultimate fudgy brownies are versatile and welcoming to your creativity. Here are some ways to switch it up:
- Nutty Delight: Add 1 cup (120g) chopped walnuts or pecans for a crunchy contrast that pairs beautifully with the fudgy base.
- Spicy Kick: Stir in 1/2 teaspoon cinnamon and a pinch of cayenne pepper for a subtle warmth that surprises the palate.
- Vegan Version: Replace butter with coconut oil, use flax eggs (3 tablespoons flaxseed meal + 9 tablespoons water), and swap chocolate chips with dairy-free alternatives.
- Fruit Infusion: Gently fold in 1/2 cup dried cherries or raspberries for a tart burst that cuts through the richness.
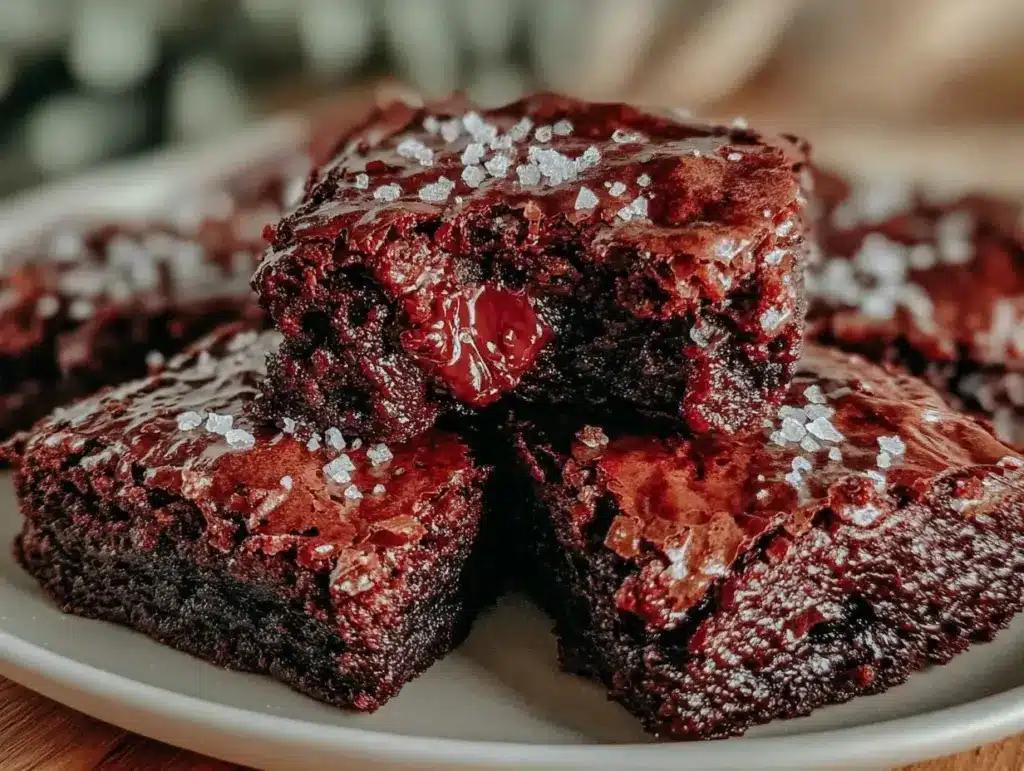
- Salted Caramel Topping: Drizzle homemade or store-bought caramel sauce over the warm brownies and sprinkle with flaky sea salt for a decadent finish.
I personally tried the nutty version last holiday season, packing the brownies into small boxes for gifts. The toasted walnuts added a lovely texture, and people still talk about that batch months later!
Serving & Storage Suggestions
These brownies are best enjoyed slightly warm or at room temperature to savor the gooey center. Serve them plain or with a scoop of vanilla ice cream for a classic treat. If you want to get fancy, a dusting of powdered sugar or a drizzle of chocolate ganache adds an elegant touch.
For storage, wrap tightly in plastic wrap or keep in an airtight container. They last well at room temperature for up to 3 days, but I prefer refrigerating leftovers to maintain that gooey texture longer—just bring them to room temp or warm briefly before serving.
These brownies freeze beautifully too. Wrap individual squares in parchment and foil, and freeze for up to 3 months. Thaw overnight in the fridge and warm slightly in the microwave or oven. Flavors often deepen after a day or two, so if you can wait, that’s even better.
Nutritional Information & Benefits
Here’s a rough estimate per brownie (based on 16 pieces):
| Calories | 220 |
|---|---|
| Fat | 12g |
| Carbohydrates | 28g |
| Protein | 3g |
| Fiber | 2g |
These brownies aren’t health food (let’s be real), but they contain some benefits thanks to dark cocoa powder, which is rich in antioxidants and minerals like iron and magnesium. Using real butter adds vitamins A and D, and the eggs contribute protein and healthy fats. For those with gluten sensitivities, swapping flour for almond or oat flour makes these brownies more accessible.
From my perspective, indulging in these brownies now and then is part of a balanced approach to wellness—joy and comfort food matter just as much as kale and quinoa sometimes!
Conclusion
In the end, these ultimate fudgy brownies with a gooey chocolate center are more than just a dessert—they’re a little moment of happiness you can bake on a whim. Whether you’re a seasoned baker or a beginner, this recipe is forgiving, straightforward, and endlessly satisfying. I love how it invites you to experiment and make it your own, while still delivering that classic chocolate fix we all crave.
So go ahead—grab your mixing bowl, maybe clear a little space in the fridge for leftovers, and treat yourself. And hey, if you try this recipe, I’d love to hear how you put your own spin on it or what moments you made it part of. Share your stories, tips, or favorite variations in the comments below. Happy baking, and here’s to the gooey chocolate moments that make life sweeter!
FAQs
How can I tell when the brownies are perfectly baked?
Insert a toothpick into the center around 25 minutes. It should come out with a few moist crumbs but no wet batter. The edges will look set and slightly pulled away from the pan.
Can I make these brownies gluten-free?
Yes! Substitute the all-purpose flour with almond flour or a gluten-free flour blend. Texture will be slightly different but still delicious and fudgy.
What’s the best way to store leftover brownies?
Keep them in an airtight container at room temperature for up to 3 days or refrigerated for up to a week. You can also freeze them for longer storage.
Can I use regular chocolate instead of chocolate chips?
Absolutely! Chop your favorite chocolate bar into chunks and fold them into the batter for gooey pockets of melted chocolate.
Is it necessary to use espresso powder?
Not necessary, but it really enhances the chocolate flavor without making the brownies taste like coffee. If you don’t have it, simply skip it or add a tiny pinch of instant coffee.
PrintUltimate Fudgy Brownies Recipe Easy 5-Step Gooey Chocolate Center

These ultimate fudgy brownies feature a rich, dense texture with a gooey chocolate center, perfect for satisfying any chocolate craving with simple pantry ingredients and quick preparation.
- Prep Time: 20 minutes
- Cook Time: 25-30 minutes
- Total Time: 1 hour 45 minutes
- Yield: 16 servings 1x
- Category: Dessert
- Cuisine: American
Ingredients
- 1 cup (227g) unsalted butter, melted
- 1 1/2 cups (300g) granulated sugar
- 1/2 cup (100g) packed brown sugar
- 3 large eggs, room temperature
- 2 teaspoons pure vanilla extract
- 1 cup (125g) all-purpose flour, sifted
- 3/4 cup (75g) unsweetened cocoa powder
- 1/2 teaspoon salt
- 1 teaspoon instant espresso powder (optional)
- 1 cup (175g) semi-sweet or bittersweet chocolate chips
Instructions
- Preheat your oven to 350°F (175°C). Line a 9×9-inch baking pan with parchment paper, leaving some overhang on the sides for easy removal. (5 minutes)
- Melt the butter gently in a microwave-safe bowl or on the stovetop over low heat. Let it cool slightly. (5 minutes)
- In a large bowl, whisk together granulated sugar, brown sugar, and eggs vigorously until thick and pale, about 2 minutes. (3 minutes)
- Slowly pour in the cooled melted butter while stirring gently. Add vanilla extract and espresso powder if using. The batter will look rich and shiny. (2 minutes)
- In a separate bowl, sift together flour, cocoa powder, and salt. Gradually fold the dry ingredients into the wet mixture using a spatula until just combined. (5 minutes)
- Fold in about 3/4 cup (130g) of the chocolate chips, reserving the rest for topping. (1 minute)
- Pour the batter into the prepared pan and spread evenly. Sprinkle the remaining chocolate chips on top. (2 minutes)
- Bake for 25–30 minutes. Start checking at 25 minutes by inserting a toothpick near the center; it should come out with a few moist crumbs but no wet batter. The edges will look set and slightly pulled away from the pan. (25-30 minutes)
- Cool completely on a wire rack for at least 1 hour before slicing to allow the gooey center to set. (60 minutes)
- Use the parchment overhang to lift the brownies out of the pan. Cut into squares with a sharp knife, wiping it clean between cuts for neat edges. (5 minutes)
Notes
For a gluten-free version, substitute all-purpose flour with almond flour. For dairy-free, replace butter with coconut oil and use dairy-free chocolate chips. Refrigerate brownies for 20 minutes after cooling if your kitchen is humid to firm up the gooey center before slicing. Avoid overmixing the batter to keep brownies dense and moist.
Nutrition
- Serving Size: 1 brownie (1/16th of
- Calories: 220
- Fat: 12
- Carbohydrates: 28
- Fiber: 2
- Protein: 3
Keywords: fudgy brownies, gooey brownies, chocolate brownies, easy brownies, chocolate dessert, quick brownies, homemade brownies


