The aroma of buttery crust mingling with gooey salted caramel and warm cinnamon apples? That’s the scent I wish I could bottle up and keep on my kitchen counter all year long. Every fall, when apples are piled high at the market and the weather turns just cool enough for sweaters, I find myself craving those classic, nostalgic flavors. That’s exactly how these salted caramel apple bars came to life in my kitchen—born from a love of caramel apples and a need for something fuss-free but totally show-stopping for fall gatherings.
I remember the first time I brought a tray of these salted caramel apple bars to a neighborhood bonfire. Everyone swarmed the dessert table, and before I could sneak a second piece, the pan was empty. True story! The combination of tender apples, rich caramel, and a hint of sea salt just hits all the right notes—sweet, salty, creamy, and crunchy. Plus, you don’t have to fuss with a pie crust or roll out anything tricky. It’s the kind of recipe you’ll want to make on repeat for everything from Sunday suppers to Friendsgiving, especially if you love sharing a dessert that looks as good as it tastes.
What really makes these salted caramel apple bars stand out? They’re easy enough for a beginner baker, but taste like something straight from a bakery. I’ve tested the recipe countless times, tweaking the crust for max crunch and making sure the caramel doesn’t turn grainy. Whether you’re baking for a hungry crowd or just treating yourself after a long week, this recipe is made for you. Let’s get ready to bake up a batch of fall happiness!
Why You’ll Love This Recipe
- Quick & Easy: These salted caramel apple bars come together in about an hour, and almost all the work is hands-off. No elaborate techniques or chilling times—just a straightforward process.
- Simple Ingredients: All you need are pantry basics and a few fresh apples. No fancy gadgets or expensive specialty items required.
- Perfect for Parties: These bars are portable, easy to cut and share, and always a hit at potlucks, classroom celebrations, or cozy family get-togethers. They’re sturdy enough to travel, but soft enough to melt in your mouth.
- Crowd-Pleaser: Kids love the gooey caramel, adults adore the buttery crust and that sprinkle of flaky salt. Trust me, I’ve watched even the pickiest dessert skeptics reach for seconds.
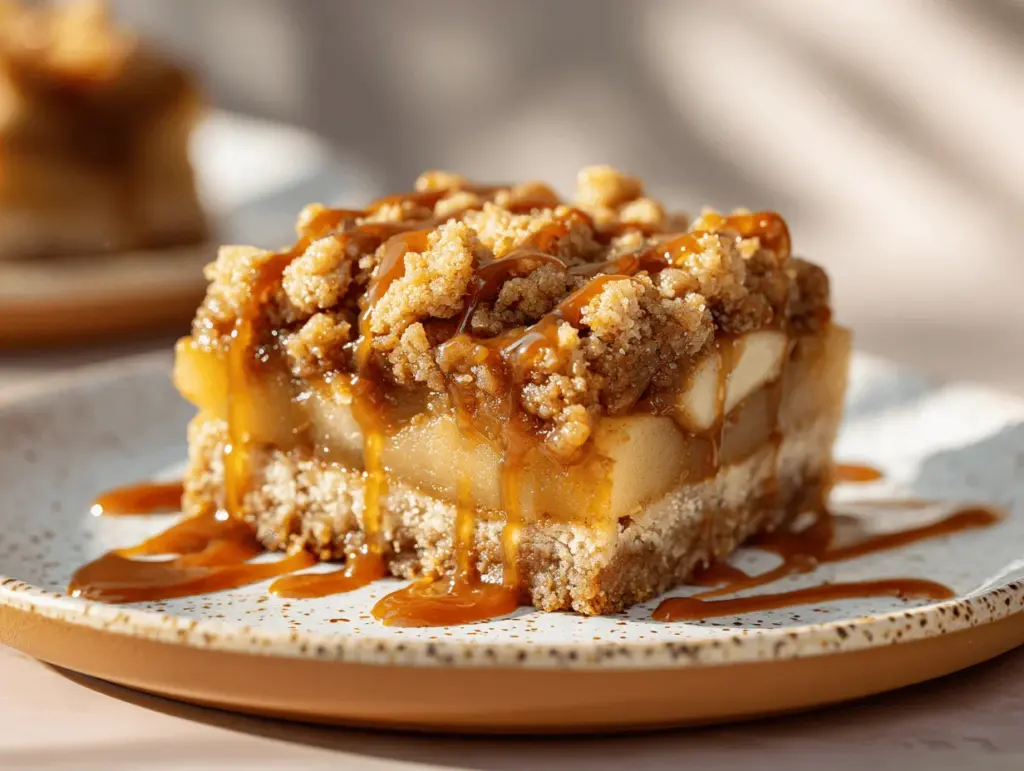
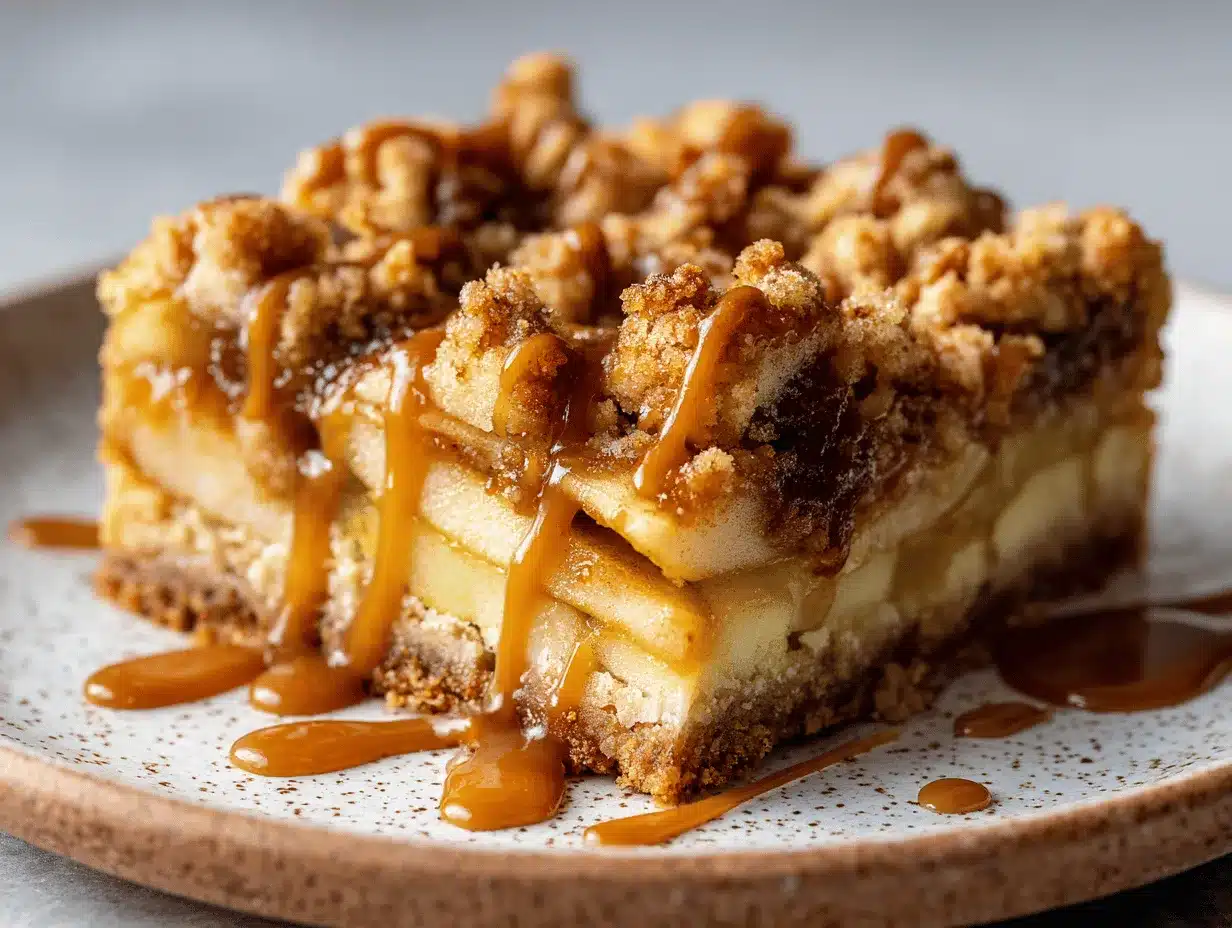
- Unbelievably Delicious: The layered flavors—spiced apples, real salted caramel, and a golden streusel topping—make every bite totally irresistible.
What makes these salted caramel apple bars different from the rest? I blend the crust and crumble topping with a little brown sugar and cinnamon for maximum flavor, and I use a homemade caramel that stays soft even after baking. Blending a bit of sea salt into both the caramel and the apple mixture takes things to another level. Honestly, this recipe was born from years of trial and error (and more than a few messy caramel fails). I’ve figured out how to get that bakery-perfect bar at home—without the stress.
You know that feeling when you take the first bite and your eyes close just a little? That’s what these bars deliver. It’s comfort food, but with a grown-up twist thanks to the salt and rich caramel. They’re the ultimate fall treat for impressing guests or just making an ordinary weeknight feel special. If you want a dessert that brings people together and leaves everyone asking for the recipe, this is it!
What Ingredients You Will Need
This recipe keeps things simple—each ingredient brings its own little magic to the party. Most of what you need is probably already in your pantry or fridge! If you don’t, you’ll find everything at a basic grocery store.
- For the Crust & Crumble:
- 1 cup (226g) unsalted butter, cold and cubed (adds richness and structure)
- 2 1/4 cups (281g) all-purpose flour (gives the bars their classic texture; swap in a gluten-free blend if needed)
- 1/2 cup (100g) light brown sugar, packed (for a deeper, caramel-like sweetness)
- 1/4 cup (50g) granulated sugar (balances the brown sugar)
- 1 teaspoon ground cinnamon (for that cozy fall flavor)
- 1/2 teaspoon fine sea salt (don’t skip this—it brings out all the other flavors)
- For the Apple Layer:
- 3–4 medium apples (about 500g), peeled, cored, and diced (Granny Smith for tartness, Honeycrisp for sweetness, or a mix)
- 2 tablespoons (16g) all-purpose flour (helps soak up apple juices so the bars aren’t soggy)
- 2 tablespoons (28g) granulated sugar (adjust to taste depending on your apple variety)
- 1 teaspoon ground cinnamon (hello, autumn!)
- 1/4 teaspoon ground nutmeg (optional, but adds warmth)
- Pinch of fine sea salt
- 1 teaspoon fresh lemon juice (to brighten the apples and keep them from browning)
- For the Salted Caramel:
- 1/2 cup (100g) granulated sugar
- 2 tablespoons (28g) unsalted butter (softened)
- 1/4 cup (60ml) heavy cream (for that silky caramel texture)
- 1/2 teaspoon flaky sea salt (like Maldon; adjust to taste)
- Finishing Touch:
- Extra flaky sea salt for sprinkling (trust me, it makes all the difference!)
If you’re out of something, don’t stress. You can swap the heavy cream in the caramel for coconut cream if dairy-free is your thing, or use a store-bought caramel sauce in a pinch (just stir in a bit of extra salt). For the apples, any firm, tart variety works—just avoid really soft apples, which can get mushy. And if you’re gluten-free, your favorite 1:1 flour blend will do the job just fine. I prefer using real butter for the crust, but vegan butter sticks work too for a dairy-free version. My go-to brands: King Arthur for flour, Kerrygold for butter, Maldon for finishing salt.
Equipment Needed
- 9×13-inch Baking Pan: The classic size for party bars. If you only have an 8×8-inch, just halve the recipe and adjust baking time a bit.
- Parchment Paper: Makes it easy to lift and slice the bars; you can use foil in a pinch (greased well).
- Mixing Bowls: At least two—one for the apple mixture, one for the crust/crumble.
- Pastry Cutter or Fork: For cutting the butter into the dry ingredients. I sometimes just use my (clean) hands for this step.
- Medium Saucepan: Essential for making the salted caramel (if homemade).
- Whisk or Heatproof Spatula: For stirring the caramel and making sure nothing sticks.
- Measuring Cups and Spoons: Accuracy is key for baking!
- Sharp Paring Knife: For peeling and dicing apples. A vegetable peeler speeds things up.
- Wire Cooling Rack: Helps the bars cool evenly (but a trivet or clean towel works too if you don’t have one).
Pro tip: If you’re short on mixing bowls, just wash and reuse as you go. I’ve made these bars in a tiny college apartment with one bowl and a borrowed pan, so don’t let a lack of fancy tools stop you. For cleaning up sticky caramel, soak pans in hot water—makes life easier!
Preparation Method
- Preheat and Prep: Preheat your oven to 350°F (175°C). Line a 9×13-inch baking pan with parchment paper, leaving an overhang on the sides for easy lifting later. Lightly grease the paper.
- Make the Crust & Crumble:
- In a large mixing bowl, combine 2 1/4 cups (281g) all-purpose flour, 1/2 cup (100g) packed brown sugar, 1/4 cup (50g) granulated sugar, 1 teaspoon cinnamon, and 1/2 teaspoon sea salt.
- Add 1 cup (226g) cold, cubed unsalted butter. Cut it in using a pastry cutter, fork, or your fingers until the mixture resembles coarse crumbs. Don’t overmix—you want some pea-sized pieces for texture.
- Press about 2/3 of this mixture firmly and evenly into the bottom of your prepared pan to form the crust. Set the rest aside for the topping.
- Prepare the Apple Layer:
- In a medium bowl, toss 3–4 diced apples (about 500g) with 2 tablespoons (16g) flour, 2 tablespoons (28g) sugar, 1 teaspoon cinnamon, 1/4 teaspoon nutmeg (if using), a pinch of salt, and 1 teaspoon lemon juice.
- Spread the apple mixture evenly over the crust. Try to fill in all the corners for even flavor in every bite.
- Make the Salted Caramel (if homemade):
- In a medium, heavy-bottomed saucepan over medium heat, melt 1/2 cup (100g) sugar, stirring constantly with a heatproof spatula. The sugar will clump, then melt into a deep amber liquid—watch closely so it doesn’t burn (this happens fast!).
- Once melted and golden, add 2 tablespoons (28g) butter, stirring until melted and combined. Slowly pour in 1/4 cup (60ml) heavy cream (it will bubble vigorously—just keep stirring until smooth).
- Remove from heat and stir in 1/2 teaspoon flaky sea salt. Let cool for about 3–5 minutes before using.
- If you’re pressed for time, use 1/2 cup (120ml) good-quality store-bought caramel sauce, warmed and mixed with a pinch of sea salt.
- Assemble the Bars:
- Drizzle the slightly cooled caramel evenly over the apples. Don’t worry about covering every inch—it will spread as it bakes.
- Sprinkle the reserved crumble mixture evenly over the top. Press down gently so everything sticks together, but don’t compact it too much or the topping won’t be crumbly.
- Bake:
- Bake in the preheated oven for 35–40 minutes, or until the topping is golden brown and the caramel is bubbling at the edges.
- Check at 30 minutes—if the top is browning too quickly, tent loosely with foil for the remaining time.
- Cool & Slice:
- Let the bars cool in the pan for at least 1 hour (or until just slightly warm). This helps everything set for clean slices. I know it’s tempting, but slicing too soon leads to a gooey mess (trust me, I’ve made that mistake!).
- Lift the bars out using the parchment overhang and slice into 20–24 squares.
- Sprinkle with extra flaky sea salt before serving for the final wow factor.
Troubleshooting: If your caramel seizes (turns lumpy), add a splash of cream and gently reheat, stirring until smooth. If the bars seem too soft when cooled, chill for 30 minutes before slicing. For crispier bottoms, bake an extra 5 minutes.
Personal tip: I sometimes make the caramel a day ahead and store it in a jar—saves time and avoids hot sugar stress on baking day!
Cooking Tips & Techniques
- Butter Temperature Matters: Use cold, cubed butter for the crust and crumble. If your kitchen is hot, pop the butter in the freezer for 10 minutes before using—it keeps the texture perfect.
- Apple Prep: Dice apples into small, even pieces. Big chunks won’t soften as well and can lead to uneven bars. I once left my apples too big and ended up with half-raw sections—not ideal!
- Caramel Success: Keep the heat medium and never walk away from the sugar as it melts. Caramel goes from golden to burnt in seconds. If it smells bitter, start over (I’ve had to do this more than once!).
- Even Layering: Press the base down firmly, but not so hard that it becomes dense. The crumble topping should be gently scattered for a classic, rustic look.
- Multitasking: While the crust bakes, prep your apples and caramel. It saves time and keeps you from feeling rushed.
- Baking Consistency: Ovens vary, so check a few minutes before the minimum baking time. Look for bubbling caramel and a golden brown top as your cues.
- Cooling Patience: Letting the bars cool fully is key. I learned the hard way that slicing too soon leads to a caramel avalanche (delicious, but messy!).
Honestly, baking is as much about learning from flops as it is about following directions. I once forgot the salt in my caramel and the bars tasted flat—never again! Don’t stress if things aren’t perfect the first time, because even slightly messy bars taste amazing. And remember: parchment paper is your friend for easy lifting and clean slices.
Variations & Adaptations
- Gluten-Free: Swap in a 1:1 gluten-free flour blend for the all-purpose flour. I’ve used Bob’s Red Mill with great results—no one could tell the difference.
- Dairy-Free: Use vegan butter for the crust/crumble and coconut cream in place of heavy cream in the caramel. Store-bought dairy-free caramel works too.
- Seasonal Fruit Swap: In spring or summer, replace apples with diced pears or peaches. Add a handful of fresh or frozen berries for a twist (just reduce the sugar a bit in the fruit layer).
- Nutty Crunch: Sprinkle 1/2 cup (60g) chopped pecans or walnuts over the apple layer before adding the crumble for extra crunch and flavor.
- Spice It Up: Add 1/4 teaspoon ground ginger or cardamom to the apple mixture for a more complex flavor profile.
- Allergen Notes: If you need nut-free, stick with the original recipe and double-check your caramel ingredients for cross-contamination.
My personal favorite variation? I sometimes swirl a bit of cream cheese into the caramel layer for a tangy, cheesecake vibe. It’s outrageously good, especially if you’re serving these bars for brunch. Don’t be afraid to play around—this recipe is super forgiving and welcomes your creativity!
Serving & Storage Suggestions
Serve these salted caramel apple bars slightly warm or at room temperature. The caramel is gooier when warm—just the way I like it! For parties, I cut them into small squares and arrange them on a rustic wooden tray. A scoop of vanilla ice cream or a dollop of whipped cream on the side takes them right over the top.
If you want to get fancy, drizzle extra caramel and sprinkle with a little more flaky sea salt before serving. These bars pair perfectly with hot apple cider, spiced tea, or a rich cup of coffee.
For storage, keep leftover bars in an airtight container at room temperature for up to 2 days, or in the fridge for up to 5 days. The flavors deepen and meld as they sit, making the bars even better on day two. To freeze, wrap individual bars tightly and store for up to 2 months. Thaw at room temp or gently warm in a low oven (300°F/150°C) for 10 minutes to re-crisp the topping.
Pro tip: If the caramel gets a little sticky after storing, a quick zap in the microwave (10–15 seconds) revives that dreamy texture.
Nutritional Information & Benefits
Each salted caramel apple bar (assuming 24 bars per batch) is approximately 180 calories, with 4g fat, 32g carbohydrates, and 2g protein. Apples provide a dose of fiber and vitamin C, and using real butter (instead of margarine) gives you a richer flavor with fewer additives. If you go for the gluten-free or dairy-free options, these bars work for a variety of dietary needs.
Keep in mind, though, that this is an indulgent treat—there’s sugar and butter, but also the satisfaction of homemade comfort food. Potential allergens include wheat, dairy, and (if you add them) nuts. I always feel good about sharing these bars at events, since a little goes a long way, and they’re made from real, recognizable ingredients. Honestly, they’re worth every bite and make for a much happier fall gathering than anything from a box!
Conclusion
Salted caramel apple bars are my go-to fall dessert for a reason—they’re easy, gorgeous, and every bite is a festival of flavors. Whether you’re baking for a big party or just want to treat yourself on a quiet weekend, this recipe is always a winner. You can customize it to your taste or dietary needs, and it never fails to bring a smile (and requests for the recipe) wherever I take it.
Seriously, if you love the cozy combo of apples, caramel, and a hint of salt, you have to try these bars. Don’t be afraid to play around—swap the fruit, add nuts, or try a different spice blend. Let me know your favorite twist in the comments, and tag me if you share a photo—I’d love to see your creations!
Thanks for baking with me—happy fall, and may your kitchen always smell like caramel apples!
Frequently Asked Questions
Can I use store-bought caramel sauce instead of homemade?
Yes! Just pick a thick, good-quality caramel and stir in a pinch of flaky sea salt for that homemade flavor. Warm it slightly so it spreads easily over the apples.
What are the best apples for salted caramel apple bars?
Granny Smith apples are my top pick for their tartness, but Honeycrisp, Pink Lady, or a mix of sweet and tart apples work great too.
Can I make these bars gluten-free?
Absolutely. Swap in a 1:1 gluten-free flour blend for all-purpose flour in both the crust and apple layers. No other changes needed!
How do I keep the caramel from getting hard after baking?
Be sure not to overcook the caramel, and let the bars cool before slicing. If it does get a bit firm, warming the bars briefly will soften it right up.
Can I freeze salted caramel apple bars?
Yes, these bars freeze beautifully! Wrap them individually and freeze for up to 2 months. Thaw at room temperature or warm in a low oven before serving for best texture.
Pin This Recipe!
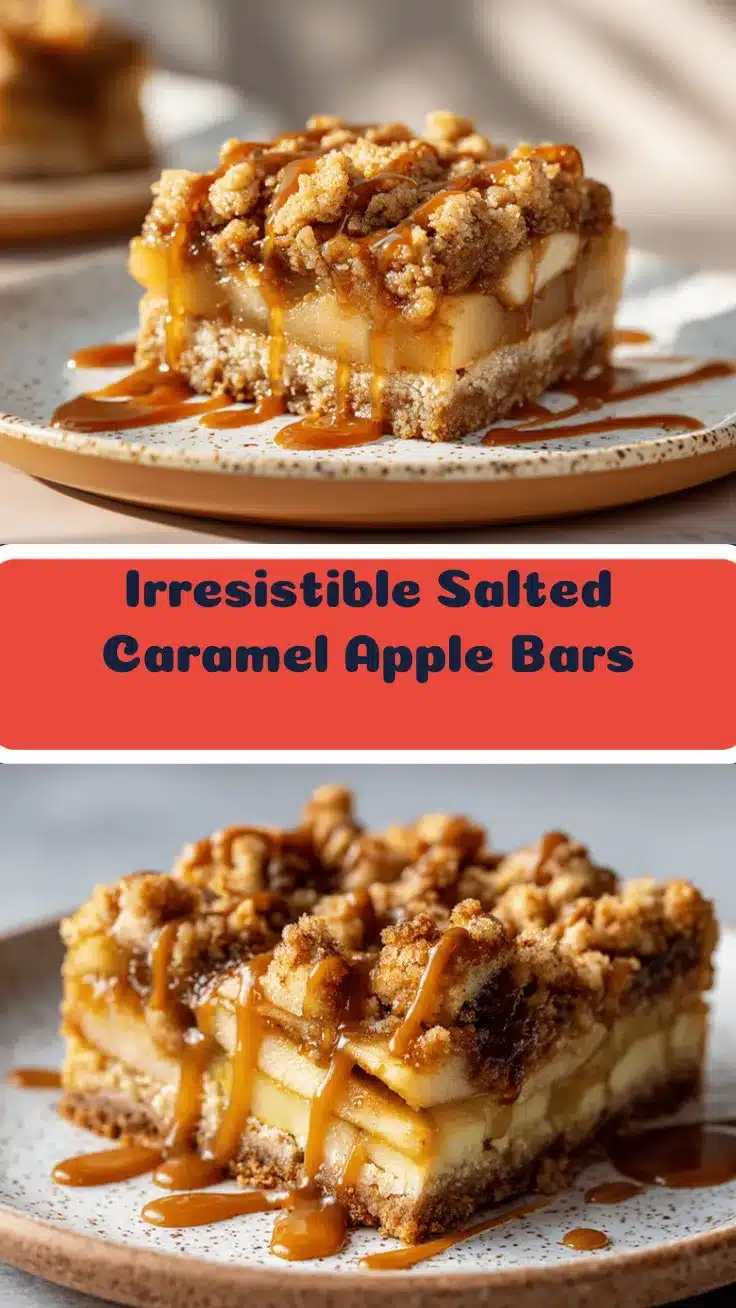
Salted Caramel Apple Bars

These salted caramel apple bars feature a buttery crust, gooey homemade salted caramel, and spiced apples for the ultimate easy fall dessert. Perfect for parties, potlucks, or cozy family gatherings, they’re simple to make and always a crowd-pleaser.
- Prep Time: 20 minutes
- Cook Time: 40 minutes
- Total Time: 1 hour
- Yield: 20–24 bars 1x
- Category: Dessert
- Cuisine: American
Ingredients
- 1 cup (226g) unsalted butter, cold and cubed
- 2 1/4 cups (281g) all-purpose flour
- 1/2 cup (100g) light brown sugar, packed
- 1/4 cup (50g) granulated sugar
- 1 teaspoon ground cinnamon
- 1/2 teaspoon fine sea salt
- 3–4 medium apples (about 500g), peeled, cored, and diced (Granny Smith, Honeycrisp, or a mix)
- 2 tablespoons (16g) all-purpose flour
- 2 tablespoons (28g) granulated sugar
- 1 teaspoon ground cinnamon
- 1/4 teaspoon ground nutmeg (optional)
- Pinch of fine sea salt
- 1 teaspoon fresh lemon juice
- 1/2 cup (100g) granulated sugar (for caramel)
- 2 tablespoons (28g) unsalted butter, softened (for caramel)
- 1/4 cup (60ml) heavy cream
- 1/2 teaspoon flaky sea salt (like Maldon; adjust to taste)
- Extra flaky sea salt for sprinkling
Instructions
- Preheat your oven to 350°F (175°C). Line a 9×13-inch baking pan with parchment paper, leaving an overhang on the sides. Lightly grease the paper.
- In a large mixing bowl, combine 2 1/4 cups flour, 1/2 cup brown sugar, 1/4 cup granulated sugar, 1 teaspoon cinnamon, and 1/2 teaspoon sea salt.
- Add 1 cup cold, cubed butter. Cut it in using a pastry cutter, fork, or your fingers until the mixture resembles coarse crumbs.
- Press about 2/3 of this mixture firmly and evenly into the bottom of the prepared pan to form the crust. Set the rest aside for the topping.
- In a medium bowl, toss diced apples with 2 tablespoons flour, 2 tablespoons sugar, 1 teaspoon cinnamon, 1/4 teaspoon nutmeg (if using), a pinch of salt, and 1 teaspoon lemon juice.
- Spread the apple mixture evenly over the crust.
- For the caramel: In a medium, heavy-bottomed saucepan over medium heat, melt 1/2 cup sugar, stirring constantly until it melts into a deep amber liquid. Add 2 tablespoons butter, stirring until melted. Slowly pour in 1/4 cup heavy cream (it will bubble), stirring until smooth. Remove from heat and stir in 1/2 teaspoon flaky sea salt. Let cool for 3–5 minutes.
- Drizzle the slightly cooled caramel evenly over the apples.
- Sprinkle the reserved crumble mixture evenly over the top. Press down gently.
- Bake for 35–40 minutes, or until the topping is golden brown and the caramel is bubbling at the edges. Check at 30 minutes and tent with foil if browning too quickly.
- Let the bars cool in the pan for at least 1 hour. Lift out using the parchment and slice into 20–24 squares.
- Sprinkle with extra flaky sea salt before serving.
Notes
For gluten-free bars, use a 1:1 gluten-free flour blend. For dairy-free, use vegan butter and coconut cream in the caramel. Store in an airtight container at room temperature for 2 days or refrigerate up to 5 days. Bars freeze well for up to 2 months. Let bars cool fully before slicing for clean edges. If caramel seizes, add a splash of cream and gently reheat. For extra crunch, add chopped pecans or walnuts to the apple layer.
Nutrition
- Serving Size: 1 bar (1/24 of recipe)
- Calories: 180
- Sugar: 18
- Sodium: 90
- Fat: 4
- Saturated Fat: 2.5
- Carbohydrates: 32
- Fiber: 1
- Protein: 2
Keywords: salted caramel apple bars, fall dessert, apple bars, caramel apple bars, easy dessert, party dessert, apple recipes, caramel recipes, autumn baking, potluck dessert


