Just picture it: you walk into your kitchen, and the sweet scent of vanilla and sugar swirls through the air like magic. The colors—oh, the colors—are bright and cheerful, bursting from every corner of your counter. I’ll never forget the first time I baked Rainbow Pot of Gold Cupcakes for a festive party; my hands were covered in edible glitter, and my kids were giggling at the rainbow sprinkles raining down. It was one of those moments where you pause, take a deep breath, and just grin because you know you’ve stumbled onto something truly special.
Honestly, these cupcakes are pure, nostalgic comfort with a playful twist. They remind me of the birthday parties I went to when I was knee-high to a grasshopper, where every treat was a surprise and every bite felt like a celebration. I first tried making these after a rainy weekend, searching for ways to brighten up our dreary days. Let’s face it—sometimes you just need a little extra color (and chocolate gold coins) to lift your spirits.
And the reactions? My family couldn’t stop sneaking them off the cooling rack (and, hey, I can’t really blame them). Friends ask for them every St. Patrick’s Day and, honestly, they’re perfect for potlucks, school bake sales, or just making your Pinterest feed pop. You know what, I wish I’d found this recipe years ago—it’s become a staple for family gatherings and gifting. Making these cupcakes feels like wrapping a warm hug in a rainbow wrapper. I tested this recipe more times than I care to admit (in the name of research, of course), and I can promise you, you’re going to want to bookmark this one for every festive party.
Why You’ll Love This Recipe
If you’re searching for the ultimate festive treat, Rainbow Pot of Gold Cupcakes hit every mark. After dozens of batches, party taste-tests, and a few kitchen mishaps, I’ve narrowed down why these cupcakes are an absolute must for any celebration.
- Quick & Easy: You’ll have these cupcakes ready from start to finish in under an hour, including decorating time. Perfect for busy parents, last-minute party planners, or anyone who loves a shortcut to something adorable.
- Simple Ingredients: Nothing fancy here. You’ll find everything in your pantry or local grocery store—no need for special trips or boutique baking shops.
- Perfect for Any Occasion: These cupcakes shine at birthday parties, St. Patrick’s Day, school events, or any gathering where you want to wow a crowd. They’re especially great for kids, but adults sneak seconds too.
- Crowd-Pleaser: The combination of fluffy vanilla cake, creamy buttercream, and playful candy toppings wins over even picky eaters. They get rave reviews every time I serve them.
- Unbelievably Delicious: The cupcakes are moist and tender, with just the right amount of sweetness. The buttercream frosting is silky and smooth, and the gold coin candies add a fun (and tasty) surprise.
What sets this recipe apart? Instead of just swirling colors in the batter, I layer distinct rainbow hues for a bold, Instagram-worthy effect. The buttercream is whipped extra light for easy piping, and I use a trick for keeping rainbow candies crisp and vibrant (no sticky messes here). Plus, the “pot of gold” isn’t just a decoration—it’s a hidden pocket of chocolate coins inside the cupcake for maximum party magic.
This isn’t just another cupcake—it’s a treat that makes everyone pause after the first bite and smile. It’s comfort food reimagined for the party crowd: bright, joyful, and (let’s be honest) kind of addictive. If you want to impress guests without the stress, or make your everyday baking feel special, this Rainbow Pot of Gold Cupcakes recipe is your new best friend. Trust me, you’ll want to make these again and again!
What Ingredients You Will Need
These Rainbow Pot of Gold Cupcakes rely on simple, everyday ingredients, but deliver bold flavor and dazzling color. Most are pantry staples, with easy swaps for allergies or dietary needs.
- For the Cupcake Batter:
- 2 1/2 cups (300g) all-purpose flour (or use a gluten-free blend for GF option)
- 1 1/2 cups (300g) granulated sugar
- 1 cup (226g) unsalted butter, softened (adds richness)
- 4 large eggs, room temperature (for fluffier cupcakes)
- 1 cup (240ml) whole milk (or dairy-free milk if preferred)
- 2 tsp vanilla extract (I recommend Nielsen-Massey for best flavor)
- 2 tsp baking powder
- 1/2 tsp baking soda
- 1/2 tsp salt
- Food coloring gels: red, orange, yellow, green, blue, purple (gel colors for vibrant hues; brands like Americolor are great)
- For the Buttercream Frosting:
- 1 cup (226g) unsalted butter, softened
- 4 cups (480g) powdered sugar, sifted
- 3-4 tbsp (45-60ml) milk or cream (adjust for desired consistency)
- 1 tsp vanilla extract
- Pinch of salt
- For Decoration:
- Rainbow-colored candies (M&Ms, Skittles, or Sixlets work perfectly)
- Chocolate gold coins (mini size, for the “pot of gold” effect)
- Edible gold glitter or sprinkles (optional, but highly recommended for sparkle)
- Rainbow sour belts or strips (for “rainbow bridges”)
- Cupcake wrappers (bright colors or gold foil add extra pizzazz)
If you don’t have all the colors, you can mix food gels to make any shade. For dairy allergies, swap in vegan butter and dairy-free milk; I’ve tested with Earth Balance and Silk successfully. For a nut-free version, double-check candy labels. In summer, try adding fresh berries on top for a fruity twist. Honestly, you can get creative here—these cupcakes are as flexible as your party theme!
Equipment Needed
Baking Rainbow Pot of Gold Cupcakes doesn’t require much fancy gear. You probably have most of these tools already:
- 12-cup muffin tin: Standard size works best; nonstick makes cleanup easier.
- Paper cupcake liners: Gold foil or colorful ones add a festive touch.
- Mixing bowls: At least two, plus a few small bowls for dividing and coloring batter.
- Electric mixer: Stand or handheld—either gets the job done for fluffy cake and smooth frosting.
- Rubber spatula: For scraping every last bit of batter.
- Ice cream scoop or spoon: Makes portioning batter easy and mess-free.
- Piping bags & star tips: For beautiful buttercream swirls (or just use a zip-top bag with the corner snipped).
- Toothpicks: For swirling colors and checking doneness.
If you’re missing specialty items like piping tips, don’t sweat it—spreading frosting with a spoon works, too. I used to use zip-top bags before I bought reusable piping bags, and honestly, they’re a solid budget option. Muffin tins just need a good soak for easy cleaning afterward. And if you want to get really fancy, try silicone liners for easy release. The main thing? Have fun with whatever you’ve got!
Preparation Method
- Preheat & Prep: Preheat your oven to 350°F (175°C). Line a 12-cup muffin tin with cupcake liners.
- Mix Dry Ingredients: In a large bowl, whisk together 2 1/2 cups (300g) flour, 2 tsp baking powder, 1/2 tsp baking soda, and 1/2 tsp salt. Set aside. (Tip: Sifting ensures no lumps and softer cupcakes!)
- Cream Butter & Sugar: In another bowl, beat 1 cup (226g) butter with 1 1/2 cups (300g) sugar until light and fluffy—about 2-3 minutes. The mixture should look pale and airy.
- Add Eggs & Vanilla: Beat in 4 eggs, one at a time, scraping down the sides after each addition. Add 2 tsp vanilla extract.
- Combine Wet & Dry: Alternate adding the flour mixture and 1 cup (240ml) milk to the butter mixture, beginning and ending with flour. Mix just until combined—don’t overbeat or you’ll lose that tender crumb.
- Divide & Color Batter: Split batter evenly into 6 smaller bowls. Add a few drops of food coloring gel to each bowl—red, orange, yellow, green, blue, and purple. Stir gently until each color is vibrant. (Wear gloves if you’re worried about stains!)
- Layer Batter: Using teaspoons, layer colored batter in each cupcake liner, starting with purple and ending with red. Don’t mix—just layer for bold stripes. Tap the muffin tin gently to level the batter.
- Bake: Bake for 18-22 minutes, until cupcakes are golden and a toothpick comes out clean. Let cool in tin for 5 minutes, then transfer to a rack. (The smell at this stage is heavenly—reminds me of birthday parties!)
- Prepare Buttercream: Beat 1 cup (226g) butter until creamy. Gradually add 4 cups (480g) powdered sugar, 1 tsp vanilla, and a pinch of salt. Pour in 3-4 tbsp (45-60ml) milk until frosting is light and fluffy. (If it’s too stiff, add more milk, a tablespoon at a time.)
- Fill Cupcakes (Optional): Use a small knife to cut a shallow hole in the center of each cupcake. Stuff with a mini chocolate gold coin—this is your hidden “pot of gold.” Replace the top piece of cake.
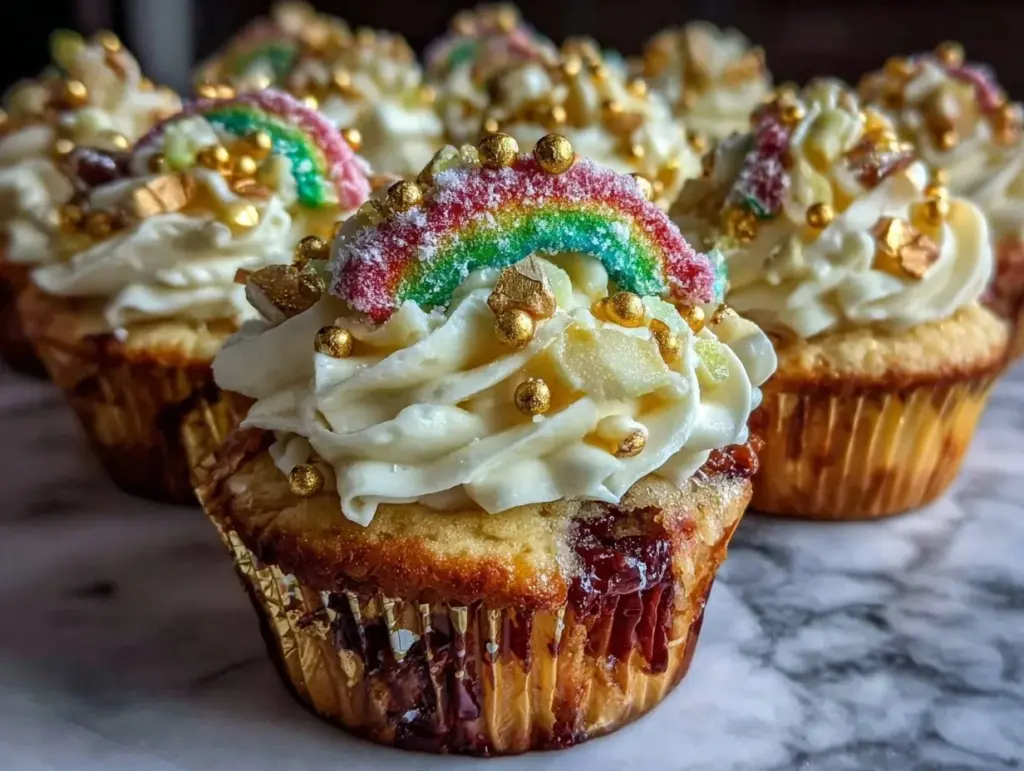
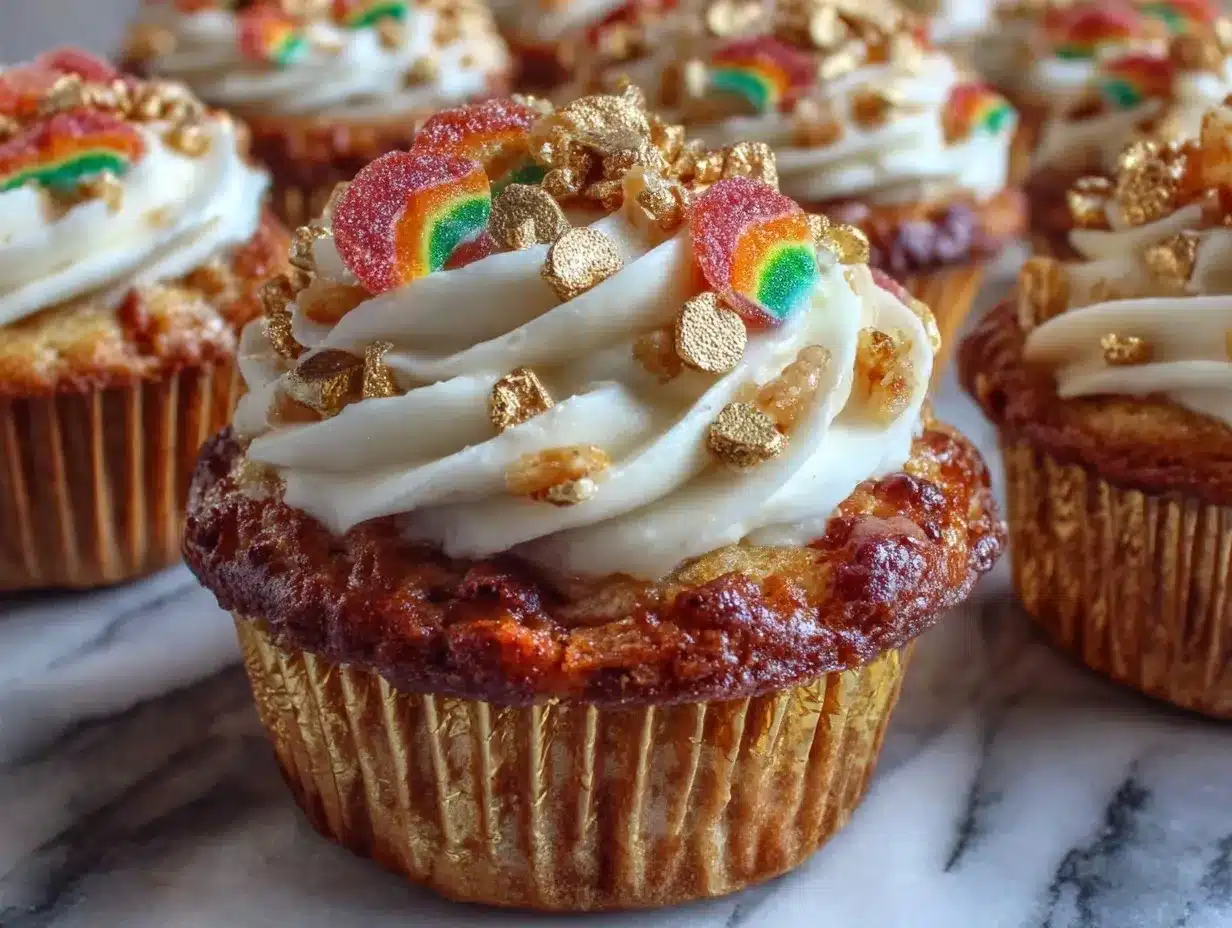
- Frost & Decorate: Pipe or spread buttercream frosting on cooled cupcakes. Arrange rainbow candies across the top, and tuck a chocolate gold coin near one side. Add rainbow sour belt “bridges,” and sprinkle with edible gold glitter if you like.
- Final Touches: Let the cupcakes sit at room temperature for 20 minutes to set. Serve immediately, or store in an airtight container.
If your cupcakes sink in the middle, it’s usually from overmixing or a too-hot oven—been there, fixed that! For bold colors, use gel food coloring, not liquid. And don’t be afraid to experiment with layering order for a different rainbow effect. Efficiency tip: color all your batters at once, then layer quickly to keep things moving. The visual payoff is worth the effort!
Cooking Tips & Techniques
I’ve learned a few tricks over the years that make Rainbow Pot of Gold Cupcakes truly shine. Here’s what works—and what to watch out for:
- Color Intensity: Gel food colors give deep, vibrant hues without thinning the batter. Liquid colors can make the mixture runny and pastel.
- Layering Batter: Use small spoons or piping bags to layer each color gently. If you rush, the colors will blend—still tasty, just less “rainbow.”
- Buttercream Consistency: Whip the buttercream for at least 3 minutes on medium-high. It should be soft, not stiff—think soft-serve ice cream. If your kitchen is warm, chill the frosting for 10 minutes before piping.
- Hidden Gold Coin: Make sure cupcakes are completely cool before adding the chocolate coin—otherwise, they’ll melt and make a gooey mess (learned this the hard way!).
- Decorating: Place candies right after frosting so they stick well. If you wait too long, the buttercream will crust.
- Batch Baking: Bake one tray at a time for even results. Crowding the oven can cause uneven rising.
- Multitasking: While cupcakes bake, prep your frosting and lay out decorations. This keeps things moving and makes decorating a breeze.
- Troubleshooting: If cupcakes are dry, check your oven temp and don’t overbake. If colors fade, use fresh food gels.
Honestly, my first attempt was a little chaotic—colors ran together, and the coins melted! Over time, I realized patience is key. Take your time layering, let cupcakes cool fully, and have fun with decorations. The little imperfections just prove they’re homemade!
Variations & Adaptations
Rainbow Pot of Gold Cupcakes are super customizable. Here are a few of my favorite twists:
- Gluten-Free: Use a 1:1 gluten-free flour blend in place of regular flour. I’ve had great success with King Arthur and Bob’s Red Mill blends.
- Vegan & Dairy-Free: Swap out the butter for plant-based margarine, eggs for flaxseed “eggs” (1 tbsp ground flax + 3 tbsp water per egg), and dairy milk for almond or oat milk.
- Seasonal Flavors: For summer parties, add lemon zest to the batter and top with fresh berries. In winter, mix in a bit of cinnamon and nutmeg for a cozy twist.
- Alternative Fillings: Instead of chocolate coins, try mini marshmallows, caramel squares, or even a spoonful of rainbow sprinkles.
- Different Cooking Methods: You can bake these in mini muffin tins for bite-sized treats, or in a sheet pan for rainbow “bars.”
- Allergen Substitutions: Double-check all candies for nut or dairy traces if serving to allergy-sensitive guests. I’ve used Enjoy Life chocolate coins for a nut-free option.
My personal favorite? Swapping the vanilla extract for orange or almond extract—gives the cupcakes a subtle, surprising twist. And if you’re feeling extra creative, try swirling two colors for a tie-dye effect. The possibilities are endless!
Serving & Storage Suggestions
Serve your Rainbow Pot of Gold Cupcakes at room temperature for the best flavor and texture. Arrange them on a bright cake stand, or nestle each cupcake in a gold wrapper for extra sparkle. These cupcakes look stunning lined up or displayed in a rainbow arc—kids love picking their favorite color!
Pair with fresh fruit skewers, lemonade, or a bubbly punch for festive parties. For adults, a cup of coffee or Irish cream liqueur works wonders (trust me).
For storage, keep cupcakes in an airtight container at room temp for up to 2 days. If you want to keep them longer, refrigerate for up to 5 days—just let them come to room temp before serving so the buttercream softens. Freeze unfrosted cupcakes for up to 2 months; thaw overnight and decorate fresh.
Reheating isn’t usually necessary, but if you prefer a warm cupcake, microwave for 10 seconds. Flavors actually deepen after a day, and the colors stay vibrant if stored away from sunlight. Honestly, they’re just as good on day two!
Nutritional Information & Benefits
Each Rainbow Pot of Gold Cupcake has approximately 320 calories, with 15g fat, 45g carbs, and 3g protein. Butter and eggs provide a good dose of energy, while the milk adds a touch of calcium. The recipe is nut-free as written, but always check candy labels for hidden allergens.
For gluten-free or vegan adaptations, calories may vary slightly. The cupcakes are a fun way to encourage kids to eat homemade treats instead of store-bought snacks. The bright colors and simple ingredients make these cupcakes a cheerful, family-friendly dessert.
While not exactly low-cal, they’re a festive option for parties or special occasions. I like knowing exactly what goes into my treats—no artificial preservatives, and real butter for that classic taste. If you’re mindful of sugar, try cutting back on the frosting or using a sugar substitute. Just remember, these are meant to be enjoyed as a special treat!
Conclusion
There’s a reason Rainbow Pot of Gold Cupcakes have become my go-to for festive parties: they’re fun, delicious, and guaranteed to make people smile. Whether you’re celebrating a birthday, hosting a holiday bash, or just want to add some color to your week, these cupcakes are worth every minute in the kitchen.
Feel free to adjust the colors, fillings, or decorations to suit your own style. I love how every batch comes out a little different—no two rainbows are ever the same! For me, these cupcakes are a reminder to celebrate the small joys and share sweet moments with the ones you love.
So, what do you think? Give this recipe a try, leave a comment below, or tag me with your own rainbow creations. Share it with friends, pin it for later, and let your cupcakes shine! Baking should be fun, festive, and a little magical—so go ahead, create your pot of gold.
Frequently Asked Questions
Can I make Rainbow Pot of Gold Cupcakes ahead of time?
Absolutely! Bake the cupcakes a day ahead and store them in an airtight container. Decorate just before serving for freshest results.
What’s the best food coloring for vibrant rainbow layers?
Gel food colors work best—they’re more concentrated and won’t thin out your batter. Brands like Americolor and Wilton are my personal favorites.
How do I keep the gold coins from melting inside the cupcake?
Wait until the cupcakes are completely cool before adding the coins. If you add them while warm, they’ll melt and create a gooey mess!
Can I use a cake mix for this recipe?
You sure can. Start with a vanilla cake mix, then follow the coloring and layering steps as described. The result is nearly as tasty and super quick.
Are these cupcakes safe for nut allergies?
The base recipe is nut-free, but always check candy toppings for possible traces. Choose certified nut-free candies to be safe for allergy-sensitive guests.
Pin This Recipe!
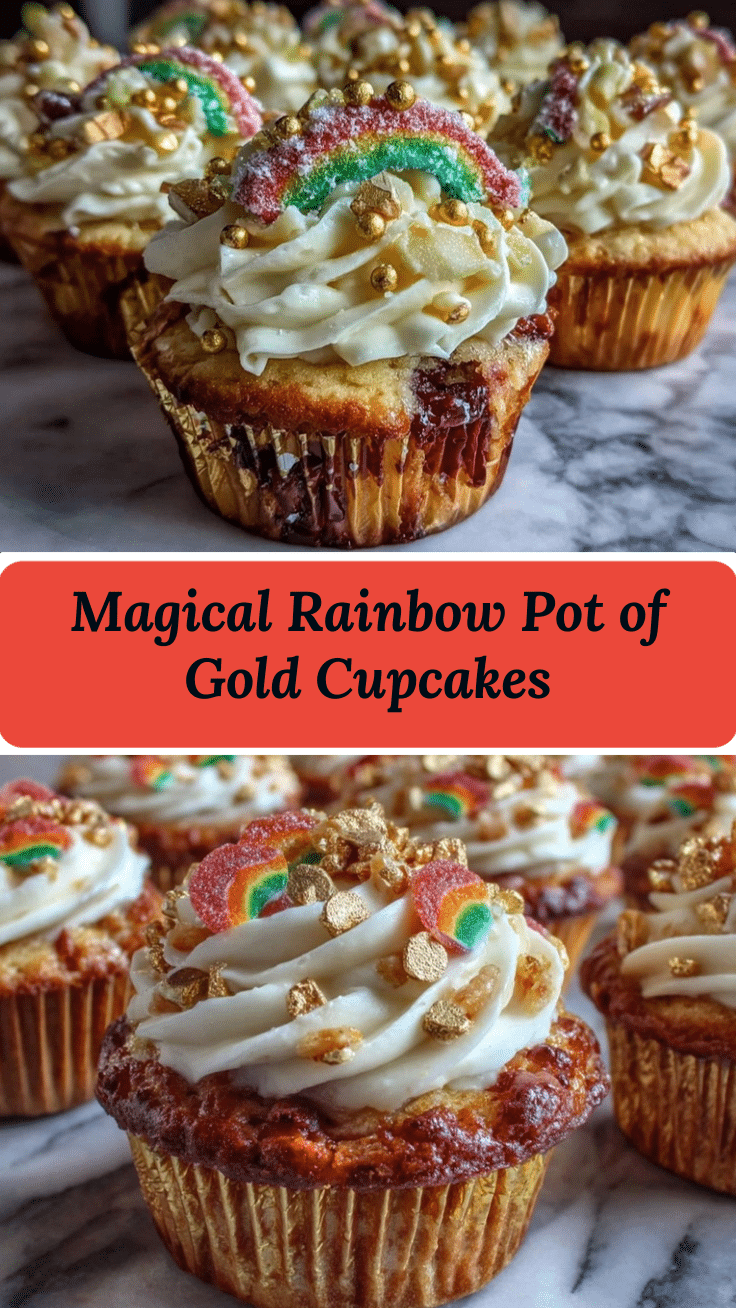
Rainbow Pot of Gold Cupcakes Easy Festive Party Recipe

These Rainbow Pot of Gold Cupcakes are a festive, colorful treat perfect for parties, birthdays, and celebrations. Moist vanilla cupcakes are layered with vibrant rainbow colors, filled with a hidden chocolate gold coin, and topped with creamy buttercream and playful candy decorations.
- Prep Time: 25 minutes
- Cook Time: 20 minutes
- Total Time: 45 minutes
- Yield: 12 cupcakes 1x
- Category: Dessert
- Cuisine: American
Ingredients
- 2 1/2 cups all-purpose flour (or gluten-free blend)
- 1 1/2 cups granulated sugar
- 1 cup unsalted butter, softened
- 4 large eggs, room temperature
- 1 cup whole milk (or dairy-free milk)
- 2 tsp vanilla extract
- 2 tsp baking powder
- 1/2 tsp baking soda
- 1/2 tsp salt
- Food coloring gels: red, orange, yellow, green, blue, purple
- 1 cup unsalted butter, softened (for frosting)
- 4 cups powdered sugar, sifted
- 3–4 tbsp milk or cream
- 1 tsp vanilla extract (for frosting)
- Pinch of salt (for frosting)
- Rainbow-colored candies (M&Ms, Skittles, or Sixlets)
- Chocolate gold coins (mini size)
- Edible gold glitter or sprinkles (optional)
- Rainbow sour belts or strips
- Cupcake wrappers
Instructions
- Preheat oven to 350°F (175°C). Line a 12-cup muffin tin with cupcake liners.
- In a large bowl, whisk together flour, baking powder, baking soda, and salt. Set aside.
- In another bowl, beat butter and sugar until light and fluffy (2-3 minutes).
- Beat in eggs one at a time, then add vanilla extract.
- Alternate adding the flour mixture and milk to the butter mixture, beginning and ending with flour. Mix just until combined.
- Divide batter evenly into 6 bowls. Add food coloring gel to each bowl for red, orange, yellow, green, blue, and purple. Stir until vibrant.
- Layer colored batter in each cupcake liner, starting with purple and ending with red. Tap tin gently to level.
- Bake for 18-22 minutes, until golden and a toothpick comes out clean. Cool in tin for 5 minutes, then transfer to rack.
- For buttercream, beat butter until creamy. Gradually add powdered sugar, vanilla, and salt. Add milk until frosting is light and fluffy.
- Optional: Cut a shallow hole in each cooled cupcake and fill with a mini chocolate gold coin. Replace top piece.
- Pipe or spread buttercream on cooled cupcakes. Decorate with rainbow candies, chocolate gold coin, rainbow sour belt, and edible glitter.
- Let cupcakes sit at room temperature for 20 minutes to set. Serve or store in airtight container.
Notes
Use gel food coloring for vibrant colors. Let cupcakes cool completely before adding chocolate coins to prevent melting. For gluten-free or vegan adaptations, substitute flour, butter, eggs, and milk as needed. Decorate immediately after frosting for best results. Store in airtight container at room temperature for up to 2 days, or refrigerate for up to 5 days.
Nutrition
- Serving Size: 1 cupcake
- Calories: 320
- Sugar: 32
- Sodium: 180
- Fat: 15
- Saturated Fat: 9
- Carbohydrates: 45
- Fiber: 1
- Protein: 3
Keywords: rainbow cupcakes, pot of gold cupcakes, festive dessert, party cupcakes, St. Patrick's Day, birthday cupcakes, colorful cupcakes, kid-friendly dessert


