“You won’t believe how this cake came together,” my neighbor chuckled as she handed me a slightly squished box from her kitchen. It was a late Saturday afternoon, and I’d just stopped by to borrow some sugar. Honestly, I wasn’t expecting to discover the perfect two-tier graduation cap cake recipe right there in her cluttered kitchen. The little mishap with the fondant, the hurried piping of the tassels, and that slightly lopsided top tier made it all the more charming.
The air was thick with the scent of rich chocolate and sweet vanilla buttercream, and I remember thinking, “This is no ordinary celebration cake.” Maybe you’ve been there—the pressure of making something special for a graduation party, juggling work and family, and yet wanting that wow factor without turning into a stressed mess. This cake, with its playful imperfections and bold flavors, stuck with me.
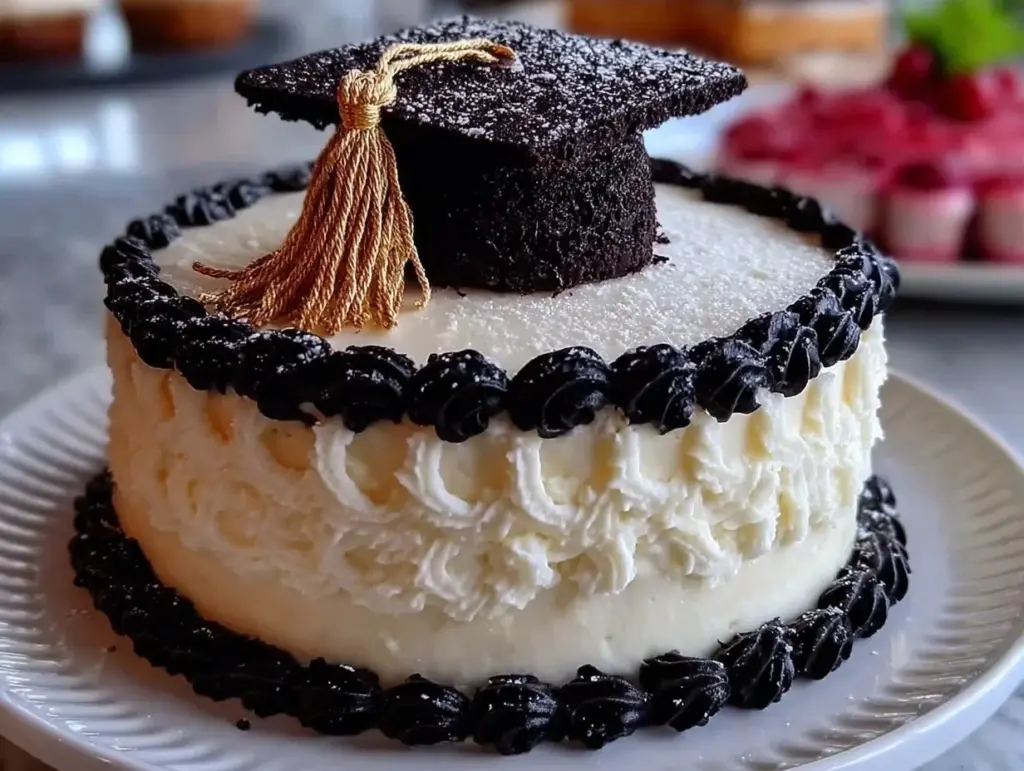
Let me tell you, the way those two tiers stacked up, topped with a perfectly sized edible graduation cap, was a sight to behold. It wasn’t just the look but the taste that won me over. I forgot my sugar, made a mess with the piping bag, and got interrupted by a ringing phone, but somehow, this recipe stayed with me as a go-to for celebration cakes that feel heartfelt yet easy to pull off. So, if you’re hunting for a crowd-pleaser that’s both impressive and doable, this is the one to try.
Why You’ll Love This Recipe
After several tries and some happy accidents, this two-tier graduation cap cake recipe has earned its place in my celebration lineup. I tested it thoroughly, tweaked the frosting to perfection, and yes, even my picky niece gave it two thumbs up. Here’s why you’ll want to make this cake your own:
- Quick & Easy: Comes together in under 3 hours, perfect for last-minute party prep.
- Simple Ingredients: No need for specialty stores—everything’s pantry-friendly and familiar.
- Perfect for Celebrations: Whether it’s a graduation, milestone birthday, or just a proud moment, this cake sets the mood.
- Crowd-Pleaser: The moist layers and smooth buttercream always get rave reviews from adults and kids alike.
- Unbelievably Delicious: The combo of classic vanilla and chocolate layers with creamy frosting is just right—not too sweet, not too heavy.
What sets this cake apart? The secret lies in the frosting technique that creates a smooth, velvety finish and the clever way the graduation cap topper is crafted from fondant and edible paint—no fancy molds needed! It’s the kind of cake that makes you close your eyes after the first bite and say, “Yep, this is celebration-worthy.” Honestly, it turns simple ingredients into a centerpiece that speaks volumes about your effort and love.
What Ingredients You Will Need
This recipe calls for everyday ingredients that come together to create a cake that’s both delicious and visually stunning. Most of these you’ll find in your pantry or local grocery store. Here’s a breakdown:
For the Cake Layers:
- All-purpose flour – 3 cups (360 g), sifted for a light texture
- Granulated sugar – 2 ½ cups (500 g), for sweetness and structure
- Baking powder – 2 ½ teaspoons, to help the cake rise nicely
- Baking soda – ½ teaspoon, balances acidity
- Salt – ½ teaspoon, enhances flavor
- Unsalted butter – 1 cup (227 g), softened (I prefer Plugrá for its rich flavor)
- Large eggs – 4, room temperature for better mixing
- Whole milk – 1 cup (240 ml), adds moisture (can swap with almond milk for dairy-free)
- Pure vanilla extract – 2 teaspoons, for that warm aroma
- Cocoa powder – ½ cup (50 g), for the chocolate layers (use Dutch-processed for deeper taste)
For the Buttercream Frosting:
- Unsalted butter – 1 ½ cups (340 g), softened
- Powdered sugar – 5 cups (600 g), sifted to avoid lumps
- Whole milk or heavy cream – 3-4 tablespoons (45-60 ml), to thin consistency
- Pure vanilla extract – 2 teaspoons
- Black gel food coloring – a few drops, for the graduation cap details
For the Graduation Cap Decoration:
- Black fondant – about 200 grams (7 oz), store-bought or homemade
- Edible gold paint or gold dust – for the tassel
- Edible glue or water – to attach fondant pieces
Pro Tip: When choosing your fondant, I recommend Satin Ice for ease of molding and smooth finish. If you’re feeling adventurous, you can tint white fondant with black gel coloring yourself.
Equipment Needed
- Two round cake pans: 8-inch (20 cm) and 6-inch (15 cm) diameters for the two tiers. If you don’t have two sizes, use the same size and stack accordingly.
- Mixing bowls: Medium and large, preferably glass or stainless steel for ease of cleaning.
- Electric hand mixer or stand mixer: Essential for smooth batter and fluffy frosting. I’ve used both KitchenAid and Cuisinart with great results.
- Offset spatula: For smooth frosting application and leveling layers.
- Piping bags and round piping tips: Useful for neat edges and decorative touches.
- Rolling pin: To roll out fondant evenly for the cap topper.
- Bench scraper or cake scraper: Helps achieve sharp frosting edges.
- Cooling racks: To cool cakes evenly and prevent sogginess.
If you don’t have a cake scraper, the edge of a large knife works in a pinch. Also, a pizza cutter can be handy for cutting fondant neatly. When it comes to fondant tools, cheap plastic ones from craft stores work just fine if you’re not ready to invest in professional kits.
Preparation Method
- Preheat your oven to 350°F (175°C). Grease and flour your 8-inch and 6-inch round cake pans, or line with parchment paper for easy removal. This usually takes about 10 minutes including prepping your ingredients.
- Prepare the cake batter: In a large bowl, whisk together the flour, baking powder, baking soda, salt, and cocoa powder (for chocolate layers). In a separate bowl, beat the softened butter and granulated sugar with an electric mixer until light and fluffy—about 3 to 5 minutes.
- Add eggs one at a time to the butter mixture, beating well after each addition. Stir in the vanilla extract.
- Alternate adding dry ingredients and milk to the butter mixture, starting and ending with the dry ingredients. Mix gently until just combined—don’t overmix or the cake will be tough.
- Divide the batter evenly between your pans. Smooth the tops with a spatula. Bake for 30-35 minutes (8-inch pan) and 25-30 minutes (6-inch pan), or until a toothpick inserted in the center comes out clean. Keep an eye starting at 25 minutes to avoid overbaking.
- Cool the cakes in the pans for 10 minutes, then transfer to wire racks to cool completely. This step is crucial to prevent frosting from melting.
- Make the buttercream: Beat softened butter until creamy. Gradually add powdered sugar, one cup at a time, beating well between additions. Add vanilla and milk/cream, adjusting for your preferred consistency. Beat for 3-5 minutes until fluffy.
- Color a small portion of the buttercream black for the graduation cap details, using gel food coloring.
- Level the cakes by trimming the domed tops with a serrated knife. Place the 8-inch cake on your serving plate and spread a layer of buttercream on top, then place the 6-inch cake on top carefully. Use dowel rods or straws inserted into the bottom tier for stability, especially if transporting.
- Crumb coat the entire cake with a thin layer of buttercream and chill for 20 minutes.
- Apply the final coat of buttercream, smoothing with an offset spatula and scraper. Use piping bags to add decorative borders or details as you like.
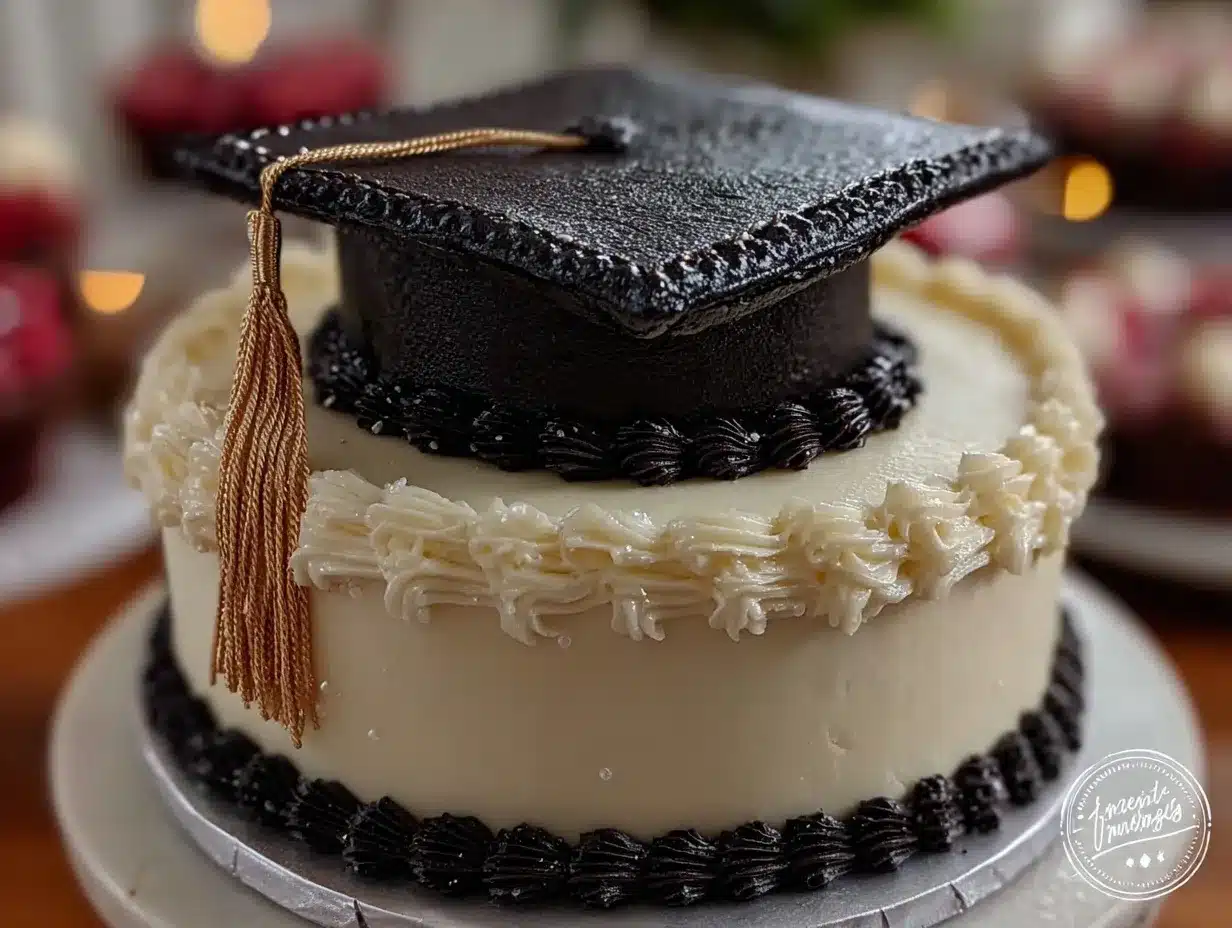
- Create the graduation cap topper: Roll out black fondant to about ¼ inch (6 mm) thickness. Cut out a square approximately 5 inches (13 cm) on each side for the cap top. For the base, mold a small black fondant circle to fit on the cake’s top tier. Attach the square to the circle using edible glue or water.
- Make the tassel: Use thin strips of fondant or edible gold paint to create the tassel effect, attaching it to one corner of the square. Let it dry for 15-20 minutes before placing on the cake.
Cooking Tips & Techniques
Getting the perfect two-tier graduation cap cake isn’t rocket science, but a few insider tips make life easier. First, always sift your dry ingredients to keep the batter light—trust me, it makes a noticeable difference in texture. When mixing, don’t overdo it; mix just till the ingredients come together to avoid a dense cake.
Leveling your cake layers might seem tedious, but it’s the key to a stable, professional-looking stack. I once skipped this step and ended up with a wobbly cake that made me nervous every time I looked at it. Use a serrated knife or a cake leveler if you have one.
Chilling the cake between crumb coating and final frosting helps the buttercream set and prevents crumbs from ruining the smooth finish. If you don’t chill, you’ll end up scraping crumbs into your final coat, which is no fun.
When working with fondant, keep your hands dry and lightly dust your workspace with cornstarch to prevent sticking. If the fondant cracks, a small dab of water can help smooth it out. Also, avoid overhandling fondant as it warms up and gets sticky.
Finally, dowels or straws are essential for two-tier cakes to keep the top tier steady, especially if the cake needs to be moved. I learned this the hard way after my first two-tier cake collapsed during transport—lesson painfully learned!
Variations & Adaptations
This two-tier graduation cap cake is a versatile base for a range of celebrations and dietary needs. Here are some ideas:
- Flavor swaps: Replace vanilla with lemon zest and juice for a refreshing twist, or swap the chocolate layer for red velvet to add a pop of color.
- Dietary adaptations: Use gluten-free all-purpose flour blends to make a gluten-free version. For a dairy-free option, substitute coconut milk and vegan butter in both cake and frosting.
- Decoration alternatives: Instead of fondant, pipe black buttercream for the graduation cap, and use licorice strings or edible gold sprinkles for the tassel.
- Seasonal touches: Add fresh berries between layers during spring or summer for added freshness and color.
I once tried adding a layer of raspberry jam between the tiers—unexpected but delicious. It gave the cake a pleasant tartness that balanced the sweetness beautifully. Feel free to experiment and make this cake truly yours!
Serving & Storage Suggestions
Serve this cake at room temperature to get the best flavor and texture—cold frosting can mute the taste and stiffen the buttercream. When presenting, place the cake on a sturdy cake stand or decorative platter to highlight its two-tier elegance.
Pair it with a light beverage like sparkling water with lemon or a mild coffee to complement the sweetness. For a full spread, consider simple finger foods or fresh fruit to balance richness.
Store any leftovers covered in the refrigerator for up to 4 days. When ready to enjoy again, let the cake sit at room temperature for 30-45 minutes before serving to soften the buttercream. You can also freeze individual slices wrapped tightly in plastic wrap and foil for up to 2 months. Thaw in the fridge overnight.
Keep in mind, the fondant topper is best added fresh or stored separately to avoid softening from moisture.
Nutritional Information & Benefits
This cake is a treat best enjoyed in moderation. A typical serving (about 1/12 of the cake) contains approximately 350-400 calories, with 18-22 grams of fat, 45-50 grams of carbohydrates, and 4-5 grams of protein. The use of real butter and whole milk adds richness but also beneficial fat-soluble vitamins.
The recipe can be adapted for lower sugar by cutting back on powdered sugar in the frosting or using natural sweeteners. Gluten-free and dairy-free versions make it accessible to a wider range of dietary needs.
From a wellness perspective, celebrating milestones with homemade treats like this connects us to joyful moments and family traditions—which is just as nourishing as the cake itself.
Conclusion
This perfect two-tier graduation cap cake is more than a dessert—it’s a celebration centerpiece that combines ease, charm, and deliciousness. Whether you’re a baking novice or a seasoned pro, this recipe invites you to customize and make memories around the cake stand.
Honestly, I keep coming back to this recipe because it strikes the right balance between looking impressive and feeling doable. The small imperfections—the slight tilt of the top tier, the hand-painted tassel—make it feel personal and heartfelt.
If you try this recipe, I’d love to hear about your versions and any tweaks you make! Share your photos, tips, or questions in the comments. Here’s to many joyful celebrations with cake and smiles!
FAQs
Can I make this cake ahead of time?
Yes! You can bake the layers a day or two in advance and store them wrapped in plastic wrap at room temperature. Assemble and frost the day of your event for the freshest look and taste.
How do I prevent the buttercream from melting?
Keep your kitchen cool while frosting, and chill the cake between crumb coat and final coat steps. Avoid frosting in hot, humid environments whenever possible.
What if I don’t have fondant experience?
You can skip the fondant topper and pipe the graduation cap using black buttercream with a small round tip. Use licorice strings or colored sugar for the tassel instead.
Can I use different cake flavors for each tier?
Absolutely! Mixing flavors like chocolate and vanilla or red velvet and lemon adds visual and taste interest. Just make sure each layer is fully cooled before stacking.
How do I transport the two-tier cake safely?
Use a sturdy cake box and insert dowel rods or straws into the bottom tier for support. Transport the cake on a flat surface in a cool vehicle to avoid sliding or melting.
Pin This Recipe!
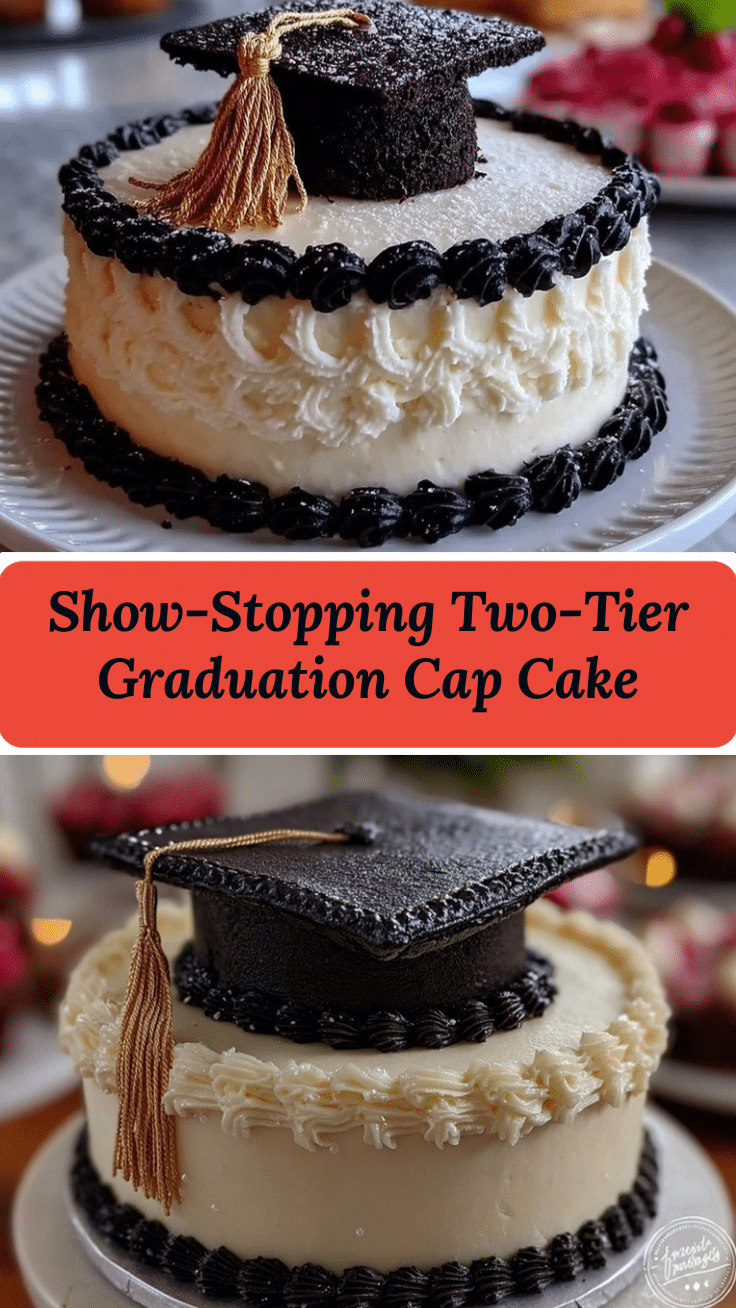
Perfect Two-Tier Graduation Cap Cake

A quick and easy two-tier graduation cap cake recipe featuring moist vanilla and chocolate layers with smooth buttercream frosting, perfect for celebrations.
- Prep Time: 30 minutes
- Cook Time: 35 minutes
- Total Time: 2 hours 45 minutes
- Yield: 12 servings 1x
- Category: Dessert
- Cuisine: American
Ingredients
- 3 cups (360 g) all-purpose flour, sifted
- 2 ½ cups (500 g) granulated sugar
- 2 ½ teaspoons baking powder
- ½ teaspoon baking soda
- ½ teaspoon salt
- 1 cup (227 g) unsalted butter, softened
- 4 large eggs, room temperature
- 1 cup (240 ml) whole milk (can substitute almond milk for dairy-free)
- 2 teaspoons pure vanilla extract
- ½ cup (50 g) cocoa powder (Dutch-processed recommended)
- 1 ½ cups (340 g) unsalted butter, softened (for buttercream)
- 5 cups (600 g) powdered sugar, sifted
- 3–4 tablespoons (45–60 ml) whole milk or heavy cream
- 2 teaspoons pure vanilla extract (for buttercream)
- Black gel food coloring, a few drops
- About 200 grams (7 oz) black fondant
- Edible gold paint or gold dust
- Edible glue or water
Instructions
- Preheat oven to 350°F (175°C). Grease and flour 8-inch and 6-inch round cake pans or line with parchment paper.
- In a large bowl, whisk together flour, baking powder, baking soda, salt, and cocoa powder (for chocolate layers).
- In a separate bowl, beat softened butter and granulated sugar with an electric mixer until light and fluffy, about 3 to 5 minutes.
- Add eggs one at a time to the butter mixture, beating well after each addition. Stir in vanilla extract.
- Alternate adding dry ingredients and milk to the butter mixture, starting and ending with dry ingredients. Mix gently until just combined.
- Divide batter evenly between pans. Smooth tops with a spatula.
- Bake for 30-35 minutes (8-inch pan) and 25-30 minutes (6-inch pan), or until a toothpick inserted in the center comes out clean.
- Cool cakes in pans for 10 minutes, then transfer to wire racks to cool completely.
- Make buttercream: Beat softened butter until creamy. Gradually add powdered sugar, one cup at a time, beating well between additions.
- Add vanilla and milk/cream, adjusting for preferred consistency. Beat for 3-5 minutes until fluffy.
- Color a small portion of buttercream black using gel food coloring for graduation cap details.
- Level cakes by trimming domed tops with a serrated knife.
- Place 8-inch cake on serving plate, spread a layer of buttercream on top, then place 6-inch cake on top carefully. Insert dowel rods or straws into bottom tier for stability.
- Crumb coat entire cake with a thin layer of buttercream and chill for 20 minutes.
- Apply final coat of buttercream, smoothing with offset spatula and scraper. Use piping bags to add decorative borders or details.
- Create graduation cap topper: Roll out black fondant to about ¼ inch (6 mm) thickness. Cut a 5-inch (13 cm) square for the cap top.
- Mold a small black fondant circle for the base to fit on top tier. Attach square to circle using edible glue or water.
- Make tassel using thin strips of fondant or edible gold paint, attach to one corner of the square. Let dry 15-20 minutes before placing on cake.
Notes
Sift dry ingredients for a lighter texture. Do not overmix batter to avoid toughness. Level cake layers for stability. Chill cake between crumb coat and final frosting to prevent crumbs. Keep hands dry and dust workspace with cornstarch when working with fondant. Use dowels or straws for tier support during transport. Fondant topper is best added fresh or stored separately to avoid softening.
Nutrition
- Serving Size: 1 slice (1/12 of cak
- Calories: 375
- Sugar: 35
- Sodium: 220
- Fat: 20
- Saturated Fat: 12
- Carbohydrates: 48
- Fiber: 2
- Protein: 5
Keywords: graduation cake, two-tier cake, celebration cake, chocolate cake, vanilla cake, buttercream frosting, fondant decoration, easy cake recipe


