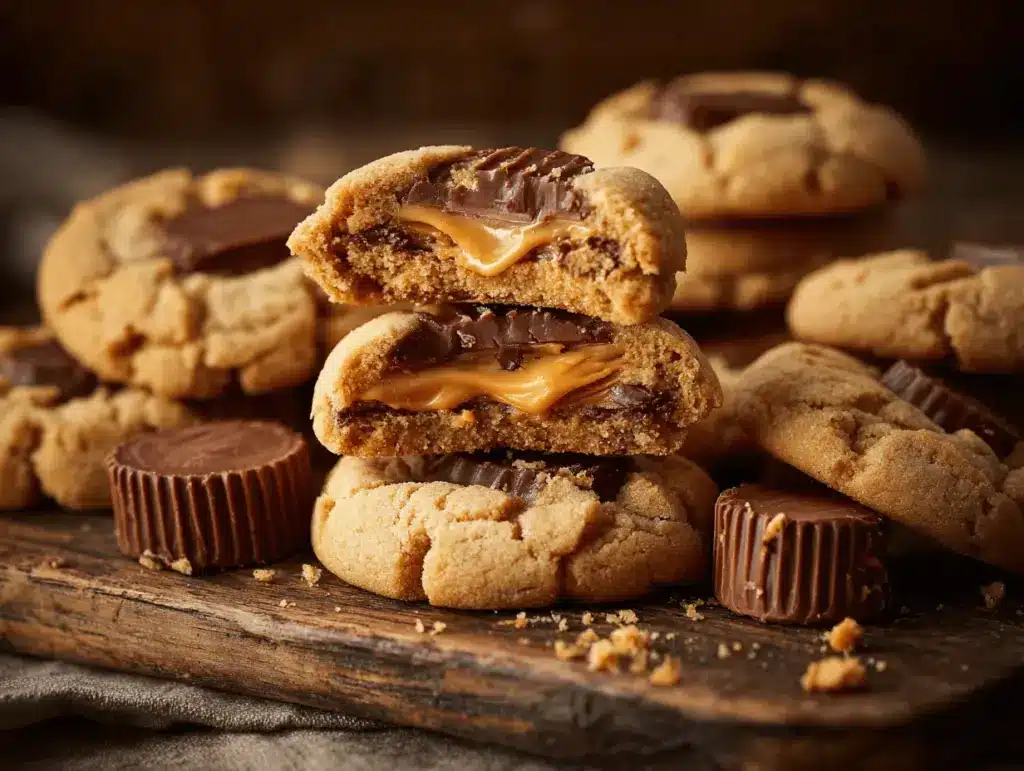
The moment you walk into my kitchen and catch a whiff of warm, nutty peanut butter mingling with gooey chocolate, you know something magical is happening. Honestly, these peanut butter cup cookies are the kind of treat that grabs your senses right away—soft, thick, and generously stuffed with creamy chocolate centers. I first whipped up this recipe during a cold winter afternoon when my cravings for classic peanut butter cookies collided with my love for chocolate-filled desserts. One bite and I was hooked!
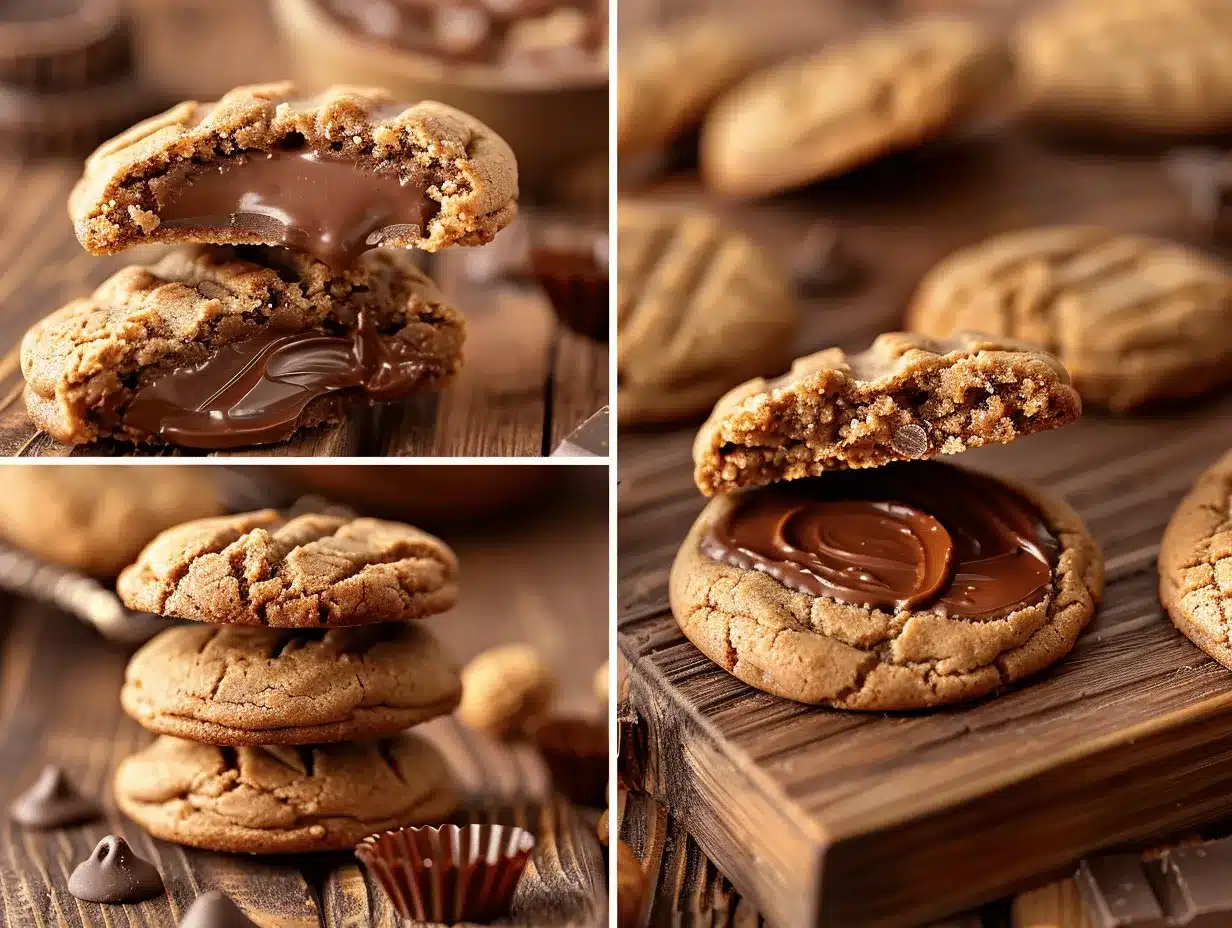
Now, these aren’t just any cookies. We’re talking about soft peanut butter cup cookies filled with chocolate—the kind that practically melt in your mouth and have that dreamy, bakery-style texture. My family requests these for every holiday, birthday, and lazy weekend. (You know, the kind of cookie that disappears before you even get a chance to stash some for later!) Whether you’re baking for a crowd or just treating yourself, these cookies totally hit the spot—no fancy equipment, no complicated steps, just pure cookie bliss.
Over the years, I’ve tested this peanut butter cup cookies recipe dozens of times, tweaking the peanut butter ratio and playing with different chocolate fillings. As a mom and self-confessed cookie addict, I can tell you these are a game-changer (especially if you adore the classic peanut butter-chocolate combo). If you love easy recipes that look gorgeous on a Pinterest board and taste even better, you’re in the right place. Ready to make the softest, chocolate-stuffed cookies ever? Let’s get started!
Why You’ll Love This Recipe
- Quick & Easy: This peanut butter cup cookies recipe comes together in under 30 minutes. Perfect for busy weeknights, spontaneous cravings, or when you need a last-minute dessert.
- Simple Ingredients: You probably have everything you need in your pantry right now—no fancy baking supplies required.
- Perfect for Any Occasion: Whether it’s a holiday party, school bake sale, or cozy night in, these cookies fit right in and look amazing on a plate (especially when you stack them up for photos).
- Crowd-Pleaser: Kids, adults, neighbors, coworkers—everyone loves these! Seriously, I’ve never had leftovers.
- Unbelievably Delicious: The combination of a soft peanut butter cookie with a gooey chocolate center is next-level comfort food. You get that perfect balance of sweet and salty with every bite.
What sets this peanut butter cup cookies recipe apart? First, I use creamy peanut butter blended smoothly into the dough for extra tenderness. The chocolate filling isn’t just a hidden surprise—it’s what makes each cookie look and taste like a mini dessert masterpiece. I’ve tried plenty of peanut butter cookies, but the trick here is to chill the dough just enough so the cookies stay soft and thick, never dry or crumbly. It’s the little details that make these cookies stand out from the rest.
Honestly, these cookies are more than just a treat—they’re a little slice of happiness. I love watching friends take their first bite and see that chocolate center ooze out! If you’re looking for a recipe that’s both ridiculously good and totally doable, give these a shot. They’re the kind of cookies that turn an ordinary day into something special.
What Ingredients You Will Need
This peanut butter cup cookies recipe uses simple, wholesome ingredients for bold flavor and a soft, satisfying texture. Most are pantry staples, and a few are easy to swap if you need alternatives.
- For the Cookie Dough:
- Creamy peanut butter (I always use Jif or Skippy; natural peanut butter can work but may make the dough a bit crumbly)
- Unsalted butter, softened (adds richness and helps with chewiness)
- Granulated sugar (for classic sweetness and that golden finish)
- Brown sugar, packed (for deeper flavor and extra softness)
- Large egg, room temperature (binds everything together)
- Pure vanilla extract (I love Nielsen-Massey for a rich aroma)
- All-purpose flour (King Arthur and Bob’s Red Mill are my go-tos)
- Baking soda (ensures a gentle rise)
- Salt (balances the sweetness and brings out the peanut flavor)
- For the Chocolate Filling:
- Mini peanut butter cups or regular-sized peanut butter cups, halved (Reese’s are classic, but Trader Joe’s dark chocolate cups are amazing too)
- Semi-sweet chocolate chips or chopped chocolate (you can use milk or dark chocolate based on preference)
- Optional for Garnish:
- Flaky sea salt (sprinkled on top for a sweet-salty finish)
- Chopped peanuts (for crunch and extra peanut flavor)
- Melted chocolate drizzle (looks super Pinterest-worthy!)
Ingredient Tips: Always use room temperature butter for the softest cookies. If you’re out of brown sugar, you can swap in coconut sugar for a slightly different flavor. To make these gluten-free, use a 1:1 gluten-free flour blend. For dairy-free, swap the butter with a plant-based alternative (Earth Balance works great). If you want to make these nut-free, try sunflower seed butter and allergy-friendly chocolate cups. The beauty of this recipe is how forgiving it is—even with substitutions, the cookies turn out soft and delicious.
I’ve tried using both store-bought and homemade peanut butter cups, and honestly, both work. Just make sure your chocolate filling is fresh and not too hard, so it melts nicely inside the cookies. If you have leftover Halloween candy, this is the perfect way to use it up!
Equipment Needed
- Large mixing bowl (glass or stainless steel—either works, but I prefer glass for easy cleanup)
- Hand mixer or stand mixer (you can mix by hand, but it’ll take a little more elbow grease)
- Rubber spatula (for scraping down the sides and folding in the chocolate)
- Measuring cups and spoons (precision matters for baking!)
- Baking sheet (I recommend heavy-duty aluminum for even baking)
- Parchment paper or silicone baking mat (prevents sticking and makes cleanup a breeze)
- Cookie scoop (helps portion dough evenly, but a regular spoon works in a pinch)
- Wire cooling rack (lets cookies cool evenly and keeps them soft)
If you don’t have a stand mixer, don’t stress—just use a sturdy wooden spoon and some muscle. For baking sheets, I’ve found the cheaper ones tend to warp, so if you bake often, invest in a good one. Silicone mats last forever and are worth every penny. Maintenance tip: Always wash your mixer attachments right after using peanut butter—they can get sticky fast. If you’re on a budget, you can skip the cookie scoop, but it does make your cookies look extra professional!
Preparation Method
- Preheat your oven: Set to 350°F (175°C). Line a baking sheet with parchment paper or a silicone mat.
- Mix wet ingredients: In a large bowl, cream together 1/2 cup (120g) unsalted butter and 1/2 cup (130g) creamy peanut butter until smooth—about 2 minutes with a hand mixer. Add 1/2 cup (100g) granulated sugar and 1/2 cup (110g) brown sugar, beating until light and fluffy (another 2 minutes). Crack in 1 large egg and add 1 teaspoon vanilla extract, then mix until fully combined. The mixture should be creamy and pale.
- Combine dry ingredients: In a separate bowl, whisk together 1 1/2 cups (190g) all-purpose flour, 1/2 teaspoon baking soda, and 1/4 teaspoon salt. Gradually add the dry ingredients to the wet mixture, mixing on low until a soft dough forms. If dough feels too sticky, add a tablespoon more flour.
- Shape the cookies: Use a cookie scoop (about 1.5 tablespoons/22g per cookie) to portion dough. Flatten each ball lightly with your fingers, press a mini peanut butter cup or a piece of chocolate in the center, then wrap the dough around the filling to seal. Roll gently between your palms to form a smooth ball.
- Arrange and chill: Place dough balls 2 inches apart on the prepared baking sheet. For best results, chill the tray in the fridge for 10-15 minutes before baking—this keeps the cookies thick and prevents spreading.
- Bake: Bake for 10-12 minutes, until edges are set and tops look slightly crackled. Cookies will appear soft in the center—that’s perfect! They’ll firm up as they cool.
- Cool: Let cookies rest on the baking sheet for 5 minutes, then transfer to a wire rack to cool completely. The centers will stay soft and gooey as they set.
- Optional garnish: While still warm, sprinkle with flaky sea salt or drizzle with melted chocolate for a Pinterest-worthy finish.
Preparation Notes: If your dough is crumbly, add a tablespoon of milk. If the filling pokes through, patch with a bit of extra dough—no one will know! For best results, don’t overbake; the cookies should be soft in the middle. If your oven runs hot, start checking at 9 minutes.
My personal tip: Make a double batch and freeze half the dough for emergency cookie cravings. These cookies are also fun to make with kids—just expect a little mess and a lot of laughter as you stuff the centers!
Cooking Tips & Techniques
- Use room temperature ingredients: Cold butter or eggs can lead to a dense dough. Let everything sit out for at least 30 minutes before you start.
- Don’t overmix: Once you add the flour, mix just until combined. Overmixing can make cookies tough instead of soft.
- Chill the dough: Chilling isn’t mandatory, but it helps keep cookies thick and the chocolate centers gooey. If you’re in a rush, you can skip it, but watch for spreading in the oven.
- Fill evenly: Make sure the chocolate or peanut butter cup is fully enclosed by dough. If you see it peeking out, seal with a pinch more dough.
- Watch your baking time: Every oven is a little different. Start checking the cookies at the 10-minute mark. They should look slightly underbaked in the middle—trust me, that’s the secret to a super soft cookie.
- Lesson learned: One time I forgot to chill the dough and ended up with flat cookies (they still tasted great, but didn’t look as pretty). Another time, I used too much chocolate filling and the cookies burst open—so less is sometimes more!
- Multitasking tip: While the cookies bake, clean up your mixing bowl and prep your garnish. You’ll have just enough time to get everything ready before they come out.
- Consistency: Always measure flour by spooning into the cup and leveling off. Too much flour results in dry cookies. If you want identical cookies, use a cookie scoop for every batch.
Honestly, baking is part science and part art—don’t worry if every cookie isn’t perfect. The flavor is what matters! Once you’ve made these a few times, you’ll get a feel for your oven and your ideal cookie texture.
Variations & Adaptations
- Gluten-Free Option: Swap the all-purpose flour for a 1:1 gluten-free flour blend. I’ve used King Arthur’s and Bob’s Red Mill with great results—cookies stay soft and chewy.
- Dairy-Free Adaptation: Use plant-based butter and dairy-free chocolate cups (Enjoy Life brand is a favorite). The flavor is still rich and indulgent.
- Seasonal Twist: For the holidays, add a pinch of cinnamon or pumpkin spice to the dough, or use peppermint chocolate cups for a festive flair.
- Flavor Boost: Mix chopped roasted peanuts or mini chocolate chips into the dough for more texture. You can also add a swirl of Nutella or caramel in the center instead of a peanut butter cup.
- Allergy-Friendly: Substitute sunflower seed butter for peanut butter, and use allergy-friendly chocolate. I tried this version for a playdate and it was just as delicious!
One personal favorite: I make a “monster cookie” version by mixing in oats and M&Ms (just reduce the flour by a quarter cup). My kids go wild for these! No matter your dietary needs or flavor preferences, this peanut butter cup cookies recipe is endlessly customizable. Don’t be afraid to experiment—it’s part of the fun!
Serving & Storage Suggestions
These cookies taste best slightly warm, when the chocolate center is melty and the peanut butter dough is soft. Serve them straight from the oven with cold milk, hot cocoa, or even a scoop of vanilla ice cream if you’re feeling fancy (trust me, it’s a winning combo!).
For a cute presentation, stack cookies on a bakery-style plate and sprinkle with chopped peanuts or a drizzle of chocolate. They look stunning on a dessert table and photograph beautifully for Pinterest.
Storage: Store cooled cookies in an airtight container at room temperature for up to 5 days. They’ll stay soft and flavorful. For longer storage, freeze cookies in a single layer, then transfer to a zip-top freezer bag—thaw at room temp or microwave for 10 seconds to revive the gooey center. You can also freeze the unbaked dough balls and bake fresh when needed.
As the cookies sit, the flavors deepen and the centers stay nice and soft. I always hide a few at the back of the fridge for late-night snacks (no shame here!).
Nutritional Information & Benefits
| Per Cookie (approx.) | Amount |
|---|---|
| Calories | 170 |
| Protein | 3g |
| Fat | 9g |
| Carbs | 19g |
| Sugar | 12g |
Health Benefits: Peanut butter adds protein and healthy fats, making these cookies a bit more satisfying than your average sweet treat. The chocolate brings antioxidants, and you can easily tweak the recipe to be gluten-free or dairy-free. If nut allergies are a concern, sunflower seed butter is a tasty alternative.
I love that you can enjoy this recipe even if you’re watching your sugar or carb intake—just use low-sugar chocolate and swap in coconut sugar. For me, these cookies are a guilt-free way to indulge in something sweet and homemade!
Conclusion
There’s something deeply comforting about a batch of homemade cookies—especially when they’re as soft, chocolatey, and irresistible as these peanut butter cup cookies. This recipe is easy to make, endlessly customizable, and always a hit with family and friends. If you’re looking for a simple treat that packs big flavor and Pinterest-worthy looks, you’ve found it!
Don’t be afraid to put your own spin on things. Swap fillings, play with toppings, and let your creativity shine. If you try this peanut butter cup cookies recipe, let me know how it went! I’d love to see your creations, hear your tweaks, or answer any baking questions you have.
Honestly, these cookies have brought so many smiles to my kitchen—I hope they do the same for you. Happy baking, and don’t forget to share your cookie photos and tips in the comments below!
FAQs
Can I use crunchy peanut butter instead of creamy?
Yes! Crunchy peanut butter adds a little texture (and extra peanut flavor). Just know the dough won’t be quite as smooth, but it’ll still taste amazing.
What’s the best way to keep the cookies soft?
Don’t overbake—pull them out when the edges are set but the centers look slightly underdone. Store in an airtight container to keep them soft for days.
Can I freeze peanut butter cup cookies?
Absolutely. Freeze baked cookies in a single layer, then transfer to a freezer bag. You can also freeze unbaked dough balls and bake fresh whenever you want.
What if I don’t have peanut butter cups?
No problem! Use chocolate chips, chopped chocolate bars, or even a spoonful of Nutella as the filling. The cookies will still be gooey and delicious.
How do I make these cookies gluten-free?
Just swap the all-purpose flour for your favorite 1:1 gluten-free blend. The cookies will stay soft and chewy—no one will notice the difference!
Pin This Recipe!
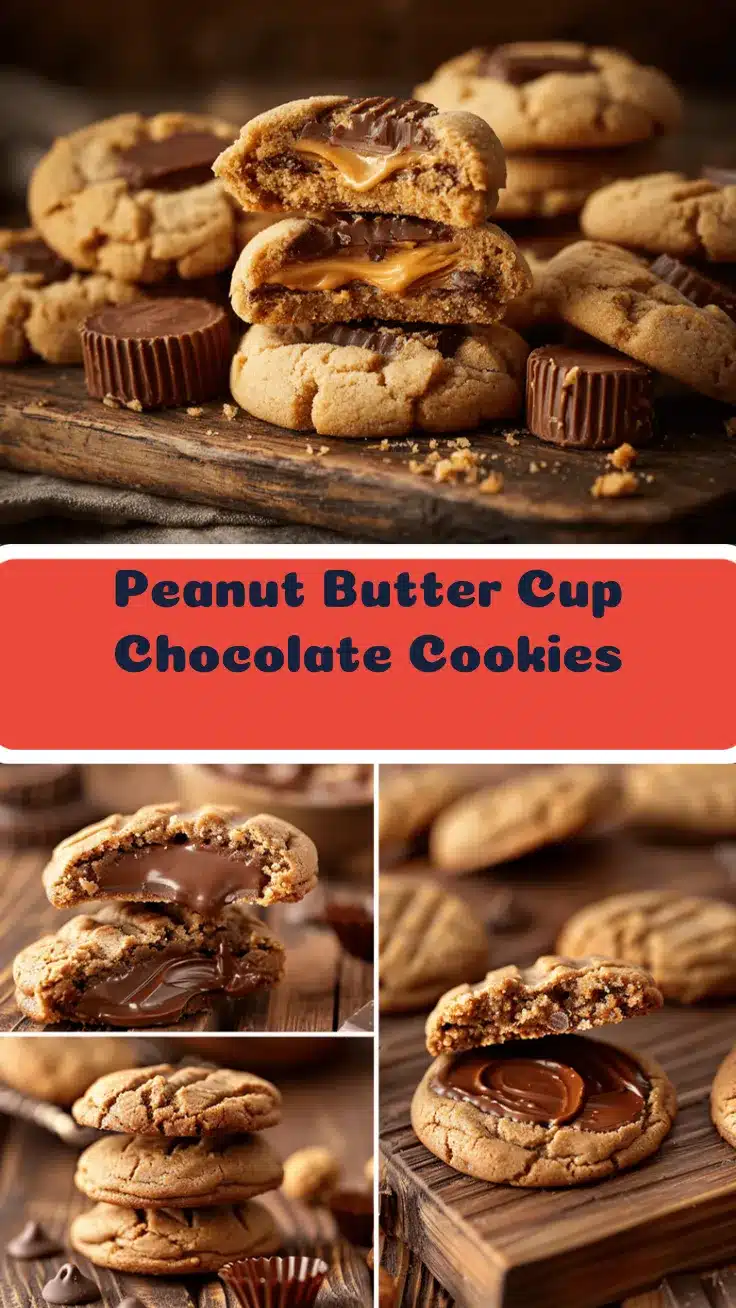
Peanut Butter Cup Cookies

These soft, bakery-style peanut butter cup cookies are filled with gooey chocolate centers for the ultimate sweet and salty treat. Quick and easy to make, they’re perfect for any occasion and guaranteed to disappear fast!
- Prep Time: 15 minutes
- Cook Time: 12 minutes
- Total Time: 27 minutes
- Yield: 18-24 cookies 1x
- Category: Dessert
- Cuisine: American
Ingredients
- 1/2 cup (130g) creamy peanut butter
- 1/2 cup (120g) unsalted butter, softened
- 1/2 cup (100g) granulated sugar
- 1/2 cup (110g) brown sugar, packed
- 1 large egg, room temperature
- 1 teaspoon pure vanilla extract
- 1 1/2 cups (190g) all-purpose flour
- 1/2 teaspoon baking soda
- 1/4 teaspoon salt
- 18–24 mini peanut butter cups or 9–12 regular-sized peanut butter cups, halved
- 1/2 cup semi-sweet chocolate chips or chopped chocolate
- Optional: flaky sea salt, chopped peanuts, melted chocolate drizzle
Instructions
- Preheat oven to 350°F (175°C). Line a baking sheet with parchment paper or a silicone mat.
- In a large bowl, cream together unsalted butter and creamy peanut butter until smooth (about 2 minutes with a hand mixer).
- Add granulated sugar and brown sugar; beat until light and fluffy (another 2 minutes).
- Add egg and vanilla extract; mix until fully combined.
- In a separate bowl, whisk together all-purpose flour, baking soda, and salt.
- Gradually add dry ingredients to wet mixture, mixing on low until a soft dough forms. If dough is too sticky, add a tablespoon more flour.
- Use a cookie scoop (about 1.5 tablespoons per cookie) to portion dough. Flatten each ball, press a mini peanut butter cup or chocolate in the center, then wrap dough around filling to seal. Roll gently to form a smooth ball.
- Place dough balls 2 inches apart on prepared baking sheet. Chill tray in fridge for 10-15 minutes before baking.
- Bake for 10-12 minutes, until edges are set and tops look slightly crackled. Centers should appear soft.
- Let cookies rest on baking sheet for 5 minutes, then transfer to a wire rack to cool completely.
- Optional: While still warm, sprinkle with flaky sea salt or drizzle with melted chocolate.
Notes
For best results, use room temperature ingredients and chill the dough before baking to keep cookies thick and centers gooey. Don’t overbake—cookies should look slightly underdone in the center. You can substitute gluten-free flour or dairy-free butter as needed. Freeze dough balls for fresh cookies anytime.
Nutrition
- Serving Size: 1 cookie
- Calories: 170
- Sugar: 12
- Sodium: 90
- Fat: 9
- Saturated Fat: 3
- Carbohydrates: 19
- Fiber: 1
- Protein: 3
Keywords: peanut butter cup cookies, chocolate filled cookies, easy peanut butter cookies, soft cookies, holiday cookies, bakery style cookies, stuffed cookies


