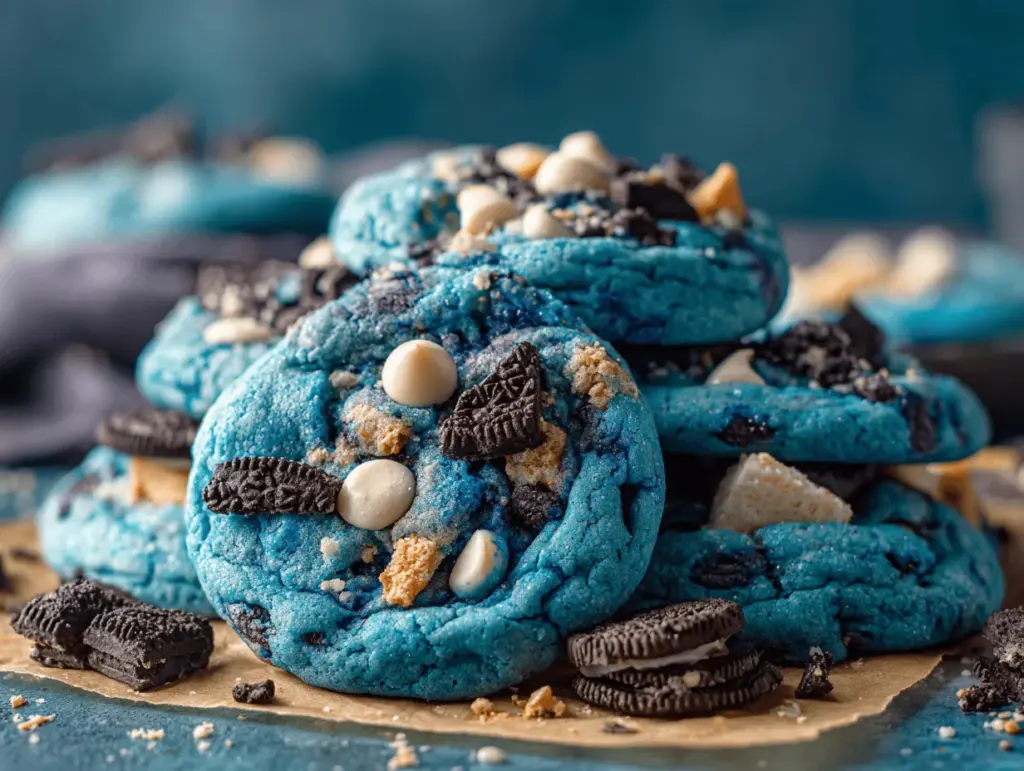
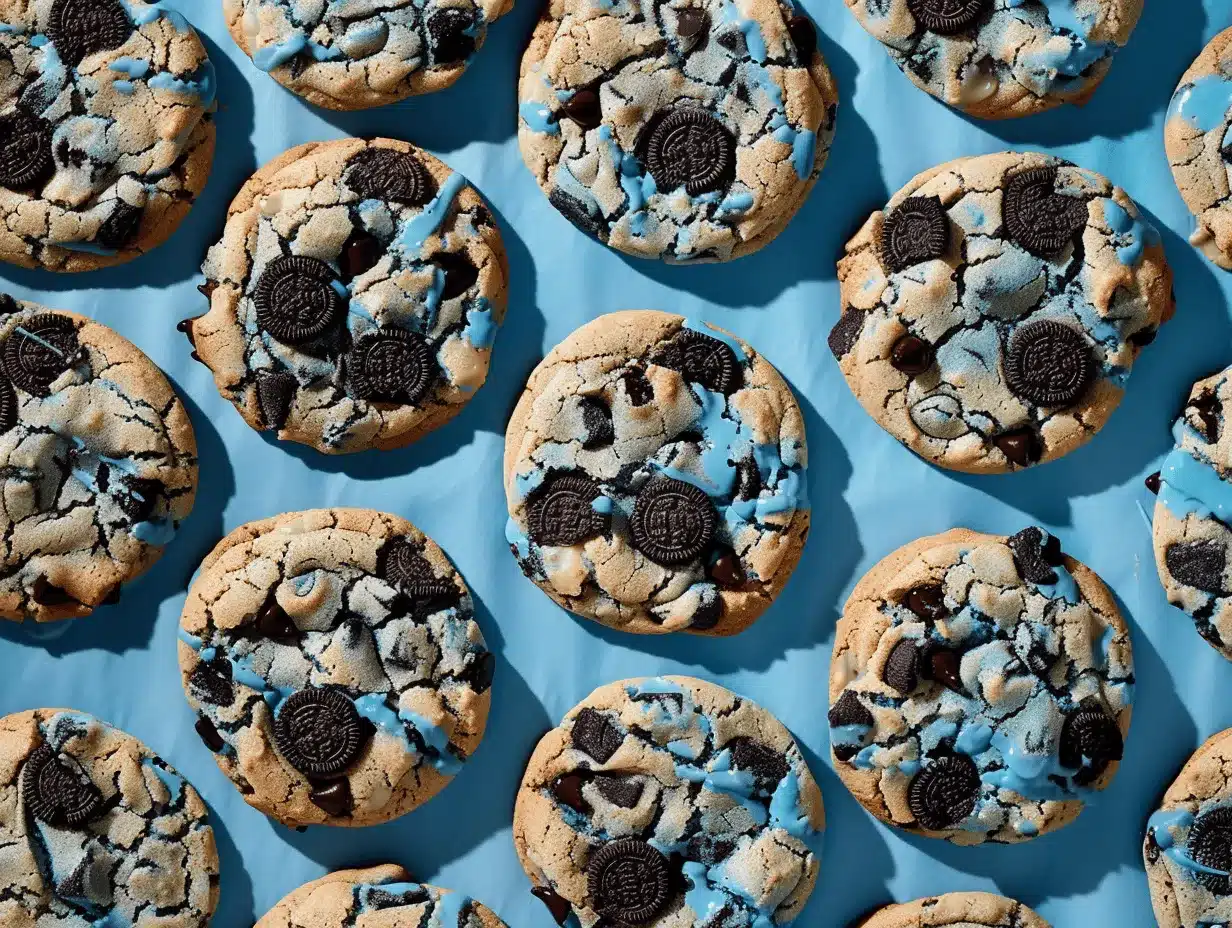
Crunchy edges, gooey middles, and big bursts of chocolate—if that doesn’t get your mouth watering, I don’t know what will! My first batch of monster cookies was whipped up on a rainy Saturday when my kids begged for “something epic” to snack on. The kitchen filled with the smell of brown sugar and baking oats, and honestly, I knew we were onto something the moment the Oreos went in. Monster cookies aren’t just cookies—they’re a celebration packed with chocolate chips, peanut butter, and, yes, chunks of Oreos. It’s like every childhood craving rolled into one treat.
This monster cookies recipe is a mashup of everything I love in a homemade treat: chewy oats, peanut butter for richness, and a glorious mix of chocolate candies and Oreo pieces. It’s the kind of cookie that’s impossible to eat quietly (trust me, the crunch will give you away). I’ve tweaked and tested this recipe so many times—sometimes swapping in different candies or adjusting the peanut butter just to see what happens. If you need an easy homemade dessert for a party or a last-minute sweet fix, you’ll want this recipe in your back pocket.
Whether you’re baking with kids, prepping for a bake sale, or just going all out for your own snack stash, these monster cookies fit the bill. They’re naturally gluten-free (thanks to the oats), loaded with chocolate, and honestly, pretty forgiving if you swap in a few fun extras. I love how the Oreos add a surprise crunch, making every bite a new adventure. If you’ve ever wondered how to turn a simple cookie into a showstopper, this monster cookies recipe is the answer. I’ll share all my tips and stories along the way—because, let’s face it, cookies should be fun!
Why You’ll Love This Recipe
- Quick & Easy: You can whip these up in under 30 minutes, so they’re perfect for spontaneous cravings or unexpected guests.
- Simple Ingredients: Most of these you probably have at home already—oats, peanut butter, eggs, sugar, chocolate chips, and Oreos. No elaborate shopping needed!
- Perfect for Any Occasion: These cookies are a hit at birthday parties, potlucks, school events, or cozy nights in. I even bring them to neighbors when I need to say “thank you.”
- Crowd-Pleaser: Kids love them for the bright candy pieces and Oreos; adults adore the chewy texture and rich flavor. They disappear fast!
- Unbelievably Delicious: The combo of chocolate, peanut butter, and Oreos is pure comfort food—each bite is a little surprise.
What makes my monster cookies recipe stand out? I always blend half the oats to give the cookies a softer, more tender texture (learned that trick after a few crumbly batches). I also use both chocolate chips and M&M’s for a double dose of chocolate, plus chopped Oreos for crunch. It’s not just another cookie—it’s a mashup that feels a little bit magical. You know those cookies that make you close your eyes for a second and just savor? Yup, that’s these.
This recipe is all about joy—big flavors, bold textures, and a little bit of chaos in every bite. No need to fuss with chilling the dough or fancy techniques. You can roll them by hand, bake them right away, and enjoy the gooey, chocolatey results. If you want a dessert that’s totally reliable, endlessly adaptable, and just plain fun, these monster cookies will win you over. I bake them whenever I need a pick-me-up or want to impress my friends with something outrageously good.
What Ingredients You Will Need
This monster cookies recipe is built on classic, easy-to-find ingredients that come together for big flavor and texture. It’s honestly a “dump and stir” kind of recipe—my favorite for when you want homemade cookies fast!
- Old-fashioned rolled oats (2 cups / 200g) – Gives the cookies their chewy base. Quick oats work, but I prefer rolled for more texture.
- All-natural creamy peanut butter (1 cup / 240g) – Adds richness and helps bind the dough. I use Jif or Skippy; natural peanut butter can sometimes make the cookies too crumbly.
- Unsalted butter, softened (1/2 cup / 115g) – For flavor and tenderness. If using salted, reduce the added salt a little.
- Brown sugar (3/4 cup / 150g) – For deep, caramel flavor.
- Granulated sugar (1/4 cup / 50g) – Balances the brown sugar and gives a touch of crunch.
- Large eggs (2) – Room temperature works best for even mixing.
- Vanilla extract (2 tsp / 10ml) – For that bakery-style aroma. I always use pure vanilla.
- Baking soda (1 tsp / 5g) – Helps the cookies rise and stay soft.
- Salt (1/2 tsp / 3g) – Balances all the sweetness.
- Semi-sweet chocolate chips (1/2 cup / 90g) – You can use milk chocolate if you want sweeter cookies.
- M&M’s or chocolate candies (1/2 cup / 90g) – For pops of color and extra chocolate.
- Oreo cookies, roughly chopped (8 cookies) – Break them into chunky pieces, not crumbs. Double-stuf or regular both work!
Optional add-ins and substitutions:
- Swap peanut butter for almond butter for a nutty twist.
- Use gluten-free oats if you want a gluten-free cookie (Oreos are not gluten-free, so use GF sandwich cookies).
- Add 1/2 cup chopped pecans or walnuts for more crunch.
- Replace M&M’s with Reese’s pieces for a peanut butter overload.
- Try golden Oreos or mint Oreos for a fun flavor twist—my kids love the mint version in summer!
I’ve used store-brand oats and peanut butter with good results, but splurging on quality chocolate chips makes a noticeable difference. If you want a dairy-free version, swap butter for coconut oil and use dark chocolate chips. This monster cookies recipe is flexible, so don’t stress if you need to make a few swaps!
Equipment Needed
- Large mixing bowl – For combining all the ingredients. Stainless steel or glass works best.
- Electric hand mixer or stand mixer – Makes creaming the butter and sugars easy, but you can use a sturdy spoon and some elbow grease if needed.
- Rubber spatula – For scraping down the sides and folding in the mix-ins. A wooden spoon works too.
- Baking sheets – Heavy-duty sheets help the cookies bake evenly. I like rimmed sheets for safety.
- Parchment paper or silicone baking mats – Prevent sticking and make cleanup a breeze.
- Cookie scoop or ice cream scoop – For uniform cookies. You can also use two spoons if you don’t have a scoop.
- Wire cooling rack – Helps the cookies cool quickly and stay crisp on the edges.
If you’re short on specialty equipment, don’t worry. I’ve shaped these cookies by hand and baked them right on greased sheets—just keep a close eye so they don’t stick. My old hand mixer has survived hundreds of batches, but a dough whisk is a good budget-friendly option for mixing thicker dough. Pro tip: keep your parchment sheets and silicone mats clean by wiping them down immediately after use so you don’t get lingering cookie crumbs (I learned this the hard way after a burnt batch!).
Preparation Method
- Preheat your oven to 350°F (175°C). Line two baking sheets with parchment paper or silicone mats. This keeps the cookies from sticking and makes cleanup easier.
- Blend half the oats (optional but recommended). Place 1 cup (100g) of oats in a food processor and pulse until finely ground. This helps create a tender, chewy cookie (I started doing this after several batches came out too crumbly).
- Cream the butter, peanut butter, and sugars. In a large mixing bowl, beat 1/2 cup (115g) softened butter, 1 cup (240g) peanut butter, 3/4 cup (150g) brown sugar, and 1/4 cup (50g) granulated sugar until light and fluffy—about 2 minutes on medium speed. The mixture should look pale and smooth.
- Add eggs and vanilla. Beat in 2 large eggs and 2 teaspoons (10ml) vanilla extract until well combined. Scrape down the sides of the bowl to make sure everything is mixed in evenly.
- Mix dry ingredients. In a separate bowl, whisk together the blended oats, remaining whole oats, 1 teaspoon (5g) baking soda, and 1/2 teaspoon (3g) salt. If you skipped blending, just mix all the oats together.
- Combine wet and dry ingredients. Gradually add the dry mixture to the wet ingredients, mixing on low speed until just incorporated. Don’t overmix—stop as soon as you don’t see dry streaks.
- Fold in the mix-ins. Using a spatula, gently fold in 1/2 cup (90g) semi-sweet chocolate chips, 1/2 cup (90g) M&M’s, and 8 chopped Oreo cookies. Aim for even distribution so every cookie gets some goodies.
- Shape the cookies. Scoop out dough in heaping tablespoons (or use a medium cookie scoop, about 2 tablespoons per cookie) and place them on the prepared sheets, spacing about 2 inches apart. The dough will be thick but sticky—if it’s too soft, chill for 10 minutes before scooping.
- Bake. Bake for 10-12 minutes, until the edges are golden and the centers look just set but still soft. The cookies will puff up, then settle as they cool.
- Cool. Let cookies cool on the baking sheet for 5 minutes, then transfer to a wire rack to cool completely. They’ll firm up as they cool—don’t panic if they look a little underdone straight from the oven!
Troubleshooting: If your cookies spread too much, check that your butter wasn’t melted (just softened). If they’re dry, measure your oats carefully; too much will make them crumbly. Monster cookies are forgiving, but watch the baking time—overbaking can dry them out.
Personal tip: I always add a few extra chocolate chips and Oreo pieces on top of each cookie before baking for that “bakery look.” It’s a little trick I picked up after my first batch looked too plain for Instagram!
Cooking Tips & Techniques
Baking monster cookies is mostly straightforward, but here are some real-life lessons from my cookie adventures:
- Room temperature ingredients blend better and create a more uniform dough. Cold eggs can make the butter seize up.
- Don’t overmix! Once you add the oats and mix-ins, stir gently. Overworked dough leads to tough cookies.
- Chill the dough for 10 minutes if it’s very soft or warm in your kitchen. This helps keep the cookies thick and chewy.
- Use a cookie scoop for even sizes—makes baking more predictable and cookies look professional.
- Watch for golden edges and slightly soft centers. The cookies will finish setting as they cool, so avoid waiting for them to look “done” in the oven.
Common mistakes? I’ve burned a few batches by forgetting to set a timer (the smell is a dead giveaway). Too much flour or oats can make them dry—always spoon and level your measurements. One time, I tried using chunky peanut butter, and the cookies fell apart. Stick with creamy unless you love a crumbly texture.
If baking multiple sheets, rotate them halfway through for even browning. I sometimes bake one tray at a time to prevent uneven baking—especially when I want picture-perfect cookies for sharing online. For extra gooey cookies, pull them out at the minimum time and let them finish on the tray. If you like crispier edges, add a minute or two, but watch closely!
Monster cookies are meant to be a little wild, so don’t stress the details. The more you bake them, the more you’ll find your “perfect” method. I always save a few M&M’s to press on top after baking for color—makes them look extra inviting!
Variations & Adaptations
One of my favorite things about monster cookies is how easy they are to customize. Here are some fun ideas to switch things up:
- Gluten-free: Use certified gluten-free oats and swap Oreos for a gluten-free sandwich cookie. The rest of the ingredients are naturally gluten-free!
- Nut-free: Replace peanut butter with sunbutter or wowbutter. Skip the nuts and use more chocolate candies.
- Seasonal twists: Stir in chopped peppermint candies for the holidays, caramel bits for fall, or pastel M&M’s for spring events.
- Flavor swaps: Try golden Oreos or mint Oreos. Add a dash of cinnamon for warmth or coconut flakes for a tropical vibe.
- Chunky style: Double the mix-ins—add extra chocolate chips, pecans, or even mini marshmallows for a s’mores version.
I’ve made a batch with butterscotch chips and pretzel pieces—honestly, that salty-sweet combo is wild! You can bake these as bars in a 9×13-inch pan—just spread the dough, bake for 20-25 minutes, and cut into squares. If you want to experiment with baking methods, monster cookies hold up well to air fryer baking (at 320°F for 7-9 minutes). Don’t be afraid to let your creativity run wild—this recipe is all about fun and flavor.
Serving & Storage Suggestions
Monster cookies are best served just slightly warm, when the chocolate is melty and the Oreos are extra crunchy. I like to stack them on a big plate with a glass of cold milk nearby—it’s classic comfort. For parties, arrange them in a colorful basket or on a tiered stand for that wow factor.
- Serve with: Ice cream (vanilla or cookies & cream), hot cocoa, or coffee. They pair well with fresh fruit, too!
- Storage: Keep in an airtight container at room temperature for up to 5 days. If you want to keep them longer, freeze in layers (separated by parchment) for up to 3 months.
- Reheating: To revive that warm, gooey center, microwave cookies for 10-15 seconds. If reheating from frozen, let them thaw at room temperature first.
- Flavor notes: The cookies get softer and more flavorful after a day or two, as the mix-ins meld with the dough. Sometimes I think they taste even better on day two!
If you like your cookies super soft, store with a slice of bread in the container—it keeps them moist. For crispier edges, leave the lid slightly ajar. Monster cookies are perfect for gifting, too—just wrap in cellophane and tie with ribbon for a Pinterest-worthy treat!
Nutritional Information & Benefits
Here’s a quick look at what you’re getting in each monster cookie (based on a batch making about 24 cookies):
| Calories | ~180 per cookie |
|---|---|
| Protein | ~3g per cookie (thanks to oats and peanut butter) |
| Fat | ~9g per cookie |
| Carbohydrates | ~22g per cookie |
The oats provide fiber and slow-release energy, while peanut butter adds protein and healthy fats. Chocolate and Oreos are more about fun than nutrition, but hey, balance is key! If you use nut-free or gluten-free swaps, the nutritional profile changes a bit but stays similar.
Potential allergens include peanuts, dairy (butter and chocolate), eggs, and wheat (Oreos). Always check labels if you’re baking for someone with allergies. I love that these cookies have a bit more substance than typical sugar cookies—great for a satisfying snack, and you can tweak mix-ins to suit your own wellness goals.
Conclusion
If you’re after the ultimate homemade treat, this monster cookies recipe is the one to try. It’s easy, fun, and packed with chocolate and Oreos—every bite is a little party. Don’t hesitate to add your own twist or switch up the mix-ins. There’s no “wrong” way to bake these! I keep coming back to this recipe because it never fails to make people smile (and, let’s be real, it’s my favorite midnight snack).
Go ahead and bake a batch, snap a pic, and share your monster cookie creations with friends. I’d love to hear what wild combos you come up with—leave a comment or tag me on Pinterest if you try a new variation. Cookie baking should be joyful, a little messy, and totally delicious. Happy baking!
Frequently Asked Questions
Can I make monster cookies without peanut butter?
Yes! Try sunbutter or wowbutter for a nut-free version. Almond butter works too, though the flavor will be slightly different.
Can I freeze monster cookies?
Definitely. Store baked cookies in a freezer-safe container for up to 3 months. Thaw at room temperature and microwave for a few seconds to refresh.
Can I use quick oats instead of rolled oats?
You can, but rolled oats give a chewier texture. Quick oats will make the cookies a bit softer and less chunky.
How do I keep monster cookies from spreading too much?
Make sure your butter is just softened, not melted. If the dough feels sticky, chill for 10 minutes before baking.
What’s the best way to get big chunks of Oreo in every bite?
Roughly chop Oreos instead of crushing them—leave some big pieces! Press a few on top of each cookie before baking for extra crunch and visual appeal.
Pin This Recipe!

Monster Cookies Recipe – Easy Homemade Treat Packed with Chocolate & Oreos

These monster cookies are chewy, gooey, and packed with chocolate chips, M&M’s, and chunks of Oreos. With crunchy edges and soft centers, they’re a fun, crowd-pleasing treat that’s quick to make and endlessly customizable.
- Prep Time: 15 minutes
- Cook Time: 12 minutes
- Total Time: 27 minutes
- Yield: 24 cookies 1x
- Category: Dessert
- Cuisine: American
Ingredients
- 2 cups old-fashioned rolled oats (200g)
- 1 cup all-natural creamy peanut butter (240g)
- 1/2 cup unsalted butter, softened (115g)
- 3/4 cup brown sugar (150g)
- 1/4 cup granulated sugar (50g)
- 2 large eggs
- 2 teaspoons vanilla extract (10ml)
- 1 teaspoon baking soda (5g)
- 1/2 teaspoon salt (3g)
- 1/2 cup semi-sweet chocolate chips (90g)
- 1/2 cup M&M’s or chocolate candies (90g)
- 8 Oreo cookies, roughly chopped
Instructions
- Preheat your oven to 350°F (175°C). Line two baking sheets with parchment paper or silicone mats.
- Optional: Place 1 cup of the oats in a food processor and pulse until finely ground for a softer texture.
- In a large mixing bowl, beat the softened butter, peanut butter, brown sugar, and granulated sugar until light and fluffy (about 2 minutes on medium speed).
- Beat in the eggs and vanilla extract until well combined, scraping down the sides as needed.
- In a separate bowl, whisk together the blended oats, remaining whole oats, baking soda, and salt.
- Gradually add the dry mixture to the wet ingredients, mixing on low speed until just incorporated. Do not overmix.
- Fold in the chocolate chips, M&M’s, and chopped Oreo cookies with a spatula until evenly distributed.
- Scoop out dough in heaping tablespoons (about 2 tablespoons per cookie) and place on prepared sheets, spacing about 2 inches apart. If dough is too soft, chill for 10 minutes.
- Bake for 10-12 minutes, until edges are golden and centers look just set but still soft.
- Let cookies cool on the baking sheet for 5 minutes, then transfer to a wire rack to cool completely.
Notes
For best texture, blend half the oats. Press extra chocolate chips and Oreo pieces on top before baking for a bakery look. Chill dough for 10 minutes if too soft. Use gluten-free oats and sandwich cookies for a gluten-free version. Store in an airtight container for up to 5 days or freeze for up to 3 months.
Nutrition
- Serving Size: 1 cookie
- Calories: 180
- Sugar: 13
- Sodium: 90
- Fat: 9
- Saturated Fat: 3
- Carbohydrates: 22
- Fiber: 1
- Protein: 3
Keywords: monster cookies, chocolate, Oreos, peanut butter, oatmeal cookies, easy dessert, kids, party, bake sale, chewy cookies, gluten-free option


