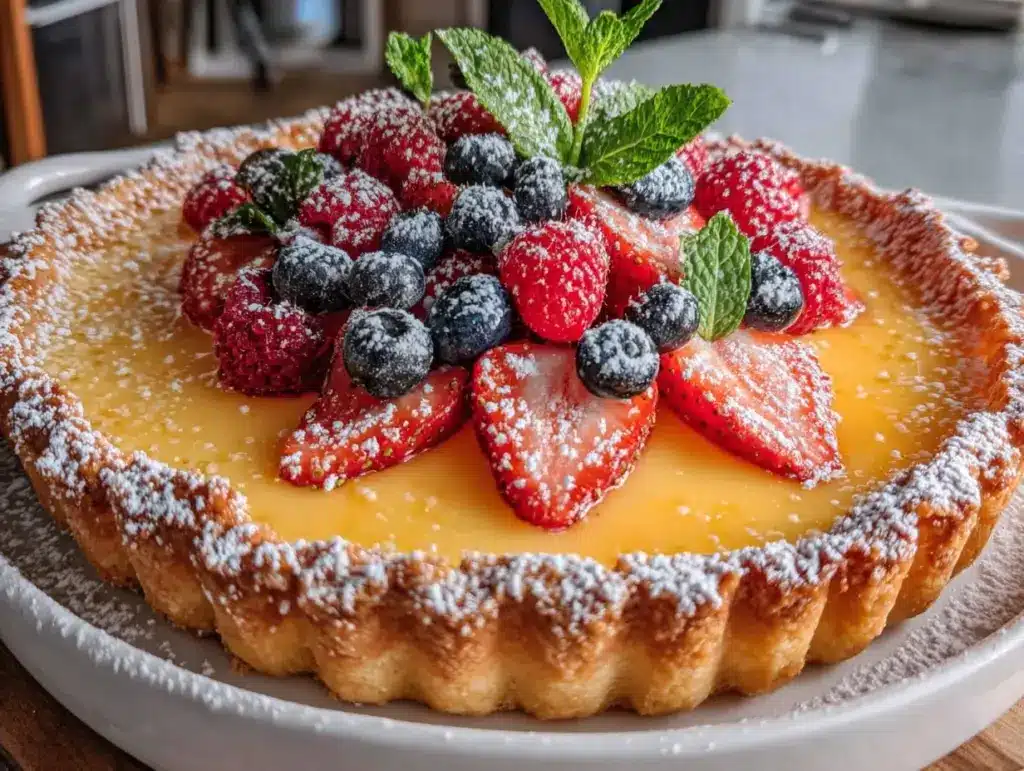
Let me set the scene: the scent of zesty lemons and sweet butter mixing together as the tart crust bakes in your oven, while a glossy, sunshine-yellow lemon curd bubbles gently on the stovetop. If you close your eyes for a second, you might just feel like you’re standing in a French patisserie (or at least, that’s how it felt to me the first time I tried this Lemon Curd Tart with Berries). The first time I sliced into this beauty and took a forkful—bright, tangy curd, crisp golden crust, and a pile of glossy berries—I had to pause and just savor it. It’s the kind of moment where you pause, take a deep breath, and just smile because you know you’re onto something truly special.
Honestly, this tart recipe came into my life on a rainy weekend years ago when I was knee-high to a grasshopper. My grandma used to make a version with whatever fruit was in season, but the lemon curd filling was always the showstopper. I stumbled onto my own version after a bake sale flop (let’s just say, meringue and humidity do not mix), and wow—what a game changer. I wish I’d discovered how easy and forgiving this tart is much earlier!
My family can’t leave this Lemon Curd Tart alone. You know what I mean—those little “just evening out the edges” slices that somehow add up to half the tart missing by breakfast. It’s pure, nostalgic comfort and, let’s face it, dangerously easy to whip up. This tart is a showstopper for brunches, perfect for potlucks, and seriously brightens up your Pinterest board. I’ve tested this recipe more times than I care to admit (in the name of research, of course), and it’s become a staple for family gatherings, gifting, and those days when you need a little sunshine on your plate. It feels like a warm hug and, honestly, you’re going to want to bookmark this one.
Why You’ll Love This Lemon Curd Tart Recipe
Over the years, I’ve baked more tarts than I can count, and this Lemon Curd Tart with Berries stands out every single time. Here’s why this recipe is a keeper (and why everyone who tries it comes back for seconds):
- Quick & Easy: You can have this show-stopping dessert ready in about an hour. Perfect for those last-minute dinner parties or when you need a sweet fix fast.
- Simple Ingredients: Nothing fancy here—just everyday pantry and fridge staples. You probably have most of what you need right now.
- Perfect for Any Occasion: Whether it’s Easter brunch, a summer picnic, or a cozy holiday dinner, this tart fits right in and always wows the crowd.
- Crowd-Pleaser: Kids go nuts for the bright, sweet-tart filling, and adults appreciate the not-too-sweet, tangy profile. It’s universally loved.
- Unbelievably Delicious: The contrast of crisp crust, silky lemon curd, and juicy berries is the ultimate comfort food combo. You know those desserts that make you close your eyes and sigh with happiness? This is one of them.
What really makes this lemon curd tart different is how approachable it is. I blend the lemon curd for extra silkiness (no grainy texture here!), and the crust is forgiving—no fancy tart rings or pastry weights needed. I’ve tried probably a dozen versions, but this one balances tang and sweetness just right. Plus, the fresh berries on top add a pop of color and flavor that makes every slice photo-worthy (hello, Pinterest goals!).
This isn’t just a good tart—it’s the kind of dessert that turns an ordinary day into something memorable. You can impress guests without breaking a sweat, and it’s just as good for a solo treat with a cup of tea. If you’re after something that’s both stunning and simple, this lemon curd tart recipe is your new go-to. Trust me, it’s a keeper for your recipe box and your Instagram feed.
What Ingredients You Will Need
This Lemon Curd Tart with Berries keeps things simple but delivers big flavor. Most of these are pantry and fridge staples, and you can easily swap a few things if needed. Here’s what you’ll need:
For the Tart Crust
- 1 1/4 cups (150g) all-purpose flour (for structure and crispness)
- 1/3 cup (40g) powdered sugar (for that tender, melt-in-your-mouth texture)
- 1/4 teaspoon salt
- 1/2 cup (115g) unsalted butter, cold and cubed (I love using Kerrygold for the best flavor, but any good quality butter works)
- 1 large egg yolk (binds the dough and adds richness)
- 1-2 tablespoons ice water (only if needed, for bringing dough together)
For the Lemon Curd Filling
- 3 large eggs, room temperature
- 3/4 cup (150g) granulated sugar (for sweetness and stability)
- 2/3 cup (160ml) fresh lemon juice (about 3-4 lemons, plus zest)
- 2 tablespoons lemon zest (for big lemon flavor—Meyer lemons are great if you find them!)
- 6 tablespoons (85g) unsalted butter, cut into cubes
- Pinch of salt (balances the tartness)
For the Berry Topping
- 1 cup (150g) fresh berries (blueberries, raspberries, strawberries—whatever’s in season or on sale)
- 1 tablespoon apricot jam or honey, warmed (for a glossy finish; optional but gorgeous!)
- Mint leaves for garnish (optional, but adds a fresh pop)
Substitution Tips
- Gluten-free? Swap the all-purpose flour for a 1:1 gluten-free blend.
- Dairy-free? Use a vegan butter for both crust and curd—Earth Balance works well.
- No fresh lemons? Bottled lemon juice is okay in a pinch, but fresh gives the best zing.
- Other fruit? Try thin slices of kiwi, mango, or even a layer of pomegranate seeds for a twist.
All of these ingredients come together to make a lemon curd tart that’s not only easy but absolutely stunning. Feel free to play around with what you have—baking is supposed to be fun, and this recipe is pretty forgiving!
Equipment Needed
You don’t need a bakery full of gadgets to make this Lemon Curd Tart with Berries. Here’s what I use (and a few swaps if you’re working with a smaller kitchen):
- 9-inch (23cm) tart pan with removable bottom: This makes removing the tart so easy, but you can use a regular pie pan if needed. Just grease it well and serve straight from the dish.
- Mixing bowls: At least two—one for the crust, one for the curd.
- Whisk: For combining the curd ingredients and getting everything nice and smooth.
- Medium saucepan: For cooking the lemon curd. A heavy-bottomed pan prevents scorching.
- Fine mesh sieve: For straining the curd (nobody likes lemon seeds or lumps!).
- Measuring cups & spoons: Accuracy matters, especially for the curd.
- Rolling pin: To roll out the crust. If you don’t have one, a wine bottle works in a pinch (ask me how I know!).
- Plastic wrap: For chilling the dough.
- Fork or pastry cutter: For working the butter into the flour—your hands work too, just move quickly!
If you’re just starting out, don’t stress about specialty pans. I’ve made this tart in a basic pie dish, and it still looked (and tasted) fantastic. Just be sure to let the tart cool completely before slicing for the neatest pieces. A quick tip: wash your sieve right after straining the curd, or you’ll be scrubbing for days!
How to Make Lemon Curd Tart with Berries
-
Make the Tart Crust: In a medium bowl, whisk together 1 1/4 cups (150g) all-purpose flour, 1/3 cup (40g) powdered sugar, and 1/4 teaspoon salt. Add 1/2 cup (115g) cold, cubed butter, and cut it in with a pastry cutter or your fingers until the mixture looks like coarse crumbs (pea-sized bits are good). Stir in 1 egg yolk. If the dough seems dry, add ice water a teaspoon at a time until it holds together when pressed.
Time: about 10 minutes. -
Chill the Dough: Press the dough into a flat disc, wrap in plastic, and chill for 30 minutes. This keeps the crust nice and flaky (don’t skip this step—trust me, I’ve tried!).
Time: 30 minutes. -
Roll & Blind Bake: Roll out the dough on a lightly floured surface to about 1/8-inch (3mm) thick. Fit into your 9-inch (23cm) tart pan, pressing into the edges. Prick the bottom with a fork, cover with parchment, and fill with pie weights or dried beans. Bake at 375°F (190°C) for 15 minutes, then remove weights and bake 10 more minutes, or until golden.
Time: 25 minutes.
Tip: If the edges are browning too quickly, cover with foil strips. -
Make the Lemon Curd: In a saucepan, whisk together 3 eggs, 3/4 cup (150g) sugar, 2/3 cup (160ml) lemon juice, 2 tablespoons zest, and a pinch of salt. Cook over medium-low heat, whisking constantly, until the mixture thickens and coats the back of a spoon (about 8–10 minutes). Remove from heat and whisk in 6 tablespoons (85g) butter, a few cubes at a time, until smooth and glossy.
Sensory cue: The curd should be thick enough to leave a clear line if you run your finger through it on a spoon. - Strain & Cool Curd: Pour the curd through a fine mesh sieve into a bowl. This step catches any cooked egg bits or zest (I always do this for the silkiest texture). Let cool for about 10 minutes, stirring occasionally.
- Fill & Chill: Pour the slightly cooled curd into the baked crust. Smooth the top with a spatula. Chill in the fridge for at least 2 hours to set—overnight is even better for the flavors to mingle.
- Add the Berries: Just before serving, pile on 1 cup (150g) fresh berries. Warm 1 tablespoon apricot jam or honey and brush gently over the fruit for a glossy finish (completely optional but makes it picture-perfect).
- Slice & Serve: Run a sharp knife under hot water, dry, and slice the tart for clean pieces. Garnish with mint leaves if you like.
Troubleshooting: If your crust shrinks, make sure it’s chilled well and don’t overwork the dough. If the curd won’t thicken, keep whisking—sometimes it just needs another minute or two. If you see a few lumps, just strain them out.
Efficiency tip: Make the crust a day ahead and store in the fridge. The curd can also be made ahead—just assemble and top with berries before serving for max freshness.
Cooking Tips & Techniques
I’ve made this Lemon Curd Tart recipe easy enough for beginners, but a few pro tips never hurt:
- Keep Everything Cold: For the flakiest crust, use chilled butter and don’t skip the dough rest in the fridge. Warm dough = tough crust. I learned that the hard way after one too many crumbly disasters!
- Whisk, Whisk, Whisk: For the curd, constant motion is your friend. If you step away, even for a second, you might get scrambled eggs instead of silky curd (yep, been there).
- Smooth Finish: Always strain your curd. It takes an extra minute, but the texture is worth it—no bits, just pure silk.
- Pie Weights: Don’t have official pie weights? Use dried beans or rice. Just remember, don’t cook the beans afterward (they’re for baking only now).
- Perfect Slices: Wipe your knife between cuts for clean, Instagram-worthy pieces.
Common mistakes? Rushing the chill time means runny curd and a messy tart. Not chilling the crust leads to shrinkage (and disappointment). And I’ll admit, I once forgot the sugar in the curd—super tart, but not in a good way. Taste as you go, and adjust the sweetness if your lemons are super sour.
If you’re multitasking, make the curd while the crust bakes. That way, everything comes together almost at once. And don’t forget—a tart pan with a removable bottom makes life much simpler, but you can always improvise.
Variations & Adaptations
One of the best things about this lemon curd tart recipe is how flexible it is. Here are a few fun twists I’ve tried (and loved):
- Gluten-Free: Swap the all-purpose flour for a 1:1 gluten-free blend. No one will notice a difference, promise.
- Dairy-Free: Use vegan butter for both the crust and the curd. The results are still rich and flavorful.
- Fruit Swaps: Top with whatever’s in season—think sliced peaches in summer, pomegranate seeds in winter, or even thinly sliced kiwi for a tropical vibe.
- Mini Tarts: Press the dough into muffin tins for individual tarts—perfect for parties or portion control (though I usually eat two!).
- Chocolate Drizzle: Melt a little dark chocolate and drizzle over the berries for an extra indulgent touch.
- Lime or Orange Curd: Swap lemon juice for lime or orange for a different citrus flavor. Blood orange is especially gorgeous and Instagram-worthy.
- Nutty Crust: Replace 1/4 cup of flour with ground almonds or hazelnuts for a toasty flavor.
When my sister went dairy-free, I made the whole tart with vegan butter and almond flour in the crust—she said it was her favorite dessert all year. Don’t be afraid to play; the tart is your canvas!
Serving & Storage Suggestions
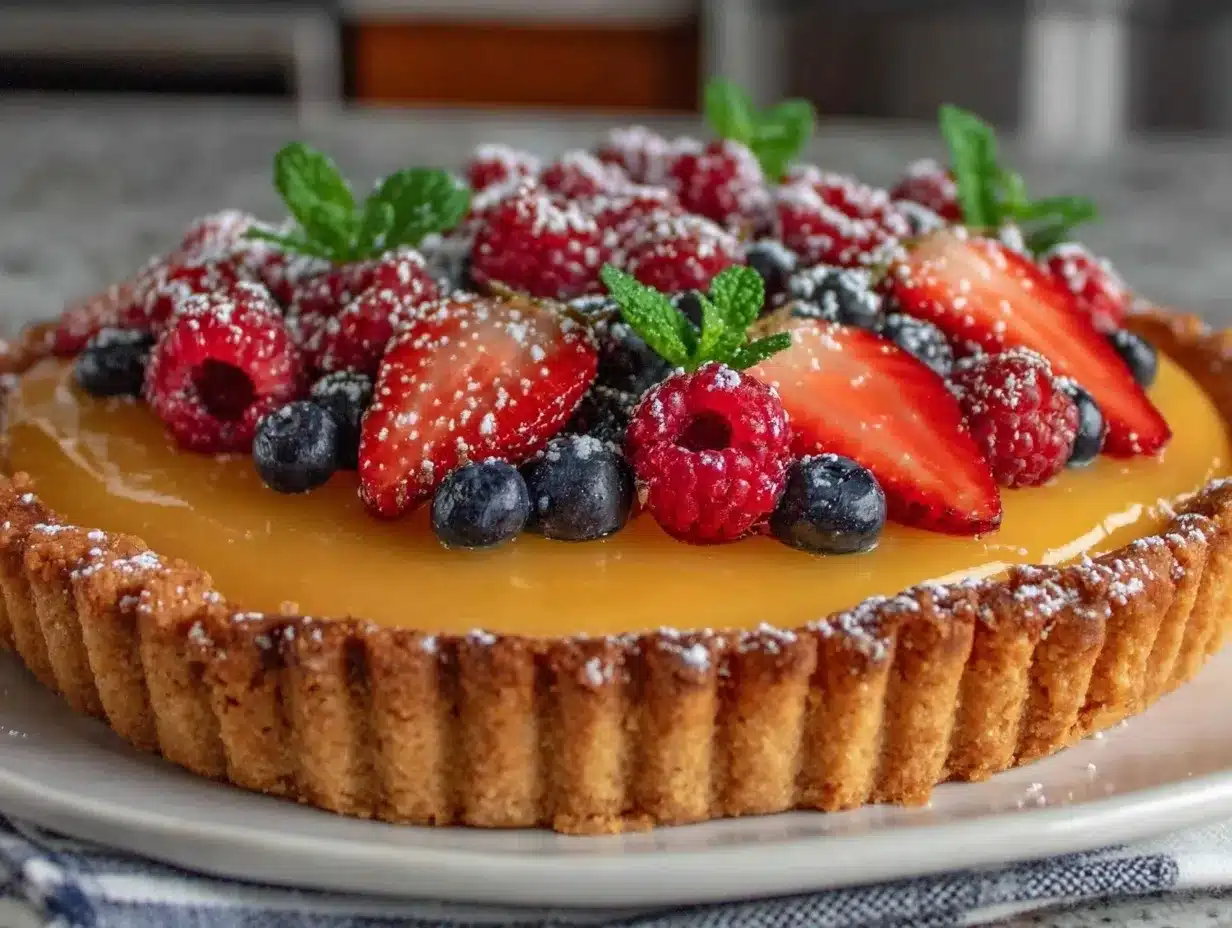
For max flavor, serve this Lemon Curd Tart chilled but not icy cold—let it sit at room temp for about 20 minutes before slicing. Arrange the berries in whatever pattern you like (I’m partial to the messy, piled-high look). A sprinkle of powdered sugar or a sprig of mint adds a “fancy” touch with zero effort.
This tart pairs perfectly with a mug of Earl Grey tea, a glass of sparkling wine, or even a scoop of vanilla ice cream if you’re feeling extra. For a brunch spread, it sits beautifully next to savory quiches or a fresh fruit salad.
Leftovers (if you have any!) keep covered in the fridge for up to 3 days. The crust stays crisp, and the curd actually gets more flavorful overnight. I don’t recommend freezing, as the fresh berries can turn mushy. To re-serve, just let the tart warm up for a few minutes so the filling is perfectly creamy again.
If you want to prep ahead, bake the crust and make the curd a day in advance. Store separately and assemble with berries right before your guests arrive. It’s a lifesaver for entertaining!
Nutritional Information & Benefits
Each slice (assuming 8 servings) comes in around 320 calories, with about 18g fat, 35g carbs, and 4g protein. The lemon curd packs in vitamin C, thanks to all that fresh juice and zest, while the berries bring a hit of antioxidants and fiber.
This tart is naturally nut-free (unless you adapt the crust) and can be made gluten-free or dairy-free with the swaps above. If you have egg allergies, you’ll want to skip the curd or substitute with a vegan lemon filling. I like knowing that, while this is a treat, it’s full of real ingredients—nothing artificial, just old-fashioned flavor and a little sunshine in every bite.
From a wellness angle, I find that making desserts from scratch lets me control the sugar and portion size. Plus, eating fresh berries always makes me feel a little extra fancy and healthy—even if it’s on top of a luscious lemon tart!
Conclusion
There’s a reason this Lemon Curd Tart with Berries has become a staple in my kitchen. It’s easy, impressive, and never fails to make people smile—whether I’m serving it for brunch, packing it for a picnic, or just sneaking a slice with my morning coffee. The combination of zesty lemon curd, crisp crust, and fresh berries is, honestly, tough to beat.
Don’t be afraid to make it your own—swap the fruit, change the crust, or add a sprinkle of toasted coconut if that’s your thing. That’s the joy of baking at home. If you try this recipe, let me know how it goes! Drop a comment below, share your photos, or tell me what twist you gave it. Recipes like this are made to be shared, and I can’t wait to see your creations.
Here’s to more stunning, easy desserts that make every day a little brighter. Happy baking, friends!
FAQs
Can I make the lemon curd ahead of time?
Absolutely! The curd can be made up to 3 days in advance. Store it in the fridge with plastic wrap pressed directly on the surface to prevent a skin from forming. Just fill your tart shell when you’re ready to assemble.
What if I don’t have a tart pan?
No worries! You can use a 9-inch pie dish instead. The edges won’t be as crisp, but it’ll still taste amazing and slice beautifully. Just grease the dish well.
Can I use bottled lemon juice?
You can, but fresh lemons give the best flavor and brightness. If you use bottled juice, add a little extra zest for that fresh taste.
How do I keep my crust from shrinking?
Make sure your dough is very cold before baking and don’t overwork it. Chilling is key! Also, pressing the dough firmly into the pan helps prevent slumping.
Can I freeze the tart?
The crust can be baked and frozen, but assembled tarts with berries don’t freeze well (the fruit gets mushy). For best results, enjoy within a few days of making.
Pin This Recipe!

Lemon Curd Tart with Fresh Berries

This easy, stunning dessert features a crisp tart crust filled with silky, tangy lemon curd and topped with fresh berries. Perfect for brunches, potlucks, or any occasion that calls for a showstopper treat.
- Prep Time: 20 minutes
- Cook Time: 45 minutes
- Total Time: 2 hours 15 minutes
- Yield: 8 servings 1x
- Category: Dessert
- Cuisine: French
Ingredients
- 1 1/4 cups all-purpose flour
- 1/3 cup powdered sugar
- 1/4 teaspoon salt
- 1/2 cup unsalted butter, cold and cubed
- 1 large egg yolk
- 1–2 tablespoons ice water (if needed)
- 3 large eggs, room temperature
- 3/4 cup granulated sugar
- 2/3 cup fresh lemon juice (about 3–4 lemons)
- 2 tablespoons lemon zest
- 6 tablespoons unsalted butter, cut into cubes
- Pinch of salt
- 1 cup fresh berries (blueberries, raspberries, strawberries, etc.)
- 1 tablespoon apricot jam or honey, warmed (optional)
- Mint leaves for garnish (optional)
Instructions
- In a medium bowl, whisk together flour, powdered sugar, and salt. Add cold, cubed butter and cut in with a pastry cutter or fingers until mixture resembles coarse crumbs.
- Stir in egg yolk. If dough is dry, add ice water a teaspoon at a time until it holds together.
- Press dough into a flat disc, wrap in plastic, and chill for 30 minutes.
- Roll out dough on a lightly floured surface to 1/8-inch thick. Fit into a 9-inch tart pan, press into edges, prick bottom with a fork, cover with parchment, and fill with pie weights or dried beans.
- Bake at 375°F for 15 minutes. Remove weights and bake 10 more minutes, or until golden.
- In a saucepan, whisk together eggs, sugar, lemon juice, zest, and a pinch of salt. Cook over medium-low heat, whisking constantly, until thickened (8–10 minutes).
- Remove from heat and whisk in butter, a few cubes at a time, until smooth and glossy.
- Strain curd through a fine mesh sieve into a bowl. Let cool for 10 minutes, stirring occasionally.
- Pour cooled curd into baked crust. Smooth top and chill in fridge for at least 2 hours (overnight is best).
- Just before serving, top with fresh berries. Brush with warmed apricot jam or honey for a glossy finish, if desired.
- Slice with a sharp knife (wiped clean between cuts) and garnish with mint leaves.
Notes
For best results, chill the dough and curd thoroughly. Strain the curd for a silky texture. Make the crust and curd ahead for easy assembly. Use any berries or fruit in season. Gluten-free and dairy-free adaptations work well. Wipe knife between slices for clean cuts.
Nutrition
- Serving Size: 1 slice (1/8 of tart
- Calories: 320
- Sugar: 22
- Sodium: 120
- Fat: 18
- Saturated Fat: 11
- Carbohydrates: 35
- Fiber: 2
- Protein: 4
Keywords: lemon curd tart, easy dessert, fresh berries, brunch, French tart, lemon dessert, spring dessert, summer dessert, potluck, baking, tart recipe


