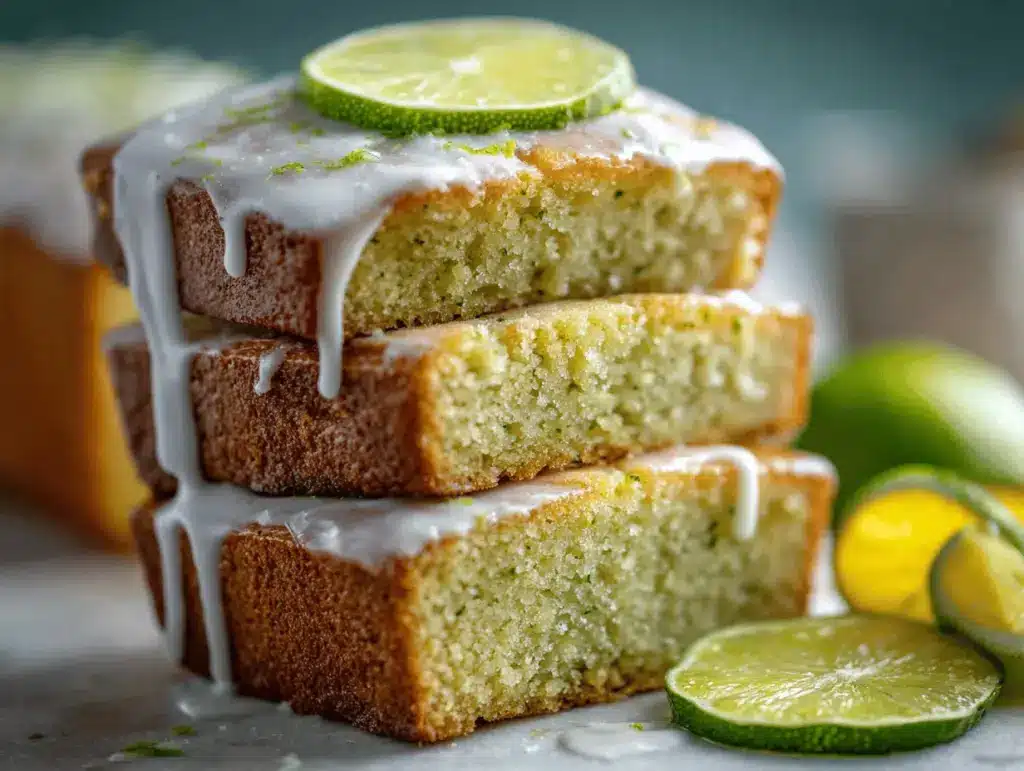
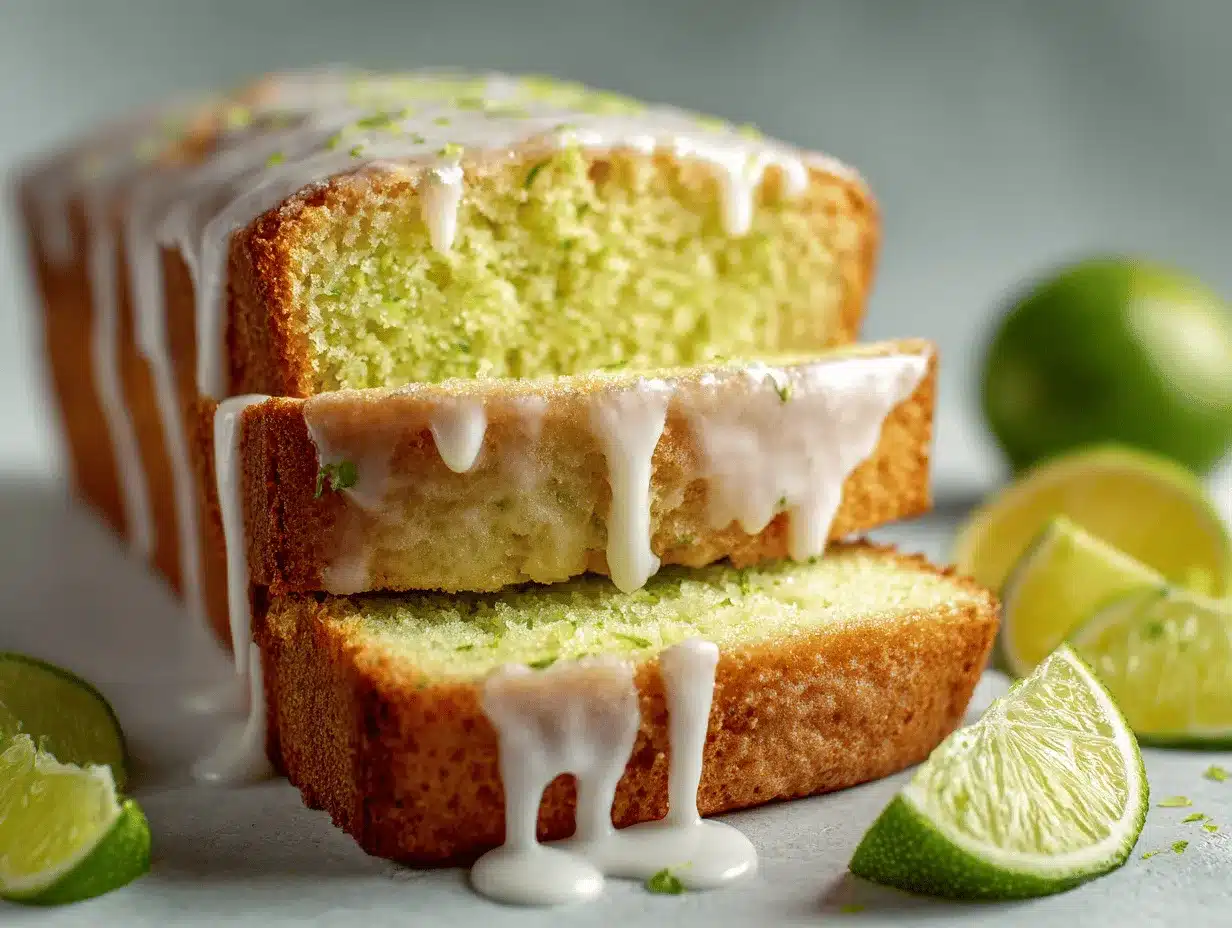
That first bite of key lime pound cake—tart, sweet, and so, so tender—always reminds me of sunshine and summer celebrations. I still remember the first time I made this cake: my kitchen was filled with the zingy scent of fresh key limes, and I was honestly just hoping it would taste half as good as it smelled. Spoiler alert: it was even better. The combination of real key lime juice, zest, and a buttery, ultra-moist crumb made this recipe an instant family favorite.
I grew up with lemon pound cake at every family gathering, but after a trip to Florida (where key limes are practically the state mascot), I just had to try making a key lime version. Let’s face it—key lime pie gets all the attention, but key lime pound cake deserves its moment in the spotlight. This cake is perfect for birthdays, brunches, backyard BBQs, or just because you want a slice of something bright and special on a Wednesday afternoon.
What makes this key lime pound cake recipe stand out? It’s all about balance: not too sweet, not too tart, and outrageously moist thanks to sour cream and just the right amount of butter. I’ve tested it more times than I can count (seriously, my freezer has been a pound cake vault), and every time, I’m floored by how simple ingredients can create something so impressive. If you’re looking for a dessert that’s easy but feels like a treat, this is the key lime pound cake recipe you’ll want to keep close. Whether you’re new to baking or a seasoned pro, this cake is pure joy in every slice.
Why You’ll Love This Recipe
- Ultra-Moist Texture: Thanks to the combo of sour cream and real butter, every bite is melt-in-your-mouth soft—no dry cake here!
- Bright, Tangy Flavor: Fresh key lime juice and zest give this pound cake a citrus punch that’s the perfect balance of sweet and tart.
- Easy to Make: You don’t need fancy tools or hard-to-find ingredients. The recipe is straightforward and foolproof—even for beginner bakers (trust me, I’ve had my share of “oops” moments, and this cake still came out great).
- Perfect for Any Occasion: Whether you’re hosting a brunch, need a showstopper for a potluck, or just want a slice with your afternoon tea, this cake fits the bill.
- Crowd-Pleaser: I’ve brought this key lime pound cake to so many gatherings, and it always disappears fast (even picky eaters come back for seconds).
- Stunning Presentation: The glaze gives it that glossy, irresistible finish—just right for sharing on Pinterest or Instagram (if you can resist eating it first).
After testing countless pound cakes, I can say this is my gold standard. The secret? Blending the zest into the sugar before mixing—it draws out the oils and makes the citrus flavor pop. Plus, the sour cream adds richness and guarantees a tender crumb, so you get that bakery-style texture without any weird preservatives. This isn’t just another “lemon” pound cake with lime swapped in; it’s purpose-built for key limes, and you can taste the difference. It’s reliable, impressive, and guaranteed to get rave reviews. Honestly, it’s the kind of cake that makes you close your eyes and savor every bite. Isn’t that what dessert should be?
What Ingredients You Will Need
This key lime pound cake recipe leans on simple, quality ingredients that come together for maximum flavor and the dreamiest texture. Most are pantry staples, and you can find fresh key limes at most grocery stores (or use bottled juice in a pinch—no judgment!). Here’s what you’ll need:
- For the Cake:
- All-purpose flour (2 3/4 cups/345g) – The base for a sturdy yet tender pound cake.
- Baking powder (1/2 tsp) – Just enough lift for a dense, moist crumb.
- Salt (1/2 tsp) – Balances sweetness and highlights the citrus notes.
- Unsalted butter, softened (1 cup/226g) – Gives rich, classic pound cake flavor. I love using Kerrygold for extra creaminess.
- Granulated sugar (2 cups/400g) – Sweetens and helps with that golden crust.
- Large eggs (4, room temperature) – Bind everything together and keep the batter rich.
- Sour cream (3/4 cup/180g) – Makes the cake extra moist. Greek yogurt can work if you’re out of sour cream.
- Key lime juice (1/4 cup/60ml) – Fresh is best for real zing, but bottled Nellie & Joe’s is a solid backup.
- Key lime zest (2 tbsp, about 6-8 key limes) – Packs a punch of citrus aroma.
- Vanilla extract (1 tsp) – Adds warmth and rounds out the flavors.
- For the Glaze:
- Powdered sugar (1 1/4 cups/150g) – For a smooth, glossy glaze.
- Key lime juice (2-3 tbsp/30-45ml) – For that tart, drizzly finish.
- Key lime zest (optional, 1 tsp) – For a little color and extra zing on top.
Ingredient notes:
- Flour: If gluten-free is your thing, swap in a 1:1 gluten-free flour blend (like Cup4Cup). It works surprisingly well.
- Sour Cream: Greek yogurt is a solid sub—just keep it full-fat for the best moisture.
- Key Limes: Persian limes can pinch-hit in a crisis; use 2 tbsp juice plus extra zest for the same citrusy kick.
- Butter: Salted butter works, too—just reduce the added salt by half.
- Vanilla: I always use real vanilla extract. The fake stuff just isn’t the same!
Pro tip: Zest the limes before juicing them—it’s nearly impossible to zest a squished lime. Learned that lesson the hard way!
Equipment Needed
- Bundt or tube pan (10-inch/25cm, nonstick preferred) – The classic shape gives you those beautiful slices and crusty edges. If you only have a loaf pan, you can divide the batter between two 9×5-inch pans (adjust baking time).
- Stand mixer or hand mixer – Creams butter and sugar until fluffy. Old-fashioned elbow grease and a sturdy whisk will work, but expect a workout!
- Microplane or fine grater – For zesting limes. Don’t use a box grater—the microplane gets all the fragrant oils.
- Citrus juicer or reamer – Not required, but makes juicing key limes a breeze. I’ve used a fork in a pinch.
- Mixing bowls – At least two: one for dry, one for wet ingredients.
- Measuring cups and spoons – Precise measurements make all the difference in pound cake.
- Rubber spatula – For scraping every last bit of batter from the bowl (and for taste tests—just saying).
- Wire rack – Essential for cooling and keeping that crust crisp.
Maintenance tip: If you use a nonstick bundt pan, avoid metal utensils and wash gently to protect the finish. I’ve had the same pan for years with this little trick. For budget-friendly gear, check thrift stores—some of my favorite cake pans are vintage finds!
Preparation Method
- Preheat your oven: Set oven to 325°F (163°C). Grease a 10-inch (25cm) bundt or tube pan generously with butter, then dust lightly with flour. Tap out excess. (This helps the cake release cleanly for that perfect look.)
- Prepare the key limes: Zest 6-8 key limes (you’ll need 2 tbsp zest). Juice them to get 1/4 cup (60ml) for the cake and 2-3 tbsp (30-45ml) for the glaze. Zest first, then juice—trust me, it’s way easier.
- Mix dry ingredients: In a medium bowl, whisk together 2 3/4 cups (345g) all-purpose flour, 1/2 tsp baking powder, and 1/2 tsp salt. Set aside.
- Cream butter, sugar, and zest: In a large mixing bowl, combine 1 cup (226g) softened unsalted butter, 2 cups (400g) granulated sugar, and the lime zest. Beat on medium-high speed (2-3 minutes) until light, fluffy, and fragrant. The sugar should look almost creamy—this makes the cake extra tender.
- Add the eggs: Add 4 large eggs, one at a time, beating well after each addition. Scrape down the sides as needed. The mixture should look smooth and slightly thickened.
- Mix in sour cream, juice, and vanilla: Add 3/4 cup (180g) sour cream, 1/4 cup (60ml) key lime juice, and 1 tsp vanilla extract. Mix on low until just combined. The batter may look a little curdled—don’t panic! It’ll smooth out once you add the flour.
- Combine wet and dry ingredients: Add the flour mixture in three parts, mixing gently and scraping the bowl after each addition. Stop as soon as the flour disappears—overmixing can make your cake tough. The batter should be thick and creamy.
- Pour and smooth: Spoon the batter into your prepared pan. Tap the pan on the counter a few times to release air bubbles and level the top.
- Bake: Bake in the center of the oven for 65-75 minutes. Start checking at 60 minutes; the cake is done when a toothpick inserted in the center comes out clean or with a few moist crumbs. The top should be golden and just pulling from the sides.
- Cool: Let the cake cool in the pan on a wire rack for 15 minutes. Run a thin knife around the edges, then carefully invert onto the rack. Cool completely before glazing (about 1 hour). If you rush this, the glaze will melt right off—I’ve made that mistake!
- Make the glaze: Whisk 1 1/4 cups (150g) powdered sugar with 2-3 tbsp (30-45ml) key lime juice until smooth and pourable. Add more juice for a thinner glaze, less for a thicker one. Drizzle over the cooled cake, letting it drip down the sides. Sprinkle with extra zest if you want to be fancy.
- Slice and serve: Let the glaze set for 10-15 minutes, then slice and enjoy! The cake is best slightly warm or at room temperature.
Troubleshooting: If the cake sticks, gently tap the pan on a towel or let it cool a bit longer. If the cake cracks on top, that’s normal for pound cake and just adds character! For even baking, rotate the pan halfway through baking if your oven has hot spots.
Personal tip: I always save a little extra glaze for drizzling on individual slices—because, why not?
Cooking Tips & Techniques
- Room temperature ingredients are key: Butter, eggs, and sour cream blend better when not cold. If you forget, set eggs in warm water for 10 minutes—it’s a quick hack I use all the time.
- Cream thoroughly: Don’t rush the butter and sugar step. The air you beat in here is what gives the cake its tender crumb.
- Don’t overmix the flour: Once you add flour, mix just until combined. Overmixing develops gluten, which is the enemy of a soft pound cake (I learned this after a few dense, sad cakes).
- Bundt pan prep matters: Grease every nook and cranny—especially with fancy pans. Use a pastry brush to get into the curves.
- Bake low and slow: Pound cakes need a lower temperature and longer bake to stay moist and rise evenly. If you bake too hot, the outside will brown before the center is done.
- Test for doneness early: Ovens vary! Check at 60 minutes. If the cake browns too quickly, tent with foil.
- Let it cool properly: Removing the cake too soon risks breakage, but waiting too long can cause sticking. I’ve found 15 minutes is the sweet spot.
- For consistent slices: Use a serrated knife and wipe between cuts for picture-perfect servings.
My biggest fail? Once, I tried to flip the cake out after just five minutes—half stayed in the pan. Now, I set a timer so I don’t get impatient. Multitasking tip: While the cake bakes, prep your glaze and tidy up. That way, you’re ready to finish and enjoy as soon as it’s cool.
Consistency tip: Measure ingredients by weight for best results. I use my trusty kitchen scale for everything now—it’s a game changer, especially for flour.
Variations & Adaptations
- Gluten-Free Version: Use a 1:1 gluten-free flour blend. I’ve made this swap for friends with celiac disease, and it turns out just as moist (though it may bake a little faster—check early).
- Dairy-Free Twist: Substitute vegan butter and use coconut yogurt in place of sour cream. The coconut adds a light tropical note—so good with the lime!
- Berry Burst: Fold in 1 cup (150g) of fresh blueberries or raspberries before baking for a fruity pop. The berries pair beautifully with the tart key lime.
- Mini Pound Cakes: Divide the batter among mini bundt pans or muffin tins. Bake for 22-28 minutes. Perfect for gifting or party favors.
- Make it a Layer Cake: Bake in two 8-inch round pans, spread with whipped cream cheese frosting, and top with extra lime zest for a celebration-worthy dessert.
- Nutty Crunch: Add 1/2 cup (60g) chopped pecans or macadamia nuts to the batter for a little crunch and a Southern twist.
Personal favorite: In spring, I love adding a handful of chopped strawberries to the batter and swapping half the lime juice for fresh orange juice. It’s like a taste of sunshine in every bite!
Allergen swaps: If you’re allergic to eggs, try a flax egg substitute (1 tbsp flaxseed meal + 2.5 tbsp water per egg). The texture changes a bit, but it still bakes up nicely.
Serving & Storage Suggestions
This key lime pound cake is a showstopper on its own, but with a few simple touches, it’s next-level. Serve it at room temperature, or slightly warm for that just-baked experience. A dollop of whipped cream and a few fresh berries on the side make it brunch-perfect. For parties, I like to slice and fan the pieces on a cake platter, then drizzle with extra glaze right before serving for that glossy Pinterest look!
Pair with iced tea, cold brew coffee, or a sparkling citrus cocktail. The cake’s tartness goes great with sweet or creamy drinks.
To store, wrap the cake tightly in plastic wrap or place in an airtight container. It keeps well at room temperature for up to 3 days. For longer storage, refrigerate for up to a week (bring to room temp before serving for best texture). Freezing? Absolutely! Wrap individual slices in plastic and foil, then freeze for up to 2 months. Thaw at room temperature or zap in the microwave for 15 seconds for a quick treat.
Bonus: The flavors deepen after a day or two, so leftovers (if you have any!) taste even better as the lime soaks in.
Nutritional Information & Benefits
Each slice of key lime pound cake (1/12 of the cake) is estimated to contain around 340 calories, 16g fat, 45g carbohydrates, and 5g protein. Of course, this varies depending on your exact ingredients and glaze amount.
Key limes are a great source of vitamin C and antioxidants, and using fresh juice and zest gives you a boost of citrus nutrients. The cake is a sweet treat, but it’s a better choice than store-bought desserts full of artificial stuff. You can make it gluten-free or dairy-free with the swaps above, and it’s naturally nut-free if you skip the optional add-ins.
From a wellness angle: I’m a big believer in enjoying dessert as part of a balanced life. This cake is rich, but the bright lime makes it feel fresh and satisfying without being overly heavy.
Conclusion
If you’re searching for the ultimate key lime pound cake recipe—one that’s ultra-moist, bursting with real citrus flavor, and totally reliable—this is the one to try. It’s the kind of dessert that brings people together, makes memories, and brightens any day, whether you’re celebrating or just want something sweet after dinner.
Feel free to make it your own! Add berries, swap in your favorite citrus, or tweak the glaze to suit your taste. I love this cake because it always turns out, no matter what little tweaks I make. It’s become a family tradition, and I hope it finds a place in your kitchen too.
If you bake this key lime pound cake, let me know how it goes! Leave a comment below, share your photos, or tell me your favorite twist on the recipe. Happy baking, and here’s to bright, zesty, homemade desserts that make every day a little sweeter!
Frequently Asked Questions
Can I use regular limes instead of key limes?
Yes, you can use regular (Persian) limes if you can’t find key limes. The flavor will be slightly less floral and a tad more tart, but it’s still delicious. Just use the same amount of juice and zest.
Can I make this key lime pound cake ahead of time?
Definitely! This cake actually tastes even better a day after baking as the lime flavor deepens. Just store it tightly wrapped at room temperature or in the fridge, and glaze before serving for the best look.
How do I prevent my pound cake from sticking to the pan?
Grease every corner of the pan with butter, then dust with flour. Pay special attention to ridges if using a bundt pan. Let the cake cool for 15 minutes before inverting—it should pop right out!
Can I freeze key lime pound cake?
Absolutely. Slice the cake and wrap each slice well in plastic and foil. Freeze for up to 2 months. Thaw at room temperature or microwave for a quick treat.
What’s the best way to zest a key lime?
Use a microplane or fine grater. Hold the lime over the grater and rotate gently, taking just the green part (the white pith underneath is bitter). Zest before juicing for easiest results!
Pin This Recipe!
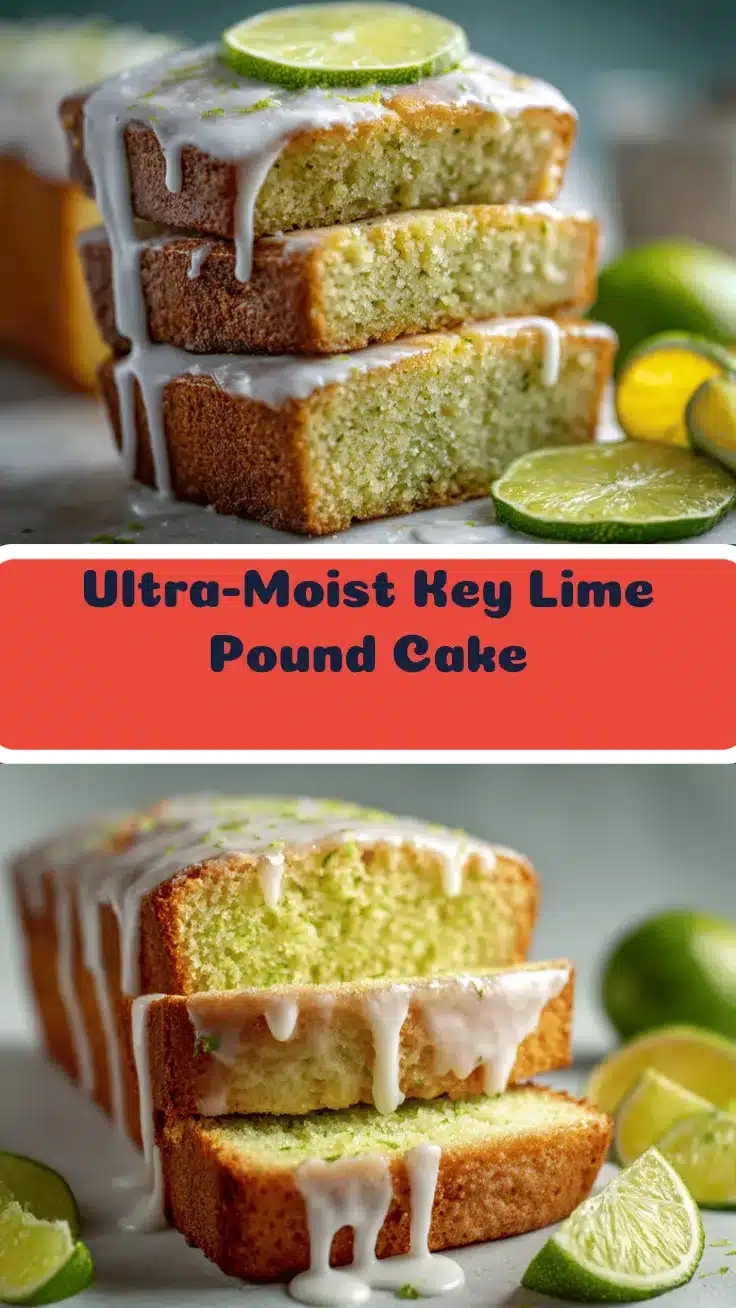
Key Lime Pound Cake

This ultra-moist key lime pound cake is bursting with real citrus flavor and a tender, buttery crumb. Easy to make and topped with a tangy key lime glaze, it’s a crowd-pleasing dessert perfect for any occasion.
- Prep Time: 20 minutes
- Cook Time: 65-75 minutes
- Total Time: 1 hour 40 minutes
- Yield: 12 servings 1x
- Category: Dessert
- Cuisine: American
Ingredients
- 2 3/4 cups all-purpose flour (345g)
- 1/2 teaspoon baking powder
- 1/2 teaspoon salt
- 1 cup unsalted butter, softened (226g)
- 2 cups granulated sugar (400g)
- 4 large eggs, room temperature
- 3/4 cup sour cream (180g)
- 1/4 cup key lime juice (60ml)
- 2 tablespoons key lime zest (about 6–8 key limes)
- 1 teaspoon vanilla extract
- For the glaze:
- 1 1/4 cups powdered sugar (150g)
- 2–3 tablespoons key lime juice (30-45ml)
- 1 teaspoon key lime zest (optional, for garnish)
Instructions
- Preheat oven to 325°F (163°C). Generously grease a 10-inch bundt or tube pan with butter and dust lightly with flour. Tap out excess.
- Zest 6-8 key limes to yield 2 tablespoons zest. Juice limes to get 1/4 cup for the cake and 2-3 tablespoons for the glaze. Zest before juicing.
- In a medium bowl, whisk together flour, baking powder, and salt. Set aside.
- In a large mixing bowl, beat softened butter, granulated sugar, and lime zest on medium-high speed for 2-3 minutes until light and fluffy.
- Add eggs one at a time, beating well after each addition and scraping down the sides as needed.
- Mix in sour cream, key lime juice, and vanilla extract on low speed until just combined. The mixture may look curdled.
- Add the flour mixture in three parts, mixing gently and scraping the bowl after each addition. Stop as soon as the flour disappears.
- Spoon the batter into the prepared pan. Tap the pan on the counter to release air bubbles and level the top.
- Bake in the center of the oven for 65-75 minutes, checking at 60 minutes. The cake is done when a toothpick inserted in the center comes out clean or with a few moist crumbs.
- Let the cake cool in the pan on a wire rack for 15 minutes. Run a thin knife around the edges, then carefully invert onto the rack. Cool completely before glazing (about 1 hour).
- For the glaze: Whisk powdered sugar with 2-3 tablespoons key lime juice until smooth and pourable. Adjust juice for desired thickness. Drizzle over the cooled cake and sprinkle with extra zest if desired.
- Let the glaze set for 10-15 minutes, then slice and serve. Best enjoyed slightly warm or at room temperature.
Notes
Room temperature ingredients blend best. Grease the pan thoroughly to prevent sticking. For gluten-free, use a 1:1 gluten-free flour blend. Cake can be made ahead and tastes even better the next day. Store tightly wrapped at room temperature for up to 3 days, or freeze slices for up to 2 months.
Nutrition
- Serving Size: 1/12 of cake (about 1 slice)
- Calories: 340
- Sugar: 28
- Sodium: 180
- Fat: 16
- Saturated Fat: 10
- Carbohydrates: 45
- Fiber: 1
- Protein: 5
Keywords: key lime pound cake, citrus cake, bundt cake, summer dessert, easy pound cake, key lime dessert, moist cake, homemade cake, glazed pound cake


