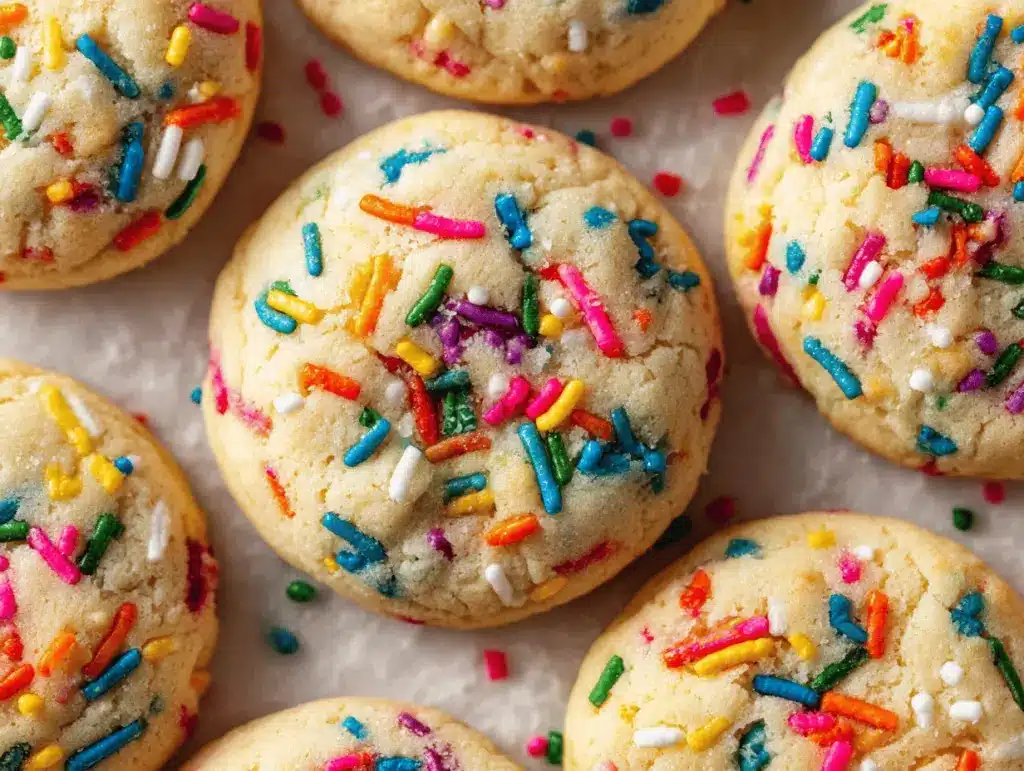
There’s just something about a batch of homemade Funfetti cookies that can turn even the gloomiest day into a celebration. The first time I made these, I honestly wasn’t expecting the way the rainbow sprinkles would light up my kitchen (and my mood). The soft, pillowy centers and those pops of color—yeah, they got me. I grew up on the boxed Funfetti cake mix, but when I finally figured out how to make Funfetti cookies from scratch, it felt like I’d discovered a secret party trick.
Funfetti cookies are more than just a treat—they’re a little slice of nostalgia and happiness all in one bite. I still remember baking these with my niece for her birthday sleepover. Flour everywhere, giggles, and a kitchen that smelled like vanilla and sugar for days. The best part? No fancy decorating skills needed—just a handful of sprinkles and a big appetite for fun.
This Funfetti cookies recipe is a game-changer for parties, after-school snacks, or days when you just need something cheerful. They’re super soft, easy to make, and always a crowd-pleaser. Whether you’re baking for a birthday, a holiday, or just because, these cookies bring the celebration to you. Over the years, I’ve tested (and taste-tested!) more batches than I care to admit, so you can trust these cookies come out right every time. If you want a homemade treat that’s as festive as it is delicious, you’re in the right spot. Let’s make some magic with this easy Funfetti cookies recipe!
Why You’ll Love This Funfetti Cookies Recipe
- Super Quick & Easy: You can have these Funfetti cookies mixed, baked, and cooling on your rack in about 30 minutes. Perfect for last-minute party needs or those “uh oh, I need a treat!” moments.
- No Special Ingredients: Everything you need is probably already in your pantry. No cake mix, no weird extracts—just the basics plus your favorite rainbow sprinkles.
- Perfect for All Occasions: Birthdays, baby showers, graduation parties, or honestly, Tuesday nights. These cookies fit every event—kids and grownups both go back for seconds.
- Crowd-Pleaser: I’ve never seen a plate of Funfetti cookies last longer than an hour at any gathering. People love the soft texture and that hint of buttery vanilla with the fun crunch from the sprinkles.
- Unbelievably Delicious: We’re talking thick, super soft centers, lightly crisp edges, and that classic “birthday cake” flavor. Every bite is pure comfort and celebration.
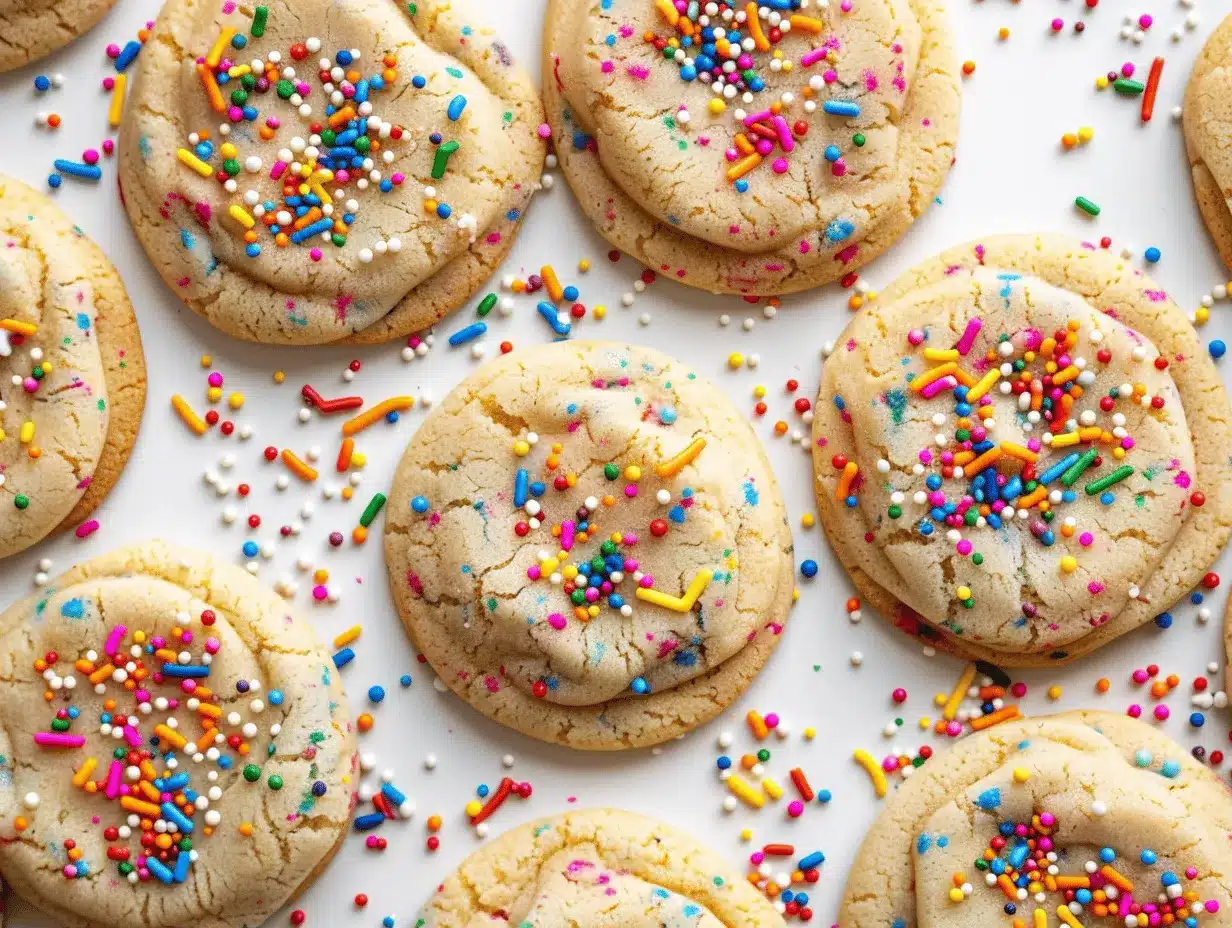
What really sets this Funfetti cookies recipe apart is how soft and chewy they stay—even days later. I’ve tweaked the ratio of butter to sugar, added a little extra vanilla, and made sure the sprinkles don’t bleed or melt into the dough (no streaky cookies here!). The dough is easy to work with, and the cookies don’t spread too thin, so you get those bakery-style mounds every time.
Honestly, I think what I love most is the way these cookies just make people happy. There’s no way to feel grumpy when you’ve got a plate of Funfetti cookies on the table. They’re bright, playful, and packed with good vibes. Even if you’re new to baking, you’ll nail this recipe—it’s practically foolproof. These cookies are made for sharing, celebrating, and making memories (and maybe sneaking one or two just for yourself).
What Ingredients You Will Need
This Funfetti cookies recipe uses simple pantry staples to create soft, bakery-style cookies bursting with color. Don’t worry, nothing fancy or hard to find here—just classic ingredients with a festive twist.
- All-Purpose Flour (2 1/4 cups / 280g): The backbone of our cookies. Look for unbleached if possible for the best texture.
- Baking Soda (1/2 teaspoon): Helps the cookies rise and stay fluffy.
- Baking Powder (1/2 teaspoon): Gives extra lift and softness.
- Salt (1/2 teaspoon): Balances the sweetness and brings out all the flavors.
- Unsalted Butter (1 cup / 226g, softened): Room temperature butter is key here. I like using European-style for extra richness, but any good unsalted butter works.
- Granulated Sugar (3/4 cup / 150g): Gives the cookies their classic sweetness and helps create those crisp edges.
- Light Brown Sugar (1/2 cup / 100g, packed): Adds a hint of caramel flavor and keeps the cookies extra moist.
- Large Eggs (2, room temperature): Bind everything together for that chewy bite.
- Pure Vanilla Extract (2 teaspoons): Don’t skimp here! Real vanilla makes the “birthday cake” flavor shine. I’ve used both store-brand and pricier ones—both work, but you can taste the difference.
- Almond Extract (1/4 teaspoon, optional): For that classic sprinkle cake flavor, a tiny splash of almond extract is a game-changer. Skip if you have nut allergies.
- Rainbow Sprinkles (1/2 cup / 80g): Not all sprinkles are created equal! Use “jimmies” (the rod-shaped ones) for best results—they don’t bleed into the dough. Save the round “nonpareils” for topping only. I like the brands Sweetapolita or Wilton.
Ingredient Tips & Substitutions:
- For gluten-free Funfetti cookies, swap the all-purpose flour for your favorite 1:1 gluten-free blend (I’ve had good luck with King Arthur Measure for Measure).
- Out of brown sugar? Use all white sugar, but add a teaspoon of molasses if you have it for depth.
- If you’re dairy-free, plant-based butter sticks (like Earth Balance) work well. Just make sure they’re the stick kind, not spread.
- Want extra color? Save a tablespoon of sprinkles to press on top of the dough balls before baking for that bakery look.
This recipe is super flexible—don’t stress if you’re missing one tiny thing. Just swap and bake!
Equipment Needed
- Mixing Bowls: You’ll want at least two—one for dry ingredients and another for wet. Glass or stainless steel are my go-tos because they don’t hold onto odors.
- Hand Mixer or Stand Mixer: Either works! I use my stand mixer for big batches, but a hand mixer does the job just fine. If you’re doing it by hand, be ready for a good arm workout.
- Baking Sheet: Heavy-duty, rimmed baking sheets work best for even baking. If you only have thin ones, double up to prevent burning.
- Parchment Paper or Silicone Baking Mat: These help prevent sticking and make cleanup a breeze. I love my Silpat mats—they’ve lasted me years and never let me down.
- Cookie Scoop (2-tablespoon size): Totally optional, but it keeps the cookies uniform and helps them bake evenly. You can use two spoons instead.
- Wire Cooling Rack: Essential for cooling the cookies without them getting soggy bottoms.
If you’re just starting out, don’t worry—you can get by with basic tools and even improvise. I’ve baked these on foil in a pinch (not ideal, but hey, it happens!). Remember to wash your silicone mats well to keep them odor-free, and always let your baking sheets cool before the next batch to avoid spreading.
Budget tip: Check thrift shops or discount stores for sturdy pans and racks—they often have hidden gems!
Preparation Method
-
Preheat Your Oven:
Preheat oven to 350°F (175°C). Line two baking sheets with parchment paper or silicone baking mats. (If you forget, just grease lightly, but cookies may spread a bit more.) -
Mix Dry Ingredients:
In a medium bowl, whisk together 2 1/4 cups (280g) all-purpose flour, 1/2 teaspoon baking soda, 1/2 teaspoon baking powder, and 1/2 teaspoon salt. Set aside. I sometimes sift for extra-light cookies, but whisking works great. -
Cream Butter & Sugars:
In a large bowl, beat 1 cup (226g) unsalted butter, 3/4 cup (150g) granulated sugar, and 1/2 cup (100g) light brown sugar until light and fluffy, about 2-3 minutes. You want the mixture to look pale and airy. If the butter’s too cold, it’ll clump—let it sit out first. -
Add Eggs & Extracts:
Beat in 2 large eggs, one at a time, scraping the bowl between each. Add 2 teaspoons vanilla extract and 1/4 teaspoon almond extract (if using). Mix until smooth—don’t worry if it looks a tad curdled, it comes together with flour. -
Combine Wet & Dry:
Gradually add the dry ingredients to the wet, mixing on low just until no streaks of flour remain. Don’t overmix or the cookies could get tough. The dough should be soft but not sticky. -
Fold in Sprinkles:
Gently stir in 1/2 cup (80g) rainbow sprinkles with a spatula. Try not to overwork the dough—this keeps the sprinkles from breaking up or bleeding color. (It’s tempting to add more sprinkles, but too many can make the cookies dry.) -
Scoop & Shape:
Using a 2-tablespoon cookie scoop or two spoons, drop dough balls onto your lined baking sheets, spaced 2 inches (5cm) apart. For that bakery look, press a few extra sprinkles on top of each dough ball. -
Bake:
Bake for 10-12 minutes, or until the edges are just set and the centers look slightly underbaked. They’ll firm up as they cool. If you like extra chewy cookies, err on the shorter side of the baking time. -
Cool:
Allow cookies to cool on the baking sheet for 5 minutes, then transfer to a wire rack to cool completely. (If you move them too soon, they might break!)
Troubleshooting: If your cookies spread too much, the butter may have been too warm or you over-creamed. If they’re too puffy, try flattening the dough balls slightly before baking. Always bake a test cookie first if you’re unsure!
Personal Tip: For an extra pop of color and crunch, sprinkle a pinch of flaky sea salt on top right after baking. Trust me, it’s a flavor bomb!
Cooking Tips & Techniques
- Chill the Dough (Optional): While this recipe works great without chilling, if you have time, pop the dough in the fridge for 30 minutes. It helps the cookies keep their shape and amps up the chewiness.
- Don’t Overmix: Once the flour goes in, mix just until combined. Overmixing can make the cookies tough (been there, regretted that).
- Mind Your Sprinkles: Always use “jimmies”—the rod-shaped sprinkles. Nonpareils can bleed and make streaky cookies. If you’re using colored sugar, sprinkle on top after baking instead.
- Room Temp Ingredients: Butter and eggs blend better when they’re not cold, leading to fluffier cookies. I sometimes forget, but a quick warm water bath for eggs and a few seconds in the microwave for butter (not melted) does the trick.
- Spacing is Key: Leave at least 2 inches between cookies. They’ll spread just enough for that perfect edge.
- Test Cookie: If you’re unsure about your oven or dough, bake one cookie first. If it spreads too much, chill the dough or add a tablespoon of flour.
- Rotate Your Pans: Halfway through baking, rotate your pans for even color and texture. My old oven always had a hot spot, so this trick saved me from lopsided cookies.
Personal Oops: I once added too many sprinkles (I know, impossible, right?) and the dough went dry and crumbly. Less is more! Stick with the suggested amount and add extras on top if you want more color.
For consistent bakery-style cookies, use a cookie scoop and keep an eye on the baking time. Slightly underbaked centers are the secret to that soft, gooey bite everyone loves. And don’t forget to let them cool before moving—they’re fragile when hot!
Variations & Adaptations
- Gluten-Free Funfetti Cookies: Swap the all-purpose flour for a 1:1 gluten-free flour blend. I’ve tested with King Arthur and Bob’s Red Mill—both deliver soft, chewy results.
- Vegan Version: Use plant-based butter and swap eggs for flax eggs (2 tablespoons ground flaxseed mixed with 5 tablespoons water, let sit for 5 minutes). Use vegan-friendly sprinkles—some brands contain confectioner’s glaze.
- Chocolate Chip Funfetti Cookies: Stir in 1/2 cup mini chocolate chips with the sprinkles. It’s a mashup of two favorites and always a hit at bake sales.
Other Ideas:
- For a holiday twist, use seasonal sprinkles (red and green for Christmas, pastels for Easter, etc.).
- If you want extra flavor, add 1/4 teaspoon lemon or orange zest to the dough.
- Nut allergy? Skip the almond extract—it’s totally optional, and the cookies are still fantastic with just vanilla.
One of my favorite personal tweaks? Swap half the vanilla for maple extract in the fall. It gives the cookies a warm, cozy flavor that pairs perfectly with coffee or tea.
Serving & Storage Suggestions
These Funfetti cookies are best enjoyed fresh from the oven, still a tad warm, with the sprinkles shining bright. They look gorgeous on a party platter, stacked in a cookie jar, or even tucked into lunchboxes as a sweet surprise.
- Serving: Serve at room temperature or slightly warm. For a cute touch, pair them with a glass of cold milk or a scoop of vanilla ice cream for a festive dessert.
- Pairings: They go great with coffee, hot cocoa, or fruity punch for parties. For an extra-decadent treat, sandwich two cookies with marshmallow fluff or frosting.
- Storing: Store in an airtight container at room temperature for up to 5 days. They stay soft! If you want them even chewier, add a slice of bread to the container—it keeps the cookies moist (grandma’s trick!).
- Freezing: Both the raw dough and baked cookies freeze well. Scoop dough onto a tray, freeze until solid, then transfer to a zip-top bag. Bake from frozen, adding 1-2 minutes to the baking time. Baked cookies thaw in about 30 minutes at room temp.
- Reheating: Pop a cookie in the microwave for 5-8 seconds for that fresh-baked taste.
Honestly, the flavor gets even better on day two as the vanilla and almond meld with the sprinkles. If you’re packing them up for gifts, stack with parchment between layers to keep them looking perfect.
Nutritional Information & Benefits
Each Funfetti cookie is about 150 calories, with 7g fat, 20g carbohydrates, 1g protein, and 10g sugar (estimated, for a batch of 24 cookies). These cookies are a treat, but they’re made with whole ingredients you can pronounce—no cake mix or artificial stuff here!
The colorful sprinkles bring joy, but if you want to go a little lighter, you can use less sugar or try natural sprinkles. The recipe is nut-free if you skip the almond extract, and you can easily make it gluten-free or dairy-free with simple swaps.
In my house, these cookies are a special-occasion treat (though honestly, we find a lot of occasions!). They’re perfect for sharing and spreading smiles. Remember, cookies are about balance—enjoying something sweet and homemade with people you love.
Conclusion
Funfetti cookies are pure joy in a bite—soft, sweet, and bursting with color. This recipe is perfect for beginners and pros alike, whether you’re baking for a crowd or just want to brighten your day. You can easily customize them to fit your vibe, your pantry, or your dietary needs.
I love how these cookies always bring people together. They remind me that sometimes, the simplest bakes are the ones we remember most. If you try this recipe, let me know how it goes—share your tweaks, your party pics, or your sprinkle disasters! I want to hear it all.
So grab your apron, preheat that oven, and let’s make some memories (and some seriously irresistible Funfetti cookies). Happy baking!
Frequently Asked Questions
Can I make Funfetti cookies ahead of time?
Yes! You can bake the cookies a day or two in advance—they stay soft when stored in an airtight container. The dough also freezes well for up to 3 months.
What kind of sprinkles should I use?
Use “jimmies”—the rod-shaped sprinkles. They don’t bleed into the dough like nonpareils. Avoid confetti dots, which can melt and get messy.
How do I keep Funfetti cookies soft?
The right ratio of brown sugar and butter helps, but also don’t overbake them. Take them out when the centers look slightly underdone—they’ll set as they cool.
Can I double the recipe for a big party?
Absolutely! Just make sure to mix the dough well and bake in batches. You might need an extra baking sheet or two.
Are Funfetti cookies safe for nut allergies?
Yes, as long as you skip the almond extract and use nut-free sprinkles. Double-check labels to be sure.
Pin This Recipe!

Funfetti Cookies

These easy homemade Funfetti cookies are soft, chewy, and bursting with colorful sprinkles—perfect for parties, birthdays, or whenever you need a cheerful treat. No cake mix required, just classic pantry staples and a big appetite for fun.
- Prep Time: 15 minutes
- Cook Time: 12 minutes
- Total Time: 27 minutes
- Yield: 24 cookies 1x
- Category: Dessert
- Cuisine: American
Ingredients
- 2 1/4 cups (280g) all-purpose flour
- 1/2 teaspoon baking soda
- 1/2 teaspoon baking powder
- 1/2 teaspoon salt
- 1 cup (226g) unsalted butter, softened
- 3/4 cup (150g) granulated sugar
- 1/2 cup (100g) light brown sugar, packed
- 2 large eggs, room temperature
- 2 teaspoons pure vanilla extract
- 1/4 teaspoon almond extract (optional)
- 1/2 cup (80g) rainbow sprinkles (jimmies preferred)
Instructions
- Preheat oven to 350°F (175°C). Line two baking sheets with parchment paper or silicone baking mats.
- In a medium bowl, whisk together flour, baking soda, baking powder, and salt. Set aside.
- In a large bowl, beat butter, granulated sugar, and brown sugar until light and fluffy, about 2-3 minutes.
- Beat in eggs, one at a time, scraping the bowl between each. Add vanilla extract and almond extract (if using). Mix until smooth.
- Gradually add the dry ingredients to the wet, mixing on low just until no streaks of flour remain. Do not overmix.
- Gently fold in rainbow sprinkles with a spatula.
- Using a 2-tablespoon cookie scoop or two spoons, drop dough balls onto lined baking sheets, spaced 2 inches apart. Press extra sprinkles on top if desired.
- Bake for 10-12 minutes, or until edges are just set and centers look slightly underbaked.
- Allow cookies to cool on the baking sheet for 5 minutes, then transfer to a wire rack to cool completely.
Notes
For best results, use ‘jimmies’ style sprinkles to prevent color bleeding. Chilling the dough for 30 minutes before baking can help cookies keep their shape and enhance chewiness. To make gluten-free, use a 1:1 gluten-free flour blend. For nut allergies, omit almond extract. Store cookies in an airtight container at room temperature for up to 5 days, or freeze dough balls for up to 3 months.
Nutrition
- Serving Size: 1 cookie
- Calories: 150
- Sugar: 10
- Sodium: 70
- Fat: 7
- Saturated Fat: 4
- Carbohydrates: 20
- Protein: 1
Keywords: funfetti cookies, sprinkle cookies, birthday cookies, party cookies, easy cookies, homemade funfetti, soft cookies, chewy cookies, kid-friendly dessert


