“I never expected a quick dessert to become my go-to for summer gatherings,” my friend Lisa admitted last July, right after handing me one of her famous strawberry cheesecake cups. It was a scorching Saturday afternoon, and honestly, the last thing I wanted was to turn on the oven or wrestle with complicated recipes. But those Easy No-Bake Strawberry Cheesecake Cups with Creamy Layers caught me by surprise—in the best way.
The first time I made these, I was juggling a last-minute barbecue on a whim. My fridge was bare except for a few strawberries and some cream cheese I’d meant to use earlier that week but forgot. I threw together this no-bake dessert in a rush, with a cracked mixing bowl and my toddler toddling around, nearly knocking over the whole operation. Somehow, what came out was delightfully light, creamy, and not too sweet—the kind of treat you want to eat while sitting on the porch swing, watching the sun dip below the trees.
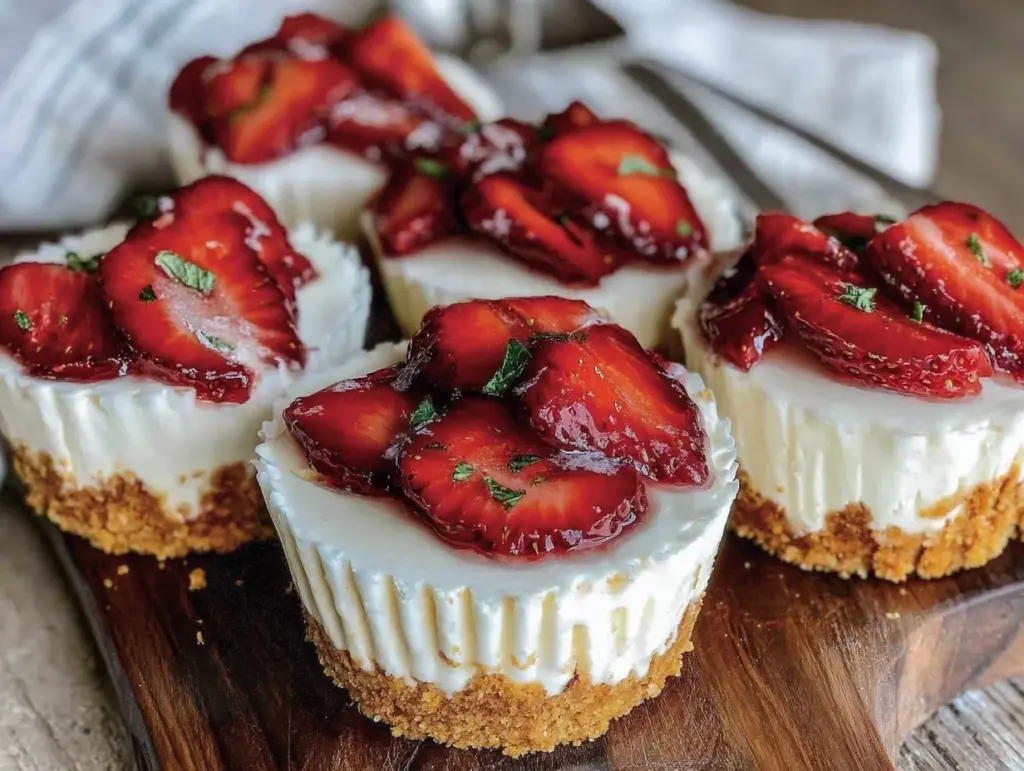
Maybe you’ve been there: craving something fresh and sweet but not ready for a sugar crash or a kitchen meltdown. These cups are exactly that kind of saving grace. They bring that classic cheesecake flavor without the fuss, layered with juicy strawberries and a crumbly, buttery crust that just melts on your tongue. Let me tell you, they’ve stuck around in my summer rotation ever since—whether it’s a casual weeknight or a neighborhood potluck.
Why You’ll Love This Recipe
Honestly, this recipe has won me over for several reasons, and I’m betting it’ll do the same for you.
- Quick & Easy: Assembling these takes less than 20 minutes, perfect for when you want dessert without the wait or the heat.
- Simple Ingredients: You likely have everything on hand—cream cheese, strawberries, a few pantry staples—no hunting for specialty items.
- Perfect for Summer: Light and refreshing, these cups are just right for those warm days when heavy desserts feel like too much.
- Crowd-Pleaser: Kids and adults alike fall for the creamy layers and fresh fruit combo every single time.
- Unbelievably Delicious: The balance of tangy cream cheese and sweet strawberries is just right, with a buttery crust that adds the perfect crunch.
What makes this recipe different? It’s the layering technique that creates those gorgeous, creamy pockets you want to savor slowly. Plus, I use a quick whipped cream addition that keeps the texture airy without being overly rich. You know that feeling when a dessert feels indulgent but not heavy? That’s exactly what these cups deliver.
Whether you’re impressing guests or just treating yourself on a lazy Sunday, this recipe brings that perfect, effortless charm to the table.
What Ingredients You Will Need
This recipe uses simple, wholesome ingredients to deliver bold flavor and satisfying texture without the fuss. Most of these are pantry staples or fresh items you can find easily.
- For the crust:
- 1 ½ cups graham cracker crumbs (about 10 full sheets; I prefer Honey Maid for consistent texture)
- 5 tablespoons unsalted butter, melted (adds richness and helps bind the crust)
- 2 tablespoons granulated sugar
- For the creamy cheesecake layer:
- 8 ounces (225g) cream cheese, softened (room temperature is key for smooth mixing)
- ½ cup powdered sugar (for just the right sweetness)
- 1 teaspoon vanilla extract (use pure vanilla for best flavor)
- 1 cup heavy whipping cream, cold (helps create that fluffy texture)
- For the strawberry topping:
- 1 ½ cups fresh strawberries, hulled and sliced (choose ripe, fragrant berries for maximum flavor)
- 1 tablespoon granulated sugar (optional, depending on berry sweetness)
- 1 teaspoon lemon juice (brightens the fruit)
Ingredient tips: If you want a dairy-free option, swap cream cheese with a plant-based variety and use coconut cream instead of heavy whipping cream. For gluten-free crust, crushed gluten-free cookies or almond flour work well.
Equipment Needed
- Mixing bowls (one large and one medium-sized)
- Electric hand mixer or stand mixer (whipping cream by hand is possible but takes effort)
- Measuring cups and spoons
- Spoon or small offset spatula for layering
- Serving cups or small jars (4 to 6 oz size works perfectly)
- Knife and cutting board for slicing strawberries
If you don’t have a mixer, a whisk can work for the cream, but be prepared for a bit of an arm workout! I bought a budget-friendly hand mixer from Hamilton Beach years ago, and it’s still going strong—definitely a worthwhile kitchen helper.
Preparation Method
- Prepare the crust: In a medium bowl, combine 1 ½ cups graham cracker crumbs, 5 tablespoons melted butter, and 2 tablespoons sugar. Mix well until the crumbs are evenly coated and resemble wet sand. This should take about 3 minutes.
- Divide the crust: Spoon about 2 tablespoons of the crumb mixture into each serving cup. Use the back of a spoon or your fingers to gently press the crumbs down to form a firm, even layer. Set aside while you prepare the cream layer. (This helps the crust hold together and not crumble when you eat.)
- Make the cheesecake layer: In a large bowl, beat 8 ounces softened cream cheese with ½ cup powdered sugar and 1 teaspoon vanilla extract until smooth and creamy. This should take 2-3 minutes on medium speed. Scrape down the sides occasionally to avoid lumps.
- Whip the cream: In a separate chilled bowl, whip 1 cup cold heavy cream until stiff peaks form. This means when you lift the whisk, peaks hold their shape without collapsing. This usually takes 4-5 minutes with an electric mixer.
- Combine layers: Gently fold the whipped cream into the cream cheese mixture, using a spatula. Fold carefully to keep it light and airy—don’t overmix or you’ll lose that fluffy texture. Your mixture should look smooth and spreadable.
- Assemble the cups: Spoon or pipe a generous layer of the creamy cheesecake mixture over the crust in each cup. Smooth the tops gently with a spoon.
- Prepare the strawberries: In a small bowl, toss the sliced strawberries with 1 tablespoon sugar and 1 teaspoon lemon juice. Let them sit for 5-10 minutes to macerate and release their juices—this makes them juicy and flavorful.
- Add strawberry topping: Spoon the strawberries and their syrupy juices over the cheesecake layer in each cup. You want a nice, even layer that shows off those vibrant reds.
- Chill: Cover the cups with plastic wrap or lids and refrigerate for at least 2 hours, though overnight is best if you can wait. This helps the layers set and flavors meld beautifully.
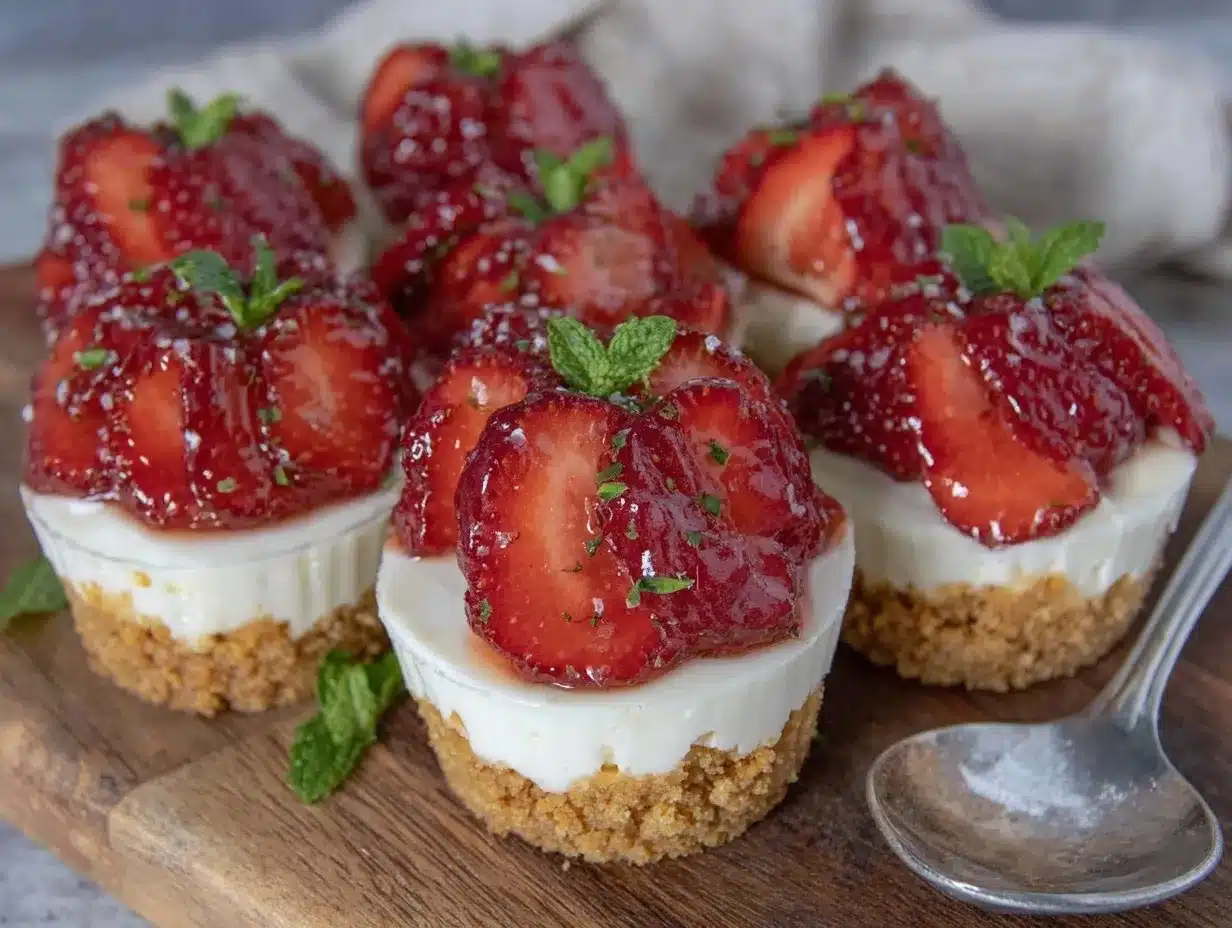
- Serve: Just before serving, you can add a fresh strawberry slice on top or a small mint leaf for a pop of color and freshness.
Pro tip: If your cream cheese is too cold, it will clump. Take it out of the fridge about 30 minutes before starting. Also, don’t rush the chilling step—it’s what turns this from good to “honestly, I could eat a dozen.”
Cooking Tips & Techniques
Whipping cream to stiff peaks may sound intimidating, but here’s a trick: chill your bowl and beaters in the freezer for 10 minutes before whipping. Cold tools make a huge difference. I learned this the hard way after one failed batch where my cream was just… sad and runny.
When folding the whipped cream into the cream cheese, think of it like folding a delicate letter. Use a gentle motion from the bottom up to keep the air trapped inside. Overmixing leads to a dense, heavy filling, which nobody wants.
Crust-wise, pressing firmly but gently is key. Pressing too hard packs it into a rock; too lightly and it falls apart when you eat. I usually press down with my fingers, then smooth with a spoon for an even layer.
Timing-wise, prep the crust first so it can chill while you whip the cream and cream cheese. Multitasking like this saves time and keeps everything fresh. Also, if your strawberries aren’t super sweet, don’t skip macerating—they get juicy and syrupy, balancing the tang of the cheesecake.
Variations & Adaptations
- Berry Swap: Use raspberries, blueberries, or blackberries instead of strawberries for a mixed berry version. Each berry adds a unique flavor twist.
- Chocolate Twist: Add 2 tablespoons cocoa powder to the crust mixture for a chocolate graham base. Or drizzle melted dark chocolate over the top before chilling.
- Vegan Version: Replace cream cheese with vegan cream cheese and use coconut cream whipped until fluffy. Use dairy-free cookies or crushed nuts for the crust.
- Mini Cheesecake Pops: Freeze the assembled cups and insert popsicle sticks before chilling for a frozen treat perfect for hot days.
Personally, I once swapped out the strawberries for caramelized peaches one summer. The result was a warm, golden sweetness that complemented the creamy layers beautifully—so worth a try if you’re feeling adventurous!
Serving & Storage Suggestions
Serve these cheesecake cups chilled straight from the fridge. They’re perfect as is, but if you want to get fancy, add a sprig of fresh mint or a dusting of powdered sugar right before serving.
Pair them with a light sparkling wine, iced tea with lemon, or a fresh coffee for a delightful afternoon treat. They’re also fantastic as a dessert after a casual backyard dinner.
Store leftovers in airtight containers in the refrigerator for up to 3 days. The crust might soften a bit but still tastes great. If you want to keep them longer, freeze the cups (without the fresh strawberry topping) for up to a month. Thaw overnight in the fridge before serving.
Reheating isn’t necessary since these are best cold, but letting them sit at room temperature for 10 minutes before eating helps bring out the flavors.
Nutritional Information & Benefits
Each serving of these Easy No-Bake Strawberry Cheesecake Cups contains roughly 280 calories, with about 18 grams of fat, 22 grams of carbohydrates, and 4 grams of protein. They’re a treat but made with real ingredients and fresh fruit to keep things wholesome.
Strawberries bring a boost of vitamin C and antioxidants, while the cream cheese adds calcium and protein. Choosing full-fat dairy helps you feel satisfied with smaller portions, which is a win when indulging.
If you watch your sugar intake, you can reduce the powdered sugar or swap it for a sugar substitute like erythritol without losing that creamy texture. The recipe is naturally gluten-free if you use gluten-free crumbs.
Conclusion
Honestly, these Easy No-Bake Strawberry Cheesecake Cups with Creamy Layers are a small joy in a cup—simple, fresh, and delightful. They come together quickly, taste like a treat, and don’t ask much from you in the kitchen. Whether you’re feeding a crowd or just craving a sweet moment alone, they fit the bill.
Feel free to make the recipe your own—swap berries, add a twist, or keep it classic. I love this recipe because it’s as forgiving as it is delicious, and it reminds me that sometimes the best desserts come from happy accidents and a little creativity.
Give it a try, share your results, and let me know how you make these cups your own. There’s something special about a dessert you can whip up in minutes that still gets all the compliments!
FAQs
Can I make these cheesecake cups ahead of time?
Yes! They actually taste better after chilling for a few hours or overnight. Just cover and refrigerate until ready to serve.
What can I use if I don’t have graham crackers?
Digestive biscuits, vanilla wafers, or even crushed nuts can work well for the crust. Just adjust the sweetness accordingly.
How do I prevent the cream cheese from clumping?
Make sure it’s softened to room temperature before mixing, and beat it until smooth before folding in the whipped cream.
Can I use frozen strawberries?
Fresh strawberries give the best texture, but if frozen, thaw and drain them well before using to avoid watery cups.
Is it possible to make this recipe dairy-free?
Absolutely. Use vegan cream cheese and coconut cream whipped until fluffy. For the crust, choose dairy-free cookies or nut-based crusts.
Pin This Recipe!
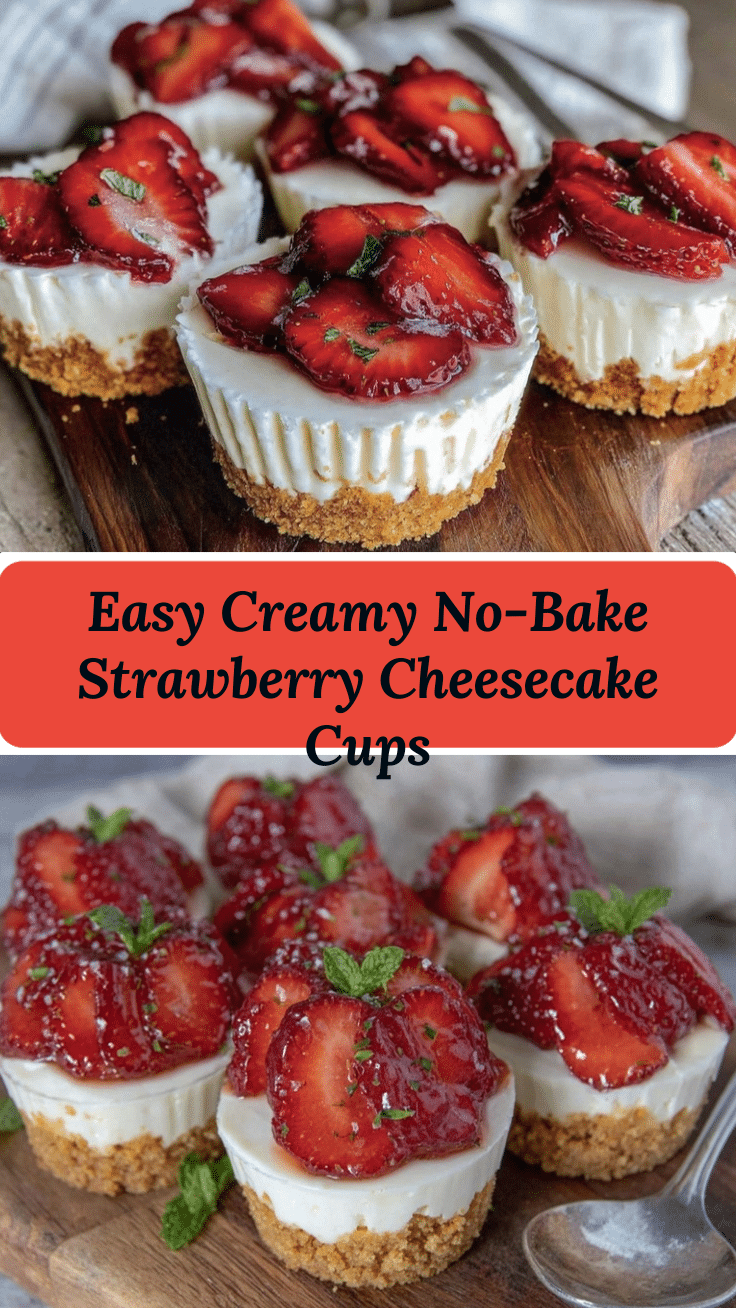
Easy No-Bake Strawberry Cheesecake Cups

A quick and refreshing no-bake dessert featuring creamy cheesecake layers, a buttery graham cracker crust, and fresh strawberry topping, perfect for summer gatherings.
- Prep Time: 15 minutes
- Cook Time: 0 minutes
- Total Time: 2 hours 15 minutes
- Yield: 6 servings 1x
- Category: Dessert
- Cuisine: American
Ingredients
- 1 ½ cups graham cracker crumbs (about 10 full sheets)
- 5 tablespoons unsalted butter, melted
- 2 tablespoons granulated sugar
- 8 ounces cream cheese, softened
- ½ cup powdered sugar
- 1 teaspoon vanilla extract
- 1 cup heavy whipping cream, cold
- 1 ½ cups fresh strawberries, hulled and sliced
- 1 tablespoon granulated sugar (optional)
- 1 teaspoon lemon juice
Instructions
- In a medium bowl, combine graham cracker crumbs, melted butter, and granulated sugar. Mix until crumbs are evenly coated and resemble wet sand.
- Divide the crust mixture by spooning about 2 tablespoons into each serving cup. Press down gently to form a firm, even layer. Set aside.
- In a large bowl, beat softened cream cheese with powdered sugar and vanilla extract until smooth and creamy.
- In a separate chilled bowl, whip cold heavy cream until stiff peaks form.
- Gently fold the whipped cream into the cream cheese mixture until smooth and airy.
- Spoon or pipe a generous layer of the cheesecake mixture over the crust in each cup and smooth the tops.
- Toss sliced strawberries with granulated sugar and lemon juice in a small bowl. Let sit for 5-10 minutes to macerate.
- Spoon the strawberries and their juices over the cheesecake layer in each cup.
- Cover the cups and refrigerate for at least 2 hours or overnight to set.
- Before serving, optionally garnish with a fresh strawberry slice or mint leaf.
Notes
Use room temperature cream cheese to avoid clumping. Chill bowl and beaters before whipping cream for best results. Fold whipped cream gently to keep mixture airy. Macerate strawberries to enhance juiciness. For dairy-free, substitute cream cheese with vegan cream cheese and heavy cream with coconut cream. Gluten-free crust can be made with gluten-free cookies or almond flour.
Nutrition
- Serving Size: 1 cup (about 4 to 6
- Calories: 280
- Sugar: 15
- Sodium: 150
- Fat: 18
- Saturated Fat: 11
- Carbohydrates: 22
- Fiber: 1
- Protein: 4
Keywords: no-bake, strawberry cheesecake, summer dessert, easy dessert, quick dessert, creamy cheesecake, graham cracker crust


