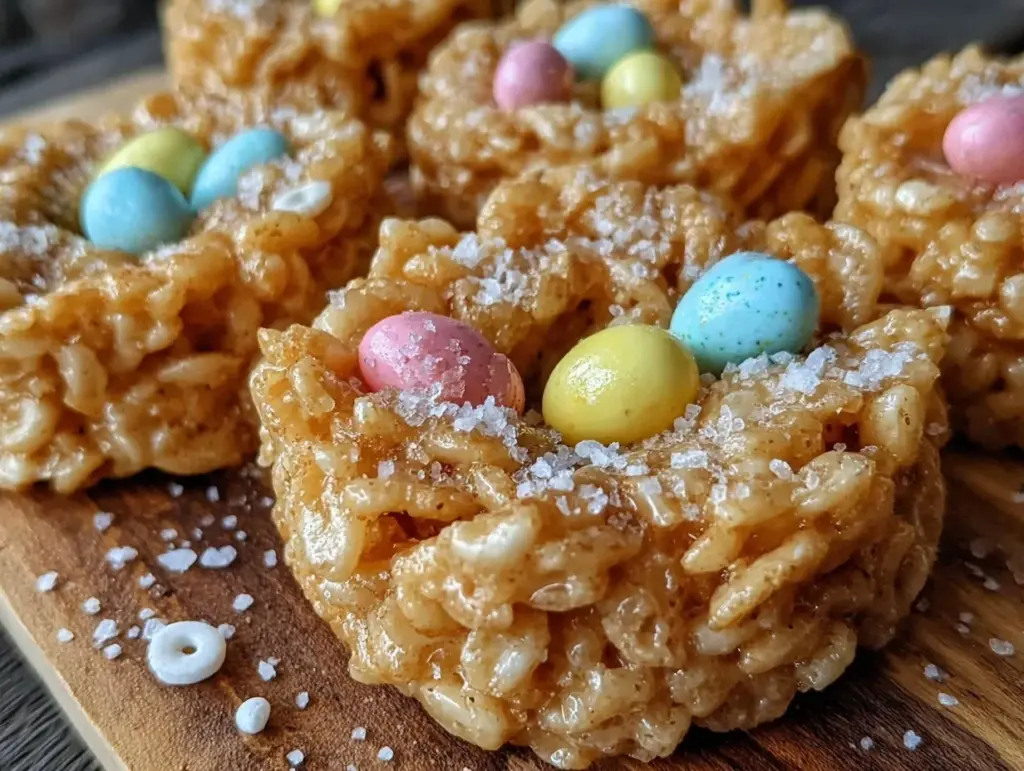
Let me tell you, the moment you pull these Easy Easter Nest Rice Krispie Treats out of the kitchen, the sweet scent of toasted marshmallows and buttery cereal instantly fills the air, making it impossible to resist. The first time I made these charming little nests, I was instantly hooked—the kind of moment where you pause, take a deep breath, and just smile because you know you’re onto something truly special. It was during a rainy weekend when I needed a quick, festive treat for my kids, and honestly, these little nests saved the day.
Years ago, when I was knee-high to a grasshopper, my grandma used to make simple cereal treats but never with this playful twist. I wish I’d discovered this recipe back then—it’s dangerously easy and brings a pure, nostalgic comfort that brightens any holiday table. My family couldn’t stop sneaking them off the cooling rack (and I can’t really blame them). These treats have become a staple for our Easter gatherings, perfect for gifting, sharing, or just indulging in a sweet moment of joy.
You know what makes these Easy Easter Nest Rice Krispie Treats perfect? They’re the kind of fun, festive dessert that brightens up your Pinterest cookie board and makes everyone smile. Whether you’re looking for a sweet surprise for your kids’ party or a cheerful table centerpiece, you’re going to want to bookmark this one.
Why You’ll Love This Recipe
Having tested this recipe multiple times (in the name of research, of course), I can confidently say it’s a winner for all the right reasons. Here’s why you’ll love these Easy Easter Nest Rice Krispie Treats:
- Quick & Easy: Ready in under 30 minutes, these treats are perfect for busy parents or last-minute Easter prep.
- Simple Ingredients: No fancy grocery store runs needed—just pantry staples like cereal, marshmallows, and butter.
- Perfect for Easter: The adorable nest shape with candy eggs makes them a festive hit for holiday brunches, potlucks, or classroom treats.
- Crowd-Pleaser: Kids adore the fun shape and candy surprise, while adults can’t resist the buttery, gooey texture.
- Unbelievably Delicious: The crunchy cereal meets soft marshmallow with just the right touch of sweetness—comfort food with a playful twist.
What sets this recipe apart? It’s the simple technique of molding the treats into nest shapes and adding those colorful candy eggs that make each bite feel special. Plus, the balance of buttery richness and sweet marshmallow is spot on. Honestly, this isn’t just another cereal treat—it’s your best version for festive fun that will have everyone asking for seconds. This recipe feels like a warm hug, perfect for impressing guests without any stress and turning a simple snack into something memorable.
What Ingredients You Will Need
This recipe uses simple, wholesome ingredients to deliver bold flavor and a satisfying texture without any fuss. Most of these are pantry staples, making it easy to whip these nests up whenever the mood strikes.
- Rice Krispies Cereal – 6 cups (about 170 grams); the classic choice for that perfect crispy crunch.
- Mini Marshmallows – 10 ounces (approximately 280 grams); I usually go for Jet-Puffed for their melt-in-your-mouth softness.
- Unsalted Butter – 3 tablespoons (about 42 grams), softened; adds richness and helps bind everything together.
- Vanilla Extract – 1 teaspoon; a splash to deepen the flavor.
- Mini Chocolate Eggs or Candy Eggs – about 24 pieces; these are the “nest eggs” that make the treats festive and fun.
- Optional: A pinch of salt to balance sweetness (especially if using salted butter).
If you want to make a gluten-free version, rest assured that Rice Krispies cereal is gluten-free in many markets—just double-check your brand. For dairy-free adaptations, swap the butter for coconut oil and use vegan marshmallows. In summer, I love swapping candy eggs for fresh berries for a fresh twist, though the classic candy look is unbeatable for Easter.
Equipment Needed
- Large mixing bowl – for combining your cereal and marshmallow mixture.
- Medium saucepan – to melt butter and marshmallows smoothly.
- Wooden spoon or silicone spatula – sturdy enough to stir the sticky mixture without wearing out.
- Measuring cups and spoons – for accuracy, especially with butter and vanilla.
- Non-stick baking sheet or parchment paper – to cool the nests and keep them from sticking.
- Optional: Small bowl of water – to wet your hands while shaping nests, preventing sticking.
If you don’t have a saucepan, a microwave-safe bowl works fine for melting butter and marshmallows in bursts of 30 seconds. I’ve found that a silicone spatula is my favorite tool here — easy to scrape every sticky bit off the sides. For budget-friendly options, parchment paper is a lifesaver and reusable if you’re careful.
Preparation Method
- Prepare your workspace: Line a baking sheet with parchment paper or a silicone mat. This makes cooling and handling the nests so much easier. (Time: 5 minutes)
- Melt the butter: In a medium saucepan over low heat, melt 3 tablespoons (42 grams) of unsalted butter fully, stirring occasionally to avoid browning.
- Add marshmallows: Toss in 10 ounces (280 grams) of mini marshmallows. Stir gently but continuously until the marshmallows have melted into a smooth, glossy mixture. Be patient; the marshmallows should fully dissolve without burning. If you notice any bits sticking, reduce the heat slightly.
- Flavor boost: Remove the pan from heat and stir in 1 teaspoon of vanilla extract and a pinch of salt if using. This adds depth and balances the sweetness.
- Mix in the cereal: Immediately add 6 cups (170 grams) of Rice Krispies cereal. Using a wooden spoon or silicone spatula, carefully fold the cereal into the marshmallow mixture. Be gentle to avoid crushing the cereal, but make sure every piece is coated.
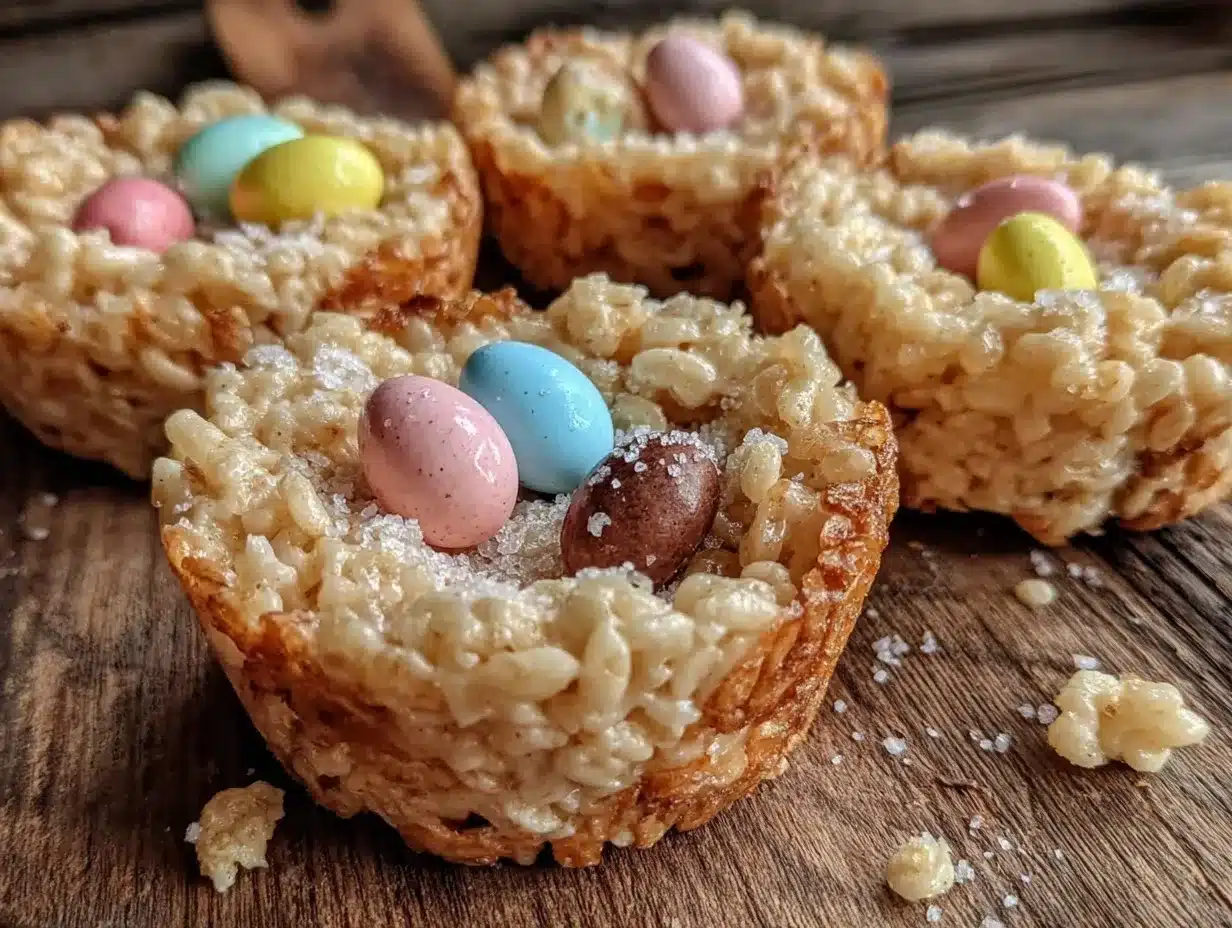
- Form the nests: While the mixture is still warm but cool enough to handle (about 2-3 minutes after mixing), wet your hands lightly with water and scoop a handful (around 1/3 cup or 80 grams) of the mixture. Shape it into a small nest by pressing a hollow in the center with your thumb or fingers. Place the shaped nest on the prepared baking sheet. Repeat with remaining mixture, making approximately 12 nests. (Tip: Wet hands prevent sticking and make shaping easier.)
- Add the eggs: Press 2 or 3 mini chocolate or candy eggs into the center of each nest, gently but firmly.
- Cool completely: Let the nests sit at room temperature for at least 30 minutes to firm up. If you’re in a hurry, pop them in the fridge for 15 minutes, but be careful not to chill too long or they may become overly hard.
Troubleshooting tip: If your mixture hardens before you finish shaping, just warm it gently in the microwave for 10-15 seconds to soften. Watch out not to overheat or it will become too sticky to handle.
When they’re ready, the nests should hold their shape but still be soft and chewy inside. The candy eggs add a delightful surprise and a pop of color every time.
Cooking Tips & Techniques
Let’s face it, working with marshmallow treats can be sticky business, but a few tricks make all the difference. First, always melt your butter and marshmallows over low heat to avoid scorching. I learned the hard way that rushing this step leads to grainy or burnt marshmallow, which nobody wants.
When folding in the cereal, be gentle. Crushing those crispy bits kills the texture and makes your nests dense instead of light and airy. Use a silicone spatula and fold rather than stir aggressively.
Shaping the nests is easier if you wet your hands frequently. Honestly, this tip saved me from a sticky mess more times than I can count. If your mixture cools too fast and gets hard to shape, warming it briefly in the microwave helps without compromising texture.
Timing is key—work fairly quickly after mixing so the marshmallow isn’t too hot but still pliable. If you wait too long, you’ll struggle to mold the nests. Multitasking by prepping your baking sheet and candy eggs beforehand helps keep the process smooth.
Finally, resist the urge to overbake or chill excessively. These treats are best enjoyed soft and chewy, the way they’re meant to be.
Variations & Adaptations
These Easy Easter Nest Rice Krispie Treats are super versatile, and you can easily switch things up depending on your mood or dietary needs.
- Chocolate lovers’ twist: Add 1/2 cup (90 grams) of mini chocolate chips into the mixture before shaping for a melty chocolate surprise inside each nest.
- Nut-free and allergy-friendly: Use sunflower seed butter instead of butter for a dairy-free version, and swap candy eggs with allergy-safe jelly beans or fruit gummies.
- Seasonal spin: Swap Rice Krispies for gluten-free puffed quinoa or millet cereal to keep it gluten-free and add a nutty flavor.
- Mini nests for parties: Make bite-sized nests by using a teaspoon-sized scoop to create delicate, party-friendly treats that disappear fast.
- Natural colors and flavors: Add a few drops of natural food coloring to melted marshmallows before mixing for pastel-colored nests, perfect for a gentle Easter palette.
Personally, I once tried adding shredded coconut to the mix for a tropical vibe, and it gave a lovely chewiness and subtle sweetness that was unexpected but delightful.
Serving & Storage Suggestions
These nests are best served at room temperature, letting the soft marshmallow and crunchy cereal shine. They make a perfect centerpiece for an Easter brunch table, especially when arranged on a pastel-colored platter. Pair them with a hot cup of tea or a glass of milk—classic combo.
If you’re serving them at a party, arrange the nests on a tiered stand with some fresh flowers or greenery for a charming touch. Kids love grabbing a nest or two during egg hunts or after their meal.
To store, place nests in an airtight container at room temperature for up to 3 days. If you want them to last longer, refrigeration extends freshness up to a week, but be aware they may firm up a bit. For longer storage, freeze the nests in a sealed container for up to a month; thaw at room temperature before serving.
When reheating, a few seconds in the microwave (10-15 seconds) soften the nests nicely without melting the candy eggs. Keep in mind, flavors tend to mellow and meld over time, so leftovers often taste even better the next day.
Nutritional Information & Benefits
Each nest provides a sweet treat that’s mostly indulgence, but here’s a quick rundown for those curious:
| Serving Size | 1 nest (approx. 50 grams) |
|---|---|
| Calories | 150-170 kcal |
| Fat | 4-6 g (mostly from butter) |
| Carbohydrates | 30-35 g (from cereal and marshmallows) |
| Protein | 1-2 g |
The key ingredients—Rice Krispies and marshmallows—are mostly carbs, making these treats a quick energy boost. Butter adds some fat for richness, and the candy eggs provide a fun, festive touch. For those with dietary restrictions, swapping butter for coconut oil or vegan butter and choosing gluten-free cereal can make this recipe fit more needs. Just be mindful of the sugar content, especially if you’re watching intake.
From a wellness perspective, these treats are a joyful indulgence—perfect for celebrating without overthinking. After all, holidays are about fun and connection, and these nests deliver just that.
Conclusion
There you have it—Easy Easter Nest Rice Krispie Treats that are as charming as they are delicious. This recipe is worth trying because it combines simple ingredients with a playful twist that everyone will love. Whether you stick to the classic version or customize it with your favorite add-ins, these nests bring a bit of magic to your Easter celebrations.
I love this recipe because it reminds me of family, fun, and the joy of creating something sweet with my hands. Plus, it’s so easy that you can whip it up even if you’re short on time or baking skills. Give it a try, share your variations, and don’t forget to tell me how they turned out!
Go ahead and make these treats your own—and hey, if you feel like sharing, drop a comment or share a photo. I’m always excited to see your festive creations. Happy Easter and happy snacking!
FAQs
Can I use a different cereal instead of Rice Krispies?
Yes! Puffed wheat or gluten-free puffed quinoa work well too. Just keep in mind the texture and flavor might change slightly.
How do I keep the nests from sticking to my hands?
Wet your hands lightly with water or spray them with non-stick cooking spray before shaping the nests. This simple trick makes molding much easier.
Can I make these nests ahead of time?
Absolutely! They store well at room temperature for a few days or in the refrigerator for up to a week. Just keep them in an airtight container.
What can I use if I don’t have mini candy eggs?
You can substitute mini chocolate chips, jelly beans, or even small fruit gummies to decorate the nests.
Is there a way to make these treats healthier?
You can reduce the amount of butter slightly or use natural sweeteners in place of marshmallows, but keep in mind that will affect texture and taste. Adding nuts or seeds can also boost nutrition.
Pin This Recipe!

Easy Easter Nest Rice Krispie Treats Recipe for Festive Fun

These charming Easter nest treats combine crispy Rice Krispies cereal with gooey marshmallows and buttery richness, shaped into festive nests filled with candy eggs. Perfect for quick, fun, and nostalgic holiday snacking.
- Prep Time: 10 minutes
- Cook Time: 10 minutes
- Total Time: 30 minutes
- Yield: 12 nests 1x
- Category: Dessert
- Cuisine: American
Ingredients
- 6 cups Rice Krispies Cereal (about 170 grams)
- 10 ounces mini marshmallows (approximately 280 grams)
- 3 tablespoons unsalted butter (about 42 grams), softened
- 1 teaspoon vanilla extract
- About 24 mini chocolate eggs or candy eggs
- Optional: pinch of salt to balance sweetness
Instructions
- Line a baking sheet with parchment paper or a silicone mat to prepare your workspace.
- In a medium saucepan over low heat, melt 3 tablespoons (42 grams) of unsalted butter, stirring occasionally to avoid browning.
- Add 10 ounces (280 grams) of mini marshmallows to the melted butter. Stir gently and continuously until the marshmallows melt into a smooth, glossy mixture.
- Remove the pan from heat and stir in 1 teaspoon of vanilla extract and a pinch of salt if using.
- Immediately add 6 cups (170 grams) of Rice Krispies cereal. Fold the cereal gently into the marshmallow mixture using a wooden spoon or silicone spatula, coating every piece.
- While the mixture is warm but cool enough to handle (about 2-3 minutes after mixing), wet your hands lightly with water and scoop about 1/3 cup (80 grams) of the mixture. Shape it into a small nest by pressing a hollow in the center with your thumb or fingers. Place the nest on the prepared baking sheet. Repeat to make approximately 12 nests.
- Press 2 or 3 mini chocolate or candy eggs into the center of each nest gently but firmly.
- Let the nests cool completely at room temperature for at least 30 minutes to firm up. Alternatively, refrigerate for 15 minutes if in a hurry, but avoid chilling too long to prevent them from becoming overly hard.
Notes
Wet your hands lightly with water before shaping nests to prevent sticking. Melt butter and marshmallows over low heat to avoid burning. If mixture hardens before shaping, warm gently in microwave for 10-15 seconds. Avoid over-chilling to keep nests soft and chewy.
Nutrition
- Serving Size: 1 nest (approx. 50 g
- Calories: 160
- Sugar: 20
- Sodium: 90
- Fat: 5
- Saturated Fat: 3
- Carbohydrates: 32
- Protein: 1.5
Keywords: Easter treats, Rice Krispie treats, marshmallow dessert, festive snacks, candy egg nests, quick dessert, kids party treats


