
Let me tell you, the moment those crispy sweetheart cream puffs come out of the oven, their golden shells crackling softly as you touch them, you know you’re in for something special. The scent of warm butter and vanilla wafts through the kitchen, teasing your senses and making it nearly impossible to wait until they’re filled. Honestly, the first time I baked these delicate treats, I was instantly hooked—the kind of moment where you pause, take a deep breath, and just smile because you know you’re onto something truly special.
Years ago, when I was knee-high to a grasshopper, my grandma used to make cream puffs that seemed to vanish the minute they hit the table. I never thought I could match her magic until I stumbled across this recipe on a rainy weekend, trying to recreate that nostalgic feeling. My family couldn’t stop sneaking them off the cooling rack (and I can’t really blame them). These crispy sweetheart cream puffs with velvety vanilla filling quickly became a staple for family gatherings and sweet gifts—dangerously easy to make yet delivering pure, nostalgic comfort.
You know what? These puffs are perfect for brightening up your Pinterest cookie board, making a sweet treat for your kids, or impressing guests without fuss. I’ve tested this recipe more times than I can count, in the name of research, of course. Trust me, you’re going to want to bookmark this one.
Why You’ll Love This Recipe
There’s a reason this crispy sweetheart cream puffs recipe has earned a special spot in my kitchen and heart. Whether you’re a novice baker or a seasoned pro, you’ll find this recipe approachable yet impressive. Here’s why it stands out:
- Quick & Easy: Comes together in under 45 minutes, perfect for busy weeknights or last-minute dessert cravings.
- Simple Ingredients: No fancy or hard-to-find items—most are pantry staples you probably already have.
- Perfect for Any Occasion: Great for brunch, potlucks, cozy dinner parties, or even a sweet midday pick-me-up.
- Crowd-Pleaser: Always gets rave reviews from kids and adults alike—trust me, there’s rarely enough to go around.
- Unbelievably Delicious: The crisp outer shell paired with that smooth, velvety vanilla filling is comfort food at its finest.
This isn’t just another cream puff recipe. What makes it different? The batter’s perfectly balanced moisture and butter content create an irresistibly crisp shell, while the vanilla filling is luxuriously smooth thanks to a little trick I picked up from a pastry chef friend: folding in just the right amount of cream for texture without losing flavor. It’s comfort food reimagined—lighter, faster, but with the same soul-soothing satisfaction. Honestly, one bite and you’ll close your eyes and savor every moment.
What Ingredients You Will Need
This recipe uses simple, wholesome ingredients to deliver bold flavor and a satisfying texture without fuss. Most are classic pantry staples, but I’ll also share a few tips for picking the best versions.
- For the Choux Pastry (Puff Shells):
- 1 cup (240 ml) water (cold or room temperature)
- 8 tablespoons (113 g) unsalted butter, cut into pieces (I recommend Kerrygold for rich flavor)
- 1/2 teaspoon salt
- 1 cup (125 g) all-purpose flour (sifted for best texture)
- 4 large eggs, room temperature (important for proper rise)
- For the Velvety Vanilla Filling:
- 2 cups (480 ml) whole milk
- 1/2 cup (100 g) granulated sugar
- 1/4 cup (30 g) cornstarch (for thickening without lumps)
- 4 large egg yolks
- 2 tablespoons (28 g) unsalted butter, softened
- 2 teaspoons pure vanilla extract (homemade or Nielsen-Massey brand adds depth)
- Optional: 1/2 cup (120 ml) heavy cream, whipped to soft peaks (for extra creaminess)
Substitution notes: Use almond flour for a gluten-free version of the pastry, but note the texture will be a bit different—still delicious though! If dairy is a concern, swap whole milk for any unsweetened plant-based milk and use dairy-free butter alternatives. For the vanilla filling, coconut yogurt can replace the heavy cream for a lighter twist.
Equipment Needed
- Medium saucepan – for heating milk and making the filling
- Mixing bowls – one large for the dough, one for eggs
- Wooden spoon or heatproof spatula – essential for stirring the choux dough
- Piping bag with round tip (about 1/2 inch) – for shaping the cream puffs neatly (a zip-top bag with corner snipped works fine too!)
- Baking sheet lined with parchment paper or silicone mat
- Whisk – for smooth filling preparation
- Fine mesh sieve – optional but helpful for sifting flour
If you don’t have a piping bag, folding a piece of parchment into a cone shape works just as well. For cleanup, silicone mats are a favorite of mine because the puffs slide right off and they’re easy to wash. I once tried using a nonstick spray on paper, which worked but left a weird residue. Keep it simple and you’ll thank yourself later!
Preparation Method

- Preheat your oven to 425°F (220°C). Line a baking sheet with parchment paper or a silicone mat.
- Make the choux pastry: In a medium saucepan, combine 1 cup (240 ml) water, 8 tablespoons (113 g) butter, and 1/2 teaspoon salt. Bring to a rolling boil over medium heat. Once boiling, remove from heat and immediately add 1 cup (125 g) sifted flour all at once.
- Stir vigorously with a wooden spoon until the dough pulls away from the sides and forms a smooth ball, about 1-2 minutes. Return the pan to low heat and stir constantly for another 1-2 minutes to dry the dough slightly — this step helps create that perfect crisp shell.
- Transfer the dough to a large mixing bowl and let it cool for 5 minutes (too hot and the eggs will scramble).
- Add eggs one at a time: Beat in 4 large eggs, one by one, fully incorporating each before adding the next. The dough should be smooth, glossy, and fall off the spoon in thick ribbons. This can take some elbow grease but trust me, it’s worth it.
- Pipe the puffs: Transfer dough to a piping bag fitted with a round tip. Pipe 1 1/2-inch (4 cm) rounds onto the prepared baking sheet, leaving about 2 inches (5 cm) between each.
- Bake at 425°F (220°C) for 10 minutes, then reduce oven temperature to 350°F (175°C) and bake for an additional 20-25 minutes until puffed, golden, and crisp. Avoid opening the oven door during baking to prevent collapse.
- Cool completely: Transfer puffs to a wire rack and cool fully before filling to keep that crisp texture.
- Prepare the vanilla filling: In a saucepan, heat 2 cups (480 ml) whole milk just until simmering. In a separate bowl, whisk together 1/2 cup (100 g) sugar, 1/4 cup (30 g) cornstarch, and 4 egg yolks until smooth.
- Temper the eggs: Slowly pour about 1/2 cup (120 ml) hot milk into the egg mixture, whisking constantly to prevent curdling. Then return the mixture to the saucepan with the remaining milk.
- Cook over medium heat stirring constantly until thickened and bubbling, about 3-5 minutes. Remove from heat and stir in 2 tablespoons (28 g) butter and 2 teaspoons vanilla extract.
- Optional: Let filling cool slightly, then fold in 1/2 cup (120 ml) softly whipped cream for extra velvety texture.
- Fill the puffs: Slice each puff in half horizontally or poke a small hole and pipe the vanilla filling inside.
- Chill: Refrigerate filled puffs for at least 30 minutes before serving for the best texture and flavor meld.
Cooking Tips & Techniques
Making crispy sweetheart cream puffs can be surprisingly straightforward once you know a few tricks. First off, drying the dough slightly on the stove after adding flour is key to that perfect crisp shell—you want to evaporate some moisture to avoid sogginess. Also, adding eggs one at a time gives you better control over the dough’s consistency.
One common mistake is opening the oven door too soon; trust me, this can cause your puffs to collapse like a souffle after a party. Patience is a virtue here. If your dough looks too runny or too stiff after eggs, it’s okay to add a bit more beaten egg or a splash of water respectively to get the right texture.
When making the vanilla filling, constant whisking while heating prevents lumps and scrambling. Tempering eggs carefully (slowly adding hot milk) is a lifesaver and keeps the custard silky smooth. Lastly, piping the dough evenly ensures uniform puffs and even baking. I sometimes use a kitchen scale to weigh dough balls for precision at bake sales!
Variations & Adaptations
You can easily customize these crispy sweetheart cream puffs to suit different tastes or dietary needs. Here are a few of my favorite twists:
- Chocolate lovers’ delight: Add 2 tablespoons cocoa powder to the choux dough and fill with chocolate ganache instead of vanilla cream.
- Fruit-filled puffs: Fold fresh berries or raspberry jam into the filling for a fruity surprise—perfect for summer gatherings.
- Dairy-free version: Use plant-based milk and vegan butter in the dough, and coconut cream whipped for the filling.
For a different cooking method, you can freeze unbaked puffs on the baking sheet and bake from frozen, adding a few extra minutes to the baking time. I tried this once for a last-minute party—works like a charm!
Serving & Storage Suggestions
Serve these crispy sweetheart cream puffs chilled or at room temperature. They’re charming on a dessert platter, dusted lightly with powdered sugar or drizzled with melted chocolate for a fancy touch. Pair them with a cup of strong coffee or a glass of chilled champagne for a treat that feels indulgent yet approachable.
Store any leftovers in an airtight container in the refrigerator for up to 3 days. The shells may lose a bit of their crispness, but reheating lightly in a warm oven for 5 minutes can restore some crunch. Filling can be made ahead and stored separately for up to 2 days. These puffs also freeze well unfilled; just thaw and fill when ready to serve.
Flavors tend to mellow and deepen after resting overnight, so if you’re prepping ahead, you’re in for a real treat the next day.
Nutritional Information & Benefits
Each crispy sweetheart cream puff (filled) is approximately 200-250 calories, depending on size and filling richness. Key ingredients like eggs and milk provide protein and calcium, while butter adds a dose of healthy fats for satiety. Using whole ingredients and making this from scratch means you avoid preservatives and unnecessary additives found in store-bought versions.
For those watching carbs, swapping traditional sugar with coconut sugar or erythritol can reduce glycemic impact without sacrificing sweetness. Gluten-free bakers can replace flour with almond or rice flour, though texture will differ slightly.
From my perspective, this recipe strikes a great balance between indulgence and wholesome ingredients—perfect for enjoying a treat without guilt.
Conclusion
If you’re looking for a recipe that’s equal parts charming and delicious, these crispy sweetheart cream puffs with velvety vanilla filling are absolutely worth making. They come together quickly with easy-to-find ingredients, and the results are nothing short of magical. I love how they bring back those cozy family memories while feeling fresh and light—plus, they’re a guaranteed crowd-pleaser.
Feel free to play around with the filling or add your own twist. I’d love to hear how you make these your own, so please share your comments and photos! Go on, treat yourself—you deserve a little homemade sweetness.
Happy baking!
FAQs
Can I make the cream puffs ahead of time?
Yes! You can bake the shells a day ahead and store them in an airtight container. Fill them just before serving for best texture.
Why did my cream puffs collapse?
Opening the oven door too early or not cooking the dough long enough on the stove can cause collapse. Make sure to bake with the door closed and dry the dough well during prep.
Can I freeze the cream puffs?
Absolutely! Freeze unfilled baked puffs in a single layer, then thaw and fill when ready to serve.
What if I don’t have a piping bag?
No worries! Use a zip-top bag and snip off a corner, or spoon the dough onto the baking sheet — though piping gives the best shape.
Can I use low-fat milk for the filling?
Whole milk gives the best creaminess, but low-fat milk can work. Just expect a slightly lighter texture in the filling.
Pin This Recipe!
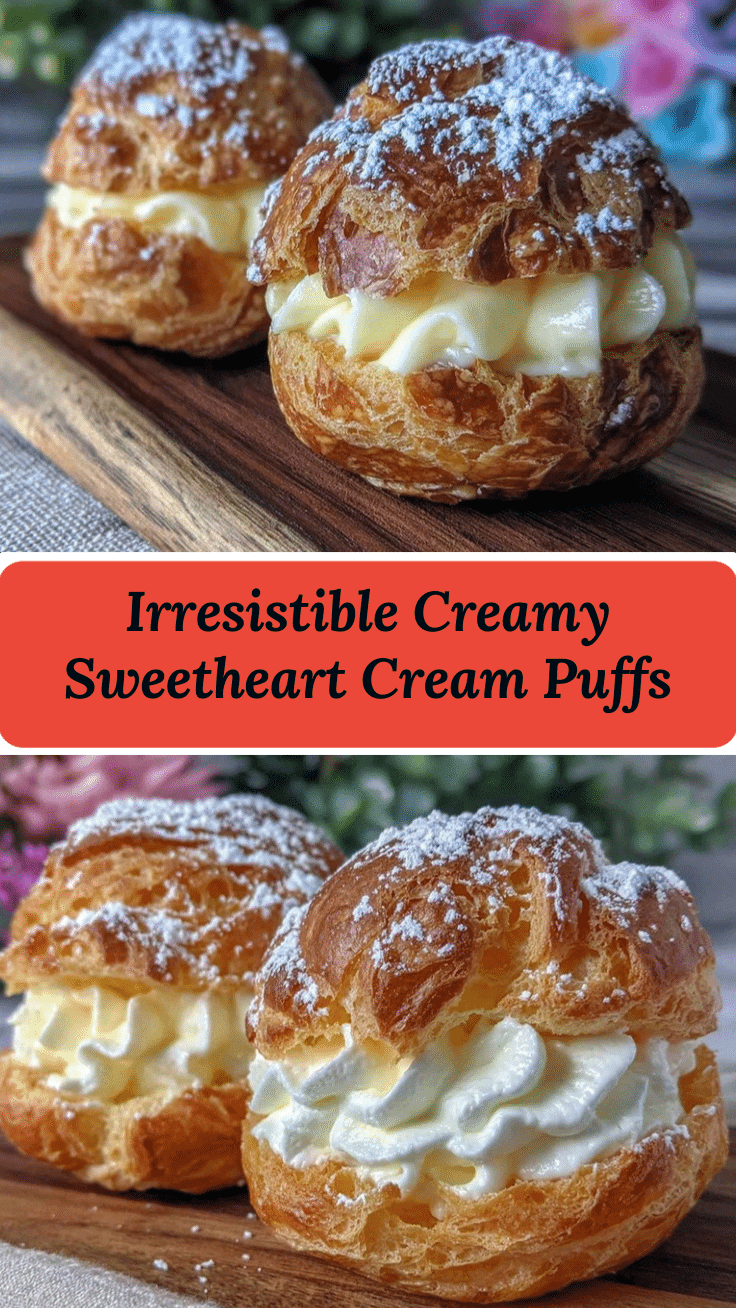
Crispy Sweetheart Cream Puffs with Velvety Vanilla Filling

Delight in these crispy sweetheart cream puffs with a smooth, velvety vanilla filling. Quick and easy to make, they are perfect for any occasion and sure to impress.
- Prep Time: 15 minutes
- Cook Time: 35 minutes
- Total Time: 50 minutes
- Yield: 12 servings 1x
- Category: Dessert
- Cuisine: French
Ingredients
- 1 cup (240 ml) water (cold or room temperature)
- 8 tablespoons (113 g) unsalted butter, cut into pieces
- 1/2 teaspoon salt
- 1 cup (125 g) all-purpose flour (sifted)
- 4 large eggs, room temperature
- 2 cups (480 ml) whole milk
- 1/2 cup (100 g) granulated sugar
- 1/4 cup (30 g) cornstarch
- 4 large egg yolks
- 2 tablespoons (28 g) unsalted butter, softened
- 2 teaspoons pure vanilla extract
- Optional: 1/2 cup (120 ml) heavy cream, whipped to soft peaks
Instructions
- Preheat your oven to 425°F (220°C). Line a baking sheet with parchment paper or a silicone mat.
- In a medium saucepan, combine water, butter, and salt. Bring to a rolling boil over medium heat.
- Remove from heat and immediately add sifted flour all at once. Stir vigorously with a wooden spoon until dough pulls away from sides and forms a smooth ball, about 1-2 minutes.
- Return pan to low heat and stir constantly for another 1-2 minutes to dry the dough slightly.
- Transfer dough to a large mixing bowl and let cool for 5 minutes.
- Beat in eggs one at a time, fully incorporating each before adding the next, until dough is smooth, glossy, and falls off the spoon in thick ribbons.
- Transfer dough to a piping bag fitted with a round tip. Pipe 1 1/2-inch rounds onto prepared baking sheet, leaving about 2 inches between each.
- Bake at 425°F for 10 minutes, then reduce oven temperature to 350°F and bake for an additional 20-25 minutes until puffed, golden, and crisp. Avoid opening oven door during baking.
- Transfer puffs to a wire rack and cool completely before filling.
- To prepare the vanilla filling, heat whole milk in a saucepan just until simmering.
- In a separate bowl, whisk together sugar, cornstarch, and egg yolks until smooth.
- Slowly pour about 1/2 cup hot milk into egg mixture, whisking constantly to temper eggs.
- Return mixture to saucepan with remaining milk and cook over medium heat, stirring constantly until thickened and bubbling, about 3-5 minutes.
- Remove from heat and stir in butter and vanilla extract.
- Optional: Let filling cool slightly, then fold in whipped cream for extra velvety texture.
- Fill the puffs by slicing each in half or poking a small hole and piping the vanilla filling inside.
- Refrigerate filled puffs for at least 30 minutes before serving.
Notes
Drying the dough slightly on the stove after adding flour is key to a perfect crisp shell. Add eggs one at a time for better dough consistency. Avoid opening the oven door during baking to prevent collapse. Temper eggs carefully when making the filling to avoid curdling. Piping dough evenly ensures uniform puffs. For gluten-free, substitute almond flour; for dairy-free, use plant-based milk and vegan butter.
Nutrition
- Serving Size: 1 cream puff
- Calories: 225
- Sugar: 10
- Sodium: 150
- Fat: 14
- Saturated Fat: 8
- Carbohydrates: 22
- Fiber: 0.5
- Protein: 5
Keywords: cream puffs, choux pastry, vanilla filling, crispy cream puffs, homemade dessert, easy cream puffs, pastry


