Introduction
That smell—warm, yeasty dough mingling with the unmistakable hit of coarse salt—always takes me straight back to those bustling bakeries I wandered into as a kid. The first time I pulled a batch of crispy pretzel rolls from my own oven, I swear the whole house paused in awe. The golden-brown crusts, crackling as they cooled on the rack, were almost too tempting to resist (my kids definitely didn’t wait for them to cool, and honestly, neither did I).
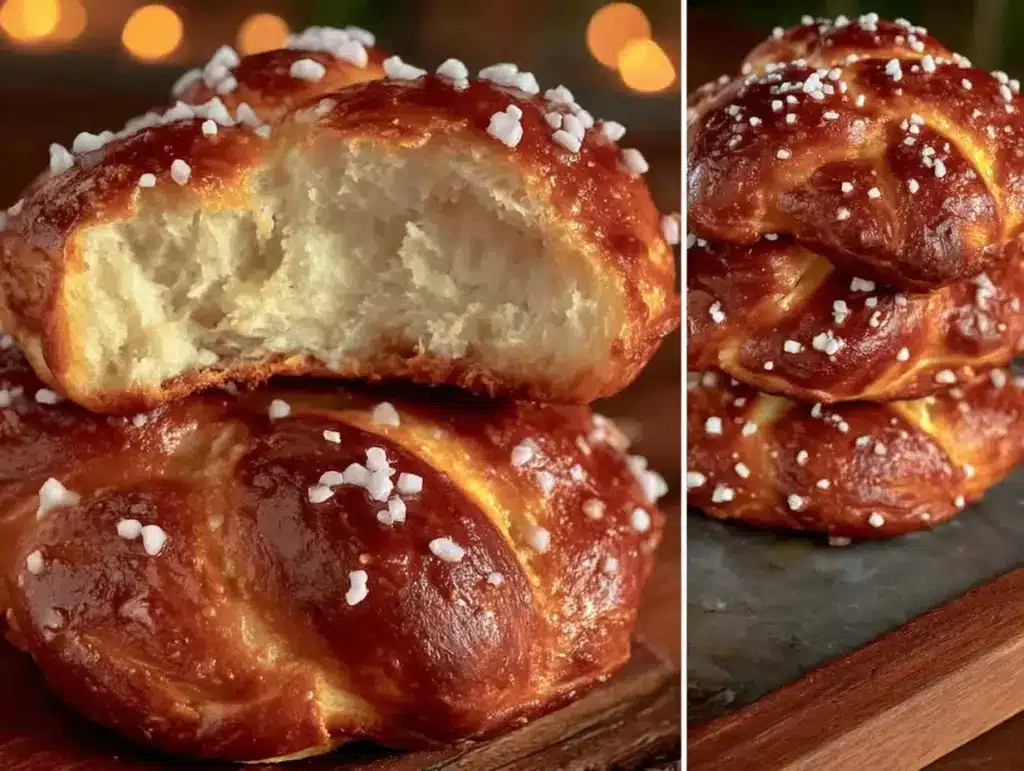
There’s something magical about biting into a bakery-style pretzel roll: shatteringly crisp outside, pillowy-soft inside, just enough chew to keep things interesting. I was instantly hooked. It’s the kind of comfort food that makes you close your eyes, grin, and just enjoy the moment. The first time I made these rolls was on a rainy Sunday, trying to recreate the ones my grandma used to buy for family picnics—when I was knee-high to a grasshopper, she’d always sneak me an extra roll on the way home.
Honestly, I wish I had stumbled across this crispy pretzel rolls recipe years ago. It’s dangerously easy—no fancy gadgets, no wild ingredients, just real, honest baking. My family couldn’t stop sneaking them off the cooling rack (and I can’t really blame them—these rolls have a way of disappearing fast). Whether you’re looking for a snack for movie night, a showstopper for your Pinterest board, or just want to brighten up your lunchbox routine, these crispy pretzel rolls fit the bill. I’ve tested this recipe more times than I care to admit (in the name of research, of course), and it’s become a staple for family gatherings and gifting. Feels like a warm hug every time, and you’re going to want to bookmark this one!
Why You’ll Love This Recipe
I’ve baked a lot of bread in my kitchen—everything from sourdough to sandwich loaves—but nothing gets people talking quite like crispy pretzel rolls. Here’s what makes them a must-try (and why I keep coming back):
- Quick & Easy: Ready in under 2 hours—no overnight rise, no endless waiting. Perfect for when the craving hits and you want bakery-style results fast.
- Simple Ingredients: Flour, yeast, salt, baking soda, and water. Nothing fancy, just the stuff you probably already have in your pantry.
- Perfect for Any Occasion: These pretzel rolls shine at potlucks, backyard BBQs, game nights, or as a cozy snack for rainy afternoons. They’re a hit everywhere.
- Crowd-Pleaser: Kids love them, adults ask for seconds, and honestly, they disappear faster than you’d expect. Bring them to a party and you’ll leave with an empty tray.
- Unbelievably Delicious: That classic pretzel flavor and bakery-style texture—crisp, chewy, and perfectly salty. It’s comfort food, plain and simple.
What sets this crispy pretzel rolls recipe apart? I spent ages tweaking the baking soda bath technique (the secret to that signature crust) and experimented with different flour blends. The result is a roll that’s crisp on the outside, soft and fluffy inside. I even tried baking them on a pizza stone—what a game-changer for texture!
This isn’t just another pretzel roll recipe. It’s the one that makes you pause mid-bite and think, “Wow, I made this!” It’s comfort food made at home, but with all the bakery-style charm you crave. Whether you’re impressing guests or just treating yourself, these rolls deliver every time. If you love easy recipes that taste like they took way more effort, you’ll be hooked—just like my family was after the first batch. Trust me, you’ll want to make them again and again.
What Ingredients You Will Need
This crispy pretzel rolls recipe uses straightforward, wholesome ingredients to deliver bold flavor and that addictive bakery-style texture. Most are pantry staples, and I’ve got a few notes on brands and substitutions to help you get those perfect results.
- For the Dough:
- 3 1/2 cups (420g) all-purpose flour (I like King Arthur for consistent texture)
- 2 1/4 tsp (7g) instant yeast (or active dry yeast, just bloom in warm water first)
- 1 1/2 tsp (9g) fine sea salt
- 1 tbsp (13g) granulated sugar (helps with browning and flavor)
- 1 1/4 cups (300ml) warm water (about 110°F/43°C)
- 2 tbsp (28g) unsalted butter, melted (adds richness)
- For the Pretzel Bath:
- 10 cups (2.4L) water
- 2/3 cup (160g) baking soda (essential for that crisp, deep brown crust)
- For Topping:
- 1 egg, beaten (for egg wash—gives that glossy finish)
- Coarse salt (pretzel salt or flaky sea salt—Maldon is great)
If you need a gluten-free option, swap the all-purpose flour for your favorite gluten-free blend (Cup4Cup works well). Dairy-free? Use olive oil or vegan butter instead of regular butter. In summer, I sometimes toss in a handful of fresh rosemary or thyme for extra flavor—totally optional, but delightful. The coarse salt is non-negotiable for that classic pretzel kick, but you can adjust the amount to taste. If you prefer a slightly sweeter roll, up the sugar just a bit.
All these ingredients work together to create a roll that’s crisp, chewy, and just salty enough. No need for obscure specialty items—just a few basics, mixed and baked to perfection. If you want to experiment, rye flour gives an earthy twist, and a touch of honey in the dough adds subtle sweetness. The beauty of crispy pretzel rolls is how well they adapt to what you have on hand.
Equipment Needed

You don’t need a fancy bakery setup to make these crispy pretzel rolls. Here’s what I use (and a few alternatives if you’re working with a smaller kitchen):
- Large mixing bowl – For mixing and kneading the dough. If you have a stand mixer, it makes things easier, but hand-mixing works just fine.
- Wooden spoon or dough hook – To bring the dough together. I’ve tried silicone spatulas, but nothing beats a sturdy wooden spoon for getting that dough nice and smooth.
- Baking sheet – Line it with parchment paper for easy cleanup. If you want extra crunch, a pizza stone works wonders (just preheat it for best results).
- Small saucepan – For melting butter. If you’re skipping the butter, you can use a microwave-safe bowl instead.
- Large pot – For the baking soda bath. I use my trusty Dutch oven, but any deep, wide saucepan will do the trick.
- Slotted spoon – Essential for fishing out the rolls after their bath (don’t use a regular spoon—the holes help drain excess water).
- Pastry brush – For the egg wash. If you don’t have one, a clean paper towel works in a pinch.
- Kitchen scale (optional) – Makes measuring flour more precise, especially for beginners.
If you’re short on equipment, don’t worry! I started making these rolls with just a bowl, spoon, and baking sheet. Maintenance tip: Keep your baking sheets clean—residual salt can corrode them over time. For budget-friendly options, check out local thrift stores for sturdy kitchen tools; some of my favorite spoons and bowls came from there!
Preparation Method
- Make the Dough
Combine 1 1/4 cups (300ml) warm water, 2 tbsp (28g) melted butter, and 1 tbsp (13g) sugar in a large mixing bowl. Sprinkle 2 1/4 tsp (7g) instant yeast over the top. Let it sit for 2-3 minutes (if using active dry yeast, wait until it gets foamy).
Add 3 1/2 cups (420g) all-purpose flour and 1 1/2 tsp (9g) salt. Mix with a wooden spoon until a shaggy dough forms. Knead by hand for 8-10 minutes (or 5 minutes in a stand mixer) until smooth and elastic. If the dough feels too sticky, sprinkle in a tablespoon of flour at a time.
- First Rise
Place the dough in a lightly oiled bowl, cover with a clean towel, and let rise in a warm spot for about 45 minutes to 1 hour. It should double in size—if your kitchen is chilly, set the bowl near the oven or use the proofing setting. I sometimes put mine in the microwave (turned off!) with a cup of hot water to speed things up.
- Shape the Rolls
Punch down the dough gently to release air. Divide into 8 equal pieces (about 90g each). Shape each piece into a round ball—pull the sides under and pinch at the bottom for a smooth top. Place shaped rolls on a parchment-lined baking sheet.
Cover and let rest for 15 minutes. This helps them relax and hold their shape better during boiling.
- Prepare the Pretzel Bath
Preheat your oven to 425°F (220°C). Bring 10 cups (2.4L) water and 2/3 cup (160g) baking soda to a gentle boil in a large pot. The baking soda bath is what gives pretzel rolls their signature crust—don’t skip this step!
- Boil the Rolls
Using a slotted spoon, carefully lower 2-3 rolls into the boiling water. Boil for 30 seconds per side (don’t overcrowd the pot). The rolls will puff up and get a slightly tacky skin—that’s a good sign. Remove with the slotted spoon and return to the baking sheet.
Troubleshooting: If rolls deflate after boiling, your water might be too hot—lower the heat a touch. If they stick, grease your spoon lightly.
- Egg Wash and Salt
Brush each roll with beaten egg and sprinkle generously with coarse salt. Use more if you love that classic pretzel flavor, or less for a milder bite.
- Bake
Bake in the preheated oven for 18-22 minutes, until deep golden brown and crisp. The rolls should sound hollow when tapped on the bottom. Rotate the pan halfway through for even browning.
Personal tip: For extra crunch, bake for an additional 2 minutes—but keep a close eye so they don’t overbrown!
- Cool and Serve
Transfer rolls to a wire rack to cool slightly. They’re best enjoyed warm, but honestly, they’re delicious at room temp too.
Warning: Hot rolls can be steamy inside—let them cool for at least 10 minutes before diving in (I know, it’s hard to wait).
Efficiency tip: Shape and boil the rolls while the oven preheats—you’ll save time and keep the process moving. The dough is forgiving, so don’t stress if your shaping isn’t perfect; a rustic look adds to the charm!
Cooking Tips & Techniques
Baking crispy pretzel rolls at home isn’t rocket science, but I’ve picked up a few tricks after plenty of trials and (some hilarious) errors:
- Baking Soda Bath: Don’t rush the boiling step. Thirty seconds per side is just right for a deep brown, crisp crust. If your rolls taste bitter, check your baking soda measurement—too much can overpower the flavor.
- Shaping: Pulling the dough taut and pinching underneath gives a smooth, round top. My first few batches were lopsided, but the taste was still spot on.
- Egg Wash: Brush gently and evenly for a glossy finish. If you skip the egg wash, the rolls won’t get that signature shine.
- Oven Temperature: Preheat fully and bake on the middle rack. A pizza stone helps get the bottoms extra crisp, but a regular baking sheet works fine too.
- Multitasking: While the dough rises, prep your baking soda bath and set out toppings. I like to lay out parchment and measure salt so I don’t scramble at the last minute.
- Consistency: If your dough is too sticky, add flour a tablespoon at a time. If it’s dry, sprinkle in a bit of warm water. Every kitchen has its quirks!
Common mistakes? Overcrowding the boiling pot—rolls can stick and lose their shape. Don’t be afraid to boil in small batches. I’ve also learned (the hard way) that skipping the resting period before boiling can make rolls flat. Let them chill for those 15 minutes!
My biggest lesson? These rolls are forgiving. Even if they look a little “rustic,” they’ll taste amazing. If you want to get ahead, shape the dough the night before and let it rest in the fridge. Fresh, hot pretzel rolls in the morning—now that’s a treat!
Variations & Adaptations
The beauty of homemade crispy pretzel rolls is how easy they are to tweak to suit tastes, dietary needs, or the season. Here are a few favorite variations:
- Cheese-Stuffed Pretzel Rolls: Tuck a cube of cheddar or mozzarella inside each dough ball before boiling—melty, gooey, and irresistible!
- Whole Wheat or Multigrain: Swap half the all-purpose flour for whole wheat or a multigrain blend. Adds a nutty flavor and a little extra nutrition.
- Vegan/Dairy-Free: Use olive oil or vegan butter in place of regular butter, and skip the egg wash for a matte finish (brush with aquafaba or almond milk instead).
- Herb-Infused: Mix chopped fresh rosemary, thyme, or chives into the dough for a savory twist—especially great in summer!
- Low-Sodium Option: Reduce the amount of coarse salt on top, or use a sodium-free salt alternative for a lighter snack.
Cooking methods? You can bake these on a pizza stone for an extra-crisp bottom, or in an air fryer (just reduce the time and batch size). For gluten-free rolls, swap in a cup-for-cup gluten-free flour blend and check the dough consistency—sometimes a little extra water helps.
Personal favorite: I love making mini pretzel rolls for parties. Just divide the dough into 16 pieces instead of 8, and reduce the boiling and baking time by a couple of minutes. They’re perfect for sliders or dipping in cheese sauce!
Serving & Storage Suggestions
Crispy pretzel rolls are best served warm—fresh out of the oven, when the crust is shatteringly crisp and the inside is steamy and soft. I like to pile them up on a wooden board, sprinkle a little extra coarse salt for flair, and serve with softened butter or grainy mustard on the side.
Pair these rolls with hearty soups (potato, cheddar, or tomato), grilled sausages, or a big green salad. For brunch, they’re amazing with scrambled eggs and smoked salmon. If you want a showstopping snack for game day, serve them with a tangy cheese dip or homemade hummus.
To store, let the rolls cool fully, then place in a zip-top bag or airtight container. They’ll keep at room temperature for up to 2 days, or in the fridge for 4 days. For longer storage, wrap tightly and freeze for up to 2 months. To reheat, pop in a 350°F (175°C) oven for 8-10 minutes—crisps them up like new! Microwave works in a pinch, but the oven is best for texture.
Flavor tip: The rolls’ flavor deepens after a day or two, making them even better for sandwiches or snacking. If you have leftovers, cube and toast them for croutons (trust me, so good in salads).
Nutritional Information & Benefits
Each crispy pretzel roll (based on 8 rolls per batch) contains roughly:
- Calories: 210
- Protein: 5g
- Fat: 3g
- Carbohydrates: 40g
- Sodium: 380mg (varies with salt topping)
What’s great about this recipe? It uses simple, whole ingredients—no preservatives or additives. The rolls are naturally low in fat and provide a good protein boost from the flour and yeast. Use whole wheat flour for extra fiber, or reduce the salt for a lighter snack.
Dietary notes: Easy to make vegan (skip butter/egg), and gluten-free with a flour swap. Allergens: Contains wheat, egg, and dairy (unless adapted). From a wellness perspective, I love that these rolls satisfy cravings for something crunchy and salty—without needing to buy pre-packaged snacks. Homemade always feels better!
Conclusion
If you’re searching for a recipe that hits all the bakery-style notes—crisp crust, chewy bite, and salty finish—these crispy pretzel rolls are it. They’re easy enough for beginners, but special enough to impress anyone who tries them. The flavor and texture always remind me of cozy afternoons and family gatherings (and the joy of sneaking just one more from the tray).
Honestly, there’s no wrong way to enjoy these rolls. Tweak the toppings, play with the flour blends, and make them your own. I love them because they turn any ordinary snack into a memory—plus, they make your kitchen smell absolutely amazing.
Give this crispy pretzel rolls recipe a try, and let me know your favorite twists! Share your results in the comments, pin it to your Pinterest board, or tag me in your baking adventures. Here’s to homemade comfort food—one salty, golden roll at a time!
Frequently Asked Questions
Can I make crispy pretzel rolls ahead of time?
Absolutely! Shape and boil the rolls, then refrigerate overnight. Bake fresh the next day for best results. They freeze well after baking, too.
Can I use bread flour instead of all-purpose flour?
Yes, bread flour will give the rolls a slightly chewier texture. You might need to add a tablespoon of extra water if the dough feels dry.
How do I get that deep brown color on my pretzel rolls?
The baking soda bath is key—don’t skip it! Boil the rolls for 30 seconds per side, then bake until golden. An egg wash adds extra shine.
Are these pretzel rolls vegan-friendly?
They can be! Swap the butter for olive oil or vegan butter, and use almond milk or aquafaba for the egg wash. Skip the egg entirely for a matte finish.
Why did my pretzel rolls turn out flat?
Usually, it’s from skipping the resting step before boiling or using water that’s too hot. Let the shaped rolls rest for 15 minutes and keep the boil gentle.
Pin This Recipe!

Crispy Pretzel Rolls

Bakery-style pretzel rolls with a shatteringly crisp crust and pillowy-soft interior, perfect for snacking, sandwiches, or serving at gatherings. This easy homemade recipe uses simple pantry ingredients and delivers irresistible results every time.
- Prep Time: 25 minutes
- Cook Time: 22 minutes
- Total Time: 1 hour 30 minutes
- Yield: 8 rolls 1x
- Category: Snack
- Cuisine: German
Ingredients
- 3 1/2 cups all-purpose flour
- 2 1/4 tsp instant yeast (or active dry yeast, bloomed in warm water)
- 1 1/2 tsp fine sea salt
- 1 tbsp granulated sugar
- 1 1/4 cups warm water (about 110°F)
- 2 tbsp unsalted butter, melted
- 10 cups water (for pretzel bath)
- 2/3 cup baking soda (for pretzel bath)
- 1 egg, beaten (for egg wash)
- Coarse salt (pretzel salt or flaky sea salt) for topping
Instructions
- Combine warm water, melted butter, and sugar in a large mixing bowl. Sprinkle yeast over the top and let sit for 2-3 minutes (if using active dry yeast, wait until foamy).
- Add flour and salt. Mix with a wooden spoon until a shaggy dough forms. Knead by hand for 8-10 minutes (or 5 minutes in a stand mixer) until smooth and elastic. Add flour if dough is too sticky.
- Place dough in a lightly oiled bowl, cover, and let rise in a warm spot for 45 minutes to 1 hour, until doubled in size.
- Punch down dough and divide into 8 equal pieces. Shape each into a round ball, pulling sides under and pinching at the bottom for a smooth top. Place on a parchment-lined baking sheet.
- Cover and let rolls rest for 15 minutes.
- Preheat oven to 425°F. Bring water and baking soda to a gentle boil in a large pot.
- Using a slotted spoon, lower 2-3 rolls into boiling water. Boil for 30 seconds per side. Remove and return to baking sheet.
- Brush each roll with beaten egg and sprinkle generously with coarse salt.
- Bake for 18-22 minutes, until deep golden brown and crisp. Rotate pan halfway through for even browning.
- Transfer rolls to a wire rack to cool slightly. Enjoy warm or at room temperature.
Notes
For extra crunch, bake rolls for an additional 2 minutes. If making vegan, substitute butter with olive oil or vegan butter and use almond milk or aquafaba for the egg wash. Rolls can be made ahead and refrigerated overnight before baking. For gluten-free, use a cup-for-cup gluten-free flour blend. Mini rolls can be made by dividing dough into 16 pieces and reducing boiling/baking time. Rolls freeze well and can be reheated in the oven for best texture.
Nutrition
- Serving Size: 1 roll
- Calories: 210
- Sugar: 2
- Sodium: 380
- Fat: 3
- Saturated Fat: 1.5
- Carbohydrates: 40
- Fiber: 1.5
- Protein: 5
Keywords: pretzel rolls, homemade pretzel, bakery-style, snack, easy bread, German, party food, comfort food, crispy pretzel, soft pretzel, lunchbox, game day


