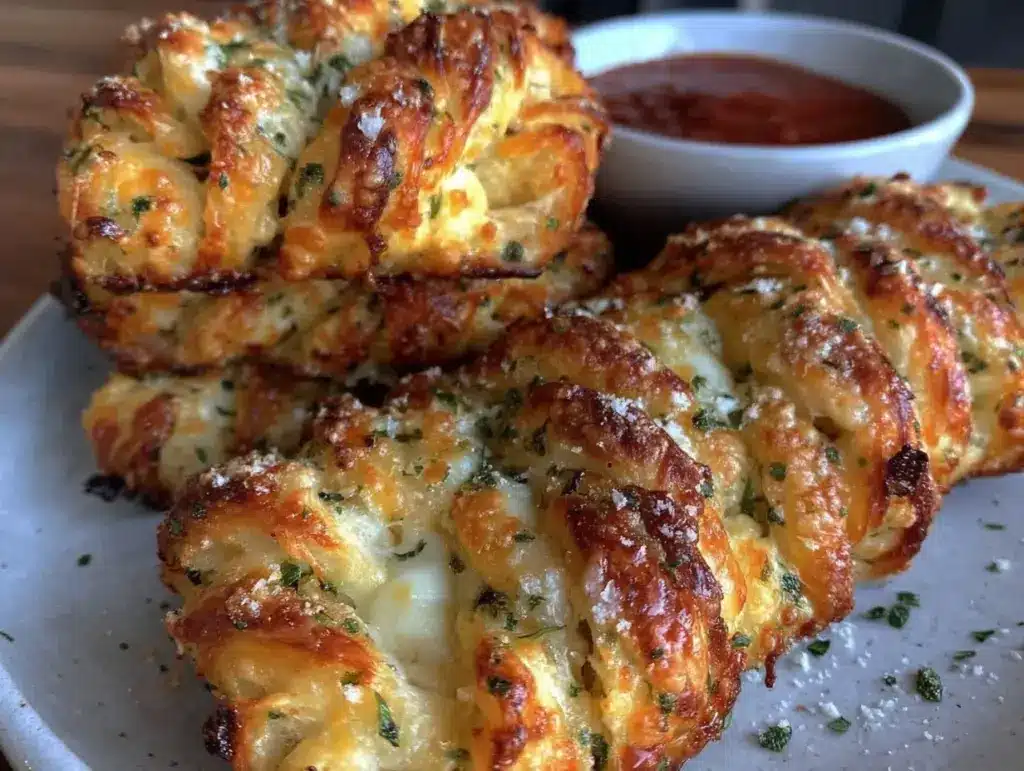
Let me just say, the moment the aroma of sizzling garlic, bubbling cheese, and that golden, buttery bread hit my kitchen, I knew these crispy cheesy garlic bread twists were about to become legendary. Imagine pulling a tray from the oven, steam rising, the edges perfectly crisp and the center soft and gooey (with cheese stretching in every direction). Honestly, it’s the kind of snack that makes you pause, take it all in, and maybe sneak a twist before the rest of the family catches on.
The first time I made these twists, it was a rainy Saturday and I was hunting for something comforting, simple, and—let’s face it—impossible to resist. I remembered my grandma’s old garlic bread recipe from when I was knee-high to a grasshopper, but I wanted something fun and snackable. That’s when the idea for these twists popped up. And oh boy, talk about a game changer. I wish I’d stumbled on this combo years ago because my family couldn’t keep their hands off them (my teenager even tried to claim the last one as “chef’s privilege”—nice try!).
There’s pure, nostalgic comfort in every bite but also a little twist (literally) that makes them stand out at potlucks, movie nights, and even alongside a bowl of soup. These crispy cheesy garlic bread twists are dangerously easy to make, and honestly, they’ve become my go-to for family gatherings, gifting, and—yes—late-night snacking in the name of research, of course. If you want a recipe that feels like a warm hug and brightens up your Pinterest snack board, you’re going to want to bookmark this one.
Why You’ll Love These Crispy Cheesy Garlic Bread Twists
I’ve baked my way through hundreds of snack recipes (trust me, my kitchen has seen it all), and these crispy cheesy garlic bread twists have earned their spot as a top-tier favorite. Here’s why:
- Quick & Easy: Ready in under 30 minutes, they’re perfect for busy weeknights or when you need a last-minute party snack.
- Simple Ingredients: No wild goose chase at the grocery store—you probably have everything already.
- Perfect for Any Occasion: These twists are a hit at brunches, potlucks, cozy movie nights, and holiday spreads.
- Crowd-Pleaser: Kids, teens, and adults all go nuts for these (I’ve witnessed actual wrestling matches over the last twist).
- Unbelievably Delicious: It’s the texture—crispy edges, soft cheesy middle, a buttery finish, and that hit of parsley—that’ll have you closing your eyes, savoring every bite.
What makes these twists different? Well, I use a blend of mozzarella and sharp cheddar for maximum cheese pull and flavor depth. Brushing with real melted butter and fresh parsley after baking is my not-so-secret weapon for extra richness. The garlic is roasted, not raw, for a mellow bite that doesn’t overpower (learned that the hard way after one overly pungent batch!).
These aren’t just good, they’re the kind of snacks that make people linger in your kitchen, hoping for seconds. They deliver comfort food satisfaction—faster and easier than classic garlic bread but with that same soul-soothing feeling. You can whip these up to impress guests (without breaking a sweat) or just to treat yourself when you want something memorable. Honestly, you’ll keep coming back to this recipe.
What Ingredients You Will Need
This recipe uses simple, wholesome ingredients to deliver bold flavor and satisfying texture without the fuss. Most are pantry staples, and you can swap or tweak as needed. Here’s what you’ll need for these crispy cheesy garlic bread twists:
- For the Dough:
- 1 sheet puff pastry (about 250 g / 9 oz, thawed if frozen)
- All-purpose flour (for dusting)
- For the Garlic Butter:
- 1/4 cup (60 g) unsalted butter, melted
- 3 large garlic cloves, minced (or more if you’re feeling bold)
- 1/2 tsp fine sea salt
- 1/4 tsp black pepper
- For the Cheese Filling:
- 1/2 cup (60 g) shredded mozzarella (for gooey stretch)
- 1/2 cup (60 g) shredded sharp cheddar (for punchy flavor)
- 1/4 cup (25 g) grated Parmesan (adds salty, nutty kick)
- For the Buttery Parsley Finish:
- 2 tbsp unsalted butter, melted (for brushing after baking)
- 2 tbsp fresh parsley, finely chopped (or 2 tsp dried parsley)
- Optional Extras:
- Pinch of red pepper flakes (for a little heat)
- 1 tsp Italian seasoning blend (if you want a herby twist)
Ingredient notes & substitutions:
- Puff pastry is my go-to for these twists, but you can use pizza dough or crescent roll dough for a softer result (I’ve tried all three—each has its charm).
- If you need gluten-free, swap in a certified GF pastry sheet (Schar works well).
- Dairy-free? Use plant-based butter and vegan cheese shreds (I like Violife for melting).
- Fresh parsley is best for the finish, but dried works in a pinch.
- For cheese, feel free to experiment—fontina, provolone, or even Monterey Jack get rave reviews in my house.
Honestly, this ingredient list is forgiving. If you’re out of one cheese, just double up on another. The magic is in the combo of garlic, butter, and cheese wrapped up in crispy pastry.
Equipment Needed
You don’t need a chef’s kitchen to whip up crispy cheesy garlic bread twists—just a few basic tools. Here’s what I use every time:
- Baking sheet (a rimmed one is best to catch any melted cheese)
- Parchment paper or silicone baking mat (for easy cleanup—trust me, you’ll thank yourself later)
- Pastry brush (for the buttery finish)
- Sharp knife or pizza cutter (to slice the twists evenly—pizza cutter is my favorite for speed)
- Small bowl (for mixing the garlic butter)
- Measuring cups and spoons (accuracy matters for the butter and cheese ratio)
If you don’t have a pastry brush, just use the back of a spoon. For cutting, a serrated knife works in a pinch. I’ve used regular baking trays and even my old air fryer tray (for smaller batches). Maintenance tip: If you’re using a silicone mat, rinse promptly after the cheese bakes on. For budget-friendly options, dollar store baking sheets do the job just fine. Honestly, no fancy gadgets needed—just reliable basics.
Preparation Method
Here’s how to make crispy cheesy garlic bread twists with buttery parsley finish—it’s easier than you think! I’ve broken it down step-by-step, with notes from my own kitchen trial runs.
- Prep your station: Preheat your oven to 400°F (200°C). Line your baking sheet with parchment paper or a silicone baking mat. Dust your work surface lightly with flour to prevent sticking.
- Mix up garlic butter: In a small bowl, combine 1/4 cup (60 g) melted butter, minced garlic, salt, and pepper. Stir well. You want the garlic evenly distributed so every bite gets a little punch.
- Roll out the pastry: Place thawed puff pastry sheet on the floured surface. Gently roll to about 1/8 inch (3 mm) thick if it’s a bit thick—this gives you crispier twists.
- Spread garlic butter: Using a pastry brush or spoon, spread the garlic butter evenly over the entire sheet. Go right to the edges for maximum flavor (don’t be shy!).
- Add cheese: Sprinkle mozzarella, cheddar, and Parmesan over half of the pastry sheet. Press lightly so the cheese sticks (trust me, it helps with melting).
- Fold and seal: Fold the pastry in half over the cheese, pressing the edges together gently. Use a fork to crimp the edges if you want to keep the cheese inside (sometimes I skip this—no harm if a little leaks out).
- Slice into strips: With a sharp knife or pizza cutter, slice the folded pastry into 12 even strips, about 1 inch (2.5 cm) wide. If you prefer smaller twists, go for 16.
- Twist and arrange: Take each strip and gently twist several times. Place on your lined baking sheet, spacing at least 1 inch (2.5 cm) apart. (Tip: Twist gently so the filling stays inside.)
- Bake: Slide the tray into your oven. Bake for 15-18 minutes, until golden brown and the cheese is bubbling. If your oven runs hot, check at 14 minutes. You want crispy edges and a soft center.
- Finish with butter & parsley: As soon as the twists come out, brush with 2 tbsp melted butter and sprinkle with chopped parsley. The heat helps the flavors soak in (and makes them look gorgeous!).
- Cool & serve: Let twists cool for 5 minutes—they’ll crisp up as they sit. Serve warm for the full cheesy effect.
Troubleshooting tips: If twists unravel during baking, press the ends down firmly before baking. If the cheese leaks, it’s normal—just trim off the crispy bits and enjoy! For extra crispiness, bake a minute longer but keep an eye on the edges so they don’t burn. Efficiency tip: Prep everything while the oven heats and twist as you go—it’s actually relaxing once you get into the rhythm!
How do I know when the twists are perfectly baked?
The best cue is color—golden brown edges and a slightly deeper hue where the cheese bubbles. The smell alone will tell you when it’s time (the first whiff is always the best part!). The twists should feel firm but not hard, and the cheese should be melted through.
Cooking Tips & Techniques
Here are a few tried-and-true tips for perfect crispy cheesy garlic bread twists (learned from lots of “just one more batch” test runs):
- Don’t overload the cheese: Too much cheese makes the twists soggy and messy. Stick to the measurements for the best balance.
- Chill your pastry: If your kitchen is warm, pop the pastry in the fridge for 10 minutes before slicing—it’s easier to twist and keeps the layers flaky.
- Use fresh garlic: Pre-minced garlic from a jar just isn’t the same. The flavor is sharper and more aromatic when freshly minced.
- Brush with butter twice: I brush once before baking (with garlic butter) and again afterwards (with plain melted butter and parsley)—the double layer makes a huge difference.
- Space evenly: Leave enough room on your baking sheet so each twist gets nice and crispy. If they’re crowded, they’ll steam and soften.
- Multitasking: Mix the parsley and extra butter while the twists bake. That way, you’re ready to brush as soon as they come out.
- Consistency: Cut your strips evenly for uniform baking. Uneven twists can burn on one end and underbake on the other (been there, done that!).
If you overbake, the cheese can get hard—so watch your oven closely. Underbake, and the pastry stays too soft. I’ve found that practicing with half a batch is a great way to get the hang of twisting and baking time. These little tricks make every batch better.
Variations & Adaptations
One of the best things about crispy cheesy garlic bread twists is how flexible they are. Here are some easy ways to switch things up:
- Gluten-Free Option: Swap in gluten-free puff pastry (like Schar brand) and use your favorite gluten-free cheese.
- Spicy Kick: Add a pinch of cayenne or red pepper flakes to the cheese mix. My husband loves these with a bit of heat!
- Herb Lovers: Mix Italian seasoning or dried oregano into the garlic butter for a Mediterranean twist.
- Vegan Version: Use plant-based butter and cheese (Violife or Daiya melt well). Make sure your pastry is vegan too.
- Seasonal Flavors: In summer, swap parsley for fresh basil. In winter, add a sprinkle of rosemary for a cozy touch.
- Different Cooking Methods: You can bake these in an air fryer—just reduce the temperature to 370°F (188°C) and check at 10 minutes.
Personally, my favorite twist is using smoked gouda in place of cheddar—adds a whole new flavor dimension! You can also make mini twists for appetizers or longer twists for dipping into soup. Feel free to add your own spin; these bread twists are super forgiving and fun to experiment with.
Serving & Storage Suggestions
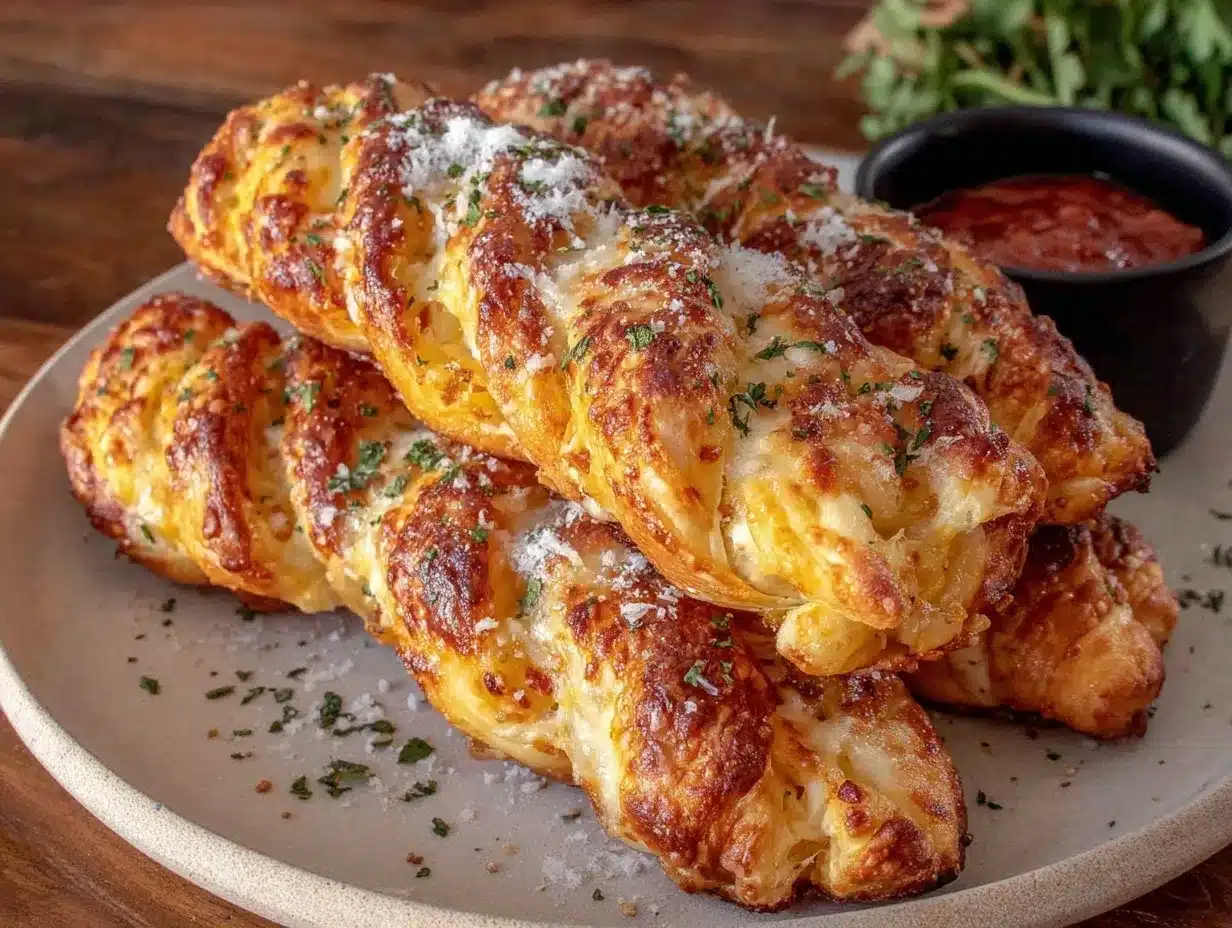
Serve these crispy cheesy garlic bread twists warm for the best flavor and texture. I love piling them into a bread basket lined with a napkin—they look seriously inviting. If you’re hosting, pair with marinara sauce, ranch, or a simple tomato soup for dipping. For parties, arrange on a platter with extra parsley scattered over the top.
Leftovers? Store in an airtight container at room temperature for up to 24 hours, or refrigerate for up to 3 days. To freeze, wrap tightly in foil and freeze for up to 1 month. Reheat in the oven at 350°F (175°C) for 5-7 minutes to restore crispiness (microwave makes them soft, so oven is best!). Honestly, the flavor deepens overnight—the garlic and cheese meld in the pastry for more punch.
If you’re making ahead for a crowd, bake the twists, cool, then brush with butter and parsley right before serving for that fresh-baked taste. These are a hit for lunchboxes, snacks, and even as a side for cozy dinners.
Nutritional Information & Benefits
Each crispy cheesy garlic bread twist (based on a batch of 12) has roughly:
- Calories: 130
- Fat: 9g
- Carbs: 11g
- Protein: 4g
- Sodium: 220mg
Health benefits: You get a punch of protein from the cheese, and parsley adds vitamin K and antioxidants. Garlic is well-known for its heart-healthy compounds and immune-boosting properties. Using real butter in moderation gives richness without loads of additives.
Dietary notes: You can easily adapt these for gluten-free or dairy-free diets. Watch for allergens—wheat, dairy, and sometimes egg (if your pastry uses it). From my wellness perspective, these twists are a great “sometimes food”—perfect for sharing and enjoying without guilt.
Conclusion
If you love crispy, cheesy snacks with unbeatable garlic flavor, these crispy cheesy garlic bread twists with buttery parsley finish are absolutely worth trying. They’re simple, quick, and crazy delicious—plus, they’re flexible enough for all kinds of tastes and occasions.
Customize the cheeses, herbs, or level of garlic based on your preferences—make them yours! Personally, I love how these twists bring people together (and how they disappear almost instantly at any gathering). There’s just something about the combo of buttery pastry and gooey cheese that feels like home.
Give these a try and let me know in the comments how you adapted them or if you have a secret twist up your sleeve! Share with friends, save to your Pinterest board, or tag me in your snack photos—can’t wait to see what you bake up. Here’s to more cozy, cheesy moments!
Frequently Asked Questions
Can I make these crispy cheesy garlic bread twists ahead of time?
Absolutely! Bake, cool, and store in an airtight container. Reheat in the oven before serving for best results.
Can I freeze the twists?
Yes, they freeze really well. Wrap tightly in foil and freeze for up to a month. Reheat in the oven to bring back the crispiness.
Can I use pizza dough instead of puff pastry?
Definitely. Pizza dough makes a softer, bread-like twist. Just roll thin and follow the same steps.
Are these twists suitable for vegetarians?
Yes! All the ingredients are vegetarian-friendly. Just check your cheese and pastry for non-veggie additives if you’re strict.
How do I keep the twists crispy after baking?
Let them cool on a wire rack for 5 minutes before serving. For leftovers, reheat in the oven—not the microwave—to restore crispiness.
Pin This Recipe!
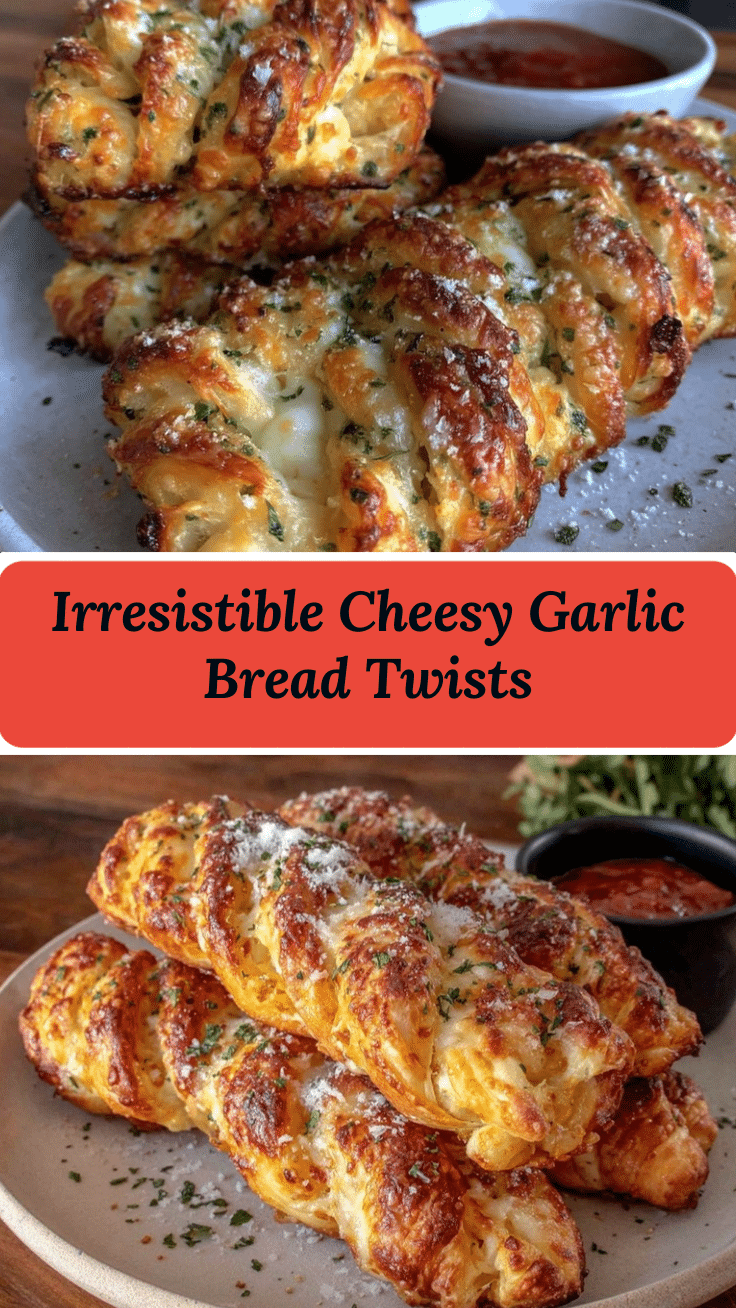
Crispy Cheesy Garlic Bread Twists

These crispy cheesy garlic bread twists are a quick, buttery snack featuring golden puff pastry, gooey cheese, and roasted garlic. Perfect for parties, cozy nights, or as a comforting side, they’re easy to make and impossible to resist.
- Prep Time: 10 minutes
- Cook Time: 18 minutes
- Total Time: 28 minutes
- Yield: 12 twists 1x
- Category: Snack
- Cuisine: American
Ingredients
- 1 sheet puff pastry (about 9 oz, thawed if frozen)
- All-purpose flour, for dusting
- 1/4 cup unsalted butter, melted
- 3 large garlic cloves, minced
- 1/2 teaspoon fine sea salt
- 1/4 teaspoon black pepper
- 1/2 cup shredded mozzarella cheese
- 1/2 cup shredded sharp cheddar cheese
- 1/4 cup grated Parmesan cheese
- 2 tablespoons unsalted butter, melted (for brushing after baking)
- 2 tablespoons fresh parsley, finely chopped (or 2 teaspoons dried parsley)
- Pinch of red pepper flakes (optional)
- 1 teaspoon Italian seasoning blend (optional)
Instructions
- Preheat oven to 400°F (200°C). Line a baking sheet with parchment paper or a silicone baking mat. Lightly dust your work surface with flour.
- In a small bowl, mix 1/4 cup melted butter, minced garlic, salt, and pepper until well combined.
- Place thawed puff pastry on the floured surface. Roll out to about 1/8 inch thick if needed.
- Spread garlic butter evenly over the entire pastry sheet using a pastry brush or spoon.
- Sprinkle mozzarella, cheddar, and Parmesan over half of the pastry. Press lightly to help cheese stick.
- Fold the pastry in half over the cheese and gently press edges together. Crimp edges with a fork if desired.
- Slice the folded pastry into 12 even strips, about 1 inch wide.
- Twist each strip several times and arrange on the lined baking sheet, spacing at least 1 inch apart.
- Bake for 15-18 minutes, until golden brown and cheese is bubbling. Check at 14 minutes if your oven runs hot.
- Remove from oven and immediately brush with 2 tablespoons melted butter. Sprinkle with chopped parsley.
- Let twists cool for 5 minutes to crisp up. Serve warm.
Notes
For extra crispiness, chill pastry before slicing and twisting. Don’t overload cheese to avoid soggy twists. Use fresh garlic for best flavor. Twists can be made gluten-free or dairy-free with appropriate substitutions. Reheat leftovers in the oven to restore crispiness.
Nutrition
- Serving Size: 1 twist
- Calories: 130
- Sugar: 1
- Sodium: 220
- Fat: 9
- Saturated Fat: 5
- Carbohydrates: 11
- Protein: 4
Keywords: garlic bread twists, cheesy breadsticks, puff pastry snacks, party appetizer, vegetarian snack, easy garlic bread, buttery bread twists


