“You won’t believe where I first got the idea for these crispy buttermilk fried chicken tenders.” I said that to my friend Mark last weekend, and honestly, it still surprises me. It was a Wednesday evening, and I was at the local hardware store, of all places, picking up a new set of kitchen tongs. The guy behind the counter, who I’d never talked to before, started chatting about his weekend and casually mentioned his aunt’s fried chicken recipe—a secret family gem. I wasn’t expecting cooking advice from a hardware guy, but there I was, scribbling notes on a receipt while he described the magic of soaking chicken in buttermilk before frying.
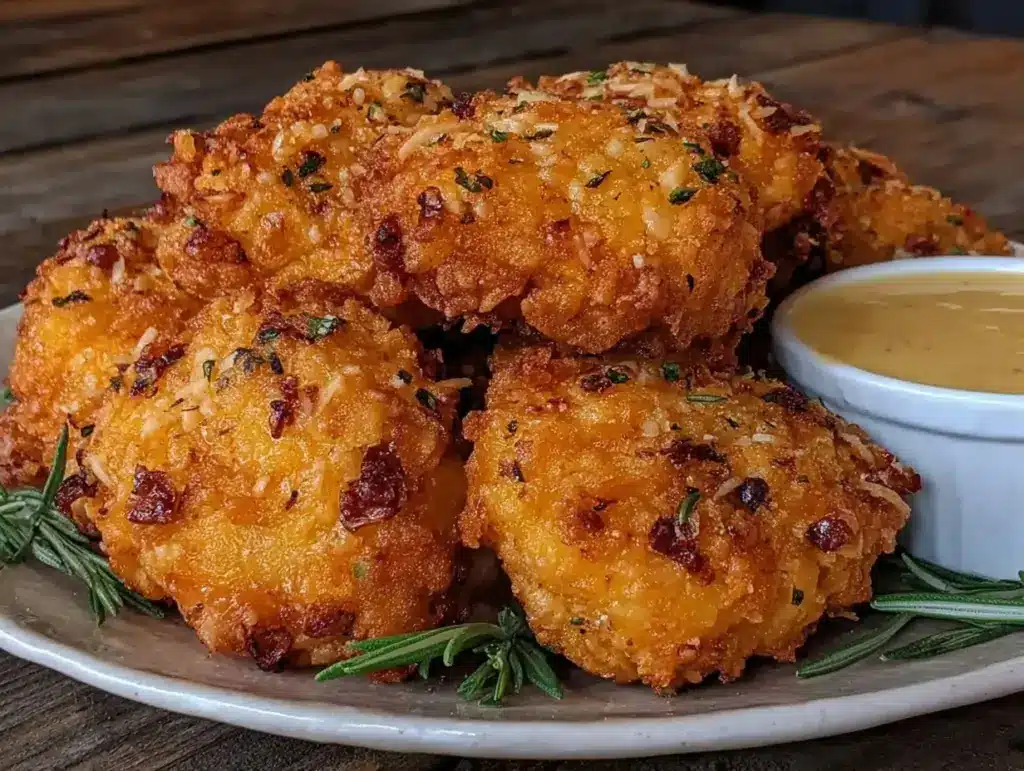
Now, let me tell you, I’ve tried my share of fried chicken recipes. Some were great, others… well, let’s just say my kitchen had its fair share of greasy disasters. But this crispy buttermilk fried chicken tenders recipe? It’s different. The tenders come out golden brown, with a crunch that makes you want to keep eating even when you’re full. Maybe you’ve been there—looking for that perfect fried chicken crunch without the mess of frying a whole bird. These tenders are the answer.
One night, I forgot to drain the buttermilk properly and ended up with a soggy mess. But rather than toss it, I adjusted the flour coating, doubled down on spices, and the next batch? Pure perfection. That’s why this recipe has stuck around. It’s simple, forgiving, and downright addictive. So if you’re ready to get your hands a little messy and your taste buds dancing, keep reading because this recipe’s about to become your go-to for crispy fried chicken tenders.
Why You’ll Love This Recipe
Honestly, making crispy buttermilk fried chicken tenders at home has never been easier or more satisfying. I’ve tested this recipe multiple times, adjusting the seasoning and coating thickness, and every time it comes out just right. Here’s what makes it stand out:
- Quick & Easy: Ready in under 45 minutes, it’s perfect for busy weeknights or those last-minute cravings when takeout just won’t cut it.
- Simple Ingredients: You probably already have most of what you need in your pantry—no fancy trips to specialty stores required.
- Perfect for Any Occasion: Whether it’s a casual family dinner, a weekend game day, or even a kid’s birthday party, these tenders steal the show.
- Crowd-Pleaser: I’ve never met a single person who didn’t ask for seconds. Kids, adults, picky eaters—everyone loves that crunchy, juicy bite.
- Unbelievably Delicious: The buttermilk soak tenderizes the chicken, and the seasoned flour coating gives it that mouthwatering crunch you crave.
What makes this recipe different is the balance—just the right amount of seasoning in the flour, a buttermilk marinade that’s not too sour, and a frying technique that keeps it crispy without being greasy. It’s comfort food that you can feel good about making at home. Plus, it’s easy to tweak—spice it up or keep it mild, depending on your mood. Trust me, once you try this, it’ll be on repeat.
What Ingredients You Will Need
This recipe uses straightforward, wholesome ingredients to deliver that bold, crispy texture and juicy flavor without any fuss. Most are pantry staples, and substitutions are easy if you want to make it your own.
- Chicken Tenders: About 1.5 pounds (680 grams) of fresh chicken tenders or chicken breast cut into strips. I like using tenders because they cook evenly and stay juicy.
- Buttermilk: 2 cups (480 ml) for soaking. This tenderizes the chicken and adds a subtle tang. If you don’t have buttermilk, mix 2 cups milk with 2 tablespoons lemon juice or vinegar and let it sit 5 minutes.
- All-Purpose Flour: 2 cups (240 grams) for the coating. I recommend King Arthur brand for a reliable, consistent texture.
- Seasonings for Flour Coating:
- 1 teaspoon garlic powder
- 1 teaspoon onion powder
- 1 teaspoon smoked paprika (adds a hint of smoky warmth)
- 1/2 teaspoon cayenne pepper (optional, for a little kick)
- 1 teaspoon salt
- 1/2 teaspoon black pepper
- Eggs: 2 large eggs, beaten. Helps the flour stick better for that crispy crust.
- Vegetable Oil or Peanut Oil: For frying, about 4 cups (1 liter). Peanut oil has a high smoke point and neutral flavor, but vegetable oil works great too.
Pro tip: Use fresh, cold buttermilk straight from the fridge for best flavor. And when picking your chicken, look for firm, pink tenders with no unpleasant smell.
Equipment Needed
- Deep Frying Pan or Dutch Oven: A heavy-bottomed pan about 4-6 inches deep works well. I prefer a Dutch oven because it retains heat evenly.
- Cooking Thermometer: Essential for monitoring oil temperature. You want steady 350°F (175°C) for perfect frying.
- Mixing Bowls: At least two—one for the buttermilk marinade, one for the flour coating.
- Tongs or Slotted Spoon: For safely turning and removing tenders from hot oil.
- Wire Rack and Baking Sheet: To let tenders drain and stay crispy after frying. Avoid paper towels if possible—wire racks keep the crust crunchy all around.
If you don’t have a thermometer, keep an eye on the oil: test by dropping in a pinch of flour; it should sizzle immediately but not burn. Also, a splatter guard helps keep the stove clean, especially if you’re a bit clumsy like me—had a few oil splashes on the counter that way!
Preparation Method

- Marinate the Chicken: In a large bowl, pour 2 cups (480 ml) of cold buttermilk over the chicken tenders. Cover and refrigerate for at least 30 minutes, or up to 4 hours. This step tenderizes the meat and adds moisture.
- Prepare the Flour Coating: In a separate bowl, whisk together 2 cups (240 g) all-purpose flour with garlic powder, onion powder, smoked paprika, cayenne pepper (if using), salt, and black pepper. Mix well to distribute the spices evenly.
- Beat the Eggs: In a third bowl, lightly beat 2 large eggs until smooth. This will help the flour stick to the chicken.
- Set up the Dredging Station: You’ll have three bowls: buttermilk-soaked chicken, beaten eggs, and seasoned flour. Remove chicken tenders from buttermilk one at a time, letting excess drip off, then dip into eggs, then dredge thoroughly in the flour mixture. Press flour onto the tenders to build a thick, even coating.
- Rest the Coated Tenders: Place coated tenders on a wire rack and let them sit for 10-15 minutes. This resting step helps the coating adhere better and keeps it from falling off while frying.
- Heat the Oil: In your deep frying pan or Dutch oven, pour in about 4 cups (1 liter) vegetable or peanut oil. Heat over medium-high until it reaches 350°F (175°C). Use a candy or frying thermometer for accuracy.
- Fry the Tenders: Carefully add chicken tenders in batches—don’t crowd the pan. Fry for 3-4 minutes per side, turning once, until golden brown and cooked through (internal temperature should reach 165°F or 74°C). Adjust heat to maintain oil temperature.
- Drain and Rest: Remove tenders with tongs and place on a wire rack set over a baking sheet to drain excess oil. Avoid stacking or placing directly on paper towels to keep crispiness intact.
- Serve Warm: Let the tenders cool for a few minutes before serving. They’re best enjoyed fresh but can be kept warm in a low oven (around 200°F/93°C) for short periods.
Quick troubleshooting: If the coating starts falling off, it usually means the oil is too hot or the tenders weren’t rested long enough before frying. Lower the heat slightly and give the coating a little more time to set next time.
Cooking Tips & Techniques
Getting perfectly crispy buttermilk fried chicken tenders isn’t just about following a recipe—it’s about some little tricks and lessons I picked up the hard way. Here’s what I’ve learned:
- Keep the Buttermilk Cold: Marinating in chilled buttermilk helps the chicken stay juicy and firm. I once tried it with room temperature buttermilk, and the texture was off.
- Double Dredge for Extra Crunch: For an ultra-crispy crust, dip the tenders back into the egg and then the flour again before frying. It adds a thicker coating without being heavy.
- Control Oil Temperature: Too hot? The crust burns before the chicken cooks through. Too cool? The tenders absorb oil and get greasy. I check the temperature every batch.
- Don’t Crowd the Pan: Fry in batches to keep oil temperature steady and ensure even cooking.
- Use a Wire Rack to Drain: This prevents soggy bottoms. Paper towels soak oil but steam the coating, making it limp.
- Season the Flour Well: Don’t skip the spices—they make all the difference. I once forgot to add paprika and felt the coating was bland.
- Patience is Key: Letting tenders rest before frying helps the flour stick better and reduces loss of coating in the oil.
Variations & Adaptations
Want to tweak your crispy buttermilk fried chicken tenders? Here are some ways I’ve played around with the recipe that you might enjoy:
- Spicy Kick: Add extra cayenne pepper or swap smoked paprika for chipotle powder to bring more heat.
- Gluten-Free: Use almond flour or a gluten-free flour blend instead of all-purpose flour. The texture differs slightly but still delicious.
- Baked Version: For a lighter option, bake the coated tenders on a greased wire rack at 425°F (220°C) for 20-25 minutes, flipping halfway.
- Herb-Infused: Add dried thyme or oregano to the flour mix for a fresh, savory twist.
- Dairy-Free: Substitute buttermilk with a mixture of coconut milk and lemon juice or apple cider vinegar.
One time, I tried tossing the fried tenders in a honey sriracha glaze after frying—unexpected but absolutely addictive. It’s fun to experiment, and this recipe is forgiving enough to handle it.
Serving & Storage Suggestions
These crispy chicken tenders are best served hot and fresh—you know that satisfying crunch can fade quickly if left out. I like to plate them with a side of creamy ranch or honey mustard for dipping. For a full meal, pair with coleslaw, baked fries, or a crisp green salad.
To store leftovers, place cooled tenders in an airtight container and refrigerate for up to 3 days. Reheat in an oven or air fryer at 375°F (190°C) for 8-10 minutes to bring back the crunch. Avoid microwaving if you want to keep the coating crispy—it tends to get soggy.
Flavors actually develop nicely after a day in the fridge, so sometimes I make these a day ahead for easy weeknight dinners. Just reheat right before serving, and they taste almost as good as fresh.
Nutritional Information & Benefits
This recipe offers a satisfying comfort food experience without going overboard. Per serving (about 4 tenders), you can expect approximately:
| Calories | 380 |
|---|---|
| Protein | 35g |
| Fat | 18g |
| Carbohydrates | 20g |
| Fiber | 1g |
Chicken tenders provide lean protein, essential for muscle repair and energy. The buttermilk adds calcium and probiotics, aiding digestion. Using peanut or vegetable oil with a high smoke point helps keep the frying process safe and efficient.
For those watching carbs or gluten, the recipe adapts well with alternative flours. Just be mindful of potential allergens like dairy and peanuts in the oil.
Personally, I’ve found this recipe strikes a good balance—comfort food that feels a little lighter thanks to the buttermilk soak and careful frying technique.
Conclusion
So, there you have it—crispy buttermilk fried chicken tenders that are easy to make, full of flavor, and perfect for just about any occasion. Whether you’re feeding hungry kids, impressing friends, or just craving that crunchy, juicy bite yourself, this recipe fits the bill.
Don’t be afraid to adjust the seasoning or try the variations to suit your taste. I love how flexible it is, making it a staple in my kitchen rotation. And honestly, the best part is seeing the smiles when people take that first crunchy bite.
If you try this recipe, I’d love to hear how it turned out for you! Share your tips, tweaks, or just your love for crispy chicken tenders in the comments. Happy cooking—and enjoy every delicious bite!
FAQs
Can I use chicken breast instead of tenders?
Yes! Just slice the breast into strips about 1-inch wide to mimic tenders. Adjust cooking time slightly to ensure they’re cooked through.
How long can I marinate the chicken in buttermilk?
Between 30 minutes and 4 hours is ideal. Longer than that might make the texture too soft.
What oil is best for frying chicken tenders?
Peanut oil or vegetable oil is recommended because of their high smoke points and neutral flavors.
Can I bake these instead of frying?
Absolutely! Bake coated tenders at 425°F (220°C) for 20-25 minutes, flipping halfway, for a lighter version.
How do I keep the tenders crispy after frying?
Drain on a wire rack instead of paper towels to avoid sogginess. Reheat in the oven or air fryer to revive crispiness.
Pin This Recipe!
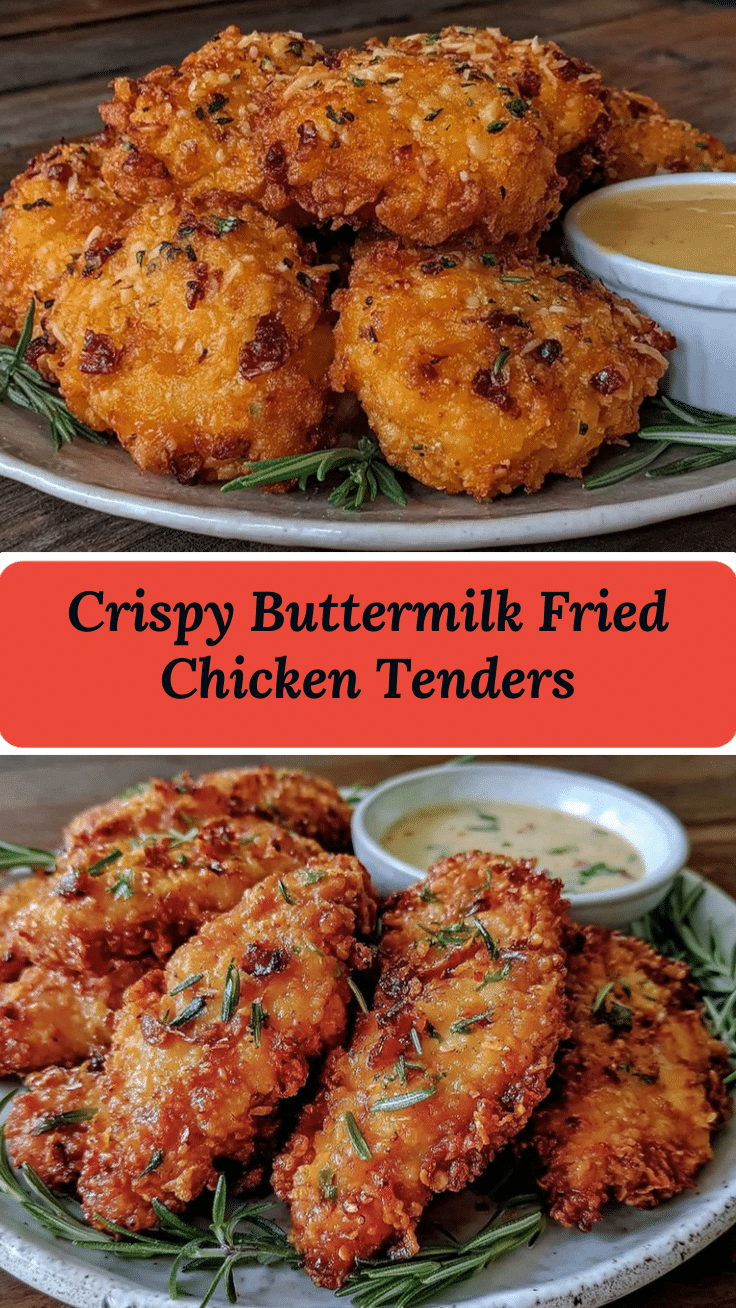
Crispy Buttermilk Fried Chicken Tenders

These crispy buttermilk fried chicken tenders are golden brown with a perfect crunch and juicy inside, making them an easy and satisfying comfort food for any occasion.
- Prep Time: 10 minutes
- Cook Time: 15 minutes
- Total Time: 45 minutes
- Yield: 4 servings 1x
- Category: Main Course
- Cuisine: American
Ingredients
- 1.5 pounds fresh chicken tenders or chicken breast cut into strips
- 2 cups buttermilk (or 2 cups milk mixed with 2 tablespoons lemon juice or vinegar, let sit 5 minutes)
- 2 cups all-purpose flour
- 1 teaspoon garlic powder
- 1 teaspoon onion powder
- 1 teaspoon smoked paprika
- 1/2 teaspoon cayenne pepper (optional)
- 1 teaspoon salt
- 1/2 teaspoon black pepper
- 2 large eggs, beaten
- 4 cups vegetable oil or peanut oil for frying
Instructions
- Marinate the chicken: Pour 2 cups cold buttermilk over chicken tenders in a large bowl. Cover and refrigerate for at least 30 minutes or up to 4 hours.
- Prepare the flour coating: In a separate bowl, whisk together 2 cups all-purpose flour with garlic powder, onion powder, smoked paprika, cayenne pepper (if using), salt, and black pepper.
- Beat the eggs in a third bowl until smooth.
- Set up the dredging station with three bowls: buttermilk-soaked chicken, beaten eggs, and seasoned flour.
- Remove chicken tenders from buttermilk one at a time, letting excess drip off, dip into eggs, then dredge thoroughly in the flour mixture, pressing flour onto tenders to build a thick coating.
- Place coated tenders on a wire rack and let rest for 10-15 minutes to help coating adhere.
- Heat 4 cups vegetable or peanut oil in a deep frying pan or Dutch oven to 350°F (175°C).
- Fry tenders in batches without crowding the pan, cooking 3-4 minutes per side until golden brown and internal temperature reaches 165°F (74°C).
- Remove tenders with tongs and drain on a wire rack set over a baking sheet to keep crispy.
- Serve warm. Optionally keep warm in a low oven (200°F/93°C) for short periods.
Notes
Use fresh, cold buttermilk for best flavor. Let tenders rest after coating to help flour adhere. Maintain oil temperature at 350°F for perfect frying. Drain on wire rack to keep crispiness. For extra crunch, double dredge by dipping again in egg and flour before frying. Avoid overcrowding the pan.
Nutrition
- Serving Size: About 4 tenders per
- Calories: 380
- Fat: 18
- Carbohydrates: 20
- Fiber: 1
- Protein: 35
Keywords: fried chicken tenders, crispy chicken, buttermilk chicken, easy fried chicken, homemade chicken tenders, comfort food


