“You ever have one of those backyard cookouts where the grill just seems to have a mind of its own?” That’s how my journey with crispy beer can chicken on the grill began. It was one of those lazy Saturday afternoons last summer when my neighbor, Joe, casually mentioned he had the secret to the crispiest, juiciest chicken he’d ever grilled. Honestly, I was skeptical—beer can chicken always sounded like a gimmick to me. But Joe wasn’t just bragging; he had a battered old grill, a cracked ceramic beer can holder, and a recipe scribbled on a napkin from his favorite dive bar.
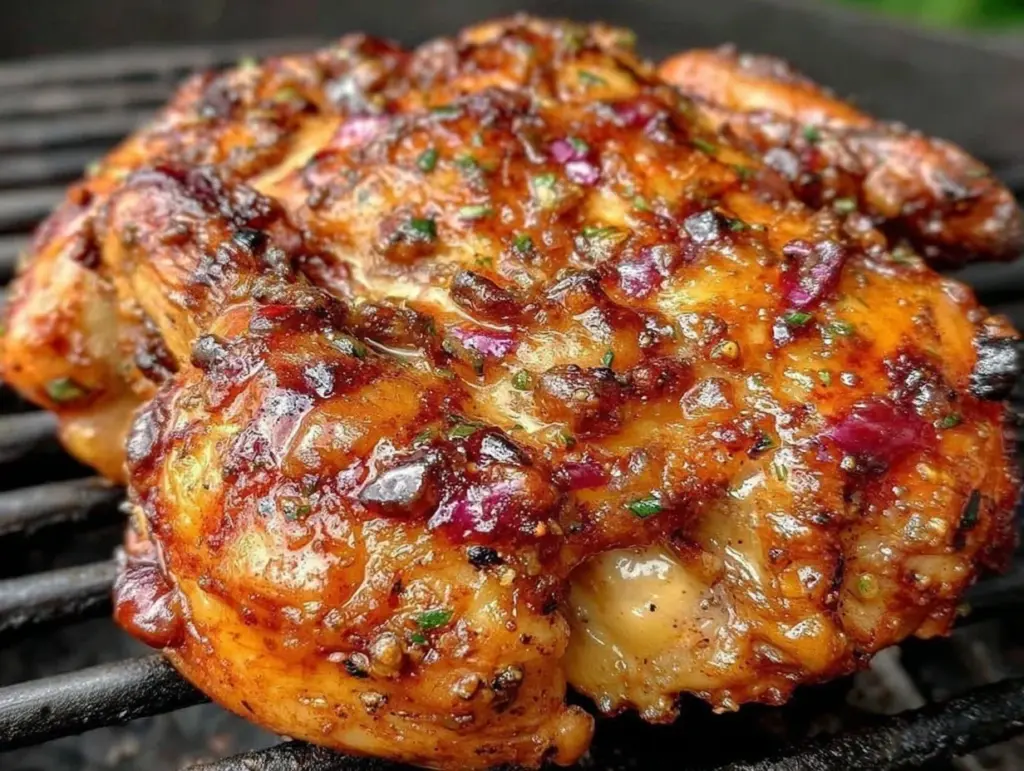
Watching him prep the bird was a mix of curious and chaotic. I forgot to bring the tongs, the cat knocked over the spice mix, and halfway through, the grill lid flew open with a gust of wind. Yet, when that chicken finally came off the heat, it was golden, crackling with crispy skin, and the meat was so tender it practically fell off the bone. Maybe you’ve been there—waiting for a dish that promises crispy skin but ends up dry or rubbery. This recipe breaks that frustrating cycle.
Since that day, I’ve tweaked Joe’s method here and there, tested it under different grills and weather conditions, and honestly, it’s become my go-to for impressing guests without breaking a sweat. Let me tell you, this crispy beer can chicken on the grill isn’t just a recipe—it’s a little weekend ritual that turns an ordinary meal into something worth savoring.
Why You’ll Love This Recipe
After multiple backyard trials, a few singed eyebrows, and plenty of hungry friends giving feedback, here’s why this crispy beer can chicken on the grill stands out:
- Quick & Easy: Preps in under 15 minutes, and then the grill does most of the work—perfect for busy weekends or unexpected guests.
- Simple Ingredients: No obscure spices or gadgets needed—just your favorite whole chicken, some pantry staples, and a cold can of beer (or substitute).
- Perfect for Outdoor Gatherings: Whether it’s a casual family barbecue or a laid-back evening with friends, this recipe always feels like a celebration.
- Crowd-Pleaser: Kids and adults alike love the crispy skin paired with juicy, tender meat inside. It’s one of those dishes that makes everyone go back for seconds.
- Unbelievably Delicious: The secret lies in the beer can steaming the chicken from inside while the grill crisps up the outside—a combo that’s pure comfort food magic.
What makes this version different? I learned that using a simple herb rub with a pinch of smoked paprika and brown sugar creates a perfectly balanced crust that’s neither too sweet nor too salty. Plus, the trick of indirect grilling keeps the chicken moist but gives that coveted crispy skin edge. Honestly, it’s the kind of recipe that makes you close your eyes and savor every bite, no fancy fuss required.
What Ingredients You Will Need
This recipe uses simple, wholesome ingredients to deliver bold flavor and satisfying texture without the fuss. Most are pantry staples, and the fresh herbs add a nice touch that’s easy to swap depending on what you have on hand.
- Whole chicken (about 4-5 lbs / 1.8-2.3 kg): Choose a fresh or fully thawed bird for even cooking.
- Beer (12 oz / 355 ml can): Any lager or pale ale works great; avoid overly hoppy IPAs for a balanced flavor. Non-alcoholic beer or sparkling water can substitute if you prefer.
- Olive oil (2 tbsp / 30 ml): For rubbing and helping the spice blend stick.
- Brown sugar (1 tbsp / 15 g): Adds a subtle caramelized sweetness to the skin.
- Smoked paprika (1 tbsp / 7 g): Provides smoky depth without needing a smoker.
- Garlic powder (1 tsp / 5 g): For that savory hit.
- Onion powder (1 tsp / 5 g): Complements the garlic and paprika.
- Dried thyme or rosemary (1 tsp / 1 g): Fresh herbs can be used instead if preferred.
- Salt (1.5 tsp / 8 g): Essential for seasoning inside and out.
- Black pepper (1 tsp / 2 g): Freshly ground if possible for best flavor.
Tip: I like to use a medium roast lager like Yuengling or a local pale ale for the beer. If you’re in a pinch, a good quality sparkling water with lemon can add similar steaming benefits without alcohol.
Equipment Needed
- Grill: A charcoal grill is ideal for that smoky flavor, but a gas grill works fine too.
- Beer can chicken holder or stand: Not mandatory but helps keep the chicken upright and stable. If you don’t have one, you can improvise with heavy-duty aluminum foil shaped into a stand.
- Meat thermometer: Highly recommended for checking doneness and avoiding dry meat.
- Tongs and heat-resistant gloves: For safe handling of the hot chicken and grill.
- Mixing bowl: To prepare the spice rub.
If you don’t own a beer can chicken stand, no worries. I once used a sturdy empty vegetable can wrapped in foil, and it worked just fine. Just be sure the can is clean and stable to avoid tipping. For maintenance, keep your thermometer calibrated by testing it in boiling water occasionally. Budget-friendly meat thermometers are widely available and a worthy investment for grilling success.
Preparation Method
- Prep the chicken: (10 minutes) Remove any giblets from the cavity. Pat the chicken dry with paper towels—this helps the skin crisp up better. Don’t skip this step; moist skin just steams and won’t get crispy.
- Make the spice rub: In a small bowl, mix the brown sugar, smoked paprika, garlic powder, onion powder, dried herbs, salt, and pepper. Add olive oil and stir until a paste forms.
- Apply the rub: Rub the spice mixture all over the chicken, including under the skin where you can gently loosen it with your fingers—this gives flavor deeper into the meat. Don’t forget inside the cavity.
- Prepare the beer can: Open the beer and pour out (or drink) about half the can. You want roughly half a can of liquid left. If you’re using a non-alcoholic substitute, fill the can about halfway with it.
- Place the chicken on the can: Carefully lower the chicken onto the beer can so the can fits inside the cavity. Use your beer can chicken holder or stand to keep it upright. Place the chicken standing up on a tray or directly on the grill.
- Preheat the grill: (10-15 minutes) Set up your grill for indirect heat—meaning coals or burners on one side, chicken on the other. Aim for a steady temperature around 350°F (175°C).
- Grill the chicken: Place the chicken on the cooler side of the grill, cover, and cook for 1 to 1.5 hours. Check after about an hour; the internal temperature should reach 165°F (74°C) in the thickest part of the thigh. Use a meat thermometer to avoid guessing.
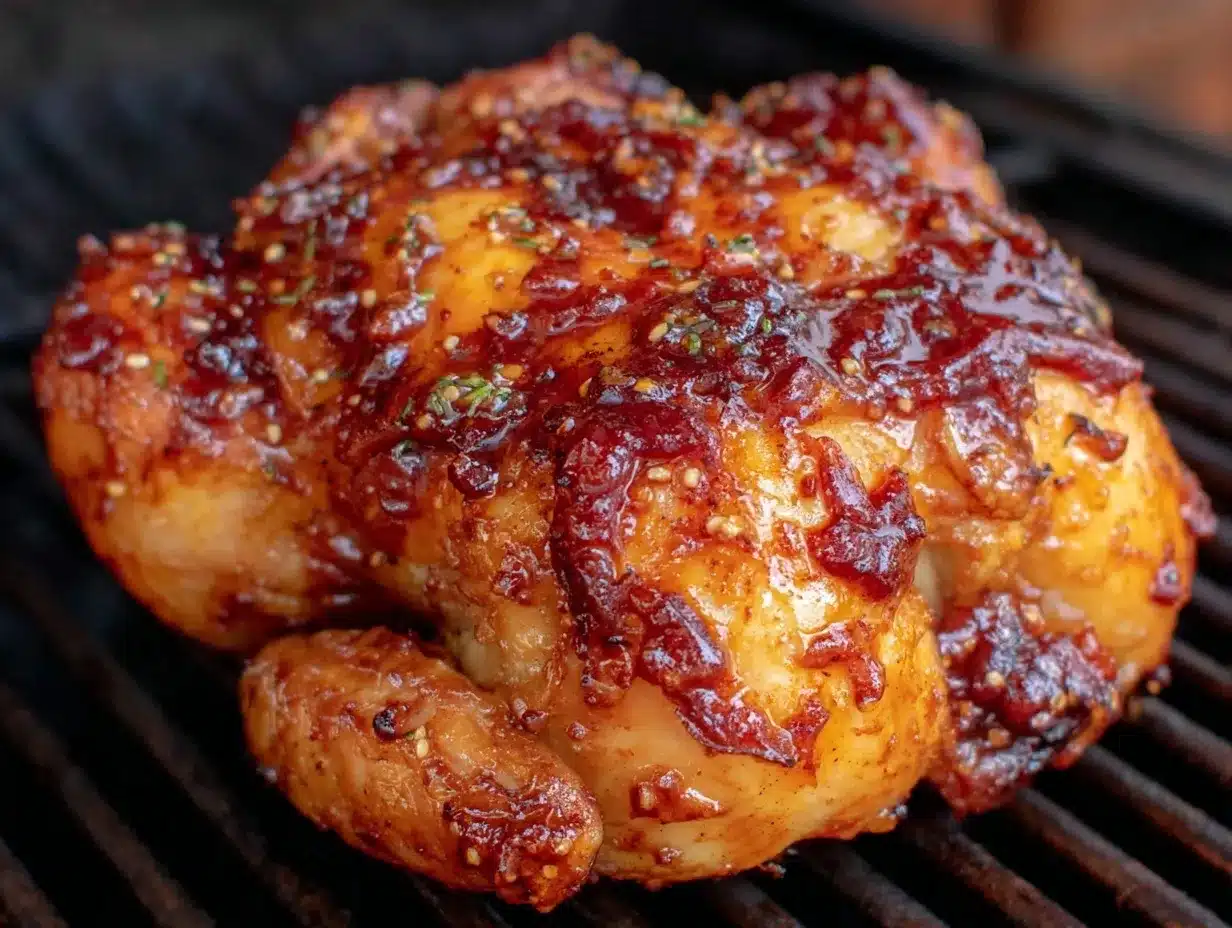
- Final crisp: If the skin isn’t as crispy as you like, move the chicken over direct heat for a few minutes, watching carefully to avoid burning.
- Rest the chicken: Remove from grill, carefully lift off the beer can (watch out for hot steam!), and let rest for 10-15 minutes before carving. This helps the juices redistribute and keeps the meat tender.
Pro tip: Keep the grill lid closed as much as possible to maintain temperature and infuse smoky flavor. I once got too chatty with neighbors and left the lid open too long—ended up with a slightly dry breast, so lesson learned!
Cooking Tips & Techniques
Getting that crispy beer can chicken on the grill just right can be tricky, but here are some tips from my experience:
- Pat the chicken dry: This cannot be overstated. Moist skin equals soggy results.
- Indirect heat is key: Cooking the chicken away from direct flames lets it roast evenly without burning the skin or drying out the meat.
- Don’t rush the process: Low and slow is your friend here. Trying to speed things up with high heat usually ends with burnt skin and undercooked interior.
- Use a meat thermometer: Guessing is a gamble. Insert it into the thickest part of the thigh, avoiding bone.
- Let it rest: Cutting too soon lets all those precious juices run out.
- Experiment with beer types: Lager gives a mild flavor, darker beers add richness, and wheat beers give a slightly fruity note. I’ve found that a standard pale ale hits the balance nicely.
- Watch for flare-ups: Beer drips can cause flames, so keep a spray bottle handy to tame any sudden bursts.
Once, I left the beer can chicken unattended for a bit too long (hey, distractions happen), and the skin got a little too charred. Since then, I keep a timer and check in regularly. It’s all part of the learning curve!
Variations & Adaptations
This crispy beer can chicken recipe is pretty flexible and welcomes a few tweaks to suit your taste or dietary needs.
- Herb Variations: Swap thyme and rosemary for oregano and basil for a Mediterranean twist. Fresh herbs work great if you have them on hand.
- Spice it Up: Add cayenne or chili powder to the rub for a smoky heat. I once made this for a friend who loves spicy food, and it was a hit.
- Gluten-Free Option: This recipe is naturally gluten-free, just double-check your spice blends and beer choice.
- Low-Alcohol or Alcohol-Free: Use sparkling water with a squeeze of lemon or apple cider vinegar diluted with water in place of beer—still steams beautifully.
- Oven Adaptation: If you don’t have a grill, try roasting the chicken upright on a beer can in a 375°F (190°C) oven for about 1 hour and 15 minutes.
One personal favorite variation is adding a honey glaze in the last 10 minutes on the grill for a sticky, sweet finish. It’s a little messier but oh-so-good.
Serving & Storage Suggestions
This crispy beer can chicken is best served hot off the grill for maximum skin crunchiness. I like to carve it right at the table—that way everyone gets the juicy cuts they prefer.
- Serving Temperature: Warm, right after resting.
- Presentation: Serve with grilled veggies, fresh corn on the cob, or a tangy coleslaw to balance the richness.
- Beverage Pairing: A crisp lager or a chilled white wine like Sauvignon Blanc complements the flavors nicely.
- Storage: Leftovers keep well in the fridge for 3-4 days, stored in an airtight container.
- Reheating: Reheat in the oven at 350°F (175°C) for about 15 minutes to revive the crispy skin—microwaving tends to make it soggy.
Flavors actually deepen after a day, so if you can resist, leftovers can taste even better the next day.
Nutritional Information & Benefits
This crispy beer can chicken recipe provides a satisfying meal that balances indulgence with nutrition. A 4-ounce (113 g) serving of roasted chicken offers about 250 calories, 35 grams of protein, and moderate fat content depending on skin consumption.
Key health benefits come from lean protein supporting muscle repair and maintenance, while the herbs and spices add antioxidants without extra calories. Using moderate salt and healthy olive oil keeps it heart-friendly. For those watching carbs, this dish is naturally low-carb and gluten-free.
If you prefer, removing the skin reduces fat intake, though you’ll miss the signature crispiness. I see it as an occasional treat that still fits well within a balanced diet.
Conclusion
If you’re looking for a dish that’s easy to prepare but delivers serious flavor and texture, this crispy beer can chicken on the grill fits the bill perfectly. It’s a recipe that invites you to slow down just enough to enjoy the process—prepping, grilling, and then savoring that first tender bite.
Feel free to adjust the herbs, spices, or beer to match your mood or pantry. Honestly, that’s part of the fun and why I keep coming back to this recipe. It’s simple, satisfying, and always a crowd-pleaser.
Give it a try this weekend, and let me know how your crispy beer can chicken turns out! Share your own twists or questions below—I love hearing from fellow grill enthusiasts.
Here’s to many more unforgettable meals around the grill.
FAQs
Can I use canned soda instead of beer for this recipe?
Yes! You can substitute beer with soda like ginger ale or sparkling water with lemon for steaming. Just keep in mind the flavor will be different but still tasty.
How do I know when the chicken is fully cooked?
Use a meat thermometer inserted into the thickest part of the thigh. It should read 165°F (74°C) for safe and juicy chicken.
What if I don’t have a beer can chicken holder?
You can improvise with heavy-duty foil shaped into a stable stand or place the chicken carefully standing up on a heatproof tray. Just be cautious to avoid tipping.
Can I prepare this recipe indoors?
Yes, you can roast the chicken upright on a beer can in the oven at 375°F (190°C) for about 1 hour and 15 minutes. The skin might not be as crispy as on a grill but still delicious.
Is it safe to cook with beer inside the chicken cavity?
Absolutely. The beer steams and infuses moisture and flavor into the chicken. Just be sure to use a clean can and avoid any paint or labels on the outside of the can that might burn.
Pin This Recipe!
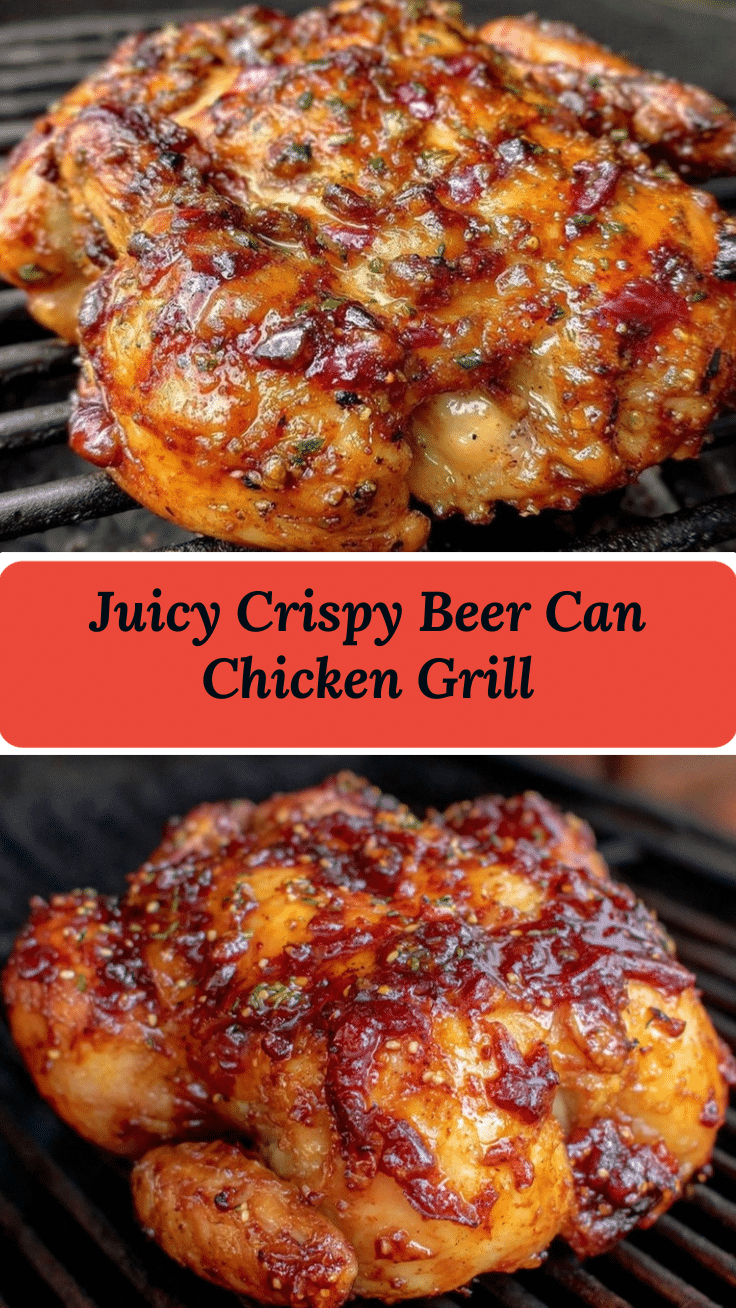
Crispy Beer Can Chicken on the Grill

A simple and delicious recipe for juicy, tender chicken with crispy skin, cooked upright on a beer can over indirect heat on the grill.
- Prep Time: 15 minutes
- Cook Time: 1 hour 15 minutes
- Total Time: 1 hour 30 minutes
- Yield: 4-6 servings
- Category: Main Course
- Cuisine: American
Ingredients
- Whole chicken (about 4-5 lbs / 1.8-2.3 kg)
- Beer (12 oz / 355 ml can) – lager or pale ale, or non-alcoholic beer/sparkling water as substitute
- Olive oil (2 tbsp / 30 ml)
- Brown sugar (1 tbsp / 15 g)
- Smoked paprika (1 tbsp / 7 g)
- Garlic powder (1 tsp / 5 g)
- Onion powder (1 tsp / 5 g)
- Dried thyme or rosemary (1 tsp / 1 g) – fresh herbs optional
- Salt (1.5 tsp / 8 g)
- Black pepper (1 tsp / 2 g)
Instructions
- Remove any giblets from the cavity. Pat the chicken dry with paper towels to ensure crispy skin.
- In a small bowl, mix brown sugar, smoked paprika, garlic powder, onion powder, dried herbs, salt, and pepper. Add olive oil and stir until a paste forms.
- Rub the spice mixture all over the chicken, including under the skin and inside the cavity.
- Open the beer and pour out or drink about half the can, leaving roughly half a can of liquid. For substitutes, fill the can halfway with non-alcoholic beer or sparkling water.
- Carefully lower the chicken onto the beer can so the can fits inside the cavity. Use a beer can chicken holder or a stable stand to keep it upright. Place the chicken standing up on a tray or directly on the grill.
- Preheat the grill for indirect heat (coals or burners on one side, chicken on the other) to about 350°F (175°C).
- Place the chicken on the cooler side of the grill, cover, and cook for 1 to 1.5 hours. Check after about an hour; the internal temperature should reach 165°F (74°C) in the thickest part of the thigh using a meat thermometer.
- If the skin isn’t crispy enough, move the chicken over direct heat for a few minutes, watching carefully to avoid burning.
- Remove the chicken from the grill, carefully lift off the beer can (watch out for hot steam!), and let rest for 10-15 minutes before carving.
Notes
Patting the chicken dry is essential for crispy skin. Use indirect heat to avoid burning and drying out the meat. Keep the grill lid closed as much as possible to maintain temperature and smoky flavor. Use a meat thermometer to ensure doneness. If skin is not crispy enough, finish over direct heat briefly. Substitute beer with sparkling water or non-alcoholic beer if desired. Leftovers keep well refrigerated for 3-4 days and reheat in the oven at 350°F for 15 minutes to maintain crispiness.
Nutrition
- Serving Size: 4 oz (113 g) roasted
- Calories: 250
- Sugar: 1
- Sodium: 400
- Fat: 10
- Saturated Fat: 3
- Carbohydrates: 2
- Protein: 35
Keywords: beer can chicken, grilled chicken, crispy chicken, backyard barbecue, easy chicken recipe, beer can cooking, outdoor grilling


