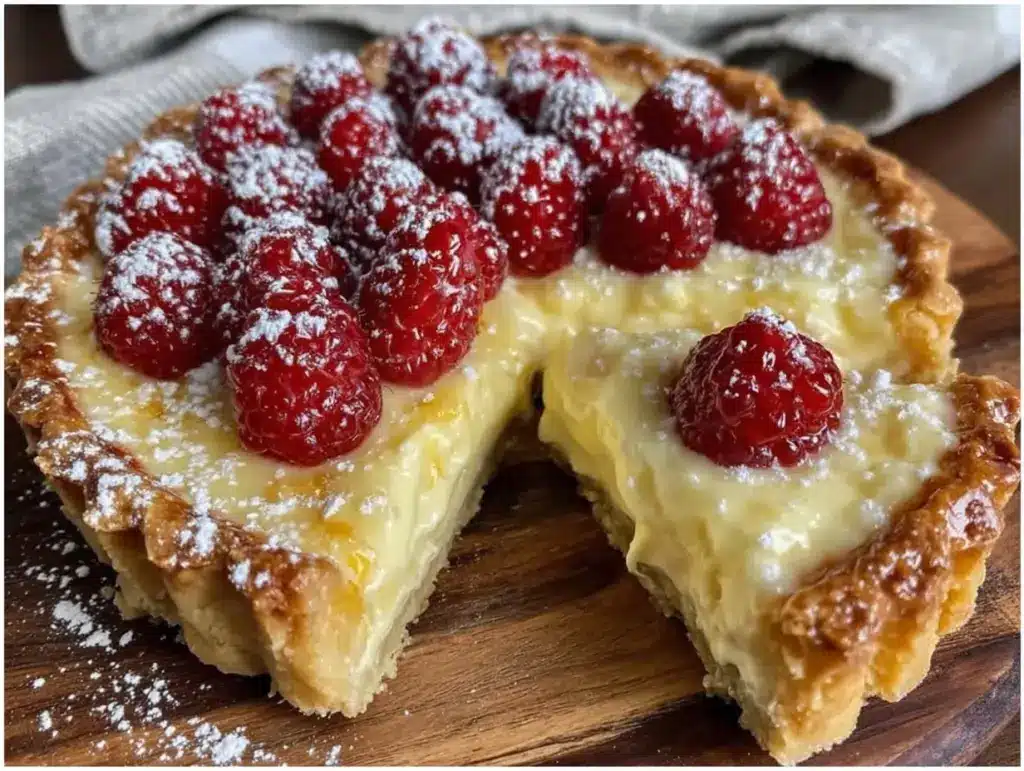
Let me tell you, the scent of a freshly baked, buttery flaky crust mingling with the sweet tang of raspberries is enough to make anyone’s mouth water. The first time I baked this creamy raspberry cream tart, I was instantly hooked—the kind of moment where you pause, take a deep breath, and just smile because you know you’re onto something truly special. It was on a rainy Saturday afternoon, years ago, when I was knee-high to a grasshopper (well, not literally, but you get the idea), trying to recreate a dessert I’d tasted at a friend’s summer gathering. Honestly, I wish I’d discovered this recipe years ago! My family couldn’t stop sneaking slices off the cooling rack (and I can’t really blame them). This tart is dangerously easy to whip up, and it provides pure, nostalgic comfort with every bite.
You know what? This creamy raspberry cream tart is perfect for potlucks, a sweet treat for your kids, or even to brighten up your Pinterest cookie board with its gorgeous layers and colors. After testing this recipe multiple times (in the name of research, of course), it’s become a staple for family gatherings and gifting. It feels like a warm hug wrapped in flaky crust and luscious cream—trust me, you’re going to want to bookmark this one.
Why You’ll Love This Recipe
Having spent quite a bit of time perfecting this creamy raspberry cream tart, I can confidently say it’s a winner for so many reasons. Here’s why it has earned a spot in my dessert hall of fame:
- Quick & Easy: Comes together in under an hour, perfect for busy weeknights or last-minute dessert cravings.
- Simple Ingredients: No fancy grocery trips needed; you likely already have everything in your kitchen pantry.
- Perfect for Any Occasion: Whether it’s brunch with friends, cozy dinners, or holiday mornings, this tart shines.
- Crowd-Pleaser: Always gets rave reviews from kids and adults alike—plus, it’s Instagram-worthy!
- Unbelievably Delicious: The combo of flaky crust and creamy, tangy raspberry filling hits next-level comfort food.
What sets this creamy raspberry cream tart apart isn’t just the balance of sweet and tart but also the technique behind the crust: a buttery, flaky base that melts in your mouth, made with cold butter and just the right amount of chilling time. The raspberry cream filling is silky smooth and lightly sweetened, blending fresh raspberries with cream cheese and whipped cream for that ultra-smooth texture you don’t always find in fruit tarts. It’s comfort food reimagined—you get the richness and creaminess without feeling weighed down.
Honestly, this tart is the kind of dessert that makes you close your eyes after the first bite. Whether you’re impressing guests without breaking a sweat or turning a simple meal into something memorable, this recipe has your back.
What Ingredients You Will Need
This creamy raspberry cream tart uses simple, wholesome ingredients to deliver bold flavor and satisfying texture without the fuss. Most are pantry staples, and fresh raspberries bring that seasonal pop of color and zing. Here’s what you’ll need:
- For the Buttery Flaky Crust:
- 1 1/4 cups all-purpose flour (about 155g)
- 1/2 teaspoon salt
- 1/2 cup (1 stick) unsalted butter, cold and cubed (I prefer Kerrygold for a rich flavor)
- 3 to 4 tablespoons ice-cold water
- For the Creamy Raspberry Filling:
- 8 oz (225g) cream cheese, softened (Philadelphia brand works great)
- 1/2 cup (120ml) heavy cream, chilled
- 1/3 cup granulated sugar
- 1 teaspoon pure vanilla extract
- 1 tablespoon lemon juice (freshly squeezed adds brightness)
- 1 cup fresh raspberries (you can swap frozen, just thaw and drain excess moisture)
- Optional Topping:
- Powdered sugar for dusting
- Extra fresh raspberries for garnish
If you want to try a gluten-free version, sub the all-purpose flour with almond flour or a gluten-free baking mix—just keep in mind the crust texture changes a bit. For a dairy-free twist, swap cream cheese and heavy cream with coconut cream and a dairy-free cream cheese alternative. In summer, swapping fresh raspberries for blueberries or blackberries works beautifully too.
Equipment Needed
- 9-inch (23 cm) tart pan with removable bottom (helps with easy release)
- Mixing bowls (preferably glass or stainless steel)
- Pastry cutter or food processor (for cutting butter into flour)
- Electric mixer or hand whisk (for whipping cream and blending filling)
- Measuring cups and spoons (accuracy matters here!)
- Rubber spatula for folding in ingredients
- Rolling pin (a lightweight one works best for delicate crust)
If you don’t have a tart pan, a regular 9-inch pie dish can work, but the crust edges won’t be as fancy. For the pastry cutter, you can use two knives crossing over each other if you’re in a pinch. I’ve also tried making this crust by hand without a food processor—it’s a bit more work but totally doable. Just keep the butter cold and don’t overwork the dough to keep it flaky.
Preparation Method
- Make the Crust Dough (15-20 minutes): In a large bowl, whisk together the flour and salt. Add the cold, cubed butter. Using a pastry cutter or your fingertips, cut the butter into the flour until the mixture resembles coarse crumbs with pea-sized bits of butter remaining. (You want to see those little butter chunks—they create the flaky layers!)
- Add Ice Water: Sprinkle in 3 tablespoons of ice-cold water, mixing gently with a fork. Add more water, one tablespoon at a time, until the dough just comes together when pressed. Be careful not to add too much water; the dough should hold but not be sticky.
- Form and Chill the Dough: Gather the dough into a ball, flatten it into a disc, wrap it in plastic wrap, and refrigerate for at least 30 minutes. This resting period is key for a tender, flaky crust.
- Preheat Oven: Preheat your oven to 375°F (190°C).
- Roll Out the Dough: On a lightly floured surface, roll the chilled dough to about 12 inches (30 cm) diameter—enough to fit your 9-inch tart pan with some overhang. Carefully transfer the dough to the tart pan, pressing it into the edges and trimming excess. Dock the bottom with a fork (poke holes) to prevent bubbling.
- Bake the Crust: Place parchment paper over the dough, fill with pie weights or dried beans, and bake for 15 minutes. Remove the weights and parchment, then bake for another 10 minutes until golden brown and cooked through. Let cool completely.
- Prepare the Filling: In a mixing bowl, beat the softened cream cheese with the sugar until smooth and creamy. Add vanilla extract and lemon juice, mixing well. In a separate bowl, whip the heavy cream until stiff peaks form.
- Combine Filling: Gently fold the whipped cream into the cream cheese mixture until smooth and airy. Then, carefully fold in half of the fresh raspberries, being gentle to keep some whole.
- Assemble the Tart: Spoon the raspberry cream filling into the cooled crust, smoothing the top with a spatula. Scatter the remaining raspberries over the surface for a pretty finish.
- Chill: Refrigerate the tart for at least 2 hours, or overnight if you have the patience. This helps the filling set and flavors meld.
- Serve: Just before serving, dust with powdered sugar if you like, slice, and enjoy!
Tip: If your crust edges brown too quickly during baking, cover them with foil strips to prevent burning. Also, don’t rush the chilling steps—they make a huge difference in texture and flavor.
Cooking Tips & Techniques
Making the perfect creamy raspberry cream tart is all about balance and patience. Here are some tips I’ve picked up along the way:
- Keep Butter Cold: Cold butter is the secret to flaky crust. If the butter melts before baking, the crust turns tough. I sometimes even chill my flour and bowl for extra crispness.
- Don’t Overwork the Dough: Handle the dough just enough to bring it together. Over-kneading develops gluten, which can make the crust chewy instead of tender.
- Dock the Dough: Poking holes in the crust before blind baking avoids pesky air bubbles and keeps the base nice and flat.
- Whip Cream to Stiff Peaks: For the filling’s luscious texture, make sure your heavy cream is chilled and whipped to stiff peaks. Under-whipping can cause a runny filling.
- Folding, Not Mixing: When combining whipped cream with cream cheese mixture, fold gently to keep it light and airy.
- Chill Time is Key: Refrigerating the tart allows flavors to meld and the filling to firm up, making slicing easier and presentation neater.
Honestly, my first few attempts ended up with soggy bottoms or runny filling, but these tips helped me nail it every time. Timing your steps helps too—while the crust chills, prep your filling, so you’re not rushing at the end.
Variations & Adaptations
Want to mix things up a bit? Here are some variations and adaptations I’ve enjoyed (and you might too!):
- Mixed Berry Twist: Swap raspberries for a combo of blueberries, blackberries, and strawberries for a colorful, seasonal flair.
- Chocolate Crust: Add 2 tablespoons of cocoa powder to the crust dough for a rich chocolate base that pairs wonderfully with raspberry.
- Vegan Version: Use vegan butter and dairy-free cream cheese alternatives, plus coconut cream instead of heavy cream. The texture changes slightly but still delicious.
- Gluten-Free Crust: Use almond flour or a gluten-free baking blend, but note that the crust will be more crumbly and less flaky.
- Make it Mini: Use mini tart pans or a muffin tin to create individual tarts, perfect for parties or gifting.
Personally, I love the mixed berry version in late summer when fresh berries are bursting with flavor. A chocolate crust gave a decadent twist for a holiday gathering, and trust me, it was a hit! Feel free to experiment with your favorite flavors.
Serving & Storage Suggestions
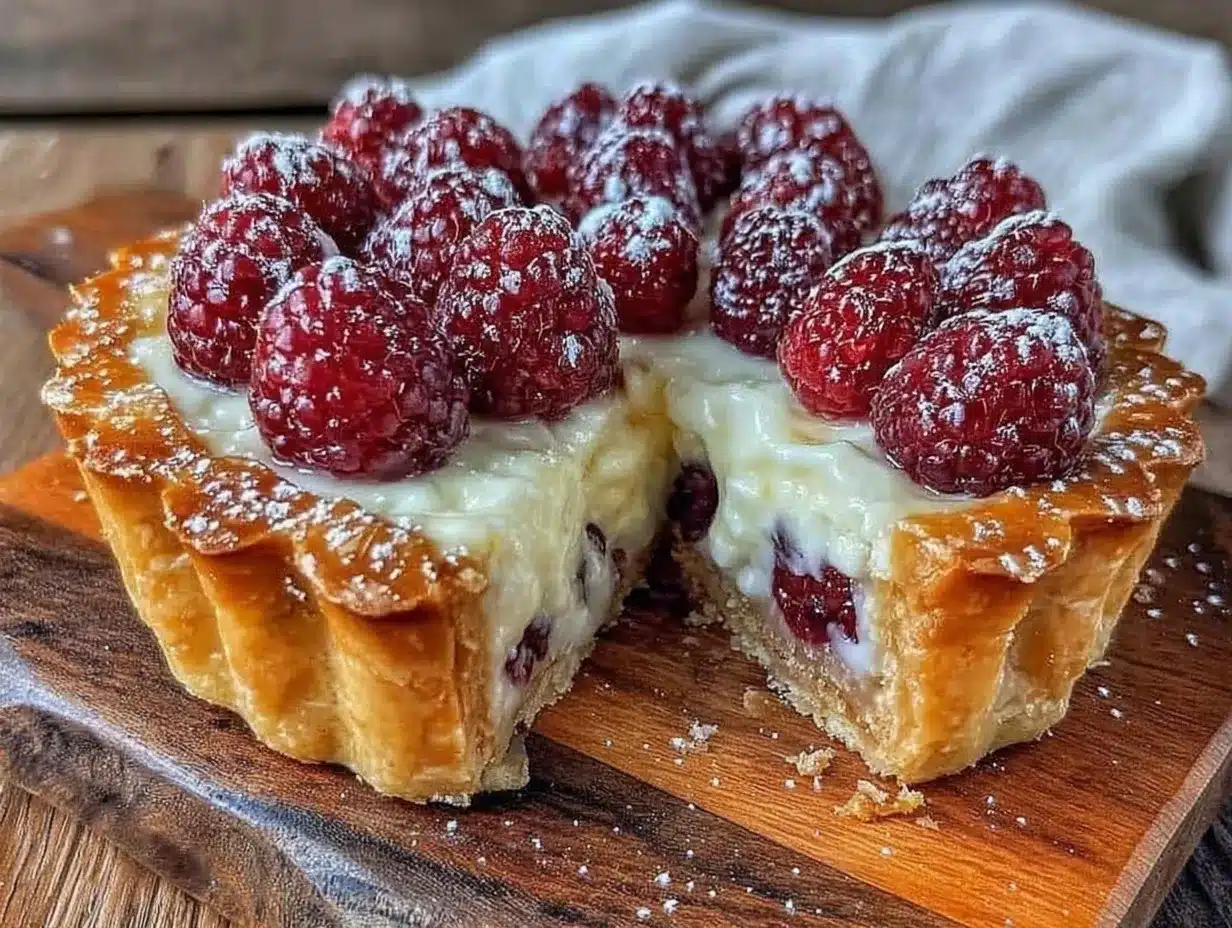
This creamy raspberry cream tart is best served chilled, straight from the fridge. The cool cream filling and flaky crust are a match made in heaven when enjoyed that way. For presentation, a light dusting of powdered sugar and a few fresh raspberries on top really make it pop.
Pair this tart with a cup of hot tea or a glass of sparkling wine for a delightful treat. It also complements brunch spreads nicely—think alongside quiches or fresh fruit salad.
To store, cover the tart loosely with plastic wrap and keep refrigerated for up to 3 days. If you need to save it longer, you can freeze it after assembling but before adding the fresh raspberries on top. Wrap it tightly in foil and plastic wrap, then thaw in the fridge overnight before serving. Note that freezing might slightly soften the crust’s flakiness.
When reheating, avoid microwaving the tart, as it will melt the cream filling. Instead, let it come to room temperature for about 15 minutes—flavors actually bloom after resting a bit!
Nutritional Information & Benefits
This creamy raspberry cream tart is a treat, but it also offers some nutritional perks. Here’s an estimated breakdown per serving (assuming 8 slices):
| Calories | 320 |
|---|---|
| Fat | 22g |
| Carbohydrates | 28g |
| Protein | 4g |
| Sugar | 14g |
Raspberries are loaded with fiber, antioxidants, and vitamin C, making this dessert a bit more wholesome than your average sweet. The cream cheese adds protein and calcium, while the butter contributes to that satisfying richness. For those monitoring carbs, you can reduce sugar or swap in a sugar substitute to lighten it up.
Keep in mind, this recipe contains gluten and dairy, so it isn’t suitable for everyone. However, with the adaptations mentioned earlier, you can make versions that fit vegan or gluten-free diets.
Conclusion
This creamy raspberry cream tart with buttery flaky crust is a dessert you’ll keep coming back to. It’s simple enough for weeknight baking but special enough to impress guests or add sparkle to your holiday table. The combination of textures and flavors hits all the right notes—rich, tangy, sweet, and flaky.
Feel free to customize the filling with your favorite berries or try a chocolate crust for a twist. I love how this tart brings back memories and creates new ones every time I make it. Give it a try, and you might find it becoming a family favorite like mine.
Don’t forget to share your own adaptations or questions in the comments—I’d love to hear how your tart turned out! Happy baking, friends.
FAQs About the Creamy Raspberry Cream Tart
Can I use frozen raspberries for this tart?
Yes! Just thaw them fully and drain excess liquid to avoid a soggy filling or crust.
How long can I store the tart in the fridge?
Keep it covered and refrigerated for up to 3 days for best freshness and texture.
Can I make the crust ahead of time?
Absolutely! The crust dough can be made and chilled up to 2 days in advance or frozen for up to a month.
What’s the best way to prevent a soggy crust?
Blind bake the crust fully and cool it before adding the filling. Docking the dough and using pie weights helps too.
Is there a dairy-free version of this tart?
Yes! Swap cream cheese and heavy cream with vegan alternatives and use dairy-free butter in the crust.
Pin This Recipe!

Creamy Raspberry Cream Tart

A deliciously flaky buttery crust paired with a silky smooth raspberry cream filling, perfect for any occasion and easy to make at home.
- Prep Time: 20 minutes
- Cook Time: 25 minutes
- Total Time: 2 hours 45 minutes
- Yield: 8 servings 1x
- Category: Dessert
- Cuisine: American
Ingredients
- 1 1/4 cups all-purpose flour (about 155g)
- 1/2 teaspoon salt
- 1/2 cup (1 stick) unsalted butter, cold and cubed
- 3 to 4 tablespoons ice-cold water
- 8 oz (225g) cream cheese, softened
- 1/2 cup (120ml) heavy cream, chilled
- 1/3 cup granulated sugar
- 1 teaspoon pure vanilla extract
- 1 tablespoon lemon juice
- 1 cup fresh raspberries
- Powdered sugar for dusting (optional)
- Extra fresh raspberries for garnish (optional)
Instructions
- In a large bowl, whisk together the flour and salt. Add the cold, cubed butter. Using a pastry cutter or your fingertips, cut the butter into the flour until the mixture resembles coarse crumbs with pea-sized bits of butter remaining.
- Sprinkle in 3 tablespoons of ice-cold water, mixing gently with a fork. Add more water, one tablespoon at a time, until the dough just comes together when pressed. Do not make it sticky.
- Gather the dough into a ball, flatten into a disc, wrap in plastic wrap, and refrigerate for at least 30 minutes.
- Preheat oven to 375°F (190°C).
- Roll the chilled dough on a lightly floured surface to about 12 inches diameter. Transfer to a 9-inch tart pan, pressing into edges and trimming excess. Dock the bottom with a fork.
- Place parchment paper over dough, fill with pie weights or dried beans, and bake for 15 minutes. Remove weights and parchment, then bake another 10 minutes until golden brown. Let cool completely.
- In a mixing bowl, beat softened cream cheese with sugar until smooth. Add vanilla extract and lemon juice, mixing well.
- In a separate bowl, whip heavy cream until stiff peaks form.
- Gently fold whipped cream into cream cheese mixture until smooth and airy. Fold in half of the fresh raspberries gently.
- Spoon raspberry cream filling into cooled crust, smooth the top, and scatter remaining raspberries on top.
- Refrigerate tart for at least 2 hours or overnight to set.
- Before serving, dust with powdered sugar if desired, slice, and enjoy.
Notes
Keep butter cold to ensure a flaky crust. Do not overwork the dough to avoid toughness. Dock the dough before blind baking to prevent bubbles. Whip cream to stiff peaks for best filling texture. Chill tart well before serving for best flavor and slicing.
Nutrition
- Serving Size: 1 slice (1/8 of tart
- Calories: 320
- Sugar: 14
- Fat: 22
- Carbohydrates: 28
- Protein: 4
Keywords: raspberry tart, creamy tart, flaky crust, easy dessert, homemade tart, raspberry cream, summer dessert


