“I wasn’t planning on making cheesecake that night,” I confess, “but sometimes the kitchen has other ideas.” It was just past midnight last Thursday when I found myself, bleary-eyed and craving something sweet, staring at a half-empty pack of Oreos and some cream cheese in the fridge. Honestly, I thought, “Why not try a no-bake Oreo cheesecake?” The idea came from a hurried scribble on a napkin at my favorite coffee shop, where a friendly barista once shared a quick dessert trick. I didn’t expect much, but I gave it a shot.
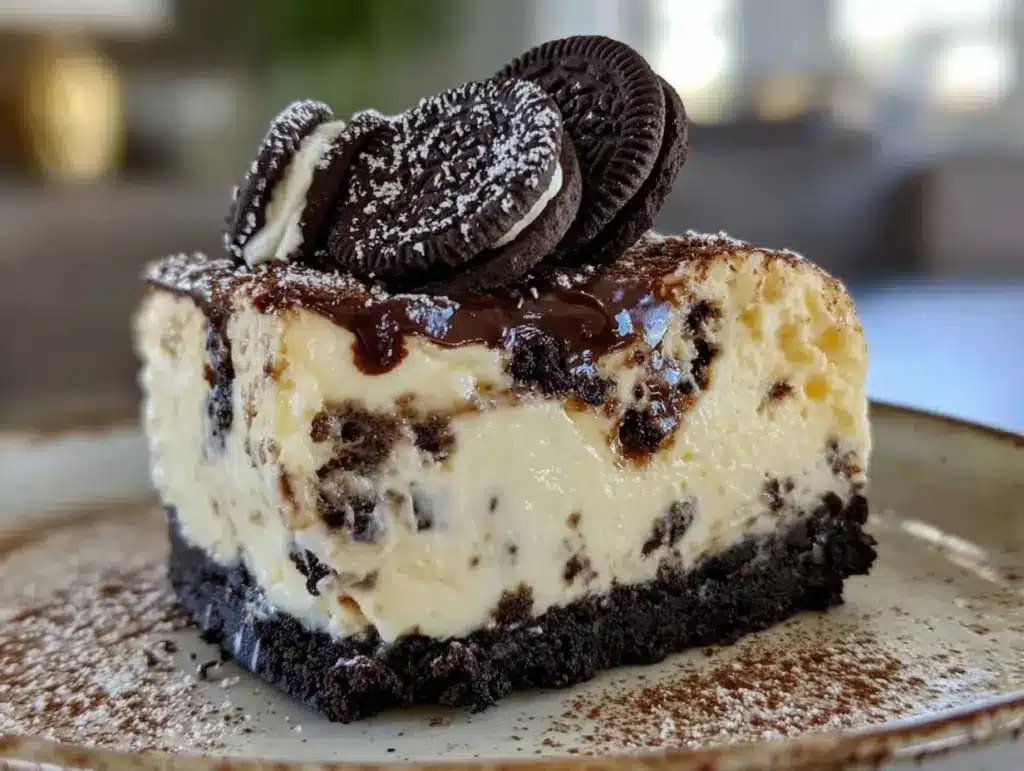
The kitchen was a mess—flour on the counter, a cracked bowl that made me wince, and my phone ringing mid-mix. Yet, despite the chaos, that first bite was pure magic. The creamy texture combined with the crunchy Oreo bits was comforting in a way that whispered, “You nailed it.” Maybe you’ve been there—looking for something simple, no fuss, but still special. That’s exactly why I keep making this Creamy No-Bake Oreo Cheesecake Delight on those nights when I just want to treat myself without the oven drama.
It’s not just a dessert; it’s a little kitchen victory, a sweet pause in a busy day. And if you’re anything like me—sometimes a little clumsy, always craving a bit of comfort—this recipe might just become your new favorite too.
Why You’ll Love This Creamy No-Bake Oreo Cheesecake Delight
Let me tell you, this recipe isn’t just another cheesecake. It’s the kind of dessert that feels like a hug in every spoonful. After testing dozens of no-bake versions (yes, many ended up in the trash or secret snacking sessions), I landed on this one that checks all the boxes:
- Quick & Easy: Ready in under 30 minutes with no baking required—ideal for busy weeknights or last-minute guests.
- Simple Ingredients: You probably have everything in your pantry and fridge already—Oreos, cream cheese, whipped cream, and a few staples.
- Perfect for Gatherings: Whether it’s a casual potluck or a cozy family dinner, it’s guaranteed to impress.
- Crowd-Pleaser: Kids and adults alike can’t get enough of the creamy texture and Oreo crunch.
- Unbelievably Delicious: The smooth, rich filling balances perfectly with the crunchy cookie crust and Oreo pieces.
This recipe stands out because of its creamy, melt-in-your-mouth filling achieved by folding in whipped cream delicately, and the crunchy Oreo crust that holds everything together without crumbling apart. Honestly, it’s the kind of dessert that makes you close your eyes after the first bite and savor the moment.
It’s a comfort food twist that’s lighter, faster, yet still indulgent. Great for impressing guests or treating yourself on a whim—you won’t regret it.
What Ingredients You Will Need for Creamy No-Bake Oreo Cheesecake Delight
This recipe uses straightforward ingredients that come together to create a bold, satisfying flavor and a luscious texture without fuss or fancy shopping trips. Here’s what you’ll want to gather:
- Oreos: 24 whole Oreo cookies (for crust and mix-ins). I prefer the classic original Oreos for the perfect balance of chocolate and cream.
- Unsalted Butter: 6 tablespoons (85g), melted, to bind the crust nicely.
- Cream Cheese: 16 ounces (450g), softened to room temperature for smooth blending. I recommend Philadelphia for consistent creaminess.
- Powdered Sugar: ¾ cup (90g), sifted to avoid lumps and add sweetness without grit.
- Vanilla Extract: 1 teaspoon for that subtle flavor lift.
- Heavy Whipping Cream: 1 cup (240ml), cold, whipped until soft peaks form to give that airy, creamy texture.
Optional:
- Extra Oreo pieces for garnish (about 6 cookies, chopped).
- A pinch of salt to balance the sweetness if desired.
Most of these ingredients are pantry staples or easy to find at any grocery store. If you want a dairy-free version, swap cream cheese with a plant-based alternative and use coconut cream instead of heavy cream—it still works beautifully.
Equipment Needed
- 9-inch (23cm) springform pan: Ideal for easy removal of the cheesecake. If you don’t have one, an 8 or 9-inch round cake pan lined with parchment paper works too.
- Mixing bowls: At least two—one for the crust and one for the filling.
- Electric mixer or hand whisk: For whipping the cream and cream cheese smoothly. A stand mixer is great but not necessary.
- Food processor or rolling pin: To crush the Oreo cookies finely for the crust. If you don’t have a processor, placing the cookies in a zip-top bag and smashing with a rolling pin does the trick.
- Spatula: For folding the whipped cream into the cream cheese mixture gently without deflating it.
Personally, I’ve tried using a blender for crushing Oreos, but it tends to over-pulverize into powder, which isn’t ideal for texture. Also, a springform pan has saved me from many messy unmolding disasters, so if you’re on a budget, consider picking one up—it’s worth it.
Preparation Method
- Prepare the Oreo crust: Start by crushing 18 Oreos into fine crumbs using a food processor or by placing them in a sealed bag and rolling a pin over them. Mix the crumbs with 6 tablespoons (85g) of melted unsalted butter until well combined. The mixture should feel like wet sand—sticky enough to hold shape but not soggy. Press this mix firmly into the bottom of your 9-inch (23cm) springform pan, creating an even layer. Chill in the fridge while you prepare the filling. (About 10 minutes)
- Make the creamy filling: In a large mixing bowl, beat 16 ounces (450g) of softened cream cheese until smooth and fluffy, about 2-3 minutes with an electric mixer on medium speed. Gradually add ¾ cup (90g) powdered sugar and 1 teaspoon vanilla extract, mixing until fully incorporated and silky.
- Whip the cream: In a separate chilled bowl, whip 1 cup (240ml) of heavy cream until it forms soft peaks. Be careful not to overwhip; it should look light and airy but still hold gentle peaks.
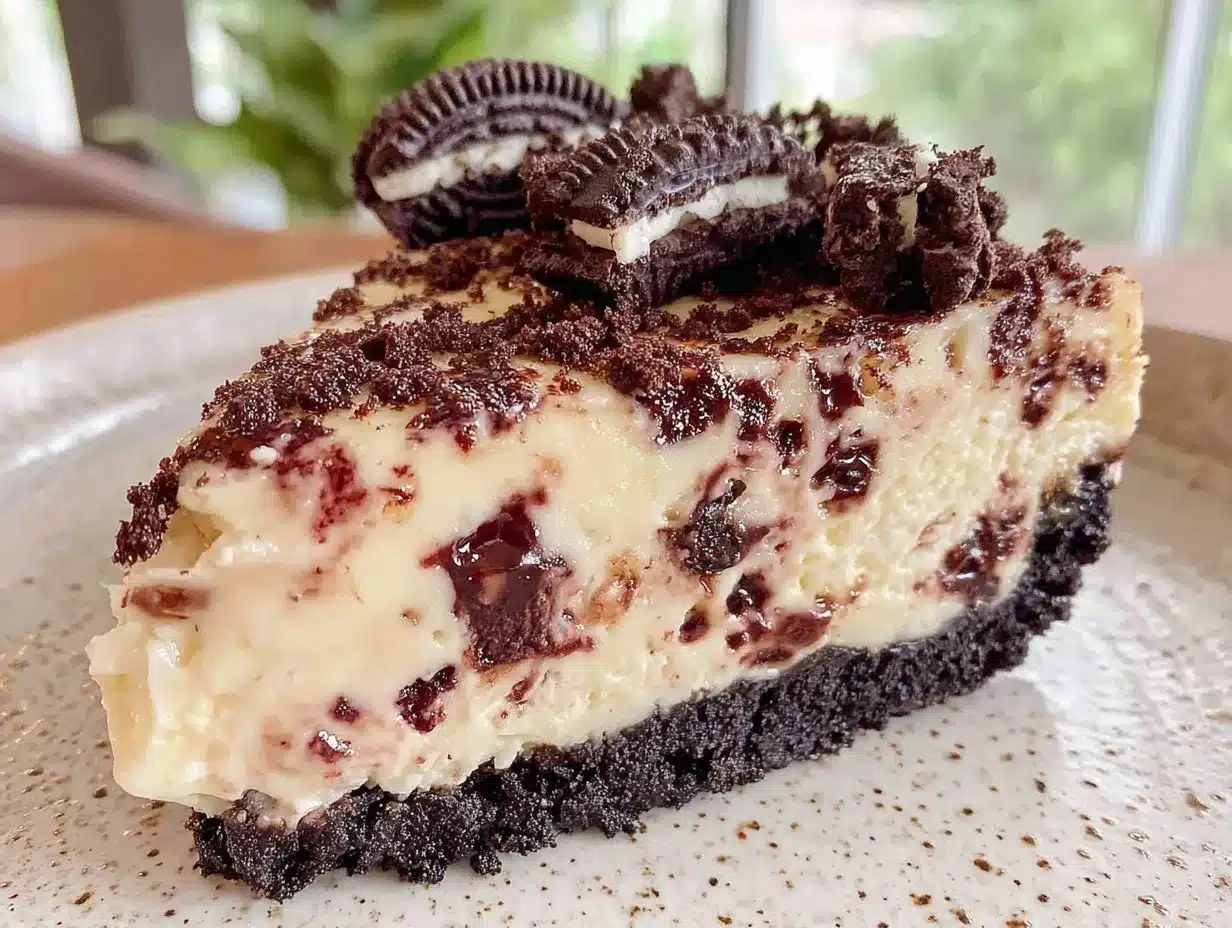
- Combine filling and whipped cream: Gently fold the whipped cream into the cream cheese mixture using a spatula. Take your time—folding is key to keeping the filling light and fluffy. When about halfway combined, fold in roughly chopped remaining 6 Oreos for bursts of crunch throughout the cheesecake.
- Assemble and chill: Pour the creamy filling over the chilled crust, smoothing the top with your spatula. Cover the pan tightly with plastic wrap and refrigerate for at least 4 hours, preferably overnight, to let it set properly. The cheesecake should be firm but still creamy to the touch.
- Serve and garnish: Before serving, decorate with extra Oreo pieces or a light dusting of cocoa powder if you like. Release the springform pan’s sides carefully, slice with a sharp knife (dip it in hot water and wipe dry for clean cuts), and enjoy!
Pro tip: If your cream cheese isn’t fully softened, the filling might end up lumpy. I learned this the hard way one afternoon, so I always let it sit out for at least an hour. Also, chilling the crust before adding the filling helps prevent sogginess—trust me on this one!
Cooking Tips & Techniques for the Perfect No-Bake Oreo Cheesecake
Making a no-bake cheesecake sounds easy, but a few tricks make all the difference. Here’s what I learned after a few slip-ups:
- Softening the cream cheese: This is crucial. If it’s too cold, your filling will have lumps. I usually take it out of the fridge at least an hour before starting, or zap it in the microwave for 10 seconds if I’m in a rush.
- Folding, not stirring: When adding whipped cream, fold gently to keep the airiness. Stirring or beating too much deflates the mixture, making it dense.
- Crust texture: Don’t pulverize the Oreos into powder for the crust. You want some texture so the crust isn’t just a mushy base. Think small crumbs that stick together.
- Chilling time: The longer, the better. I know it’s tempting to dig in early, but at least 4 hours in the fridge gives the cheesecake time to set properly.
- Multitasking: While the cheesecake chills, clean up your mess or prep toppings. Saves time and keeps your kitchen sane!
Honestly, my first attempt looked like a sad pile of cream in a bowl, but after these lessons, it’s been smooth sailing (and slicing) ever since.
Variations & Adaptations to Make It Your Own
This no-bake cheesecake is a fantastic base for all kinds of tweaks. Here are some ideas I’ve tried or dreamed up:
- Chocolate Lovers’ Twist: Add ¼ cup (25g) of cocoa powder to the cream cheese mixture for a mocha Oreo cheesecake. Top with chocolate shavings for extra indulgence.
- Fruit Infusion: Fold in 1 cup (150g) of fresh raspberries or strawberries for a fruity contrast to the chocolate. I love this in summer when berries are ripe and sweet.
- Gluten-Free Option: Use gluten-free chocolate sandwich cookies (like Kinnikinnick or Simple Mills) for the crust and mix-ins. The texture stays just as great.
- Peanut Butter Swirl: Gently swirl ½ cup (125g) of creamy peanut butter into the filling before chilling. It adds a nutty depth that pairs wonderfully with Oreos.
One time, I swapped out heavy cream for coconut cream for a dairy-free dessert and topped it with toasted coconut flakes—unexpectedly delicious!
Serving & Storage Suggestions
This cheesecake is best served chilled, straight from the fridge, so the creamy texture stays intact. I usually slice it into 8 generous pieces and serve on simple white plates to show off the Oreo specks. A dollop of whipped cream or a drizzle of chocolate sauce makes it feel a bit fancy without fuss.
For drinks, a strong black coffee or a glass of cold milk complements the sweetness perfectly. I’ve even paired it with a scoop of vanilla ice cream for an extra indulgent treat.
To store, cover the cheesecake tightly with plastic wrap or keep it in an airtight container in the refrigerator. It stays fresh for up to 5 days, and honestly, it rarely lasts that long at my house! For longer storage, you can freeze it for up to a month. Just thaw overnight in the fridge before serving.
Reheating isn’t necessary and not recommended—the charm is in the cool, creamy texture. Over time, the flavors meld beautifully, making leftovers even better the next day.
Nutritional Information & Benefits
Approximate nutrition per serving (based on 8 servings):
| Calories | 350 kcal |
|---|---|
| Fat | 25g |
| Carbohydrates | 28g |
| Protein | 5g |
| Sugar | 20g |
This dessert is rich in calcium and protein thanks to the cream cheese and heavy cream. Using real, full-fat ingredients helps with satiety, so a small slice can curb your sweet tooth effectively. The Oreos add a fun crunch and chocolate flavor, but if you want to reduce sugar, you can experiment with sugar-free cookies.
For those with dietary restrictions, this recipe can be modified as mentioned earlier to suit gluten-free or dairy-free needs.
Conclusion
This Creamy No-Bake Oreo Cheesecake Delight is a sweet little secret that came from a late-night craving and a bit of kitchen improvisation. It’s simple, fast, and truly satisfying—perfect for anyone who loves the creamy, crunchy combo of cheesecake and Oreos but doesn’t want to fuss with baking.
Feel free to tweak it to your taste—maybe add some berries or swirl in peanut butter. I love how forgiving and adaptable this recipe is, making it a staple in my dessert rotation. Give it a try and see how it fits into your kitchen stories.
If you make it, please drop a comment or share your twists—I’m always curious how others personalize this delight. Happy no-bake cheesecake adventures!
FAQs About Creamy No-Bake Oreo Cheesecake Delight
Can I use a different cookie instead of Oreos?
Absolutely! Chocolate sandwich cookies work best, but you can try vanilla wafers or graham crackers for a different flavor and texture.
How long does the cheesecake need to chill?
At least 4 hours is recommended, but overnight chilling is ideal for the best texture and flavor.
Can I make this cheesecake ahead of time?
Yes! It stores well in the fridge for up to 5 days and can be frozen for up to a month.
What if I don’t have a springform pan?
You can use a regular cake pan lined with parchment paper for easier removal, but a springform pan is the easiest option.
Is there a vegan version of this recipe?
Yes, by using plant-based cream cheese and coconut cream, and vegan cookies, you can make a delicious dairy-free and vegan-friendly version.
Pin This Recipe!
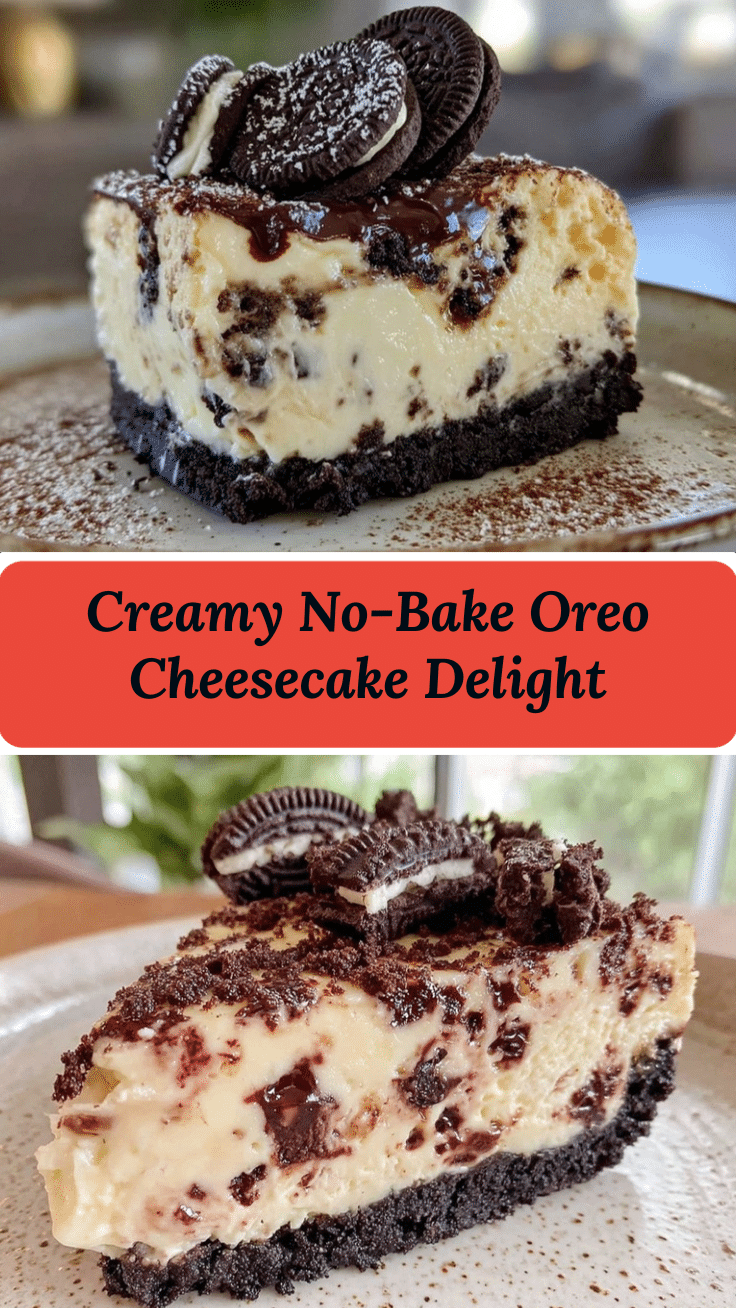
Creamy No-Bake Oreo Cheesecake Delight

A quick and easy no-bake Oreo cheesecake with a creamy filling and crunchy cookie crust, perfect for last-minute desserts and gatherings.
- Prep Time: 15 minutes
- Cook Time: 0 minutes
- Total Time: 4 hours 15 minutes
- Yield: 8 servings 1x
- Category: Dessert
- Cuisine: American
Ingredients
- 24 whole Oreo cookies (for crust and mix-ins)
- 6 tablespoons (85g) unsalted butter, melted
- 16 ounces (450g) cream cheese, softened to room temperature
- ¾ cup (90g) powdered sugar, sifted
- 1 teaspoon vanilla extract
- 1 cup (240ml) heavy whipping cream, cold, whipped until soft peaks form
- Optional: extra Oreo pieces for garnish (about 6 cookies, chopped)
- Optional: a pinch of salt to balance sweetness
Instructions
- Prepare the Oreo crust: Crush 18 Oreos into fine crumbs using a food processor or by placing them in a sealed bag and rolling a pin over them. Mix the crumbs with 6 tablespoons (85g) of melted unsalted butter until well combined. Press this mixture firmly into the bottom of a 9-inch (23cm) springform pan, creating an even layer. Chill in the fridge for about 10 minutes.
- Make the creamy filling: In a large mixing bowl, beat 16 ounces (450g) of softened cream cheese until smooth and fluffy, about 2-3 minutes with an electric mixer on medium speed. Gradually add ¾ cup (90g) powdered sugar and 1 teaspoon vanilla extract, mixing until fully incorporated and silky.
- Whip the cream: In a separate chilled bowl, whip 1 cup (240ml) of heavy cream until it forms soft peaks. Be careful not to overwhip.
- Combine filling and whipped cream: Gently fold the whipped cream into the cream cheese mixture using a spatula. When about halfway combined, fold in roughly chopped remaining 6 Oreos for bursts of crunch throughout the cheesecake.
- Assemble and chill: Pour the creamy filling over the chilled crust, smoothing the top with a spatula. Cover the pan tightly with plastic wrap and refrigerate for at least 4 hours, preferably overnight, to let it set properly.
- Serve and garnish: Before serving, decorate with extra Oreo pieces or a light dusting of cocoa powder if desired. Release the springform pan’s sides carefully, slice with a sharp knife (dip it in hot water and wipe dry for clean cuts), and enjoy.
Notes
Ensure cream cheese is softened to avoid lumps. Fold whipped cream gently to keep filling light and fluffy. Chill crust before adding filling to prevent sogginess. Chill cheesecake at least 4 hours or overnight for best texture. For dairy-free version, substitute cream cheese with plant-based alternative and heavy cream with coconut cream.
Nutrition
- Serving Size: 1 slice (1/8 of chee
- Calories: 350
- Sugar: 20
- Fat: 25
- Carbohydrates: 28
- Protein: 5
Keywords: no-bake cheesecake, Oreo cheesecake, easy dessert, no bake dessert, creamy cheesecake, Oreo dessert, quick cheesecake


