Picture this: the cool aroma of fresh mint swirling through your kitchen, mingling with the deep, chocolatey scent of crushed Oreos. Honestly, the first time I whipped up this Creamy Grasshopper Pie with Oreo Crust, I couldn’t stop grinning—there’s something about the vibrant green filling and that rich, cookie base that just feels like a celebration. I remember standing over the bowl, inhaling that pepperminty cloud, thinking, “Wow, this is what dessert dreams are made of.” And let’s face it, the moment you slice into this pie and see that silky, pastel mint layer? It’s the kind of moment where you pause, take a deep breath, and just smile because you know you’re onto something truly special.
My love affair with Grasshopper Pie started years ago, when I was knee-high to a grasshopper myself (pun absolutely intended). My aunt used to bring one to every holiday gathering, and I’d wait all year for that creamy, cool treat. Fast forward to a rainy weekend not long ago, I decided to recreate her classic—but with an Oreo twist, because, honestly, who can say no to Oreos? And let me tell you, my family couldn’t stop sneaking slices off the cooling rack (I can’t really blame them). There’s pure, nostalgic comfort in every bite, and it’s dangerously easy to make—no oven required, just a few bowls and a fridge.
This pie has become my go-to for potlucks, birthday surprises, and even those late-night “I need something sweet right now” emergencies. It brightens up any Pinterest board with its playful color and brings smiles all around. I’ve tested this recipe at least half a dozen times in the name of research (of course), and every time it disappears before I know it. It’s now a staple for family gatherings and gifting—feels like a cool, minty hug you’ll want to bookmark for every occasion.
Why You’ll Love This Creamy Grasshopper Pie with Oreo Crust
- Quick & Easy: Comes together in under 30 minutes (plus chilling), perfect for last-minute desserts or busy weeknights.
- Simple Ingredients: No wild goose chase at the grocery store—most things you’ll already have on hand.
- Perfect for Every Occasion: Whether it’s for brunch, holiday parties, potlucks, or just a cozy night in, this pie fits right in.
- Crowd-Pleaser: Kids and adults both rave about it—don’t be surprised if everyone asks for seconds.
- Unbelievably Delicious: The creamy mint filling over that crunchy, chocolatey Oreo crust is pure magic.
This recipe stands out because I use a blend of marshmallows and cream cheese for ultra-smooth texture (no gritty gelatin in sight). I’ve tried a dozen versions over the years, and this combo gives you that luscious, cloud-like filling. The Oreo crust? It’s richer and more satisfying than traditional graham cracker versions—trust me, it’s all about that deep cocoa flavor.
When you take that first bite, it’s not just another dessert—it’s the kind that makes you close your eyes and smile. It’s comfort food reimagined: lighter, faster, but with the same soul-soothing satisfaction. Perfect for impressing guests (with zero stress) or making an ordinary day feel a little more special. And if you’re a mint lover, you’re in for a real treat!
What Ingredients You Will Need
This Creamy Grasshopper Pie with Oreo Crust uses simple, wholesome ingredients to deliver bold flavor and a dreamy texture—no fancy tricks, just good old-fashioned magic. Most of these are pantry staples, and substitutions are a breeze.
- For the Oreo Crust:
- 24 Oreo cookies (crushed into fine crumbs; I prefer the classic variety for maximum chocolate flavor)
- 5 tablespoons (70g) unsalted butter, melted (adds richness and helps the crust set)
- For the Minty Filling:
- 2 cups (120g) mini marshmallows (melts smoothly and adds that signature fluffy texture)
- 1/2 cup (120ml) whole milk (or use 2% if you prefer; helps dissolve the marshmallows)
- 8 ounces (225g) cream cheese, softened (adds richness and tang—Philadelphia is my go-to)
- 1 1/2 teaspoons peppermint extract (not spearmint; this is the classic grasshopper flavor)
- 1 tablespoon crème de menthe liqueur (optional, but oh-so-delicious for that authentic flavor and color)
- Green food coloring (a few drops for that playful pastel hue; gel or liquid works fine)
- 1 1/2 cups (360ml) heavy whipping cream (whipped to soft peaks for cloud-like filling)
- For Garnish (Optional):
- Extra whipped cream (dollops or swirls—totally optional but so pretty for serving)
- Crushed Oreos or chocolate shavings (for a little crunch and drama)
- Fresh mint leaves (for color and a pop of freshness)
Ingredient Tips: If you need this pie gluten-free, swap Oreos for your favorite gluten-free chocolate sandwich cookies. For a dairy-free version, use plant-based butter, vegan cream cheese, and coconut whipped topping. Don’t have crème de menthe? Just add a little extra peppermint extract and a dash more food coloring.
Honestly, I’ve used store-brand cream cheese with great results, but if you want the smoothest possible filling, stick to trusted brands. In summer, try swapping in fresh mint leaves steeped in the milk for an herbal twist (just strain before adding to the marshmallows). This pie is friendly to substitutions—just keep those creamy and minty notes front and center!
Equipment Needed
- 9-inch (23cm) pie plate (glass, ceramic, or metal works fine—just make sure it’s sturdy)
- Food processor or blender (for crushing Oreos; a zip-top bag and rolling pin works in a pinch)
- Mixing bowls (at least two—one for crust, one for filling)
- Hand mixer or stand mixer (for whipping cream and blending filling)
- Small saucepan (to melt marshmallows and milk together)
- Flexible spatula (for scraping every last bit of filling)
- Measuring cups and spoons (accuracy counts, especially with mint extract!)
If you don’t have a food processor, just pop your Oreos in a zip-top bag and bash them with a rolling pin (it’s oddly satisfying). For whipped cream, I’ve used everything from a hand mixer to an old-fashioned whisk—takes a little longer, but totally doable. If your pie plate is on the shallow side, just reserve a little filling for mini jars or cups (hello, bonus treats!).
Maintenance tip: If you use a food processor, wipe it out right after crushing cookies or they can get sticky. And if you’re on a budget, don’t sweat it—most of these tools are basic kitchen staples you probably already own.
Preparation Method
- Prepare the Oreo Crust: In a food processor or blender, pulse 24 Oreo cookies into fine crumbs. (If using a bag and rolling pin, smash until no big chunks remain.) Pour crumbs into a mixing bowl and stir in 5 tablespoons (70g) melted unsalted butter until evenly moistened. Press mixture firmly into the bottom and up the sides of a 9-inch (23cm) pie plate. (Use the flat bottom of a measuring cup for an even crust.) Chill in the freezer while you make the filling—at least 10 minutes.
- Melt Marshmallows: In a small saucepan over low heat, combine 2 cups (120g) mini marshmallows and 1/2 cup (120ml) milk. Stir gently until marshmallows are completely melted, and the mixture is smooth—about 5 minutes. (Don’t let it boil! If it seems thick, add a splash more milk.) Remove from heat and let cool to room temperature, stirring occasionally.
- Mix Cream Cheese: In a large mixing bowl, beat 8 ounces (225g) softened cream cheese until creamy and smooth. Add the cooled marshmallow mixture, 1 1/2 teaspoons peppermint extract, and 1 tablespoon crème de menthe (if using). Beat until fully combined and silky. (If you want a brighter green, add a few drops of food coloring and mix well.)
- Whip the Cream: In a separate bowl, whip 1 1/2 cups (360ml) heavy cream to soft peaks using a hand mixer or stand mixer—about 3–4 minutes. (You’re looking for billowy, not stiff, peaks.)
- Combine and Fill: Gently fold whipped cream into the minty cream cheese mixture. (Go slow—this keeps the filling light and airy.) Taste and adjust mint flavor if needed. Pour the filling into your chilled Oreo crust, smoothing the top with a spatula.
- Chill the Pie: Cover with plastic wrap and refrigerate for at least 4 hours, preferably overnight. (The longer it chills, the firmer and creamier it gets.)
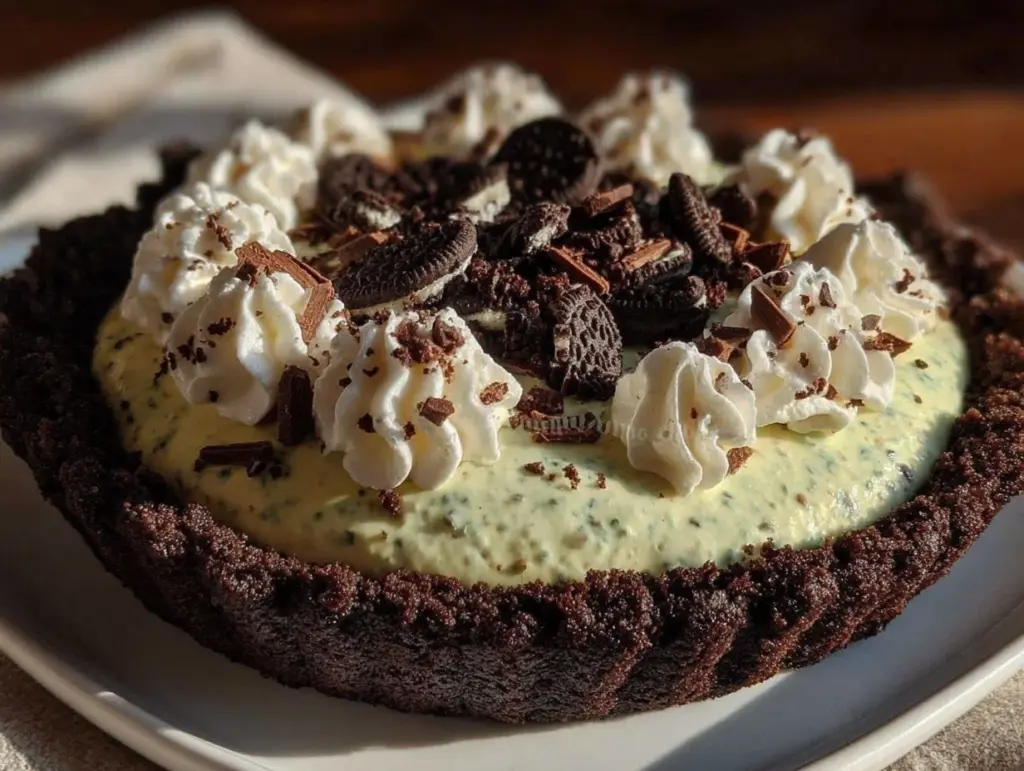
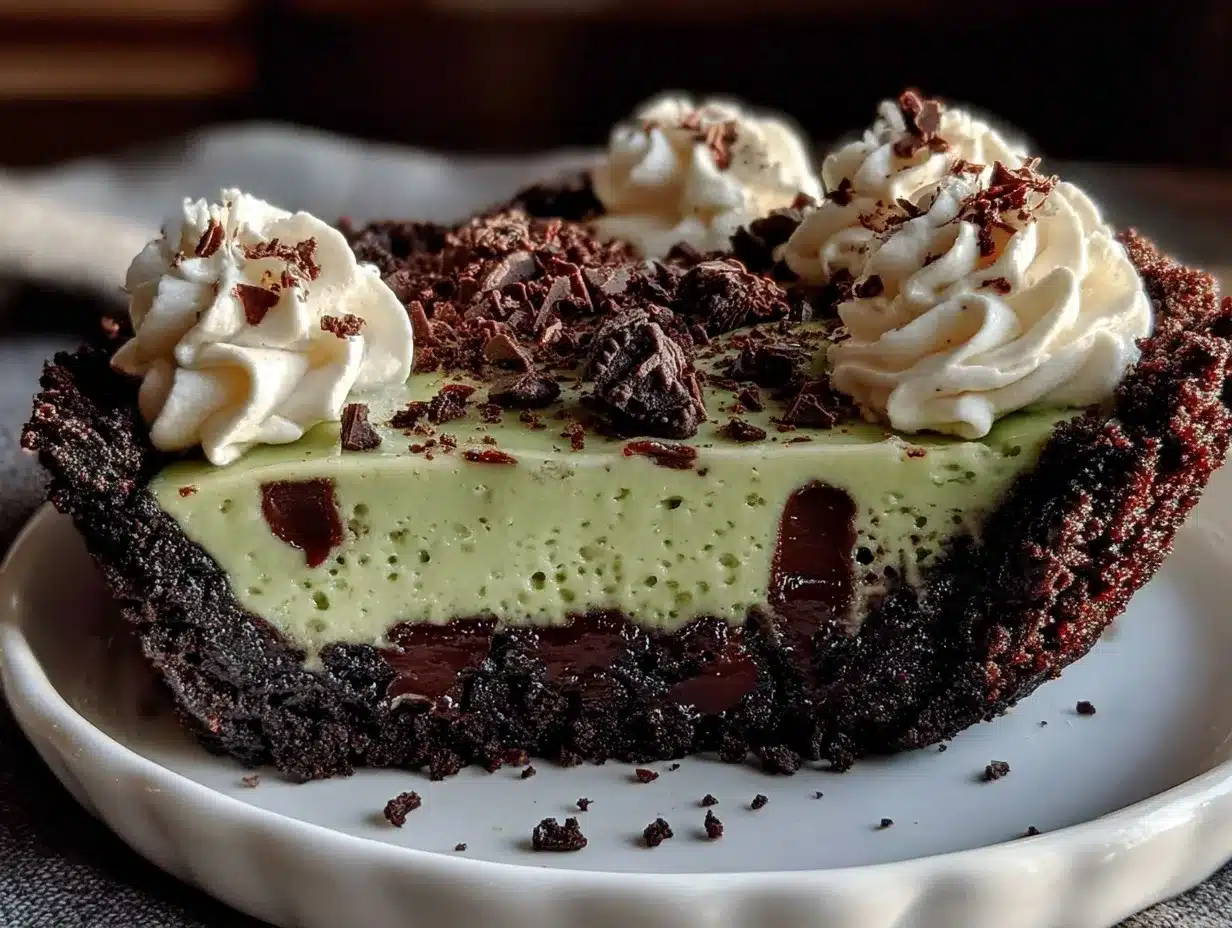
- Garnish and Serve: Before serving, top with extra whipped cream, crushed Oreos, chocolate shavings, and fresh mint leaves as desired. Slice with a warm knife for clean edges—wipe between cuts for best presentation.
Preparation Notes: If your filling seems runny, don’t panic—it will firm up as it chills. If you overbeat the whipped cream, just fold it in gently; texture will still be dreamy. Sensory cue: The filling should look pale green, thick, and cloud-like, with a cool mint aroma. For efficiency, crush Oreos while the marshmallows melt, and whip the cream while the marshmallow mix cools.
Cooking Tips & Techniques
Let’s talk about what I’ve learned (sometimes the hard way!) making this Creamy Grasshopper Pie with Oreo Crust. First, don’t rush the chilling step—patience makes all the difference. I once tried to serve it after just an hour, and, well, it was more like grasshopper pudding (still tasty, but not exactly sliceable).
- Mixing Matters: Beat the cream cheese until it’s totally lump-free before adding marshmallow mix. This gives you that signature silky texture.
- Gentle Folding: When folding whipped cream into the filling, use a spatula and a light touch. Overmixing can deflate the air and make the pie dense.
- Mint Extract Caution: Peppermint extract is powerful—start with less, taste, and add more if needed. Too much can make it taste toothpaste-y (learned that lesson early on!).
- Crust Consistency: Press crumbs firmly into the pie plate. A loose crust can crumble when you slice. For extra crunch, bake crust at 350°F (175°C) for 8 minutes, then cool before filling (optional, but tasty).
- Multitasking: While the marshmallows are cooling, whip up the cream or prep garnishes. Saves time and keeps things flowing.
- Consistency Tip: If you want super clean slices, freeze pie for 30 minutes before cutting—makes for picture-perfect servings for Pinterest!
I’ve had a few failures—too much mint, runny filling, crumbly crust. Each time, a little patience and a lot of taste-testing helped me perfect the process. Now, every slice comes out just right: creamy, minty, and deliciously decadent.
Variations & Adaptations
This Creamy Grasshopper Pie with Oreo Crust is endlessly customizable—here are some fun twists I’ve tried (and loved):
- Gluten-Free: Use gluten-free chocolate sandwich cookies for the crust. The texture and flavor are nearly identical!
- Dairy-Free: Swap in vegan butter, dairy-free cream cheese (like Kite Hill), and coconut whipped topping. The result is still creamy and satisfying.
- Chocolate-Mint Lovers: Fold in 1/2 cup (85g) mini chocolate chips or drizzle chocolate ganache over the top before serving for extra chocolatey goodness.
- Fresh Mint Infusion: Steep a handful of fresh mint leaves in the milk, then strain before melting with marshmallows. The flavor is more herbal and less sweet.
- Holiday Version: Add a splash of crème de cacao and top with crushed peppermint candies for a festive winter pie.
One of my favorite personal adaptations? Swapping the Oreo crust for chocolate graham crackers when I’m out of cookies—different texture, but still delicious. For nut allergies, skip any nut-based garnishes; this pie is naturally nut-free unless you add them. Don’t be afraid to play with flavors—if you love almond or orange, a touch of extract makes for a fun twist!
Serving & Storage Suggestions
This pie shines when served cold, straight from the fridge—perfectly refreshing after a hearty meal or on a hot summer day. For presentation, slice with a warm knife (run under hot water, wipe dry) for smooth, clean edges. Top each slice with a dollop of whipped cream, a sprinkle of crushed Oreos, and a mint leaf for a show-stopping Pinterest-worthy look.
Pair with hot coffee, cold milk, or even a minty cocktail for grown-up gatherings. It’s a great make-ahead dessert for parties, since the flavors develop beautifully overnight.
To store, cover loosely with plastic wrap and refrigerate for up to 4 days—flavors actually get more intense by day two. For longer storage, freeze slices individually wrapped; thaw in the fridge for a few hours before serving. Reheating isn’t needed (it’s a chilled dessert), but if you like it extra cold, serve straight from the freezer for a semi-frozen treat. Honestly, it rarely lasts that long in my house!
Nutritional Information & Benefits
Per slice (based on 8 servings):
- Calories: ~390
- Fat: 26g
- Carbohydrates: 35g
- Protein: 4g
The main health benefits come from the calcium in cream cheese and milk, plus antioxidants from dark chocolate Oreos (okay, maybe a stretch, but I’ll take it!). If you use fresh mint, you add a little vitamin A and C. This pie is naturally nut-free and can be made gluten-free or dairy-free with simple swaps. Potential allergens: dairy, gluten (in Oreos), and if you use crème de menthe, alcohol.
From a wellness perspective: this dessert is all about balance—treat yourself, enjoy the moment, and share a slice with someone you love.
Conclusion
So, why should you make this Creamy Grasshopper Pie with Oreo Crust? It’s easy, outrageously delicious, and brings a pop of fun to any occasion. Whether you stick to the classic recipe or riff with your own twists, it’s a dessert you’ll want to make again and again.
I love this pie because it’s nostalgic, crowd-pleasing, and totally fuss-free (even my kids help with the crushing and mixing). Don’t be afraid to play with the flavors or swap out ingredients—make it your own!
If you try this recipe, I’d love to hear how it turned out. Drop a comment, share your photos on Pinterest, or let me know your favorite adaptations. And honestly, once you taste that first creamy, minty bite, you’ll know why this pie has a permanent spot in my family’s dessert lineup. Happy baking (or, well, chilling)!
Frequently Asked Questions
Can I make Creamy Grasshopper Pie with Oreo Crust ahead of time?
Absolutely! This pie actually tastes better when made a day ahead—the flavors blend, and the filling firms up nicely. Just cover and refrigerate until you’re ready to serve.
What if I don’t have crème de menthe?
No worries! Just use extra peppermint extract and a little green food coloring. The flavor will still be minty and delicious.
Can I freeze this pie?
Yes! Slice and wrap individual pieces, then freeze for up to a month. Thaw in the fridge for a few hours before serving—so refreshing as a semi-frozen treat.
Is this recipe gluten-free?
Not as written, since Oreos contain gluten. But you can easily swap in gluten-free chocolate sandwich cookies for the crust and it’ll be just as tasty.
Can I make this pie without marshmallows?
You can substitute 1 cup (240ml) sweetened condensed milk for the marshmallows and milk. The filling will be creamier and slightly sweeter, but still delicious!
Pin This Recipe!
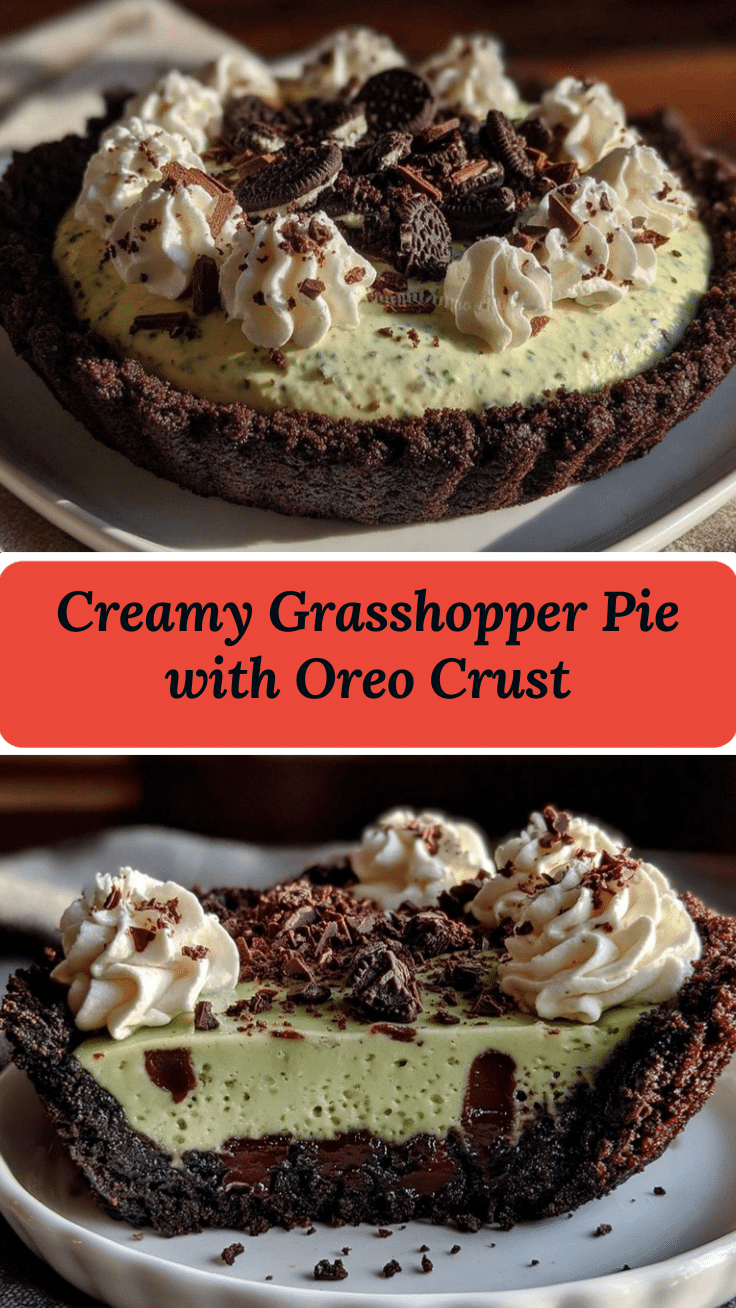
Creamy Grasshopper Pie with Oreo Crust (Easy No Bake Mint Dessert)

A cool, creamy mint pie with a rich Oreo cookie crust and a cloud-like marshmallow and cream cheese filling. This no-bake dessert is perfect for parties, potlucks, or any time you crave a refreshing, nostalgic treat.
- Prep Time: 20 minutes
- Cook Time: 10 minutes
- Total Time: 4 hours 30 minutes
- Yield: 8 servings 1x
- Category: Dessert
- Cuisine: American
Ingredients
- 24 Oreo cookies, crushed into fine crumbs
- 5 tablespoons unsalted butter, melted
- 2 cups mini marshmallows
- 1/2 cup whole milk
- 8 ounces cream cheese, softened
- 1 1/2 teaspoons peppermint extract
- 1 tablespoon crème de menthe liqueur (optional)
- Green food coloring (a few drops)
- 1 1/2 cups heavy whipping cream
- Extra whipped cream (for garnish, optional)
- Crushed Oreos or chocolate shavings (for garnish, optional)
- Fresh mint leaves (for garnish, optional)
Instructions
- Prepare the Oreo Crust: Pulse Oreo cookies into fine crumbs using a food processor or blender. Mix crumbs with melted butter until evenly moistened. Press mixture firmly into the bottom and sides of a 9-inch pie plate. Chill in the freezer for at least 10 minutes.
- Melt Marshmallows: In a small saucepan over low heat, combine mini marshmallows and milk. Stir until marshmallows are melted and mixture is smooth, about 5 minutes. Remove from heat and let cool to room temperature.
- Mix Cream Cheese: In a large mixing bowl, beat softened cream cheese until creamy and smooth. Add cooled marshmallow mixture, peppermint extract, and crème de menthe (if using). Beat until fully combined. Add green food coloring and mix well.
- Whip the Cream: In a separate bowl, whip heavy cream to soft peaks using a hand mixer or stand mixer, about 3–4 minutes.
- Combine and Fill: Gently fold whipped cream into the minty cream cheese mixture. Pour filling into chilled Oreo crust and smooth the top.
- Chill the Pie: Cover with plastic wrap and refrigerate for at least 4 hours, preferably overnight.
- Garnish and Serve: Before serving, top with extra whipped cream, crushed Oreos, chocolate shavings, and fresh mint leaves as desired. Slice with a warm knife for clean edges.
Notes
For gluten-free, use gluten-free chocolate sandwich cookies. For dairy-free, substitute vegan butter, cream cheese, and coconut whipped topping. Chill pie thoroughly for best texture. For clean slices, freeze pie for 30 minutes before cutting. Adjust mint extract to taste—start with less and add more if needed.
Nutrition
- Serving Size: 1 slice (1/8 of pie)
- Calories: 390
- Sugar: 22
- Sodium: 220
- Fat: 26
- Saturated Fat: 15
- Carbohydrates: 35
- Fiber: 2
- Protein: 4
Keywords: grasshopper pie, oreo crust, mint dessert, no bake pie, creamy pie, marshmallow filling, easy dessert, party dessert, potluck recipe, summer dessert


