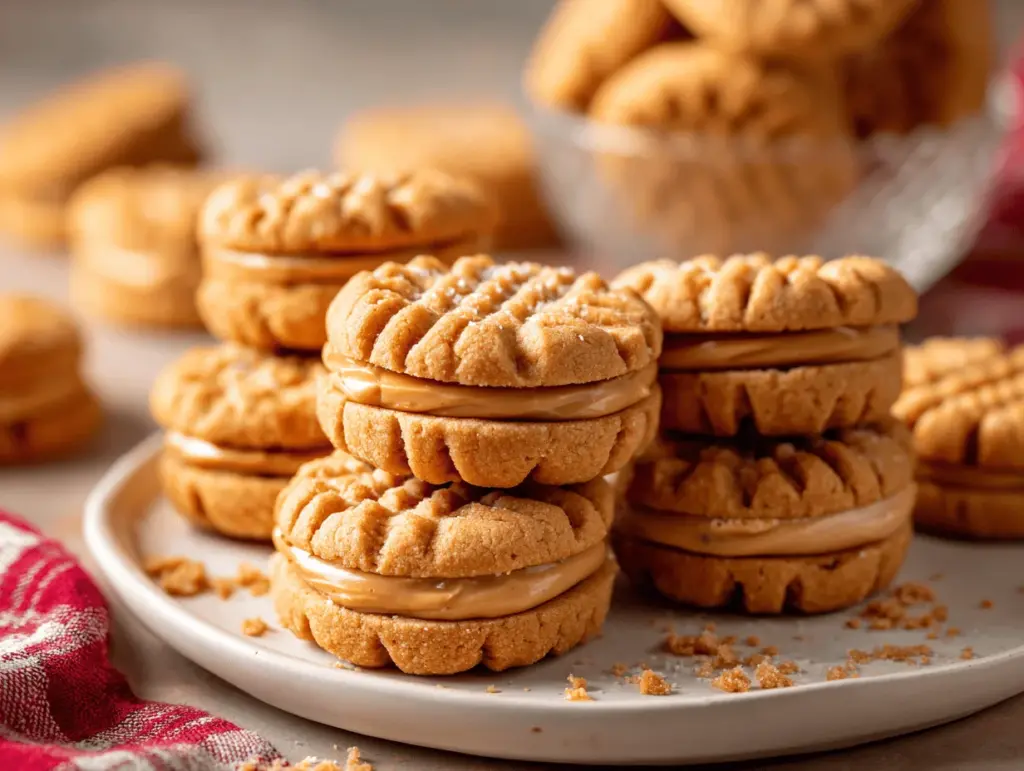
The first time I baked a batch of copycat Nutter Butters from scratch, my entire kitchen filled with the warm, nutty scent of roasted peanuts and brown sugar. It was enough to make me pause, close my eyes, and just breathe it in—honestly, if you know, you know. I grew up trading Nutter Butters at lunch, always wishing I had a double stash. Turns out, homemade is even better—crisp, peanutty cookies hugging a lush peanut butter filling, all made fresh with ingredients I trust.
This recipe for copycat Nutter Butters from scratch is my answer to every peanut butter lover’s dream. I wanted the real-deal texture: that signature crunch on the outside, plus a soft, creamy center. After a few kitchen experiments (and more than a few happy taste-testers), I landed on a version that captures everything you crave about the classic cookie, but with the deep, toasty flavors only homemade can deliver. And the best part? You probably have everything you need in your pantry already. It’s perfect for family gatherings, lunchbox treats, or whenever that peanut butter craving strikes.
Making homemade cookies has always been a comfort for me. There’s just something magical about transforming simple ingredients into something unforgettable, especially when the recipe comes with a little nostalgia. Whether you’re baking with your kids, sharing with friends, or just need a sweet pick-me-up, these copycat Nutter Butters from scratch hit every note—crunchy, creamy, salty-sweet, and downright irresistible. Trust me, once you make these, you’ll never look at the store-bought version the same way again.
Why You’ll Love This Recipe
I’ve baked a lot of cookies over the years, but these copycat Nutter Butters from scratch are the ones that always disappear first from the cookie jar. Here’s why this recipe stands out (and why you’ll find yourself coming back to it again and again):
- Quick & Easy: The dough comes together in under 20 minutes and doesn’t need to chill—perfect for those “gotta have it now” moments.
- Simple Ingredients: No weird additives or preservatives, just classic pantry staples. You probably have everything on hand right now!
- Perfect for Any Occasion: Bake a big batch for holiday cookie swaps, birthday parties, or just a fun weekend baking project with the kids.
- Crowd-Pleaser: Peanut butter fans (and honestly, even those on the fence) go wild for these. I’ve yet to meet someone who can stop at just one.
- Unbelievably Delicious: The combination of crisp, buttery cookies and that creamy peanut butter filling is next-level comfort food. It’s salty, sweet, and just melts in your mouth.
What makes these copycat Nutter Butters from scratch different? I blend roasted peanuts right into the dough for extra crunch and flavor, and the filling has a touch of honey for that nostalgic sweetness. The classic fork-tine marks (or the iconic wavy lines, if you’re feeling ambitious) give them that true Nutter Butter vibe, but every bite tastes fresh and homemade. Plus, you can tweak the filling texture—extra creamy or a little chunky, depending on your mood. It’s like the best of childhood, with a grown-up twist.
Honestly, baking these cookies is a little act of self-care in my house. There’s joy in making something from scratch and sharing it—especially when the result makes people smile. Whether you’re new to baking or a seasoned pro, these copycat Nutter Butters from scratch deliver on flavor, nostalgia, and pure peanut butter happiness. Seriously, don’t be surprised if you get requests to bake these on repeat!
What Ingredients You Will Need
This recipe keeps things simple, using easy-to-find ingredients that come together for big, bold peanut butter flavor. Every element plays its part—let’s break it down so you can see just how fuss-free these copycat Nutter Butters from scratch really are.
- For the Cookie Dough:
- All-purpose flour (2 cups, 240g) – Gives the cookies their structure and classic crunch.
- Baking soda (1 tsp, 5g) – Helps the cookies rise and get that perfect snap.
- Salt (1/2 tsp, 3g) – Balances the sweetness and brings out the peanut flavor.
- Unsalted butter, softened (1/2 cup, 113g) – Adds richness and buttery undertones. (I use Kerrygold when I want extra flavor!)
- Creamy peanut butter (1 cup, 240g) – The heart of the cookie! I go with Skippy or Jif for a classic taste, but natural peanut butter works if you stir it well first.
- Granulated sugar (1/2 cup, 100g) – For sweetness and a bit of crunch.
- Light brown sugar, packed (1/2 cup, 110g) – Adds moisture and a caramel note that deepens the flavor.
- Large egg (1, room temperature) – Helps bind everything together.
- Pure vanilla extract (1 tsp, 5ml) – Don’t skip this; it rounds out all the flavors beautifully.
- Roasted, salted peanuts, finely chopped (1/3 cup, 45g) – This is my secret for extra crunch and depth. (Planters or store-brand work well.)
- For the Peanut Butter Filling:
- Creamy peanut butter (1/2 cup, 120g) – Again, use your favorite brand. Chunky is great if you want more texture.
- Unsalted butter, softened (3 tbsp, 42g) – For that silky-smooth texture. Room temp is best for easy mixing.
- Powdered sugar (1 cup, 120g) – Sweetens and thickens the filling.
- Honey (1 tbsp, 15ml) – Adds a nostalgic, sticky-sweet note (optional, but oh-so-good).
- Pinch of salt – Balances the sweetness and keeps the filling from tasting flat.
- Milk or cream (1-2 tsp, 5-10ml, as needed) – For adjusting the filling’s consistency. I use whole milk but any will do.
Substitution Tips: If you need these gluten-free, swap in a 1:1 gluten-free flour blend. For a dairy-free version, use vegan butter and plant-based milk. No honey? Just skip it or add a drop of maple syrup. Allergic to peanuts? Almond butter works surprisingly well, though the flavor will change (still yummy, just different!).
Equipment Needed
You don’t need fancy tools to make copycat Nutter Butters from scratch, which is part of what makes them so approachable for home bakers. Here’s what I use (and some handy alternatives):
- Mixing bowls – One large and one medium. I use my old glass Pyrex bowls, but any will do.
- Electric mixer (handheld or stand) – Creaming the butter and sugars is much easier with a mixer, but elbow grease and a sturdy wooden spoon work in a pinch.
- Measuring cups & spoons – For accuracy. I always double-check with a digital scale for flour and sugar (it really helps with consistency).
- Baking sheets – Two, lined with parchment paper or silicone baking mats. If you only have one, just bake in batches.
- Cooling rack – Not strictly necessary, but helps the cookies firm up and cool evenly.
- Fork or pastry cutter – For making those classic Nutter Butter lines. A butter knife works too, or even the edge of a spoon.
- Small offset spatula or butter knife – For spreading the filling.
If you’re on a tight budget, skip the stand mixer and use a whisk and strong arm. For cleaning, I always soak my mixer attachments in warm soapy water while the cookies bake—makes cleanup a breeze!
How to Make Copycat Nutter Butters from Scratch

- Prep the oven and pans: Preheat your oven to 350°F (175°C). Line 2 baking sheets with parchment paper or silicone baking mats. This helps prevent sticking and makes cleanup a snap.
- Mix the dry ingredients: In a medium bowl, whisk together 2 cups (240g) all-purpose flour, 1 tsp (5g) baking soda, and 1/2 tsp (3g) salt. Set aside. (Don’t skip sifting if your flour is clumpy—it makes for a smoother dough.)
- Cream the butter, peanut butter, and sugars: In a large bowl, use an electric mixer to beat 1/2 cup (113g) unsalted butter and 1 cup (240g) creamy peanut butter until smooth and combined—about 2 minutes on medium speed. Add 1/2 cup (100g) granulated sugar and 1/2 cup (110g) light brown sugar; beat another 2 minutes until light and fluffy. You’re looking for a pale, soft mixture with no lumps.
- Add the wet ingredients: Beat in 1 large egg (room temperature) and 1 tsp (5ml) vanilla extract, mixing until fully incorporated. (If your dough looks grainy here, don’t panic—it’ll smooth out once you add the flour.)
- Combine wet and dry ingredients: Gradually add the flour mixture to the peanut butter mixture, beating on low just until combined. Use a spatula to scrape down the sides and fold in 1/3 cup (45g) finely chopped roasted peanuts. The dough will be thick but not dry—it should hold together when pinched.
- Shape the cookies: Scoop out tablespoon-sized portions of dough (about 20g each). Roll each into a ball, then into a short log shape—think mini hot dogs, about 2 inches (5cm) long. Place on the prepared sheets, leaving about 2 inches between each cookie.
- Form the classic Nutter Butter shape: Gently press down on each log to flatten slightly. Using a fork, pastry cutter, or butter knife, create a crisscross or wavy line pattern on top to mimic the original Nutter Butter look. (No one’s going to judge if they aren’t perfect—imperfections make them look homemade!)
- Bake: Bake for 10-12 minutes, or until the edges are light golden brown. The centers may look a bit soft—that’s okay! They’ll firm up as they cool. If they spread too much, your butter may have been too warm—just chill the next batch for 10 minutes before baking.
- Cool: Let the cookies cool on the baking sheet for 5 minutes, then transfer to a rack to cool completely. Don’t fill them while warm or the filling will melt right out.
- Make the filling: While the cookies cool, beat together 1/2 cup (120g) creamy peanut butter, 3 tbsp (42g) unsalted butter, and 1 cup (120g) powdered sugar until smooth and fluffy (about 2 minutes). Add 1 tbsp (15ml) honey and a pinch of salt, then beat in 1-2 tsp (5-10ml) milk or cream, a little at a time, until you reach a thick but spreadable consistency.
- Assemble: Pair up cookies by size. Spread about 1 tablespoon (15g) filling onto the flat side of one cookie, then gently press on the matching cookie to make a sandwich. Repeat with remaining cookies and filling.
- Set and serve: Let filled cookies sit for 10-15 minutes so the filling can firm up. (If you’re in a hurry, pop them in the fridge for 5 minutes.) Enjoy with a cold glass of milk, or just straight off the tray—I won’t tell!
Troubleshooting: If your dough is too sticky, add a tablespoon of flour. Too crumbly? Add a splash of milk. If the filling is runny, add a bit more powdered sugar. The cookies should be golden at the edges and smell deeply nutty when done. If you underbake, they’ll be soft; overbake, and they’ll be crunchy (both are delicious, honestly!).
Cooking Tips & Techniques
Through all my test batches, I’ve picked up a few tips that really make these copycat Nutter Butters from scratch foolproof. Here’s what I wish someone had told me when I first started baking them:
- Don’t Overmix: Once you add the flour, mix just until combined. Overmixing makes the cookies tough instead of crisp.
- Room Temperature Ingredients: Use room temp butter and egg for smoother mixing and even dough. If you forget, just place the egg in warm water for 5 minutes and microwave butter in 5-second bursts (but don’t let it melt).
- Chill if Needed: If your kitchen’s warm or the dough feels sticky, chill it for 10-15 minutes before shaping. This keeps the cookies from spreading too much.
- Get Creative with Shapes: If you don’t care about the peanut shape, just flatten the logs into rounds or use a cookie cutter. They’ll taste just as great!
- Double Up: I often double the recipe and freeze half the dough for quick cookies later. Just roll into logs, wrap well, and freeze for up to 2 months.
- Trouble With Filling Consistency? A splash more milk softens, a bit more powdered sugar thickens. Be patient; it comes together with a little mixing.
- Batch Baking: If baking in batches, let the sheets cool between rounds. Hot pans make cookies spread too much.
I’ve had my share of burnt bottoms (forgot to rotate the pan at the halfway point!) and crumbly cookies from overbaking. Don’t stress—just check at the 10-minute mark and go from there. Sometimes the first tray is your “test batch”—taste one and tweak your timing if needed. These cookies are forgiving, so you can relax and have fun with the process.
Variations & Adaptations
The best part about making copycat Nutter Butters from scratch is how easy they are to customize. Here are some fun variations to try:
- Gluten-Free: Substitute a 1:1 gluten-free flour blend for the all-purpose flour. I like King Arthur’s or Cup4Cup. The cookies come out just as crisp and flavorful.
- Vegan: Use dairy-free butter (like Earth Balance), plant-based milk, and a flax egg (1 tbsp flaxseed meal + 3 tbsp water, let sit 5 minutes) instead of regular egg. The filling works great with vegan butter too.
- Chocolate Dipped: After filling, dip half of each cookie in melted chocolate and let set on parchment. Adds a decadent twist (and looks amazing for gifting!).
- Chunky Style: Swap creamy peanut butter for chunky in the dough and/or filling for extra crunch and nutty texture.
- Nut-Free: Use sunflower seed butter and pumpkin seeds for a school-safe version. Just note the flavor will be different but still delicious.
I’ve even tried adding a teaspoon of cinnamon or a pinch of cayenne to the dough for a subtle kick—surprisingly good! You can play with fillings too: chocolate-hazelnut spread, marshmallow fluff, or even a layer of jam for a PB&J vibe. The possibilities are endless, so don’t be afraid to make them your own.
Serving & Storage Suggestions
These copycat Nutter Butters from scratch are best enjoyed at room temperature, when the filling is soft and the cookie has a satisfying crunch. Arrange them on a pretty platter for parties, or stack in a cookie jar for snacking.
Pairings: Serve with a tall glass of cold milk, hot coffee, or even a scoop of vanilla ice cream for an over-the-top dessert sandwich. They’re lovely with fresh fruit or as part of a cookie tray for the holidays.
Storing: Keep the cookies in an airtight container at room temp for up to 5 days. If you live somewhere humid, pop them in the fridge—just bring to room temp before eating for best texture. They also freeze well: wrap individually and stash in a zip-top bag for up to 2 months. Thaw at room temp or warm gently in the microwave for 10 seconds.
Honestly, the flavor deepens after a day or two, and the filling sets up perfectly—so they’re a great make-ahead bake. If you like a firmer filling, chill them before serving (they’re divine straight from the fridge on a hot day!).
Nutritional Information & Benefits
Each copycat Nutter Butter cookie comes in around 180-200 calories, with about 9g fat, 22g carbs, and 4g protein (estimate for a standard sandwich cookie). They’re naturally high in protein and healthy fats from the peanuts, plus a little fiber if you use chunky or natural peanut butter.
This recipe can be made gluten-free and dairy-free with simple swaps, and it’s naturally free of artificial flavors and preservatives. Just a heads-up: they do contain peanuts, eggs, dairy, and gluten unless you use the adaptations above. If you’re tracking macros, you can reduce the sugar in the filling a bit and still get a rich flavor.
As a peanut butter fan, I love knowing exactly what’s in my treat—no weird stuff, just real ingredients. It’s a feel-good cookie with nostalgia and a touch of protein, perfect for a little afternoon pick-me-up or sharing with friends.
Conclusion
If you love peanut butter, these copycat Nutter Butters from scratch are a must-try. They’re easy, packed with flavor, and way more fun (and fresh!) than anything you’ll find in a box. You can tweak them to fit your tastes or dietary needs—honestly, there’s something special about baking cookies that make everyone smile.
This recipe is my go-to for parties, after-school snacks, or just a rainy day when I need a little comfort. I hope you give them a whirl, and don’t be shy—make them your own! Let me know if you try a fun twist, or if you bake them with your kids (messy hands and all!).
Drop a comment below with your favorite variation, pin this recipe for later, and share with your fellow peanut butter lovers. Happy baking—here’s to more homemade cookie moments!
Frequently Asked Questions
Can I use natural peanut butter in the cookies?
Yes, you can use natural peanut butter, but make sure it’s well stirred and not too oily. The cookies may spread a bit more and have a slightly different texture, but they’ll still taste great.
How do I get the classic Nutter Butter shape?
Roll the dough into small logs and gently flatten, then use a fork or pastry cutter to make lines on top. It doesn’t have to be perfect—the homemade look is part of the charm!
Can I freeze the cookies or dough?
Absolutely! Freeze unbaked dough logs for up to 2 months, or freeze baked, filled cookies in an airtight container. Thaw at room temp or warm gently for the best texture.
What’s the best way to make these gluten-free?
Substitute a 1:1 gluten-free flour blend for the all-purpose flour. The cookies still bake up perfectly crisp and delicious.
Is there a way to make these nut-free for allergies?
Try sunflower seed butter and pumpkin seeds instead of peanut butter and peanuts. The flavor will be different but still tasty and safe for nut-free needs.
Pin This Recipe!
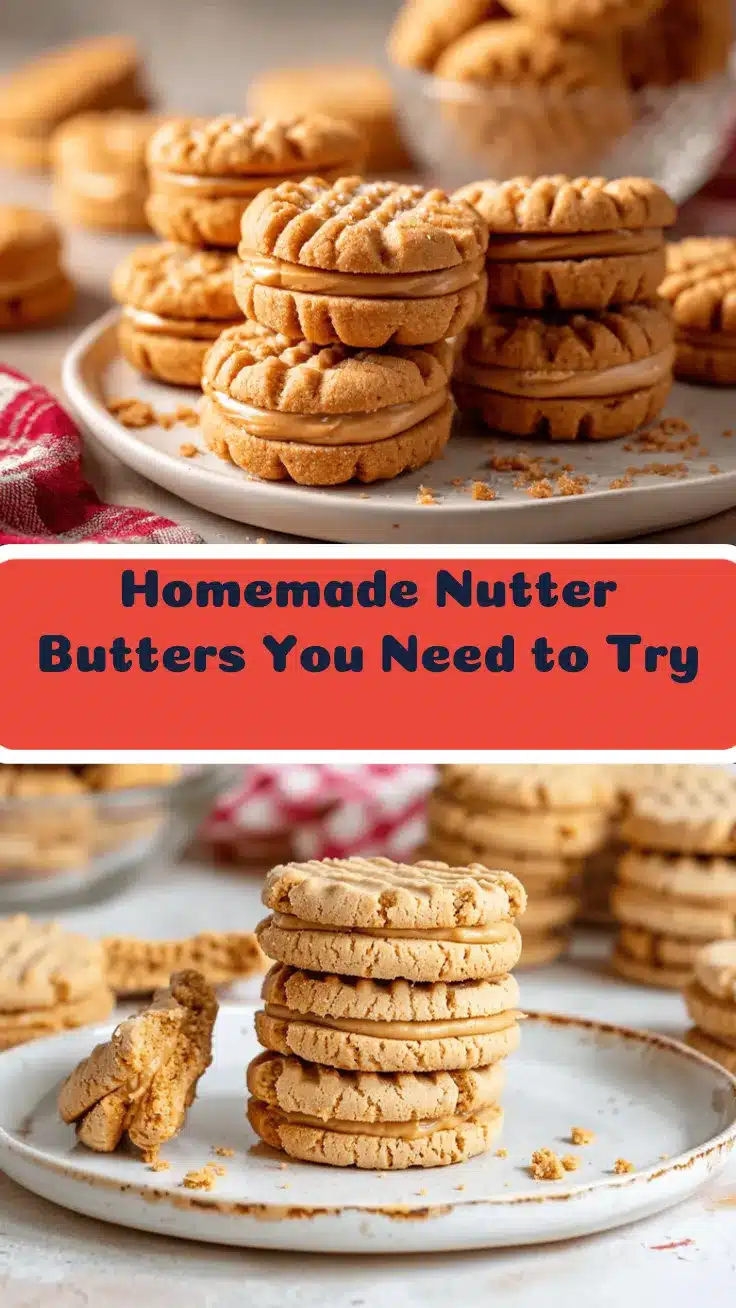
Copycat Nutter Butters from Scratch Easy Homemade Cookies
These homemade copycat Nutter Butters feature crisp, peanutty cookies hugging a creamy peanut butter filling. They deliver nostalgic flavor and texture, all made with simple pantry ingredients—perfect for peanut butter lovers and family gatherings.
- Prep Time: 20 minutes
- Cook Time: 12 minutes
- Total Time: 40 minutes
- Yield: 18 sandwich cookies 1x
- Category: Dessert
- Cuisine: American
Ingredients
- 2 cups all-purpose flour
- 1 teaspoon baking soda
- 1/2 teaspoon salt
- 1/2 cup unsalted butter, softened
- 1 cup creamy peanut butter
- 1/2 cup granulated sugar
- 1/2 cup light brown sugar, packed
- 1 large egg, room temperature
- 1 teaspoon pure vanilla extract
- 1/3 cup roasted, salted peanuts, finely chopped
- For the Peanut Butter Filling:
- 1/2 cup creamy peanut butter
- 3 tablespoons unsalted butter, softened
- 1 cup powdered sugar
- 1 tablespoon honey (optional)
- Pinch of salt
- 1–2 teaspoons milk or cream, as needed
Instructions
- Preheat oven to 350°F (175°C). Line 2 baking sheets with parchment paper or silicone baking mats.
- In a medium bowl, whisk together flour, baking soda, and salt. Set aside.
- In a large bowl, beat unsalted butter and creamy peanut butter until smooth and combined (about 2 minutes).
- Add granulated sugar and light brown sugar; beat another 2 minutes until light and fluffy.
- Beat in egg and vanilla extract until fully incorporated.
- Gradually add the flour mixture to the peanut butter mixture, beating on low just until combined. Fold in chopped roasted peanuts.
- Scoop tablespoon-sized portions of dough and roll into balls, then into short log shapes (about 2 inches long). Place on prepared sheets, leaving space between each.
- Gently flatten each log and use a fork, pastry cutter, or butter knife to create crisscross or wavy line patterns on top.
- Bake for 10-12 minutes, until edges are light golden brown. Centers may look soft; they’ll firm up as they cool.
- Let cookies cool on the baking sheet for 5 minutes, then transfer to a rack to cool completely.
- While cookies cool, beat together peanut butter, unsalted butter, and powdered sugar until smooth and fluffy (about 2 minutes). Add honey and salt, then beat in milk or cream, a little at a time, until thick but spreadable.
- Pair up cookies by size. Spread about 1 tablespoon filling onto the flat side of one cookie, then gently press on the matching cookie to make a sandwich.
- Let filled cookies sit for 10-15 minutes so the filling can firm up. Enjoy!
Notes
For gluten-free, use a 1:1 gluten-free flour blend. For dairy-free, substitute vegan butter and plant-based milk. If dough is sticky, chill for 10-15 minutes before shaping. Filling can be adjusted with more milk for softness or more powdered sugar for thickness. Cookies freeze well for up to 2 months.
Nutrition
- Serving Size: 1 sandwich cookie
- Calories: 190
- Sugar: 13
- Sodium: 120
- Fat: 9
- Saturated Fat: 3
- Carbohydrates: 22
- Fiber: 1
- Protein: 4
Keywords: nutter butter, copycat cookies, peanut butter cookies, homemade nutter butter, sandwich cookies, easy cookies, kid-friendly, lunchbox treats, nostalgic dessert


