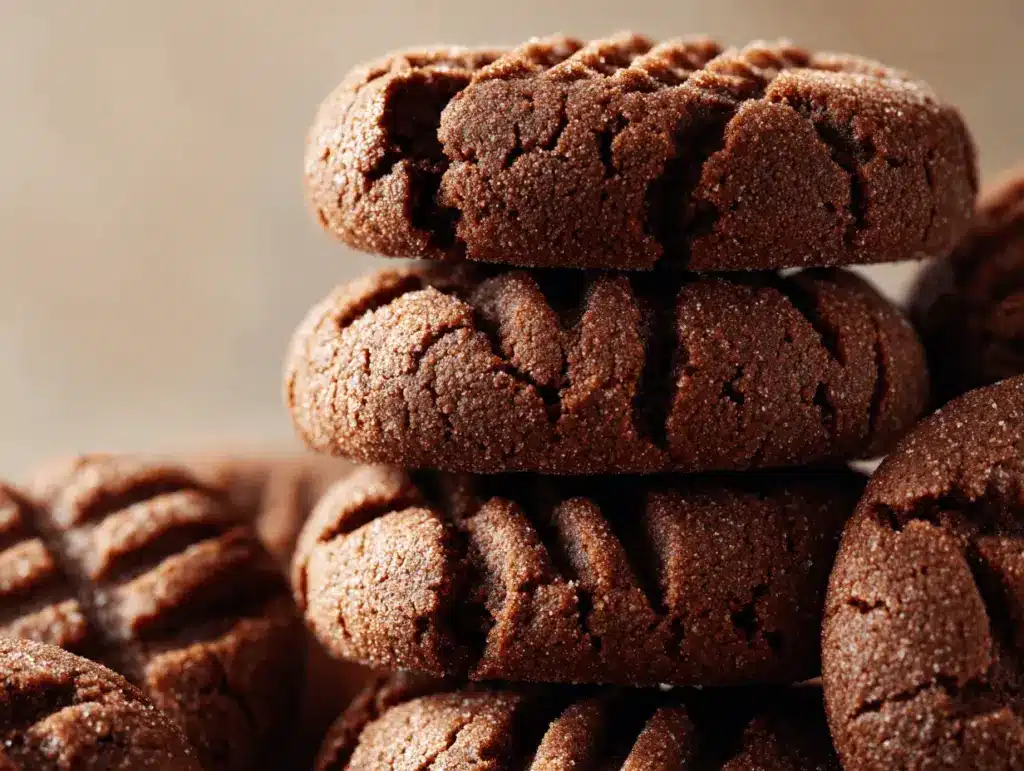
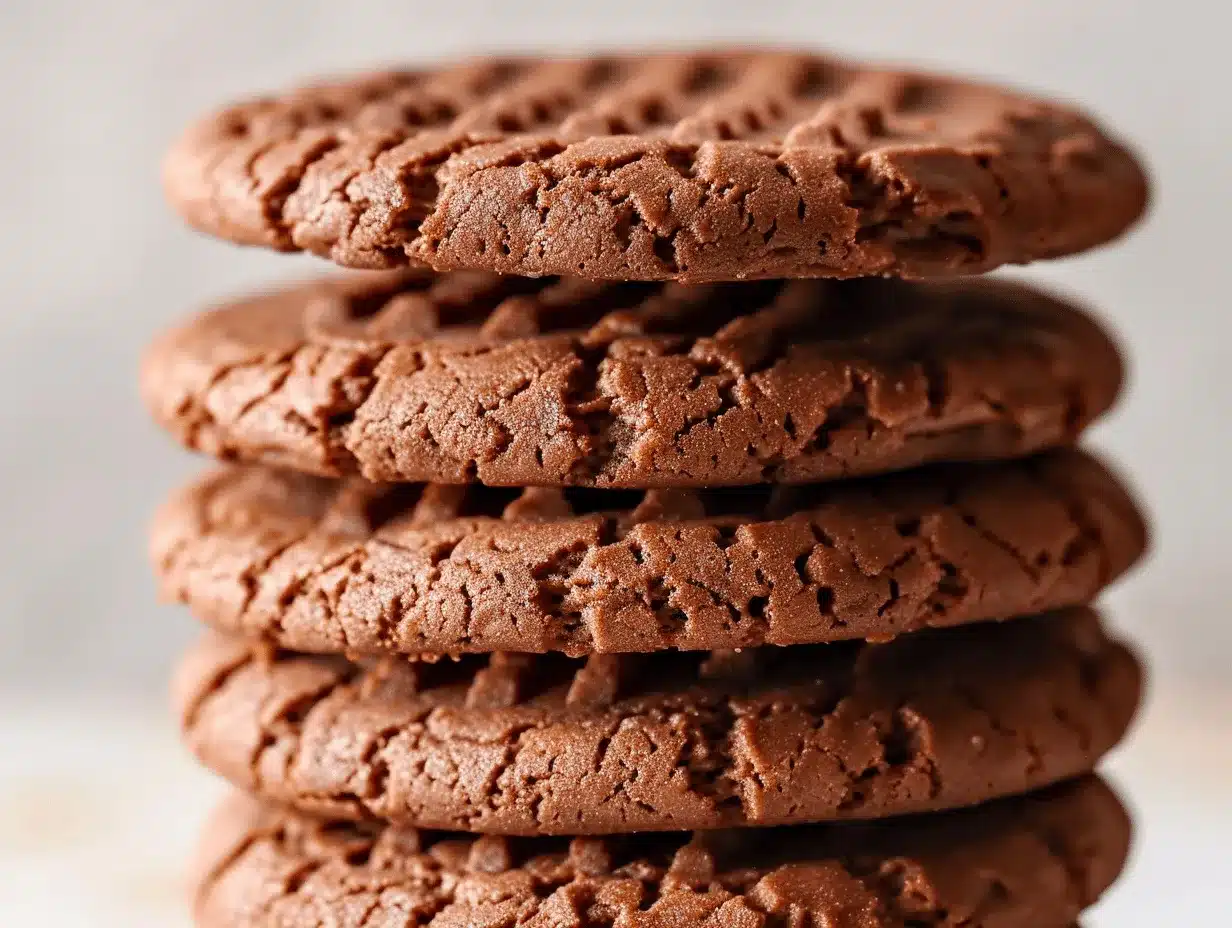
The first time I pulled a tray of these chocolate peanut butter cookies out of the oven, the kitchen was instantly filled with the warm, nutty scent of peanut butter swirling together with deep, fudgy chocolate. Honestly, it was impossible not to sneak a cookie before they cooled. You know that feeling when you find a cookie so chewy, so decadently rich, you have to hide the rest from yourself? This is that cookie.
I stumbled into this recipe during a late-night craving—no butter, almost out of flour, but determined to have something sweet. After a few trials, and a couple of burnt batches (let’s face it, we’ve all been there), I hit gold: these chocolate peanut butter cookies that hit every note—chewy, gooey, intensely chocolatey, and packed with peanut butter flavor. They’re now a staple in my house, especially when I want to impress friends or just need a quick pick-me-up treat that feels a little extra.
What I love about this recipe is how forgiving it is. It’s perfect for beginner bakers, but honestly, even if you’re a pro, you’ll be wowed by the rich, ultra-chewy texture. If you’re into cookies that are soft in the middle, slightly crisped at the edges, and bursting with chocolate peanut butter goodness, you’re in the right place. And yes, these are totally pantry-friendly—no fancy ingredients or tricky techniques. Just classic, feel-good baking with a twist that’ll make you the cookie hero at any gathering. Let’s get baking—these chocolate peanut butter cookies are about to become your new obsession!
Why You’ll Love This Chocolate Peanut Butter Cookies Recipe
As someone who’s baked and taste-tested more batches than I care to admit, I can say these chocolate peanut butter cookies are different—in the best way. Here’s what makes them a must-bake:
- Ultra Chewy Texture: Thanks to the perfect mix of brown sugar and peanut butter, each cookie stays soft and chewy for days. No more dried-out cookies the next morning!
- Quick & Foolproof: You can whip these up in under 30 minutes, start to finish. No chilling dough or complicated steps—just mix, scoop, and bake.
- Simple Ingredients: Everything you need is likely already in your pantry. No need for a last-minute grocery run (because who has time for that?).
- Perfect for Any Occasion: These cookies are amazing for bake sales, after-school snacks, or a cozy movie night. They even hold up well in lunchboxes or on a holiday cookie platter.
- Family-Approved: Every time I make these, somebody asks for the recipe. Both kids and adults go crazy for them—the ultimate crowd-pleaser.
- Next-Level Flavor: The combination of deep cocoa and creamy peanut butter is, honestly, pure nostalgia. It’s a classic pairing that never goes out of style, but the chewy texture puts it over the top.
What really makes these chocolate peanut butter cookies stand out is the use of both melted chocolate and cocoa powder, which creates a rich, almost brownie-like base. The peanut butter isn’t just an afterthought—it’s swirled into every bite, giving you big flavor and that unmistakable, crave-worthy chewiness. I’ve tried a bunch of recipes, but after lots of tweaking (and a few cookie disasters), this version is my gold standard.
If you’re looking for a cookie that’s easy enough for weeknights but impressive enough for guests, this is it. It’s the kind of treat that makes people pause, savor, and ask for seconds—no fancy tricks, just good, honest baking that hits the spot every single time.
What Ingredients You Will Need
This recipe uses simple, wholesome ingredients to deliver bold chocolate peanut butter flavor and a soft, chewy bite. Most of these are pantry staples, and I’ll share a few substitution tips to help you customize your cookies!
- All-Purpose Flour (1 cup/125g) – The base for our cookies. You can swap with a 1:1 gluten-free blend if needed.
- Unsweetened Cocoa Powder (1/3 cup/35g) – Dutch-process yields richer color, but natural works fine. Sift if lumpy.
- Baking Soda (1/2 teaspoon/2g) – Helps the cookies rise and stay soft.
- Salt (1/4 teaspoon/1g) – Balances sweetness and enhances chocolate flavor.
- Brown Sugar (3/4 cup/150g, packed) – For moisture and chew. I use light brown, but dark brown gives a deeper flavor.
- Granulated Sugar (1/4 cup/50g) – Adds sweetness and a bit of crisp edge.
- Creamy Peanut Butter (1/2 cup/125g) – Use shelf-stable for best texture (natural types can make cookies crumbly). I like Jif or Skippy.
- Unsalted Butter (1/2 cup/113g, softened) – If you only have salted, just skip the added salt.
- Egg (1 large, room temperature) – Gives structure and richness.
- Pure Vanilla Extract (1 teaspoon/5ml) – Rounds out flavors. Use real vanilla if possible.
- Semi-Sweet Chocolate Chips (1/2 cup/90g) – Folds into the dough for melty pockets of chocolate. Milk chocolate chips work if you prefer a sweeter bite.
- Peanut Butter Chips (optional) (1/4 cup/45g) – For extra peanut butter flavor. Not essential, but so good!
Substitution Notes:
- If you want a dairy-free version, use plant-based butter and dairy-free chocolate chips.
- No brown sugar? Use all white sugar, but the cookies will be less chewy.
- If you’re out of peanut butter, almond butter works, but the flavor will shift.
- Want to make it nut-free? Use sunflower seed butter for a similar texture.
Honestly, you can play around with the add-ins—sometimes I mix in chopped roasted peanuts for crunch or swirl a little extra peanut butter on top before baking (yum). The key is to keep the ratios the same for best results!
Equipment Needed
- Mixing Bowls: One large, one medium. I’ve used both glass and stainless steel—no real difference, just make sure they’re big enough to mix comfortably.
- Hand Mixer or Stand Mixer: Both work great! If you’re mixing by hand, get ready for an arm workout—it can be done, but it’s a bit of a workout with thick dough.
- Measuring Cups and Spoons: For accuracy. If you bake a lot, invest in a digital scale for even more precise results (especially with flour and cocoa powder).
- Baking Sheet: Standard half-sheet pans work best. If yours are warped (I’ve had that happen!), just rotate the pan halfway through baking for even cookies.
- Parchment Paper or Silicone Baking Mat: Prevents sticking and makes cleanup way easier. Parchment is my go-to for quick batches.
- Cookie Scoop (optional): Helps portion dough evenly. I use a medium (1.5-tablespoon) scoop, but two spoons work in a pinch.
- Cooling Rack: Lets cookies cool evenly and keeps them from getting soggy on the bottom.
Tip: Keep your mixer attachments clean and dry for best results, especially when switching between wet and dry ingredients. For budget-friendly baking, most of these tools can be found at big-box stores or secondhand shops—no need for fancy gadgets.
How to Make Chocolate Peanut Butter Cookies – Step by Step
- Prep the Ingredients. Preheat your oven to 350°F (175°C). Line two baking sheets with parchment paper or silicone mats. Measure out all your ingredients—this keeps things running smoothly.
- Mix the Dry Ingredients. In a medium bowl, whisk together 1 cup (125g) all-purpose flour, 1/3 cup (35g) unsweetened cocoa powder, 1/2 teaspoon (2g) baking soda, and 1/4 teaspoon (1g) salt. Set aside.
- Cream the Sugars, Butter, and Peanut Butter. In a large mixing bowl, beat together 1/2 cup (113g) softened unsalted butter, 3/4 cup (150g) packed brown sugar, and 1/4 cup (50g) granulated sugar on medium speed until light and fluffy—about 2 minutes. Add 1/2 cup (125g) creamy peanut butter and beat just until combined. (Don’t overmix or the cookies may turn out tough.)
- Add the Egg and Vanilla. Crack in 1 large egg and pour in 1 teaspoon (5ml) vanilla extract. Beat on low until fully incorporated, scraping down the sides as needed.
- Combine Wet and Dry Ingredients. With mixer on low, gradually add the dry mixture to the wet ingredients. Mix just until no dry streaks remain—don’t overdo it, or you risk dense cookies. The dough will be thick and fudge-like. If it’s too sticky to handle, chill for 10-15 minutes.
- Fold in the Chips. Using a spatula or spoon, gently fold in 1/2 cup (90g) semi-sweet chocolate chips and 1/4 cup (45g) peanut butter chips (if using). Try not to smash the chips—gentle is key!
- Scoop the Dough. Use a medium cookie scoop or two spoons to portion dough into 1.5-tablespoon balls. Place each ball about 2 inches (5cm) apart on the baking sheets. If you want extra pretty cookies, dot the tops with a few extra chips.
- Bake. Bake at 350°F (175°C) for 9-11 minutes, until the edges are set but the centers still look a bit soft. (Don’t overbake—chewy is the goal!) Rotate the trays halfway through if your oven has hot spots.
- Cool. Let cookies cool on the baking sheet for 5 minutes (they’ll finish setting up), then transfer to a cooling rack. They’ll be super soft at first, but they firm up beautifully as they cool.
- Enjoy! Eat warm for gooey chocolate pockets, or let cool completely for the perfect chewy bite. Store leftovers in an airtight container at room temperature for up to 5 days.
Troubleshooting Tips:
- If cookies spread too much, chill the dough longer or check if your butter was too soft.
- If they seem dry, measure flour and cocoa by weight or spoon-and-level to avoid overpacking.
- Undercooked? Let them sit on the hot pan a bit longer before moving to the rack.
My favorite part? These cookies are super forgiving—even my first batch (with a slightly too-hot oven) was still delicious. Just trust your senses: when they smell amazing and the edges are set, they’re ready!
Chocolate Peanut Butter Cookie Tips & Techniques
- Use Room Temperature Ingredients: Butter and eggs blend better at room temp, giving cookies that dreamy, even texture. Cold butter can leave lumps, and cold eggs can seize the butter—ask me how I know!
- Don’t Overmix: As tempting as it is to keep going, overmixing after adding flour can make cookies tough. Once the flour disappears, stop the mixer.
- Chill for Thicker Cookies: If you want extra thick cookies, chill the dough for 30 minutes. This helps keep them from spreading too much in the oven—something I learned after a few pancake-cookie mishaps.
- Cookie Scoop Magic: A cookie scoop gives you cookies that bake evenly and look bakery-worthy. Don’t have one? Two spoons work, but try to keep the sizes consistent.
- Rotate Your Pan: Not all ovens heat evenly. Rotate your pans halfway through baking to prevent burned edges and pale middles.
- Watch the Bake Time: These cookies can go from chewy to dry in a minute. Pull them out when they look just slightly underdone in the middle—they’ll set up as they cool.
- Customize Add-Ins: Don’t be afraid to swap in mini chocolate chips, chopped nuts, or even a sprinkle of flaky salt on top. Sometimes I press a few extra chips on top right after baking for that picture-perfect look.
One last thing: always let your cookies cool a bit before moving them—they’re fragile when hot, and patience pays off with that chewy, perfect texture. Trust me, I’ve lost a few to crumbling from impatience!
Variations & Adaptations
- Gluten-Free Chocolate Peanut Butter Cookies: Swap the all-purpose flour for a 1:1 gluten-free flour blend. I’ve had great results with Bob’s Red Mill. Texture stays chewy, just like the original.
- Vegan Option: Use plant-based butter, a flax egg (1 tablespoon ground flax + 2.5 tablespoons water), and dairy-free chocolate chips. The cookies will be slightly softer but still super rich and satisfying.
- Double Chocolate Chunk: Fold in chunks of dark chocolate or white chocolate chips for extra decadence. I sometimes add a handful of chopped roasted peanuts for crunch—so good!
- Nut-Free Adaptation: Replace peanut butter with sunflower seed butter and skip the peanut butter chips. Great for school-friendly treats.
- Seasonal Swaps: Around the holidays, I’ll mix in crushed peppermint candies or a pinch of cinnamon for a wintery twist. In summer, swirl in a spoonful of raspberry jam before baking for a PB&J vibe.
Honestly, one of my favorite spins was stuffing these cookies with mini marshmallows for a s’mores-inspired treat—messy, but totally worth it! Don’t be afraid to get creative and make these chocolate peanut butter cookies your own.
Serving & Storage Suggestions
These chocolate peanut butter cookies are best enjoyed slightly warm, when the chocolate chips are still a little melty and the centers are irresistibly soft. Serve them on a pretty plate with a tall glass of cold milk, a mug of coffee, or even a scoop of vanilla ice cream for the ultimate dessert sandwich.
If you’re making these for a party or bake sale, stack them in a clear jar or wrap them in parchment for a rustic, Pinterest-worthy presentation. They also pack well for lunchboxes or road trips—just pop them in an airtight container.
To store, keep cookies in a sealed container at room temperature for up to 5 days. For longer storage, freeze baked cookies in a zip-top bag for up to 2 months—just thaw at room temp or give them 10 seconds in the microwave for gooey goodness. The dough can also be frozen in scoops; bake straight from frozen, adding 1-2 minutes to the bake time.
Flavor tip: The chocolate and peanut butter flavors deepen after a day or two, so if you can resist eating them all at once, they’re even better on day two. (Not that they ever last that long around here!)
Nutritional Information & Benefits
Each chocolate peanut butter cookie clocks in at approximately 150 calories, with 7g fat, 18g carbohydrates, 2g protein, and 9g sugar (based on a batch of 20 cookies). They’re not health food, but the peanut butter does add a small boost of protein and healthy fats, which helps you feel a bit more satisfied after one or two.
These cookies are naturally vegetarian and can easily be made gluten-free or dairy-free with the right swaps. Peanut butter is a good source of protein and magnesium, while the cocoa powder adds antioxidants. Just keep an eye out for potential allergens: peanuts, wheat, dairy, and eggs are all present in the standard recipe.
Personally, I find these cookies a nice “treat” that satisfies even a hardcore chocolate craving in just a few bites—way better than store-bought, and you know exactly what’s inside!
Conclusion
If you’re searching for a cookie that’s ultra-chewy, rich, and absolutely loaded with that unbeatable chocolate peanut butter combo, this recipe is for you. It’s easy enough for a weeknight, special enough for gatherings, and totally customizable to fit your tastes or dietary needs.
I love these chocolate peanut butter cookies because they remind me of childhood, but with a grown-up, bakery-style twist. They’re the perfect balance of gooey and crisp, and always disappear fast—sometimes before they’ve even cooled!
Give them a try and let me know how you make them your own. Drop your favorite add-ins or adaptations in the comments, and don’t forget to share this recipe with your fellow cookie lovers. Happy baking, and may your cookies always be chewy and chocolatey!
FAQs About Chocolate Peanut Butter Cookies
Can I use natural peanut butter in this recipe?
Natural peanut butter can make the cookies crumbly or oily. For best results, use a classic creamy peanut butter like Jif or Skippy.
How do I make these cookies gluten-free?
Just substitute a 1:1 gluten-free flour blend for the all-purpose flour. The cookies stay chewy and delicious!
Can I freeze the dough or baked cookies?
Yes! Freeze scooped dough for up to 2 months and bake from frozen (add 1-2 minutes to bake time). Baked cookies also freeze well—just thaw at room temp or microwave briefly.
Why did my cookies turn out dry or cakey?
This usually happens if there’s too much flour or cocoa. Always measure by weight or use the spoon-and-level method, and don’t overbake!
Can I add other mix-ins to the dough?
Absolutely! Try chopped nuts, mini marshmallows, white chocolate chips, or a sprinkle of flaky salt. Have fun and make it your own!
Pin This Recipe!

Chocolate Peanut Butter Cookies

These ultra-chewy chocolate peanut butter cookies are rich, gooey, and packed with deep cocoa and creamy peanut butter flavor. Easy to make with pantry staples, they’re perfect for beginner bakers and guaranteed to impress any crowd.
- Prep Time: 15 minutes
- Cook Time: 10 minutes
- Total Time: 25 minutes
- Yield: 20 cookies 1x
- Category: Dessert
- Cuisine: American
Ingredients
- 1 cup (125g) all-purpose flour
- 1/3 cup (35g) unsweetened cocoa powder (Dutch-process or natural)
- 1/2 teaspoon (2g) baking soda
- 1/4 teaspoon (1g) salt
- 3/4 cup (150g) packed brown sugar (light or dark)
- 1/4 cup (50g) granulated sugar
- 1/2 cup (125g) creamy peanut butter (shelf-stable, like Jif or Skippy)
- 1/2 cup (113g) unsalted butter, softened
- 1 large egg, room temperature
- 1 teaspoon (5ml) pure vanilla extract
- 1/2 cup (90g) semi-sweet chocolate chips
- 1/4 cup (45g) peanut butter chips (optional)
Instructions
- Preheat oven to 350°F (175°C). Line two baking sheets with parchment paper or silicone mats. Measure out all ingredients.
- In a medium bowl, whisk together flour, cocoa powder, baking soda, and salt. Set aside.
- In a large mixing bowl, beat together softened butter, brown sugar, and granulated sugar on medium speed until light and fluffy (about 2 minutes).
- Add peanut butter and beat just until combined.
- Add egg and vanilla extract. Beat on low until fully incorporated, scraping down the sides as needed.
- With mixer on low, gradually add the dry mixture to the wet ingredients. Mix just until no dry streaks remain. If dough is too sticky, chill for 10-15 minutes.
- Fold in chocolate chips and peanut butter chips (if using) gently with a spatula.
- Scoop dough into 1.5-tablespoon balls and place about 2 inches apart on prepared baking sheets. Dot tops with extra chips if desired.
- Bake for 9-11 minutes, until edges are set but centers still look slightly soft. Rotate trays halfway through baking if needed.
- Let cookies cool on the baking sheet for 5 minutes, then transfer to a cooling rack to cool completely.
- Enjoy warm or at room temperature. Store leftovers in an airtight container at room temperature for up to 5 days.
Notes
For thicker cookies, chill the dough for 30 minutes before baking. Use room temperature butter and eggs for best texture. Don’t overmix after adding flour to keep cookies chewy. Customize with your favorite add-ins like nuts, marshmallows, or extra chips. Cookies freeze well, both baked and unbaked.
Nutrition
- Serving Size: 1 cookie
- Calories: 150
- Sugar: 9
- Sodium: 70
- Fat: 7
- Saturated Fat: 3
- Carbohydrates: 18
- Fiber: 1
- Protein: 2
Keywords: chocolate peanut butter cookies, chewy cookies, easy cookie recipe, peanut butter dessert, chocolate cookies, homemade cookies, pantry cookies, bake sale cookies


