The scent of nutty brown butter swirling through my kitchen is practically an invitation for everyone to gather around the oven—honestly, it’s a memory trigger every single time. I remember making these brown butter chocolate chip cookie bars on a rainy Saturday, just craving something gooey and comforting. The first bite? Rich, warm, with that unmistakable brown butter depth and pools of melty chocolate. It’s the kind of homemade dessert that makes you want to keep the recipe close, you know—just in case someone asks for it (and they will).
I stumbled onto brown butter years ago, trying to “fix” an ordinary cookie dough that tasted kind of flat. Turns out, all I needed was a few extra minutes at the stove and suddenly, my cookie bars had this toasty, caramel-like flavor that regular butter just couldn’t deliver. Since then, I’ve baked these bars for birthdays, potlucks, and even midnight cravings. They’re ridiculously easy, but feel so special—like you’re treating yourself and your loved ones to something genuinely homemade.
If you’re after a simple dessert with the wow factor, these brown butter chocolate chip cookie bars deliver every time. They’re perfect for busy families, bake sales, or anyone who wants a fuss-free treat. Plus, the recipe’s flexibility means you can whip up a batch with pantry staples and a single bowl (yes, really). Whether you’re a seasoned baker or just starting out, you’ll love how forgiving and rewarding this dessert is. I’ve tested and tweaked this recipe more times than I can count, and I’m excited to share my best version with you—packed with flavor, melty chocolate, and that signature brown butter nuttiness.
Why You’ll Love This Brown Butter Chocolate Chip Cookie Bars Recipe
- Quick & Easy: Ready in about 40 minutes, with just a single bowl and minimal fuss. Perfect for weeknights or spontaneous baking urges.
- Simple Ingredients: Most of what you need is probably in your pantry—no need for fancy stuff or specialty shopping trips.
- Perfect for Any Occasion: These bars shine at parties, cozy family dinners, school lunches, and even as edible gifts for friends.
- Crowd-Pleaser: Let’s face it, warm cookie bars loaded with chocolate chips are a surefire hit with kids and grown-ups alike.
- Unbelievably Delicious: Brown butter adds a depth of flavor that regular cookie bars just don’t have. It’s rich, slightly nutty, and totally addictive.
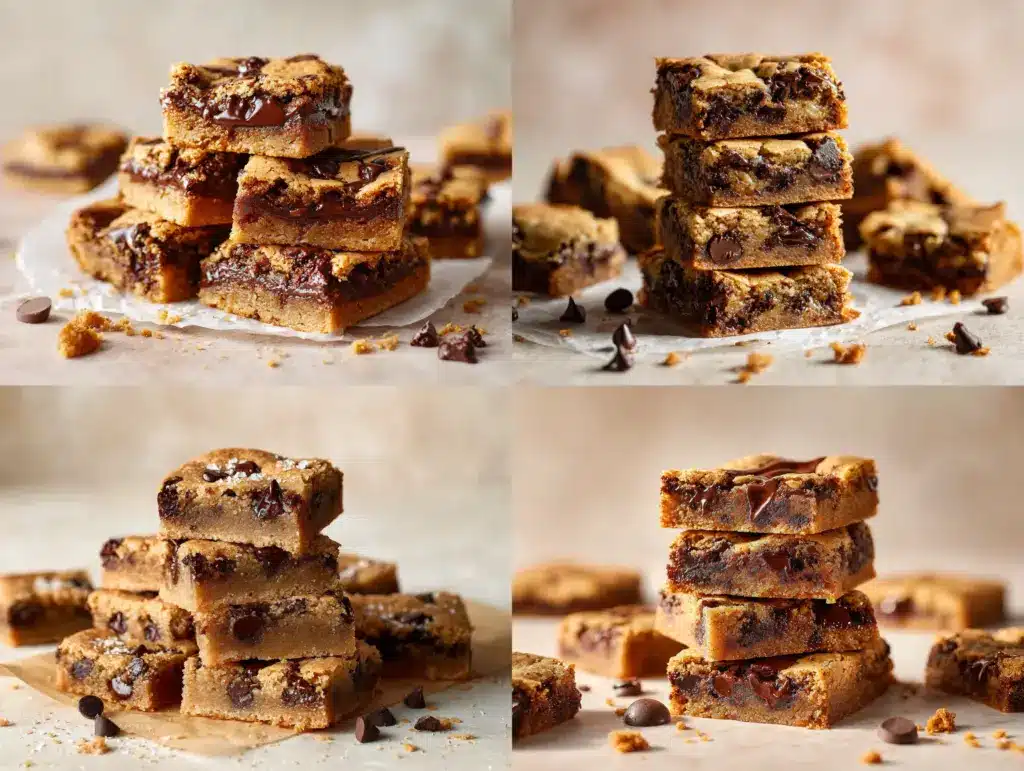
Here’s the thing—these cookie bars aren’t just another chocolate chip dessert. The secret is in the brown butter, which gets toasted and golden, giving every bite a subtle caramel vibe. I blend the butter until it’s just right, then fold in the dough until it’s soft and rich. The result? Cookie bars that are chewy at the center, crisp on the edges, and absolutely bursting with chocolate. You won’t find dry, boring squares here—just honest-to-goodness homemade comfort food.
This recipe has been tested in my kitchen more times than I can remember, and every time I serve them, people ask for seconds (and the recipe). If you love classic chocolate chip cookies but want something a little more indulgent and effortless, these bars are your answer. They’re the kind of treat that makes you close your eyes and savor the moment. Plus, they’re so easy to customize—add nuts, swap in dark chocolate, or make them gluten-free if you like. It’s homemade dessert at its best: simple, adaptable, and memorably delicious every single time.
What Ingredients You Will Need
This recipe uses everyday ingredients to create bold flavor and that signature chewy-soft texture—no complicated steps or specialty products required. Here’s what you’ll need for irresistible brown butter chocolate chip cookie bars:
- For the Dough:
- 1 cup (227g) unsalted butter (for browning; adds nutty depth)
- 1 cup (200g) packed brown sugar (for moisture and caramel notes; light or dark both work)
- ½ cup (100g) granulated sugar (balances sweetness and texture)
- 2 large eggs, room temperature (for structure and richness)
- 2 teaspoons pure vanilla extract (adds warmth and aroma)
- 2½ cups (315g) all-purpose flour (for chewiness; swap with gluten-free blend if needed)
- 1 teaspoon baking soda (helps bars rise and stay soft)
- ½ teaspoon fine sea salt (brings out flavor)
- For Mix-Ins:
- 1½ cups (270g) chocolate chips (semisweet recommended; use dark, milk, or chunks as preferred)
- Optional: ½ cup (60g) chopped walnuts or pecans (for crunch and flavor; leave out for nut-free)
- For Topping (Optional):
- Flaky sea salt (a sprinkle before baking for extra flavor punch)
Ingredient Tips: I always go for Kerrygold or Plugrá unsalted butter—trust me, quality butter makes a difference in browning. For chocolate chips, Ghirardelli and Guittard are my top picks (they melt perfectly and taste amazing). Don’t worry if you’re out of brown sugar; you can use coconut sugar or mix white sugar with a tablespoon of molasses. If you’re baking gluten-free, Bob’s Red Mill 1-to-1 flour is reliable.
Seasonal swap? Toss in a handful of dried cranberries in winter or chopped fresh strawberries in spring. This recipe is super forgiving—if you only have milk chocolate chips or want to add a dash of cinnamon, go for it. Just keep the flour and butter ratio steady for the best texture.
Equipment Needed
- 8×8-inch (20×20 cm) or 9×9-inch (23×23 cm) baking pan (lined with parchment for easy removal)
- Medium saucepan (for browning butter; a light-colored pan helps monitor color)
- Large mixing bowl (to combine dough)
- Whisk and rubber spatula (for mixing and scraping the bowl)
- Measuring cups and spoons (accuracy matters for texture)
- Cooling rack (for setting bars after baking)
If you don’t have parchment, a well-greased pan works too. I’ve used glass and metal pans—they both bake up nicely, though metal gives slightly crisper edges. For browning butter, I prefer stainless steel over nonstick because it’s easier to see when the milk solids toast. If you’re missing a whisk, a fork will do in a pinch (been there!).
Baking on a budget? Dollar store spatulas and mixing bowls get the job done, just be gentle with them. To keep your pans lasting, soak them after use and avoid metal utensils that scratch. My favorite trick for easy cleanup: line your pan, leave a bit of overhang, and lift the whole batch out when cool.
Preparation Method
- Brown the Butter:
- In a medium saucepan, melt 1 cup (227g) unsalted butter over medium heat.
- Once melted, keep stirring—the butter will foam, then turn golden and release a nutty aroma. The milk solids will toast (look for specks at the bottom).
- It takes about 5-7 minutes. Watch closely; it goes from brown to burnt quick!
- Remove from heat and let cool for 5 minutes. The butter should be warm, not hot—this helps prevent scrambled eggs in the next step.
- Mix Sugars and Eggs:
- Pour browned butter into a large mixing bowl.
- Add 1 cup (200g) brown sugar and ½ cup (100g) granulated sugar.
- Whisk until smooth and slightly glossy.
- Crack in 2 large eggs, add 2 teaspoons vanilla extract, and whisk again until fully combined (about 1-2 minutes).
- Tip: If the mixture looks separated, keep whisking—it will come together as it cools.
- Combine Dry Ingredients:
- In a separate bowl (or directly into the wet mixture, saves dishes), add 2½ cups (315g) all-purpose flour, 1 teaspoon baking soda, and ½ teaspoon salt.
- Stir with a spatula until just combined; the dough will be thick but soft.
- Don’t overmix—once the flour disappears, stop stirring!
- Fold in Chocolate and Nuts:
- Gently fold in 1½ cups (270g) chocolate chips and, if using, ½ cup (60g) chopped nuts.
- Make sure chips are evenly distributed for gooey bites in every square.
- If you like, reserve a handful of chips for scattering on top before baking.
- Spread and Bake:
- Spoon dough into your parchment-lined pan and press to smooth out the top.
- Sprinkle with flaky sea salt if desired.
- Bake at 350°F (175°C) for 22-28 minutes, until the edges are golden and the center is set but soft (a toothpick should come out with a few moist crumbs).
- Tip: Ovens vary—start checking at 22 minutes. Bars firm up as they cool!
- Cool and Slice:
- Let the pan cool on a rack for at least 20 minutes. Warm bars are gooey—waiting helps them set for clean slicing.
- Lift out using parchment edges, then cut into 16 squares (or 9 for jumbo bars).
- Enjoy warm, or let cool completely for firmer bars.
Troubleshooting: If your bars are dry, they probably baked too long. If they’re greasy, the butter wasn’t cooled enough or the flour was under-measured. For extra chewy bars, underbake by a minute or two—just watch for golden edges and a slightly soft center.
Efficiency Tips: Melt and brown your butter while prepping other ingredients. Measure everything ahead so you’re not scrambling mid-recipe. I like to mix straight in the baking pan if I’m really feeling lazy—less cleanup, more cookies!
Cooking Tips & Techniques
Let me be honest: browning butter is a game-changer, but it can be tricky if you rush. The key is to watch for that nutty aroma and golden color—if you smell burnt popcorn, you’ve gone too far. I learned the hard way (more than once) that high heat isn’t your friend here. Medium, steady heat gives you control and perfect results.
Another tip—don’t skip cooling the brown butter before mixing. If you add eggs to piping-hot butter, you might end up with scrambled bits (been there, not fun). Let it sit for a few minutes so everything blends smoothly.
For picture-perfect bars, use parchment with an overhang. It lets you lift the bars out easily and slice them without sticking. If you want super gooey bars, pull them out of the oven when the center just barely jiggles. They’ll set up as they cool, trust me.
Common mistakes? Overbaking is the big one. The bars should look underdone in the center when you take them out—that’s how you get that classic chewy texture. If you want crispier edges, use a metal pan; for softer, stick to glass. Multitasking? Melt your butter while measuring other ingredients, and preheat the oven as you start mixing to save time.
My best advice: make these bars your own. Add a pinch of cinnamon, swap in dark chocolate, or toss in dried fruit for a twist. Baking should be fun, not stressful—so experiment and enjoy every gooey, chocolatey bite!
Variations & Adaptations
- Gluten-Free: Swap the all-purpose flour with a 1-to-1 gluten-free baking blend. Bob’s Red Mill is my go-to and produces bars just as chewy and satisfying.
- Nut-Free: Simply leave out the nuts. If you want crunch, add sunflower seeds or toasted coconut flakes instead.
- Flavor Twists: Try using peanut butter chips, white chocolate, or chopped dark chocolate for a deeper cocoa vibe. A dash of cinnamon or espresso powder adds warmth and complexity.
- Vegan Adaptation: Use plant-based butter and replace eggs with flax eggs (2 tablespoons ground flaxseed mixed with 5 tablespoons water, let sit for 5 minutes). Vegan chocolate chips work great too!
- Seasonal Add-Ins: In autumn, add dried cranberries and a sprinkle of pumpkin pie spice. For spring, mix in fresh raspberries and lemon zest.
Personally, I love tossing in a handful of chopped pretzels for salty crunch—it’s the kind of quirky twist that makes people ask, “Whoa, what’s in these?” You can also bake the dough in muffin tins for individual cookie cups. If you want a birthday treat, stir in colorful sprinkles before baking (kids go wild for these!). This recipe is endlessly adaptable—use what you have, and let your taste buds lead the way!
Serving & Storage Suggestions
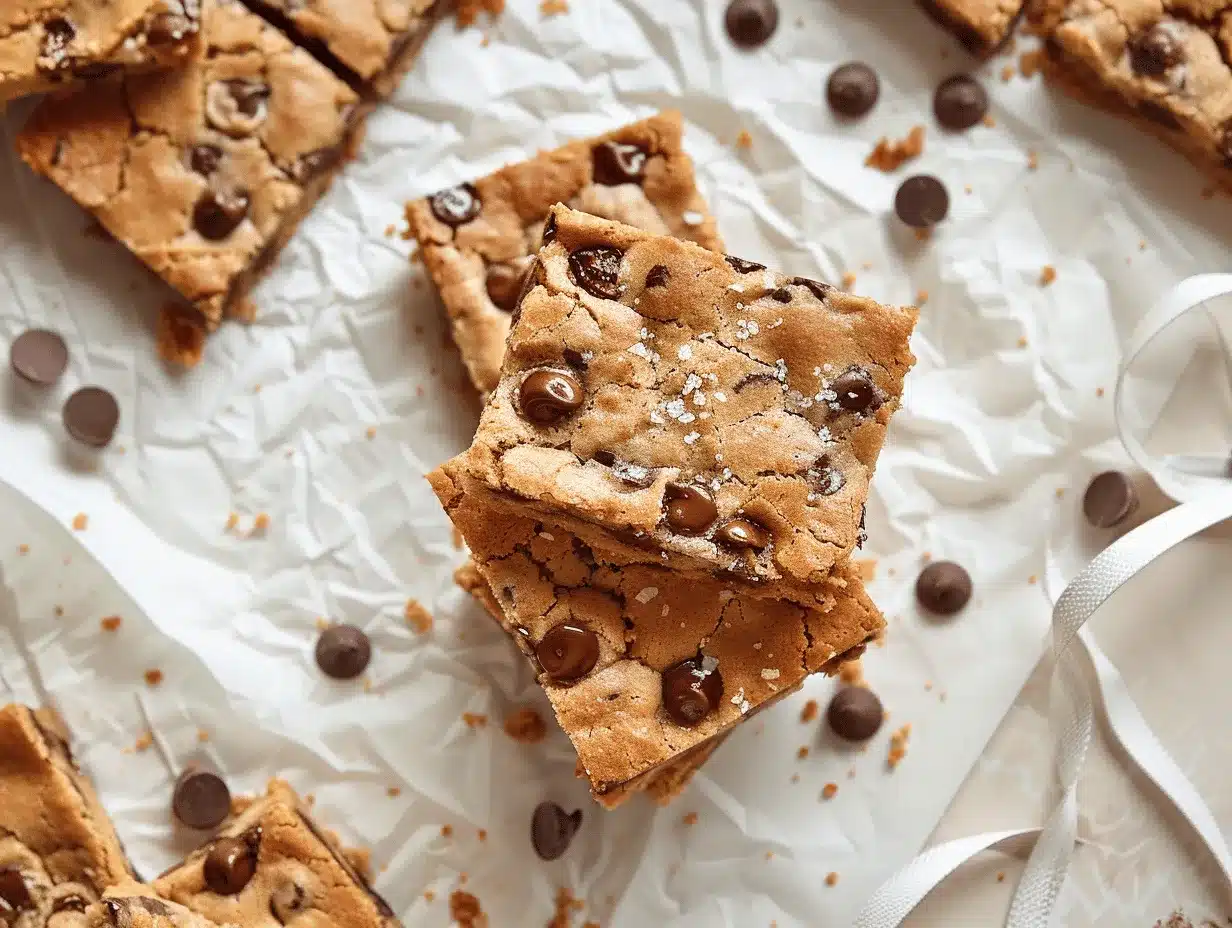
These brown butter chocolate chip cookie bars are best served slightly warm, when the chocolate is soft and the edges are perfectly crisp. Cut them into squares and pile onto a pretty platter for parties, or serve alongside a scoop of vanilla ice cream for an extra treat. They pair beautifully with cold milk, strong coffee, or even a mug of hot cocoa.
To store, keep bars in an airtight container at room temperature for up to 4 days—they stay chewy and delicious. For longer storage, wrap tightly and freeze for up to 2 months. Thaw at room temp or microwave for 10-15 seconds to revive that gooey magic.
If you like your bars extra soft, add a slice of bread to the container—it keeps them moist. Over time, the flavors deepen (the brown butter gets even more pronounced). Honestly, these bars rarely last more than a couple days in my house, but if you hide a few in the freezer, you’ll have an instant treat for those late-night cravings!
Nutritional Information & Benefits
| Serving Size | 1 bar (1/16 of a batch) |
|---|---|
| Calories | Approx. 220 |
| Protein | 3g |
| Fat | 12g |
| Carbohydrates | 28g |
| Fiber | 1g |
Brown butter brings vitamin A and healthy fats, while eggs add protein and structure. Using dark chocolate chips boosts antioxidants, and optional nuts provide heart-healthy fats and crunch. If you go for gluten-free flour, the bars work for those avoiding wheat. Allergens to note: contains dairy, eggs, gluten (unless adapted), and possible nuts.
From a wellness perspective, these bars are a treat—moderation is key. I love making them for special occasions, knowing I’m using real ingredients and can tweak the recipe to suit family needs. Enjoy a square with fruit on the side for a balanced dessert!
Conclusion
If you’re searching for a homemade dessert that hits every craving—chewy, gooey, rich, and perfectly sweet—these brown butter chocolate chip cookie bars are your answer. They’re easy to make, packed with flavor, and totally customizable. Whether you’re baking for a crowd or just treating yourself after a long week, you’ll find this recipe delivers every single time.
I love that you can tweak the mix-ins, swap flours, or add a sprinkle of sea salt for extra magic. It’s a recipe that invites creativity, but never sacrifices taste or texture. Every batch brings back happy memories—and creates new ones.
Try these bars and share your twists in the comments below! Did you add walnuts, use vegan butter, or sneak in some espresso powder? I’d love to hear about your kitchen adventures. Tag me on social and let’s swap cookie stories—happy baking, friends!
Frequently Asked Questions
Can I use regular melted butter instead of brown butter?
You can, but you’ll miss out on that deep, nutty flavor—brown butter makes these bars special. If you’re short on time, go for melted butter and add a pinch more vanilla.
What’s the best way to brown butter without burning it?
Use medium heat and keep stirring. Watch for golden color and a toasty smell, then pull it off as soon as the milk solids darken. A light-colored pan helps you spot the change.
Can I make these bars gluten-free?
Absolutely! Use a 1-to-1 gluten-free flour blend—Bob’s Red Mill works well. The texture stays chewy and delicious.
How do I store leftover cookie bars?
Store them in an airtight container at room temperature for up to 4 days, or freeze for up to 2 months. Reheat briefly in the microwave for that just-baked feel.
Can I add other mix-ins besides chocolate chips?
Yes! Try nuts, dried fruit, pretzels, white chocolate, or even caramel bits. Just keep the total add-ins under 2 cups for the best texture.
Pin This Recipe!
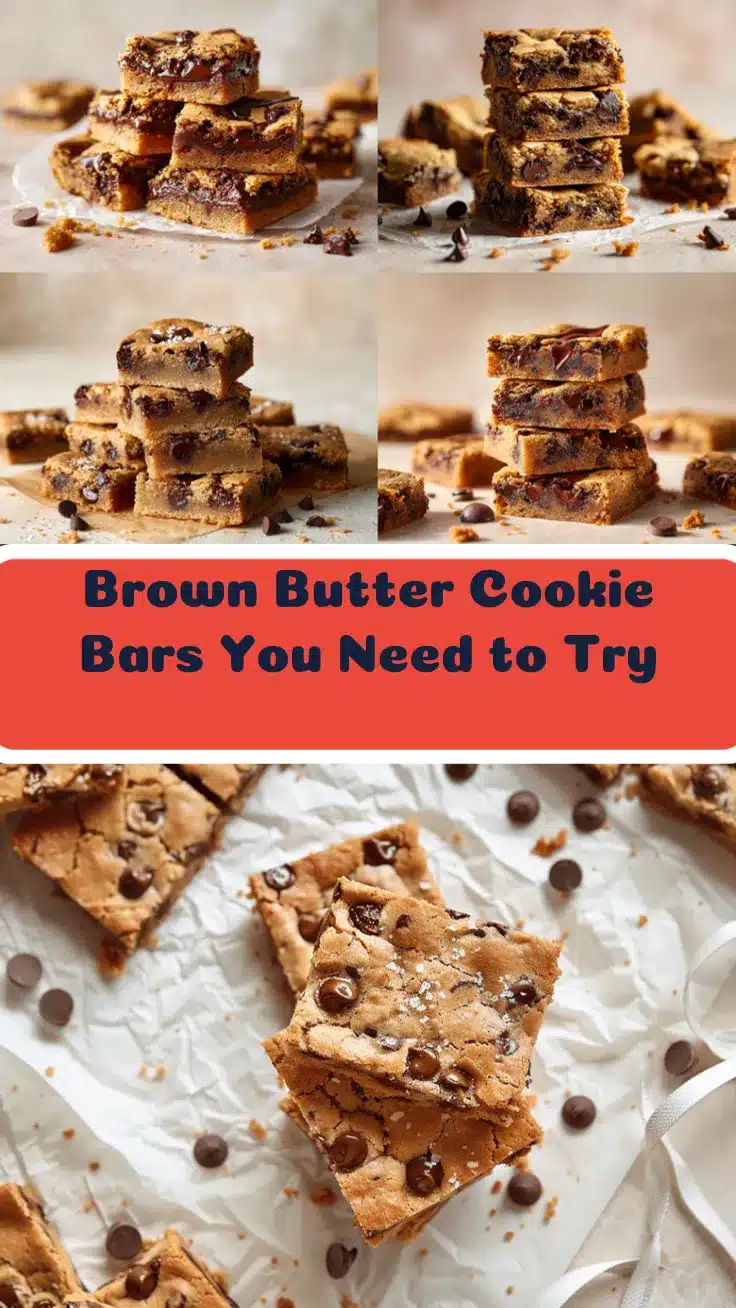
Brown Butter Chocolate Chip Cookie Bars

These brown butter chocolate chip cookie bars are chewy, gooey, and packed with rich, nutty flavor from browned butter and melty chocolate chips. They’re easy to make in one bowl and perfect for any occasion, from bake sales to cozy family nights.
- Prep Time: 15 minutes
- Cook Time: 25 minutes
- Total Time: 40 minutes
- Yield: 16 bars 1x
- Category: Dessert
- Cuisine: American
Ingredients
- 1 cup (227g) unsalted butter, for browning
- 1 cup (200g) packed brown sugar (light or dark)
- 1/2 cup (100g) granulated sugar
- 2 large eggs, room temperature
- 2 teaspoons pure vanilla extract
- 2 1/2 cups (315g) all-purpose flour (or 1-to-1 gluten-free blend)
- 1 teaspoon baking soda
- 1/2 teaspoon fine sea salt
- 1 1/2 cups (270g) chocolate chips (semisweet recommended; dark, milk, or chunks as preferred)
- Optional: 1/2 cup (60g) chopped walnuts or pecans
- Optional: Flaky sea salt, for topping
Instructions
- Preheat oven to 350°F (175°C). Line an 8×8-inch or 9×9-inch baking pan with parchment paper, leaving an overhang for easy removal.
- In a medium saucepan, melt 1 cup unsalted butter over medium heat. Stir constantly as it foams, turns golden, and develops a nutty aroma (about 5-7 minutes). Remove from heat and let cool for 5 minutes.
- Pour browned butter into a large mixing bowl. Add brown sugar and granulated sugar. Whisk until smooth and slightly glossy.
- Add eggs and vanilla extract. Whisk until fully combined (about 1-2 minutes).
- Add flour, baking soda, and salt. Stir with a spatula until just combined; do not overmix.
- Fold in chocolate chips and, if using, nuts. Reserve a handful of chips for topping if desired.
- Spread dough evenly in prepared pan. Sprinkle with flaky sea salt if desired.
- Bake for 22-28 minutes, until edges are golden and center is set but soft (a toothpick should come out with a few moist crumbs).
- Cool in pan on a rack for at least 20 minutes. Lift out using parchment and cut into 16 squares (or 9 for larger bars). Serve warm or at room temperature.
Notes
For extra gooey bars, underbake by a minute or two and let cool before slicing. Brown the butter carefully over medium heat for best flavor. Customize with nuts, dried fruit, or different chocolate chips. To make gluten-free, use a 1-to-1 gluten-free flour blend. Store in an airtight container at room temperature for up to 4 days or freeze for up to 2 months.
Nutrition
- Serving Size: 1 bar (1/16 of a batch)
- Calories: 220
- Sugar: 17
- Sodium: 120
- Fat: 12
- Saturated Fat: 7
- Carbohydrates: 28
- Fiber: 1
- Protein: 3
Keywords: brown butter, chocolate chip, cookie bars, dessert, easy, homemade, chewy, gooey, one bowl, bake sale, nutty, quick, American, bars, chocolate, comfort food


