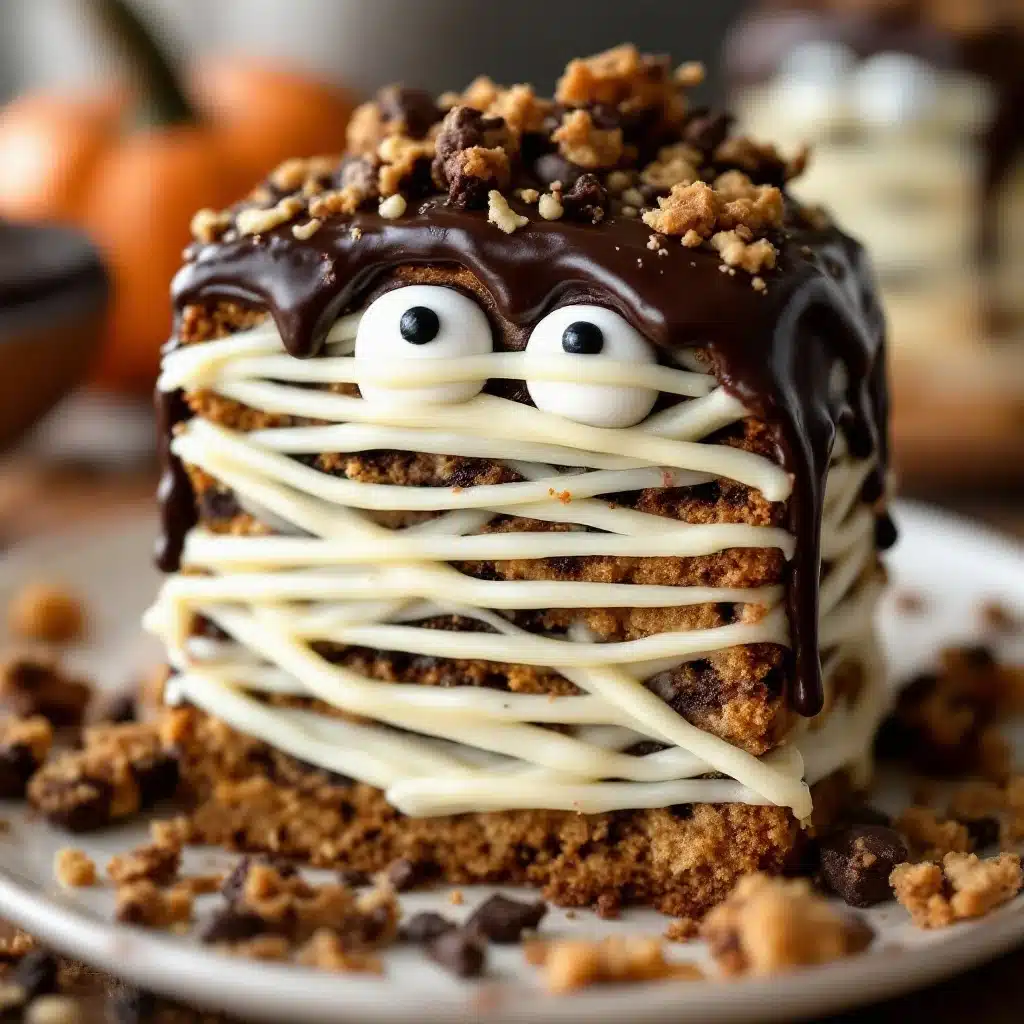
Third time in two weeks, and this time I didn’t even bother pretending it was for the kids’ Halloween party. The first batch came out looking more like sad, bandaged potatoes than mummies—too much dough, not enough space between the eyes. The second time, I overbaked the ganache and it cracked like old plaster. But this time? This time the little candy eyes were staring up at me from a perfectly set, glossy chocolate surface, and I actually laughed out loud in my empty kitchen. There’s something about a dessert that looks like it crawled out of a tomb but tastes like a rich, fudgy brownie that just hits different. I kept tweaking the dough-to-ganache ratio, the baking time, the way the strips lay across the top—because honestly, once you’ve had a slice of this cookie cake with that silky ganache pooling around the edges, you’re not going back to store-bought. It’s the kind of recipe that makes you feel like a kitchen wizard, even if you’re just following instructions in your sweatpants. Trust me on this one—it’s worth the repetition.
Why You’ll Love This Recipe
Let me tell you why this mummy cookie cake has earned a permanent spot in my Halloween rotation. First off, it’s shockingly simple to pull together. We’re talking one bowl, a spatula, and about 30 minutes of active work. The dough comes together fast, the ganache is practically foolproof, and the decorating part? That’s where the fun lives.
- Quick & Easy : From start to finish, you’re looking at about an hour. Most of that is hands-off baking time, which means you can prep the ganache while the cookie bakes.
- Simple Ingredients : Butter, sugar, flour, eggs, chocolate chips, cream—stuff you probably already have in your pantry. No weird extracts or specialty flours here.
- Perfect for Halloween Parties : This thing is a showstopper on any dessert table. Kids love the mummy face, adults love the rich chocolate flavor, and everyone loves that it’s a cookie cake—not a fussy layered cake that falls apart.
- Crowd-Pleaser : I’ve brought this to three different gatherings now, and every single time, someone asks for the recipe. It’s that good.
- Unbelievably Delicious : The cookie base is soft and chewy in the center with slightly crisp edges. The ganache is thick, glossy, and deeply chocolatey. Together, they’re pure comfort.
What makes this different from other Halloween desserts? It’s not a sugar cookie that tastes like nothing. This is a real, honest-to-goodness chocolate chip cookie cake with a dark chocolate ganache that feels luxurious. No artificial colors, no candy corn. Just pure, delicious chocolate wrapped up in a silly, spooky package.
This is the kind of dessert that makes people close their eyes after the first bite. It’s Halloween fun without sacrificing flavor—and honestly, isn’t that what we all want?
What Ingredients You Will Need
This recipe uses simple, wholesome ingredients to deliver that perfect cookie cake texture and a ganache that sets up beautifully without being too hard or too soft. Here’s what you’ll need:
For the Cookie Cake Base
- 1 cup (226g) unsalted butter, softened (I use Kerrygold for the best flavor, but any good butter works)
- 1 cup (200g) packed light brown sugar (adds moisture and that deep, caramel-like sweetness)
- 1/2 cup (100g) granulated sugar
- 2 large eggs, room temperature
- 2 teaspoons vanilla extract (pure, not imitation—trust me on this)
- 2 1/4 cups (280g) all-purpose flour (spoon and level for accuracy)
- 1 teaspoon baking soda
- 1/2 teaspoon salt (fine sea salt is my go-to)
- 2 cups (340g) semi-sweet chocolate chips (I like Ghirardelli, but any good brand works)
For the Chocolate Ganache
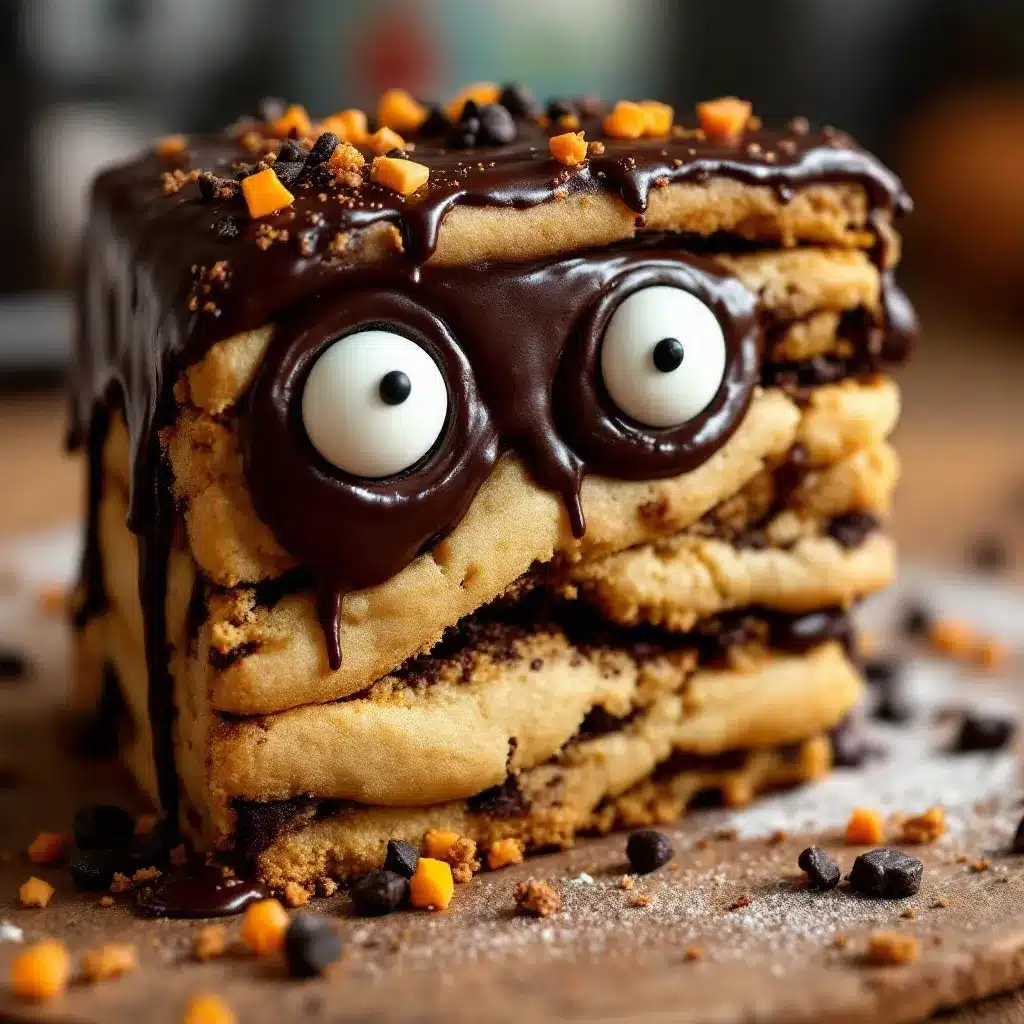
- 8 oz (226g) semi-sweet or dark chocolate, finely chopped (bar chocolate melts more smoothly than chips)
- 1 cup (240ml) heavy cream (don’t substitute with half-and-half—it won’t set right)
- 2 tablespoons unsalted butter, softened (adds shine and a silky texture)
- Pinch of salt (to balance the sweetness)
For Decorating
- Candy eyes (the classic white and black ones you find at any grocery store around Halloween)
That’s it. No weird ingredients, no hunting down specialty stores. You can find everything at your regular supermarket. The chocolate quality matters here—use something you’d actually enjoy eating on its own, because that’s what you’ll taste in every bite.
Equipment Needed
You don’t need a fancy kitchen to pull this off. Here’s what you’ll actually use:
- 9-inch round cake pan or springform pan (a springform makes removal easier, but a regular cake pan lined with parchment works perfectly too)
- Electric mixer (stand mixer or hand mixer—both work fine; I’ve used my hand mixer for years without issues)
- Large mixing bowl
- Medium heatproof bowl (for the ganache—glass or stainless steel is best)
- Saucepan (to heat the cream)
- Spatula (silicone is ideal for scraping every bit of dough)
- Parchment paper (non-negotiable for easy removal)
- Cooling rack
- Offset spatula or butter knife (for spreading the ganache)
If you don’t have a springform pan, just line your regular cake pan with two strips of parchment paper that hang over the edges—this creates handles for lifting the cookie cake out cleanly. I’ve done it both ways, and honestly, the parchment trick works just as well. No need to buy new equipment.
Preparation Method
Let’s walk through this step by step. I’ve made this enough times to know exactly where things can go wrong, so I’ll flag those spots for you.
Step 1: Prep Your Pan and Oven
Preheat your oven to 350°F (175°C). Grease your 9-inch round pan thoroughly, then line the bottom with a circle of parchment paper. If you’re using a springform, make sure the sides are locked tight—trust me, you don’t want batter leaking out. Set the pan aside.
Step 2: Cream the Butter and Sugars
In your large mixing bowl, beat the softened butter, brown sugar, and granulated sugar together on medium speed for about 3-4 minutes. You want it light and fluffy—pale in color and noticeably airy. Scrape down the sides of the bowl halfway through. Don’t rush this step; properly creamed butter and sugar is what gives your cookie cake that tender, melt-in-your-mouth texture.
Step 3: Add the Eggs and Vanilla
Add the eggs one at a time, beating well after each addition. Then add the vanilla extract and beat until combined. The mixture might look slightly curdled at this point—that’s totally normal, especially if your eggs were cold. If your eggs are room temperature, it should stay smooth and glossy.
Step 4: Combine the Dry Ingredients
In a separate bowl, whisk together the flour, baking soda, and salt. Add this dry mixture to the wet ingredients in two additions, mixing on low speed just until combined. Overmixing here will make your cookie cake tough—stop as soon as you don’t see any more streaks of flour. I’ve made that mistake before, and the result was a dense, almost bread-like texture. Not what we’re going for.
Step 5: Fold in the Chocolate Chips
Use a spatula to fold in the chocolate chips by hand. Make sure they’re evenly distributed throughout the dough. The dough will be thick and slightly sticky—that’s perfect.
Step 6: Bake the Cookie Cake
Press the dough evenly into your prepared pan. It will be thick—about 1 to 1.5 inches deep. Bake for 25-30 minutes, or until the edges are golden brown and a toothpick inserted in the center comes out with a few moist crumbs (not wet batter). The center will look slightly underdone—that’s what you want. It continues to set as it cools. Overbaking gives you a dry, crumbly cookie cake, so err on the side of underdone.
Let the cookie cake cool in the pan for 10 minutes, then transfer it to a wire rack to cool completely. Don’t even think about adding the ganache until it’s fully cool—warm cookie cake will melt the ganache into a puddle.
Step 7: Make the Ganache
Place the finely chopped chocolate in a heatproof bowl. In a small saucepan, heat the heavy cream over medium heat until it just begins to simmer—small bubbles around the edges, not a rolling boil. Pour the hot cream over the chocolate and let it sit for 2-3 minutes without stirring. This gentle heat is what melts the chocolate perfectly. Then gently stir with a spatula until smooth and glossy. Add the softened butter and a pinch of salt, and stir until the butter is fully incorporated and the ganache is silky.
Step 8: Assemble the Mummy
Once the cookie cake is completely cool, spread the ganache over the top in an even layer. Leave a small border around the edges if you want the cookie cake rim to show—or cover the whole thing for a fully wrapped mummy look. Use a spoon or the back of a knife to create wavy, uneven lines in the ganache to mimic mummy bandages. Press the candy eyes into the ganache while it’s still soft. Refrigerate for 15-20 minutes to set the ganache slightly, then bring it back to room temperature before serving.
Cooking Tips & Techniques
I’ve learned a few things the hard way so you don’t have to. Here are my best tips:
- Room temperature ingredients matter. Cold eggs and butter don’t cream together properly. Leave your butter out for at least an hour before starting, and let your eggs sit in warm water for 5 minutes if you forgot to take them out.
- Don’t overbake. I cannot stress this enough. The cookie cake will look slightly underdone in the center when you pull it out. That’s fine. It continues baking from residual heat as it cools. Overbaking gives you a dry, crumbly texture that won’t hold up to the ganache.
- Chop your chocolate finely for the ganache. Big chunks take longer to melt and can lead to a lumpy ganache. I’ve definitely ended up with chunks of unmelted chocolate floating in cream before—not the end of the world, but not as smooth as it should be.
- Let the ganache sit before stirring. That 2-3 minute rest after pouring the cream over the chocolate is crucial. It allows the heat to gently melt the chocolate from the bottom up, resulting in a perfectly smooth emulsion.
- Use a springform pan if you have one. It makes removing the cookie cake so much easier. If you’re using a regular cake pan, those parchment paper handles are your best friend.
- Make the ganache while the cookie bakes. This saves time and lets the ganache cool slightly while the cookie cake cools completely. Multitasking is your friend here.
Variations & Adaptations
This recipe is surprisingly flexible. Here are some ways to make it your own:
- Gluten-Free Version : Swap the all-purpose flour with a good 1:1 gluten-free baking flour. I’ve used Bob’s Red Mill with great results. The texture is slightly more tender, but the flavor is spot on.
- White Chocolate Mummy : Use white chocolate chips in the cookie base and make a white chocolate ganache instead of dark. The mummy looks even more ghostly and pale—perfect for a different Halloween vibe.
- Peanut Butter Twist : Add 1/2 cup of creamy peanut butter to the cookie dough along with the butter. The peanut butter flavor pairs beautifully with the chocolate ganache. Just reduce the butter by 1/4 cup to keep the dough from being too greasy.
- Spooky Sprinkle Version : Press Halloween-themed sprinkles into the edges of the ganache before it sets. Orange and black sprinkles add a fun, festive touch without changing the flavor.
- Mint Chocolate : Add 1/2 teaspoon of peppermint extract to the cookie dough and use dark chocolate ganache. The mint and chocolate combo is always a hit, and it feels extra festive for Halloween.
I’ve tried the peanut butter version myself, and honestly, it might be my new favorite. The salty-sweet combo with the dark ganache is ridiculous. Just don’t skip the chilling step—peanut butter dough can be a bit softer and needs that time to set up properly.
Serving & Storage Suggestions
This cookie cake is best served at room temperature—the cookie is soft and chewy, and the ganache is perfectly set but still creamy. Slice it like a pizza into 8-12 wedges, depending on how generous you’re feeling.
Storage: Leftovers (if you have any) can be stored in an airtight container at room temperature for up to 3 days. The ganache will firm up slightly in the fridge, so if you refrigerate it, let it sit out for 15-20 minutes before serving to bring back that silky texture.
Freezing: You can freeze the baked, undecorated cookie cake for up to 2 months. Wrap it tightly in plastic wrap, then foil. When you’re ready to serve, thaw it at room temperature, then make the ganache and decorate. I’ve done this for Halloween parties when I wanted to prep ahead—it works beautifully.
This cookie cake actually tastes even better the next day. The flavors meld together, and the cookie softens slightly from the ganache, creating a texture that’s almost like a fudgy brownie. If you can resist eating it all in one sitting, you’re in for a treat.
Nutritional Information & Benefits
Let’s be real—this is a dessert, not a health food. But here’s the breakdown per slice (assuming 12 servings):
- Calories: ~420
- Fat: 24g
- Carbohydrates: 50g
- Protein: 5g
- Sugar: 35g
The dark chocolate in the ganache does offer some antioxidants, and the eggs provide a bit of protein. But honestly, this is about enjoyment, not nutrition. It’s a Halloween treat—something to share with friends and family, to make the holiday feel special. One slice won’t derail anything, and the joy it brings is absolutely worth it.
If you’re looking for a lighter option, you could swap half the butter with unsweetened applesauce, but I won’t pretend it tastes the same. Sometimes you just need the real thing.
Conclusion
This mummy Halloween cookie cake with chocolate ganache is everything a holiday dessert should be—fun to make, gorgeous to look at, and absolutely delicious to eat. The soft, chewy cookie base studded with chocolate chips, topped with that glossy, rich ganache—it’s comfort food dressed up in a costume.
I love how this recipe brings people together. Kids get excited about placing the candy eyes and creating the bandage patterns. Adults appreciate that it’s not overly sweet or artificial-tasting. And everyone loves that first bite, when the ganache and cookie melt together in perfect harmony.
Don’t be afraid to make this your own. Change up the decorations, try a different chocolate, add your favorite mix-ins. The base recipe is solid, but the fun is in the customization.
I’d love to hear how yours turns out! Drop a comment below with your mummy creations, any tweaks you made, or just to say hi. And if you’re looking for more Halloween inspiration, check out my crispy cheesy garlic bread twists for a savory snack or the pumpkin dinner rolls with honey butter for a cozy side dish. Happy Halloween, and happy baking!
Frequently Asked Questions
Can I use milk chocolate instead of semi-sweet for the ganache?
Absolutely. Milk chocolate will give you a sweeter, creamier ganache. Just reduce the amount of sugar in the cookie dough slightly—maybe cut the granulated sugar down to 1/4 cup—to balance the overall sweetness.
How do I prevent the cookie cake from sticking to the pan?
Grease the pan thoroughly and line the bottom with parchment paper. If you’re using a regular cake pan, cut two long strips of parchment that hang over the edges—these act as handles to lift the cookie cake out cleanly. A springform pan is even easier.
Can I make this recipe dairy-free?
You can. Use a high-quality vegan butter (I like Miyoko’s) and a dairy-free heavy cream alternative like coconut cream. The texture will be slightly different—the cookie might be a bit more tender—but the flavor will still be delicious.
How far in advance can I make this for a party?
You can bake the cookie cake up to 2 days ahead and store it at room temperature, tightly wrapped. Make the ganache and decorate the day you plan to serve it for the best appearance. The candy eyes can sink or shift if the ganache sets too long.
My ganache turned out lumpy—what went wrong?
This usually happens when the cream is too hot and seizes the chocolate, or when the chocolate isn’t chopped finely enough. Next time, make sure your cream is just simmering (not boiling) and let it sit over the chocolate for a full 2-3 minutes before stirring. If it still looks lumpy, you can try whisking in a tablespoon of warm cream at a time until it smooths out.
Pin This Recipe!
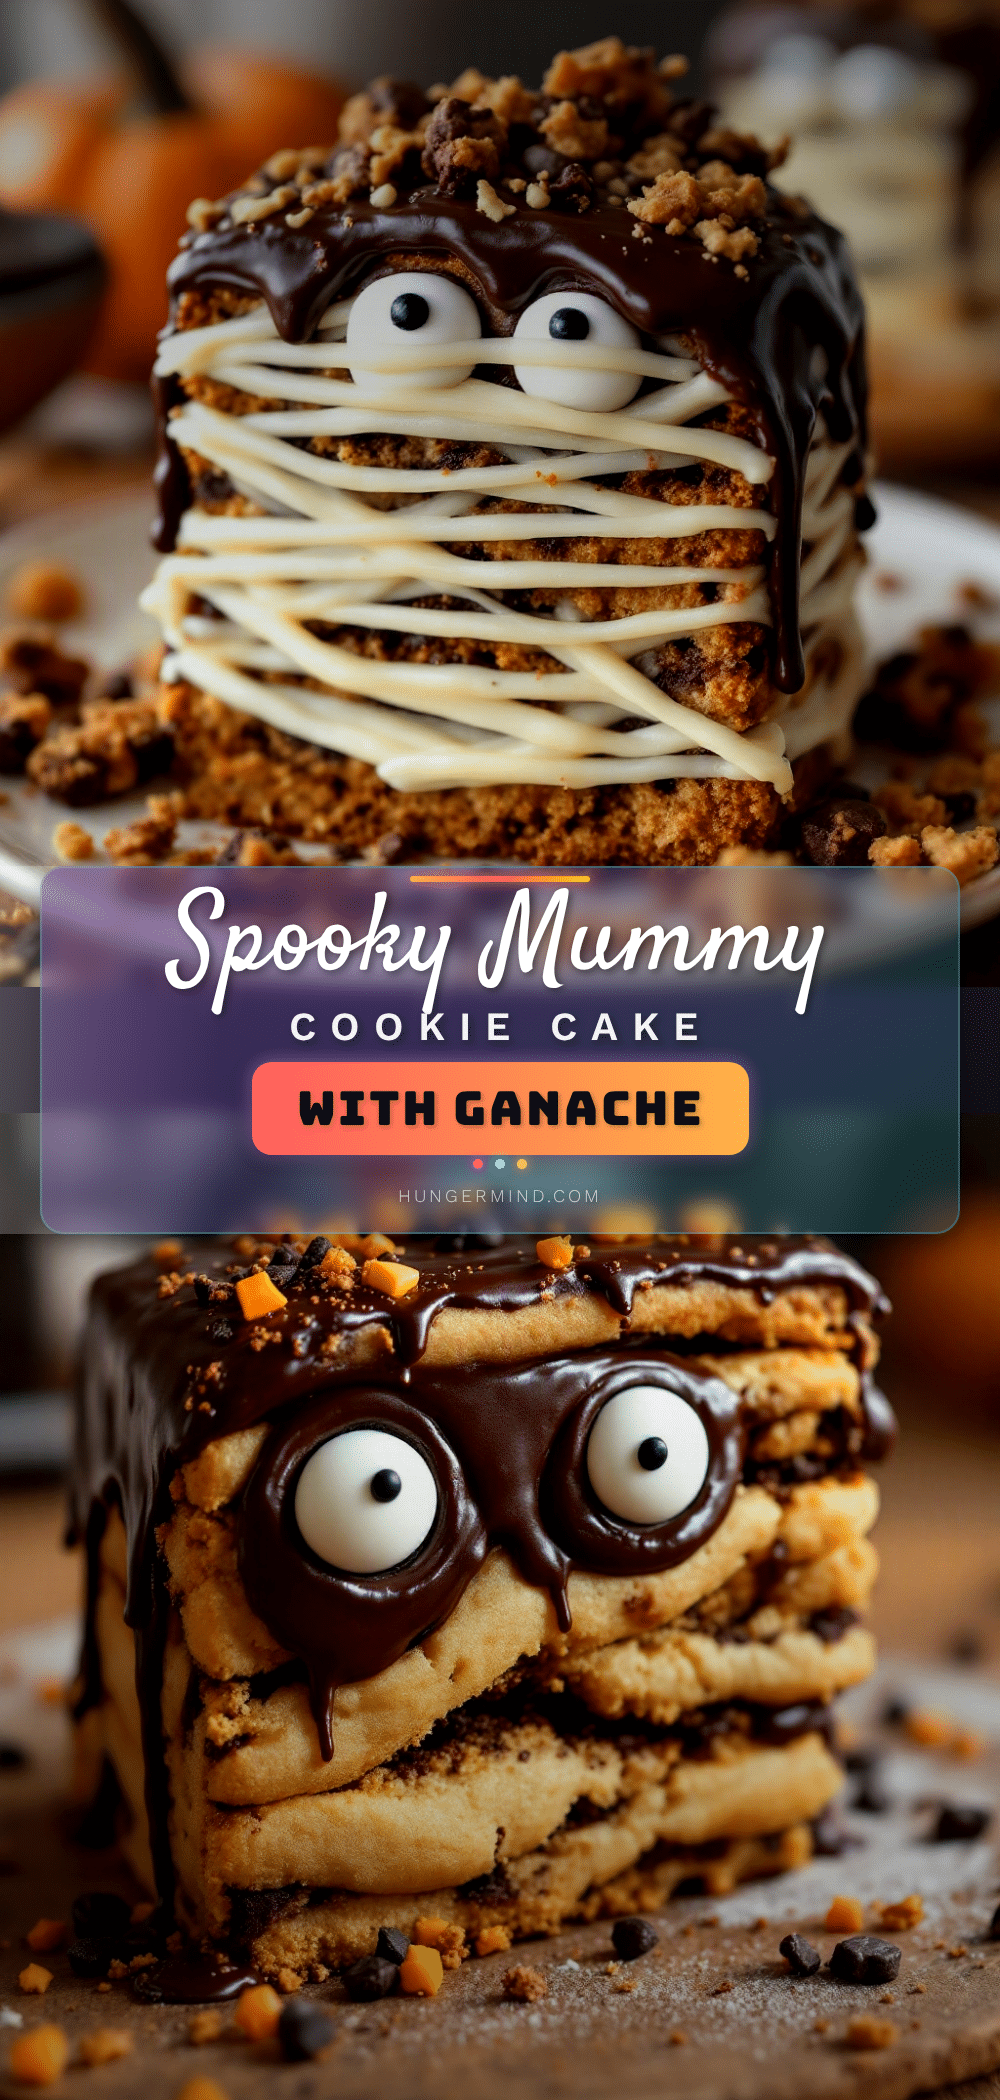
Best Mummy Halloween Cookie Cake with Easy Ganache

A soft and chewy chocolate chip cookie cake topped with a glossy dark chocolate ganache, decorated to look like a mummy. Perfect for Halloween parties, this dessert is fun to make and absolutely delicious.
- Prep Time: 30 minutes
- Cook Time: 30 minutes
- Total Time: 1 hour
- Yield: 12 servings 1x
- Category: Dessert
- Cuisine: American
Ingredients
- 1 cup (226g) unsalted butter, softened
- 1 cup (200g) packed light brown sugar
- 1/2 cup (100g) granulated sugar
- 2 large eggs, room temperature
- 2 teaspoons vanilla extract
- 2 1/4 cups (280g) all-purpose flour
- 1 teaspoon baking soda
- 1/2 teaspoon salt
- 2 cups (340g) semi-sweet chocolate chips
- 8 oz (226g) semi-sweet or dark chocolate, finely chopped
- 1 cup (240ml) heavy cream
- 2 tablespoons unsalted butter, softened
- Pinch of salt
- Candy eyes for decorating
Instructions
- Preheat oven to 350°F (175°C). Grease a 9-inch round pan and line the bottom with parchment paper.
- In a large bowl, beat softened butter, brown sugar, and granulated sugar on medium speed for 3-4 minutes until light and fluffy.
- Add eggs one at a time, beating well after each addition. Add vanilla extract and beat until combined.
- In a separate bowl, whisk together flour, baking soda, and salt. Add to wet ingredients in two additions, mixing on low just until combined.
- Fold in chocolate chips with a spatula until evenly distributed.
- Press dough evenly into prepared pan. Bake for 25-30 minutes, until edges are golden and center is slightly underdone. Cool in pan for 10 minutes, then transfer to a wire rack to cool completely.
- For the ganache: Place finely chopped chocolate in a heatproof bowl. Heat heavy cream in a saucepan until just simmering. Pour over chocolate and let sit 2-3 minutes, then stir until smooth. Add softened butter and a pinch of salt, stir until incorporated.
- Once cookie cake is completely cool, spread ganache over top in an even layer. Create wavy lines in the ganache to mimic bandages. Press candy eyes into the ganache while still soft. Refrigerate 15-20 minutes to set, then bring to room temperature before serving.
Notes
Room temperature ingredients matter. Don’t overbake the cookie cake; it should look slightly underdone in the center. Chop chocolate finely for the ganache to avoid lumps. Let the ganache sit before stirring for a smooth emulsion. Use a springform pan for easy removal. Make the ganache while the cookie bakes to save time. The cookie cake tastes even better the next day.
Nutrition
- Serving Size: 1 slice
- Calories: 420
- Sugar: 35
- Sodium: 180
- Fat: 24
- Saturated Fat: 14
- Carbohydrates: 50
- Fiber: 2
- Protein: 5
Keywords: Halloween cookie cake, mummy dessert, chocolate ganache, cookie cake, Halloween recipe, easy dessert