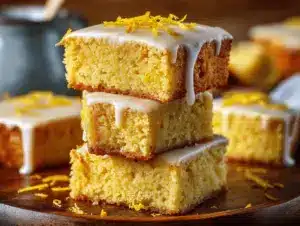
The zing of fresh lemon zest, the buttery aroma as these bars bake, and that first, fudgy bite — I’m not exaggerating when I say this lemon brownies recipe has totally changed my spring baking game. You know how chocolate brownies have that perfect dense chew? Imagine all that, but with bright, citrusy sunshine in every bite. That’s what you get here. The first time I tried these, I was honestly skeptical. Lemon “brownies”? But after a single square, I was hooked for life.
I first stumbled across lemon brownies during a backyard brunch swap with friends. Someone brought a batch, and they vanished before the coffee was even poured. I had to get the recipe. Naturally, I’ve tweaked and tested it about a dozen times since. The result? These ultra moist, zesty bars that are now my family’s most-requested treat every spring (and, let’s be real, all year round). They’re perfect for anyone who wants something sweet but not cloying, with a tangy kick that keeps you coming back for more.
This lemon brownies recipe is my secret weapon for birthdays, potlucks, and any time I want to impress with minimal effort. The ingredients are simple, the steps are foolproof, and the payoff is pure comfort food with a citrus twist. Whether you’re a lemon lover, a baking newbie, or just need something to brighten up a rainy day, you’ve got to try these. Trust me, after baking these bars more times than I can count, I can promise: these are the best easy, moist lemon brownies you’ll ever eat.
Why You’ll Love This Lemon Brownies Recipe
- Quick & Easy: These lemon brownies come together in under 15 minutes of prep — perfect for spontaneous cravings or last-minute guests.
- Simple Ingredients: You probably have everything you need already, and nothing fancy is required.
- Perfect for Spring (or Any Season): The bright lemon flavor feels like sunshine, making these bars ideal for brunches, showers, or just a pick-me-up.
- Crowd-Pleaser: Kids, adults, lemon skeptics… I’ve never seen leftovers when these are on the dessert table.
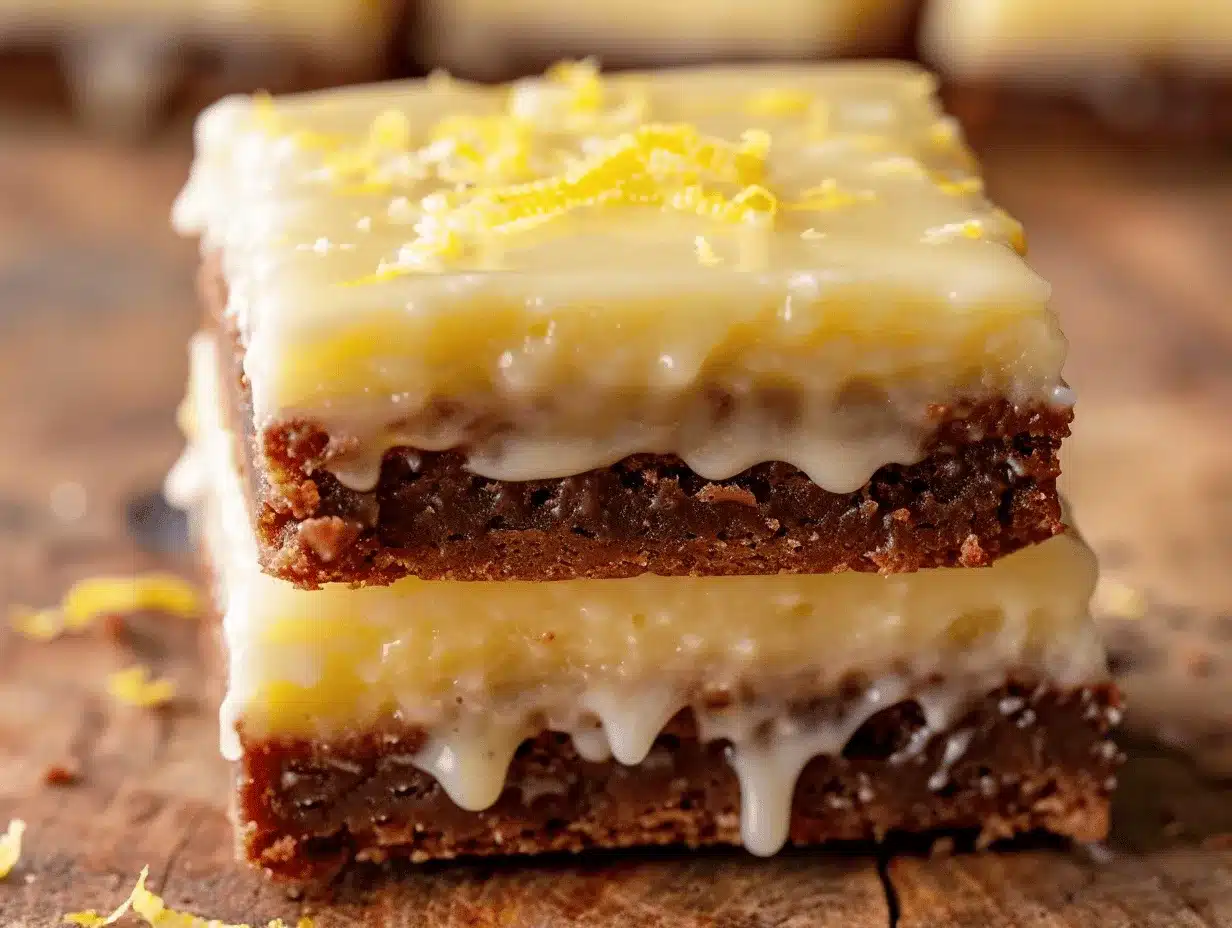
- Moist & Fudgy Texture: Like a brownie, but with a citrus punch — soft, chewy, and absolutely irresistible.
What sets this lemon brownies recipe apart is the balance. You get the tang of real lemon juice, the depth from a bit of butter, and just enough sweetness to keep things dessert-worthy. Unlike some dry, cake-like bars, these are dense and moist, thanks to a clever ratio of wet to dry ingredients (a trick I learned after my first few crumbly batches!).
Honestly, I’ve tried plenty of lemon bars and blondies over the years, but nothing comes close to the texture and punch of these. The secret is in blending both zest and juice right into the batter, and then adding a simple lemon glaze that soaks right in. It’s comfort food, but with a zesty, grown-up twist — perfect for impressing guests, spoiling your family, or just treating yourself with a cup of tea.
And, if you’re anything like me, you’ll find yourself sneaking a square for breakfast (no judgment!). This recipe isn’t just a dessert — it’s a celebration of everything I love about spring baking: easy, bright, and guaranteed to make people smile.
What Ingredients You Will Need
This lemon brownies recipe uses a handful of pantry staples, plus fresh lemons for that unmistakable zing. Here’s everything you’ll need to whip up a batch of moist, zesty bars:
- For the Lemon Brownie Batter:
- All-purpose flour – Regular flour keeps things chewy, but you can swap for gluten-free if needed.
- Granulated sugar – Just enough to sweeten without overpowering the lemon.
- Unsalted butter, melted – Brings richness and moisture. (I use Kerrygold for extra flavor.)
- Eggs, large – Room temperature is best for even mixing and a fudgy crumb.
- Fresh lemon juice – Bottled works in a pinch, but nothing beats the zing from real lemons.
- Lemon zest – The key to that aromatic, citrusy pop. Don’t skip it!
- Salt – Just a pinch to balance the sweetness and amp up the lemon.
- Baking powder – For just a touch of lift, so the bars aren’t too dense.
- Vanilla extract – I love a splash for warmth and roundness.
- For the Simple Lemon Glaze:
- Powdered sugar – Sifts into a smooth, glossy glaze.
- Fresh lemon juice – More lemon means more flavor!
- Lemon zest (optional, for extra zing and pretty flecks on top)
- Milk or cream (just a splash, if needed, to thin the glaze)
Ingredient Tips:
- If you’re out of butter, you can substitute with melted coconut oil — it works, but you’ll get a hint of coconut.
- For gluten-free lemon brownies, use a 1:1 baking blend like Bob’s Red Mill.
- No fresh lemons? Bottled juice is okay in a pinch, but zest is non-negotiable for full flavor.
- Want a dairy-free version? Swap the butter for vegan margarine and use dairy-free milk in the glaze.
- If you love extra tang, add a bit more zest or a tiny pinch of citric acid.
All in all, you don’t need anything fancy for this lemon brownies recipe. The magic is in the lemons — so use the freshest you can find for the best, brightest flavor!
Equipment Needed
- Mixing bowls – At least two: one for dry and one for wet ingredients.
- Whisk and spatula – A whisk for combining, spatula for scraping (and taste-testing batter, just saying).
- 8×8-inch baking pan (20×20 cm) – Metal or glass both work. If you only have a 9×9-inch, bars will be a bit thinner (just reduce baking time slightly).
- Microplane or fine grater – For zesting lemons easily and getting all those aromatic oils.
- Parchment paper – Makes lifting the brownies out a breeze. Grease the pan if you’re skipping it.
- Hand mixer or stand mixer (optional) – Not essential, but handy if you want a super-smooth batter.
- Measuring cups and spoons – Precision counts for brownies!
Honestly, I’ve made these with nothing but a fork and a bowl in a pinch, but a good whisk makes a big difference for a lump-free batter. If you use a metal pan, check a few minutes early — they brown faster. Glass pans give a softer edge. And that microplane? Worth every penny. Just wash it right away, or zest will stick like glue.
How to Make the Best Lemon Brownies – Step by Step
- Prep Your Pan and Ingredients (5 minutes)
Line an 8×8-inch (20×20 cm) baking pan with parchment paper, leaving some overhang. Preheat your oven to 350°F (175°C). Zest and juice your lemons before starting — you’ll need about 2 tablespoons of zest and 1/4 cup (60 mL) juice. - Mix the Wet Ingredients (3 minutes)
In a medium bowl, whisk together 1/2 cup (115 g) melted unsalted butter, 1 cup (200 g) granulated sugar, and 2 large eggs until glossy and pale yellow. Add 1/4 cup (60 mL) fresh lemon juice, 2 tablespoons zest, and 1 teaspoon vanilla extract. Whisk until smooth — it should smell super lemony! - Combine Dry Ingredients (2 minutes)
In a separate bowl, whisk 1 cup (125 g) all-purpose flour, 1/2 teaspoon baking powder, and 1/4 teaspoon salt. No lumps means no surprises later. - Bring It Together (2 minutes)
Gently fold the dry mixture into the wet with a spatula. Don’t over-mix — just until you don’t see streaks of flour. The batter will be thick, almost like cookie dough. - Spread and Bake (25-28 minutes)
Scoop the batter into your prepared pan. Smooth the top with a spatula. Bake for 25-28 minutes, or until the edges are light golden and a toothpick comes out with a few moist crumbs. If the top springs back lightly, you’re golden. - Cool Completely (30 minutes)
Let the brownies cool in the pan set on a wire rack. Warm brownies are fragile — trust me, I’ve rushed this step and ended up with lemony rubble (still tasty, though!). - Make the Lemon Glaze (5 minutes)
In a small bowl, whisk 1 cup (120 g) powdered sugar with 2-3 tablespoons (30-45 mL) fresh lemon juice. Add zest for extra color. If too thick, add a splash of milk. It should be pourable but not runny. - Glaze and Set (15 minutes)
Pour glaze over cooled brownies. Tilt the pan or spread gently with a spatula. Let set for 10-15 minutes for a crackly sheen. - Slice and Serve
Lift brownies out using the parchment handles. Slice into 16 squares. Wipe your knife between cuts for neat bars.
Troubleshooting: If your brownies seem dry, chances are they baked a bit too long — check at 22 minutes if your oven runs hot. If the glaze is too thin, add more powdered sugar. Too thick? More lemon juice or a drop of milk. The lemon scent should be strong and the bars should feel fudgy, not cakey, in the center.
Personal tip: I always zest my lemons right over the bowl so none of those flavorful oils go to waste. And don’t skip the parchment paper — it saves so much cleanup!
Cooking Tips & Techniques
- Don’t Over-mix: Like with chocolate brownies, too much mixing means tough bars. Just fold until combined.
- Use Fresh Lemons: Bottled juice works in a pinch, but real zest and juice are game-changers here. You get more aroma and flavor.
- Test for Doneness: Every oven bakes differently. Start checking at 22 minutes. The edges should just pull from the sides, and a toothpick in the center should have a few moist crumbs.
- Let the Bars Cool: I know it’s hard, but cutting too soon means crumbly, messy bars (ask me how I know!). Let them fully cool before glazing and slicing.
- Glaze Consistency: If your glaze runs off the bars, it’s too thin. Too thick? It won’t spread evenly. Aim for a slow, ribbon-like pour from the spoon. Add liquid or sugar a teaspoon at a time to adjust.
- Batch Cooking: Double the recipe for a 9×13-inch (23×33 cm) pan. Add a few extra minutes to the bake time and check for doneness in the center.
Honestly, my biggest mistake in early batches was overbaking. Lemon brownies are meant to be moist and fudgy, not dry or cakey. And don’t skip the zest — one time I forgot, and the bars just weren’t the same. If multitasking, set a timer for each step so you don’t lose track (especially important with kids or pets underfoot!).
Variations & Adaptations
The best part about this lemon brownies recipe is how easy it is to make it your own. Here are some of my favorite ways to switch things up:
- Gluten-Free Lemon Brownies: Swap the all-purpose flour for a 1:1 gluten-free baking blend. The bars stay just as moist and delicious.
- Lemon-Lime Brownies: Use half lemon zest/juice and half lime for a fun, zesty twist. The color is gorgeous and the flavor is even brighter.
- Berry Swirl: Drop small spoonfuls of raspberry or blueberry preserves onto the batter before baking, then swirl gently with a knife. Adds fruity bursts and pretty color.
- Dairy-Free Option: Use melted coconut oil or vegan butter, and non-dairy milk in the glaze.
- Extra Tangy: Add a tablespoon of cream cheese to the glaze for a cheesecake-like finish.
Personally, I’ve made a lemon-lime batch for a summer BBQ, and they disappeared even faster than the original! For nut allergies, avoid almond flour blends. Want to spice things up? Add a pinch of ginger or cardamom to the batter for a subtle warmth.
These bars are seriously forgiving. As long as you keep the wet-to-dry ratio right and don’t overbake, you can get creative with flavors and mix-ins.
Serving & Storage Suggestions
Serve these lemon brownies chilled or at room temp, depending on your mood. I love them cut into small squares on a pretty platter, dusted with extra zest for a pop of color. They pair perfectly with iced tea, lemonade, or even a hot cup of Earl Grey.
For parties, arrange them in cupcake liners for easy grabbing. They’re also lovely with fresh berries or a scoop of vanilla bean ice cream if you’re feeling fancy.
To store, keep brownies in an airtight container in the fridge for up to 5 days. The flavors get even better after a day or two as the glaze soaks in. For longer storage, freeze tightly wrapped bars (without glaze works best) for up to 2 months. Thaw overnight and glaze just before serving for that fresh-made look.
Reheating: If you want that just-baked softness, zap a bar in the microwave for 10 seconds. Just don’t overdo it or the glaze will melt right off!
Nutritional Information & Benefits
One serving (1/16 of the pan) has roughly 180 calories, 3g protein, 7g fat, and 26g carbs. These bars have less fat than traditional brownies, and the lemon brings vitamin C and antioxidants to the party. Using fresh lemon zest really adds value — you get a boost of flavor with minimal added sugar.
This lemon brownies recipe is naturally nut-free (if you use regular flour) and can be made gluten-free or dairy-free with simple swaps. Allergens to watch: eggs, dairy, and gluten in the standard recipe.
I love that these feel lighter than most desserts, and they always satisfy my sweet tooth without going overboard. For me, they’re a little taste of sunshine — and a great way to sneak some citrus into dessert time!
Conclusion
So, why should you make this lemon brownies recipe? Because it’s easy, quick, and delivers that unbeatable soft, zesty bite every single time. Whether you’re baking for a crowd or just want to treat yourself, these bars are a guaranteed hit.
Honestly, I can’t get enough of them — and I hope you feel the same. Don’t be afraid to tweak the flavors or adapt for your own dietary needs. That’s part of the fun!
If you give these ultra moist, zesty lemon brownies a try, let me know how it goes. Drop a comment, share your own twist, or tag me on social media. I love seeing your spring baking adventures! Happy baking, and here’s to a little extra sunshine in your day.
Frequently Asked Questions (FAQs)
How do I know when lemon brownies are done?
The edges should be light golden and just pulling away from the pan. A toothpick inserted in the center should come out with a few moist crumbs (not wet batter). Don’t wait until it’s totally dry — moist is best!
Can I make lemon brownies ahead of time?
Absolutely! They keep well in the fridge for up to 5 days and actually taste even better on day two as the glaze soaks in.
What if I don’t have fresh lemons?
Bottled juice works for the batter, but you really want fresh zest for the full flavor. If you can, always use at least one real lemon for zesting.
Can I freeze lemon brownies?
Yes, freeze unglazed brownies tightly wrapped for up to 2 months. Thaw in the fridge and glaze just before serving for the best texture and look.
How do I make these gluten-free or dairy-free?
For gluten-free lemon brownies, use a 1:1 baking blend. For dairy-free, swap butter for coconut oil or vegan margarine, and use plant-based milk in the glaze. Easy peasy!
Pin This Recipe!

Lemon Brownies Recipe: Best Easy Moist Bars for Spring Baking
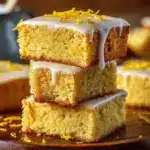
These ultra moist, zesty lemon brownies are dense, fudgy, and bursting with bright citrus flavor. Quick to make and perfect for spring, they’re a crowd-pleasing treat for brunches, potlucks, or any time you need a sweet pick-me-up.
- Prep Time: 15 minutes
- Cook Time: 25-28 minutes
- Total Time: 55-60 minutes
- Yield: 16 squares 1x
- Category: Dessert
- Cuisine: American
Ingredients
- 1 cup (125 g) all-purpose flour
- 1 cup (200 g) granulated sugar
- 1/2 cup (115 g) unsalted butter, melted
- 2 large eggs, room temperature
- 1/4 cup (60 mL) fresh lemon juice
- 2 tablespoons lemon zest
- 1/4 teaspoon salt
- 1/2 teaspoon baking powder
- 1 teaspoon vanilla extract
- For the Lemon Glaze:
- 1 cup (120 g) powdered sugar
- 2–3 tablespoons (30–45 mL) fresh lemon juice
- 1 teaspoon lemon zest (optional, for topping)
- 1–2 teaspoons milk or cream (if needed, to thin glaze)
Instructions
- Line an 8×8-inch (20×20 cm) baking pan with parchment paper, leaving some overhang. Preheat oven to 350°F (175°C). Zest and juice your lemons before starting.
- In a medium bowl, whisk together melted butter, granulated sugar, and eggs until glossy and pale yellow. Add lemon juice, lemon zest, and vanilla extract. Whisk until smooth.
- In a separate bowl, whisk together flour, baking powder, and salt.
- Gently fold the dry mixture into the wet mixture with a spatula until just combined. Do not over-mix.
- Spread the thick batter evenly into the prepared pan and smooth the top.
- Bake for 25-28 minutes, or until the edges are light golden and a toothpick inserted in the center comes out with a few moist crumbs.
- Let the brownies cool completely in the pan on a wire rack (about 30 minutes).
- For the glaze: In a small bowl, whisk powdered sugar with 2-3 tablespoons lemon juice and optional zest. Add milk or cream a teaspoon at a time if needed to reach a pourable consistency.
- Pour glaze over cooled brownies and spread gently. Let set for 10-15 minutes.
- Lift brownies out using parchment handles and slice into 16 squares. Wipe knife between cuts for neat bars.
Notes
For best flavor, use fresh lemon zest and juice. Don’t over-mix the batter or overbake the bars for maximum moistness. Let bars cool completely before glazing and slicing. Store in an airtight container in the fridge for up to 5 days or freeze (unglazed) for up to 2 months. For gluten-free or dairy-free versions, use a 1:1 gluten-free flour blend and substitute butter and milk with plant-based alternatives.
Nutrition
- Serving Size: 1 square (1/16 of pan)
- Calories: 180
- Sugar: 18
- Sodium: 70
- Fat: 7
- Saturated Fat: 4
- Carbohydrates: 26
- Protein: 3
Keywords: lemon brownies, lemon bars, spring dessert, easy lemon dessert, moist lemon brownies, citrus bars, lemon glaze, brunch dessert, potluck dessert, fudgy lemon bars