“You won’t believe how this graduation party nearly fell apart before it even started,” my friend Lisa confessed last Saturday as we rearranged the living room. She’d forgotten to order catering, and everyone was arriving in under an hour. Honestly, I’ve been there—scrambling last minute but still wanting to serve something impressive. That’s when the idea of a charcuterie board popped into my head.
Charcuterie boards feel fancy but honestly, they’re a lifesaver for celebrations, especially graduations where you want to impress without the fuss. I remember the first time I put one together for my cousin’s party—it was supposed to be a simple snack, but it ended up being the highlight of the evening. The mix of colors, textures, and flavors pulled people in from the driveway, and I swear, folks kept coming back for “just one more bite.”
Maybe you’ve been there, staring at your kitchen wondering how to pull together something that looks amazing but won’t have you sweating over the stove. This perfect graduation charcuterie board idea is just that—a crowd-pleasing, easy-to-assemble centerpiece that turns any celebration into a cozy, delicious gathering. And yes, there was a little chaos (like dropping that jar of olives), but it all came together beautifully. Let me tell you, this recipe stayed with me because it combines simplicity and style in the best way possible.
Why You’ll Love This Recipe
After countless trial runs, I can say this graduation charcuterie board is a winner for so many reasons. It’s not just about throwing meats and cheeses on a platter—it’s about the care in balance, the play of flavors, and the ease that makes you look like a pro host without breaking a sweat.
- Quick & Easy: Comes together in under 30 minutes, perfect for busy party prep or last-minute celebrations.
- Simple Ingredients: Uses pantry staples and fresh market finds—no exotic or hard-to-find items needed.
- Perfect for Graduations: Elegant enough to celebrate milestones but casual enough to relax and enjoy the moment.
- Crowd-Pleaser: Offers something for everyone—savory, sweet, crunchy, creamy—guaranteed to get rave reviews.
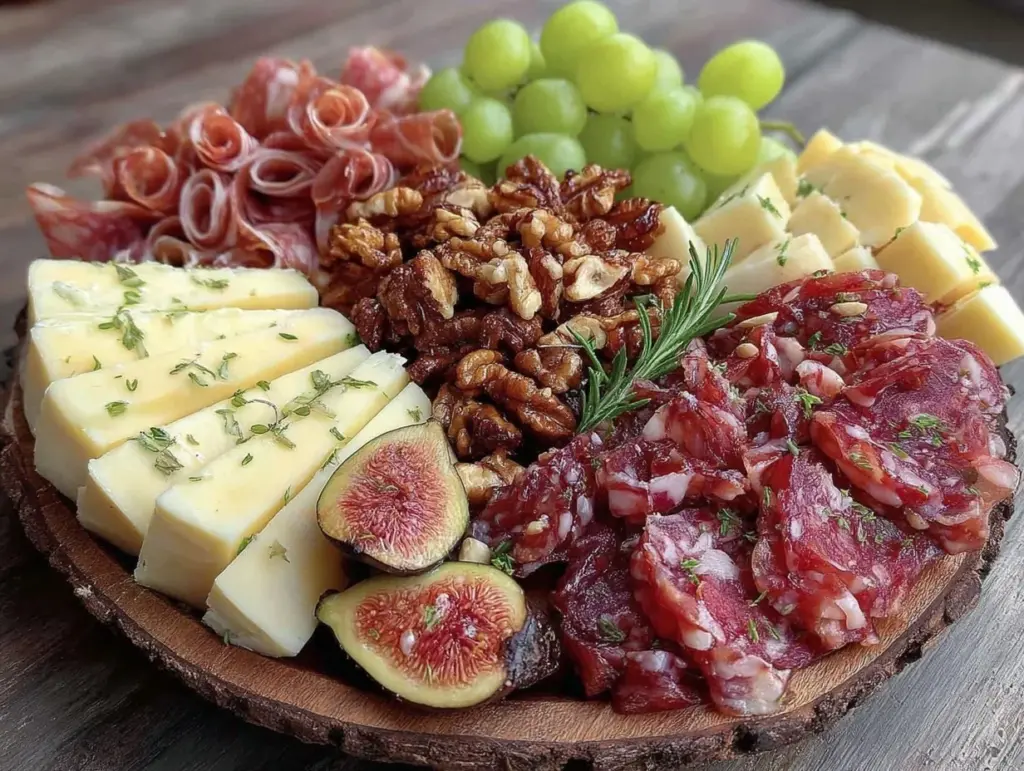
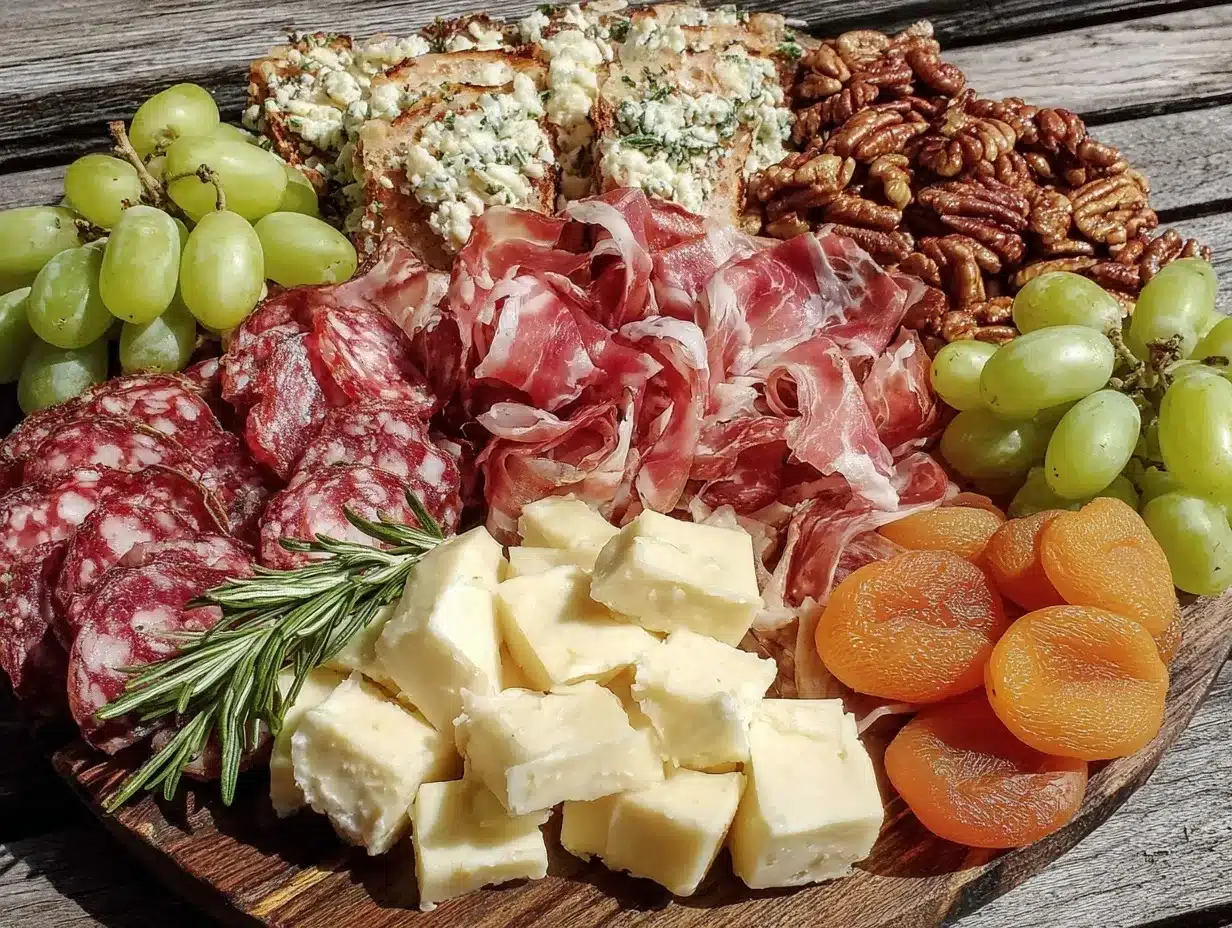
- Unbelievably Delicious: The combination of aged cheeses, cured meats, fresh fruit, and nuts creates a flavor party in every bite.
This isn’t your basic charcuterie board. I’ve tested the ratios and added a few personal twists, like a homemade honey drizzle and a sprinkle of fresh herbs that really make it pop. Honestly, it’s the kind of board where you close your eyes on the first bite and think, “Yep, this is celebration-worthy.” Whether you’re impressing family, friends, or just treating yourself, this setup will have everyone coming back for more.
What Ingredients You Will Need
This charcuterie board uses simple, wholesome ingredients to deliver bold flavor and satisfying texture without the fuss. Most of these are pantry staples or easy picks from your local market.
- Cured Meats:
- Prosciutto, thinly sliced (I like the “La Quercia” brand for its delicate flavor)
- Soppressata or spicy salami, sliced
- Capicola, optional for a smoky kick
- Cheeses:
- Sharp aged cheddar, cut into bite-sized cubes
- Creamy brie, room temperature for softness
- Manchego, sliced thin (look for firm texture)
- Goat cheese log, rolled in fresh herbs or crushed pepper
- Fresh Fruit:
- Seedless grapes (red and green for color contrast)
- Fresh figs, halved if in season (sub with dried figs if not)
- Apple slices, brushed with lemon to avoid browning
- Crunchy Elements:
- Marcona almonds, lightly salted
- Walnuts or pecans, toasted
- Mixed crackers: multigrain, water crackers, and seed crackers
- Pickled & Preserved:
- Cornichons or small dill pickles
- Olives: mix of Kalamata and Castelvetrano (pitted)
- Fig jam or apricot preserves (adds a sweet contrast)
- Extras & Garnishes:
- Fresh rosemary and thyme sprigs
- Honey for drizzling
- Dark chocolate chunks or small squares (for a touch of indulgence)
For substitutions, you can swap any cheese with dairy-free versions, and gluten-free crackers work just as well for those with dietary needs. Seasonal fruits can be adapted too—berries in spring, pears in fall. The key is variety and balance, not complexity.
Equipment Needed
- Large wooden or slate serving board (around 18×24 inches works well)
- Small bowls for olives, nuts, and preserves (to keep things tidy)
- Sharp knife for slicing cheeses and meats
- Cheese knives or spreaders for soft cheeses
- Small tongs or toothpicks for easy picking
- Optional: mini chalkboard or labels to identify cheeses and meats (adds a nice touch)
If you don’t have a fancy wooden board, a clean baking sheet lined with parchment works fine too. I’ve hosted with just a large plate and small ramekins on hand, so no stress if you’re on a budget or new to charcuterie.
Keep your knives sharp—dull blades make slicing a pain and can lead to accidents. Wiping your board with a lemon slice after serving helps remove strong odors and keeps the wood fresh.
Preparation Method
- Prep the ingredients (10-15 minutes): Wash and dry fruits like grapes and figs thoroughly. Slice apples thinly and brush with lemon juice to prevent browning. Thinly slice cheeses and cured meats. Toast nuts lightly in a dry pan over medium heat for 3-4 minutes until fragrant—don’t walk away!
- Arrange small bowls first (5 minutes): Place olives, pickles, and jams in their bowls and set them on the board spaced out. This helps organize and prevents juices from messing up crackers or other dry items.
- Place cheeses strategically (10 minutes): Spread cheeses evenly across the board. Soft cheeses like brie and goat cheese should be accessible with spreaders. Leave space for slicing and spreading. A good tip: slice some cheese in advance, but leave some blocks whole for visual appeal.
- Add cured meats (10 minutes): Fold or roll slices of prosciutto and salami for texture and height. Place near cheeses that pair well (like sharp cheddar with spicy salami). Don’t crowd—letting things breathe looks better and avoids a jumbled mess.
- Fill in with fruits and nuts (5 minutes): Cluster grapes and figs in small bunches. Sprinkle nuts around the board to fill gaps and add crunch. Use fresh herbs like rosemary sprigs as garnish for color and aroma.
- Final touches (5 minutes): Drizzle a little honey over goat cheese or brie for a sweet touch. Scatter dark chocolate chunks in empty spaces. Add crackers last so they stay crisp.
- Serving notes: Let the board sit at room temperature for about 15 minutes before guests arrive—cheese tastes better that way. Keep small plates, napkins, and utensils handy nearby.
Common hiccup: If your cheeses are too cold, they won’t spread or taste as flavorful. If meats look dry, try adding a few olive oil-soaked slices or a small bowl of mustard for moisture.
Cooking Tips & Techniques
Although no actual cooking happens here, technique matters. One pro tip I learned the hard way? Don’t overstuff your board. Negative space is your friend—it makes each item stand out.
Balance is key: mix soft and hard textures; sweet and savory flavors; muted and bold colors. When arranging, think about height too—rolling meats or stacking crackers adds dimension. I once tried stacking everything flat on one level, and it looked sad and boring.
When selecting cheeses, pick a variety of milk types (cow, goat, sheep) for flavor complexity. Use a separate knife for each cheese to avoid mixing flavors.
Timing helps too. Assemble most of the board about 30 minutes before serving, but hold off on fruits that brown quickly or crackers to keep them fresh.
Lastly, don’t forget the little extras like fresh herbs and honey drizzle—they elevate the experience without extra work.
Variations & Adaptations
- Vegetarian Version: Skip the meats and add marinated artichokes, roasted red peppers, and extra nuts. Use a variety of cheeses to keep interest high.
- Seasonal Twist: For summer, swap in fresh berries and stone fruits like peaches or nectarines. In fall, use pears, quince paste, and pumpkin seeds.
- International Flair: Swap traditional cured meats for Spanish chorizo or French saucisson. Add olives stuffed with garlic or anchovy for extra punch.
- Allergen-Friendly: Use gluten-free crackers or crispbreads. Substitute dairy cheeses with nut-based or coconut-based cheeses.
- Personal Favorite Variation: I once added spicy honey mustard and whole grain mustard alongside the fig jam, which guests adored. Mixing sweet and spicy really kicked things up.
Serving & Storage Suggestions
Serve the charcuterie board at room temperature for the best flavors and textures. A little warmth brings out the creaminess of cheeses and mellows the saltiness of cured meats. Present on a large clean board or platter with small plates and napkins within easy reach.
Complement with light white wines like Sauvignon Blanc or a crisp rosé to balance the richness. Sparkling water or iced tea work well for non-alcoholic options.
For leftovers, wrap cheeses tightly in parchment and store in the fridge. Meats and fresh fruits should be refrigerated in airtight containers. Crackers and nuts keep best in sealed containers at room temperature to stay crunchy.
Reheat soft cheeses gently if needed (just 10-15 seconds in the microwave) but avoid overdoing it. Flavors often deepen after resting overnight, so if you prepare the board the day before, it’ll taste even better.
Nutritional Information & Benefits
This charcuterie board offers a balanced mix of protein, healthy fats, and fiber. Cheeses provide calcium and vitamin D, while nuts contribute heart-healthy fats and antioxidants. Fresh fruits add natural sweetness along with vitamins and hydration.
Many cured meats contain sodium, so moderation is key. Opting for nitrate-free or organic options can reduce additives. Gluten-free crackers make this board accessible for those with sensitivities.
Overall, it’s an indulgent yet mindful way to celebrate—combining nutrition with joy and connection. Personally, I appreciate how it brings people together without the stress of complicated cooking.
Conclusion
So, if you’re gearing up for a graduation or any special celebration, this perfect graduation charcuterie board is a no-fail way to impress guests and enjoy the moment without kitchen chaos. Customize it to your taste, play with seasonal finds, and remember that the best boards are the ones made with a bit of love and a few happy accidents.
I love this recipe because it turned last-minute panic into a party centerpiece that brought everyone closer. Now, it’s my go-to when I want to make something beautiful, delicious, and effortless all at once.
Give it a try, tweak it your way, and let me know what combos you come up with! Share your photos and stories—I’m always excited to see how you make it your own.
FAQs
What is the best cheese to include on a graduation charcuterie board?
Choose a mix of textures and flavors—hard cheeses like aged cheddar, creamy options like brie, and tangy goat cheese create a balanced board. Including at least three varieties keeps it interesting.
How far in advance can I prepare the charcuterie board?
You can prep most ingredients a day ahead and assemble the board a few hours before serving. Keep fruits and crackers separate until just before guests arrive to maintain freshness.
Can I make this board vegan or dairy-free?
Absolutely! Swap cheeses for plant-based alternatives and use plenty of fruits, nuts, and veggies. Add hummus or guacamole in small bowls for extra flavor and creaminess.
What drinks pair well with a charcuterie board?
Light, crisp wines like Sauvignon Blanc, rosé, or sparkling wine complement the flavors nicely. For non-alcoholic options, sparkling water with lemon or iced herbal teas work well.
How do I keep crackers from getting soggy?
Place crackers on the board last and avoid letting any wet items like olives or fruits sit directly on them. Using small bowls for wet ingredients helps keep crackers crisp.
Pin This Recipe!
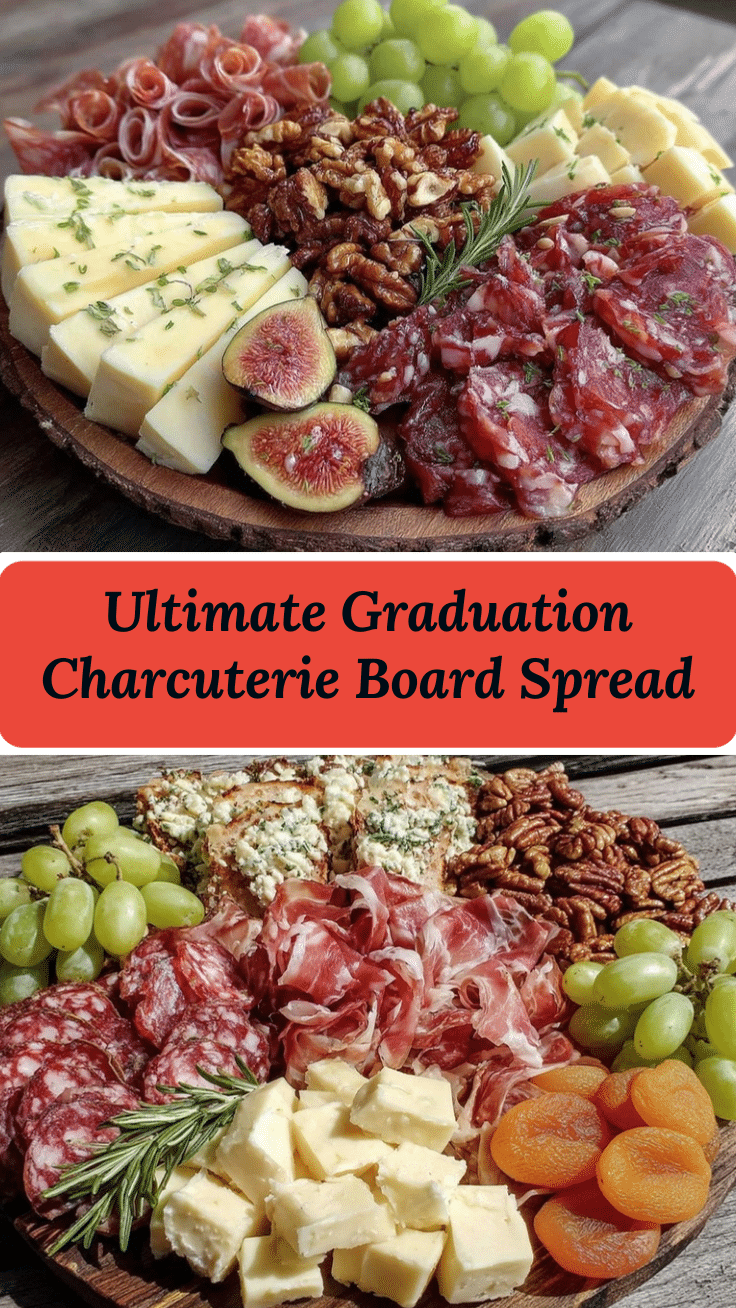
Perfect Graduation Charcuterie Board Ideas for Easy Celebrations

An easy-to-assemble, crowd-pleasing charcuterie board perfect for graduation celebrations, combining a balanced mix of meats, cheeses, fruits, nuts, and garnishes for a stylish and delicious centerpiece.
- Prep Time: 20 minutes
- Cook Time: 5 minutes
- Total Time: 25 minutes
- Yield: 8 servings
- Category: Appetizer
- Cuisine: American
Ingredients
- Prosciutto, thinly sliced
- Soppressata or spicy salami, sliced
- Capicola (optional)
- Sharp aged cheddar, cut into bite-sized cubes
- Creamy brie, room temperature
- Manchego, sliced thin
- Goat cheese log, rolled in fresh herbs or crushed pepper
- Seedless grapes (red and green)
- Fresh figs, halved (or dried figs if not in season)
- Apple slices, brushed with lemon juice
- Marcona almonds, lightly salted
- Walnuts or pecans, toasted
- Mixed crackers: multigrain, water crackers, and seed crackers
- Cornichons or small dill pickles
- Olives: mix of Kalamata and Castelvetrano (pitted)
- Fig jam or apricot preserves
- Fresh rosemary and thyme sprigs
- Honey for drizzling
- Dark chocolate chunks or small squares
Instructions
- Wash and dry fruits like grapes and figs thoroughly. Slice apples thinly and brush with lemon juice to prevent browning. Thinly slice cheeses and cured meats. Toast nuts lightly in a dry pan over medium heat for 3-4 minutes until fragrant.
- Place olives, pickles, and jams in small bowls and set them spaced out on the board to keep juices from messing up crackers or dry items.
- Spread cheeses evenly across the board. Keep soft cheeses like brie and goat cheese accessible with spreaders. Leave some cheese blocks whole for visual appeal.
- Fold or roll slices of prosciutto and salami for texture and height. Place near cheeses that pair well, avoiding crowding to let items breathe.
- Cluster grapes and figs in small bunches. Sprinkle nuts around the board to fill gaps and add crunch. Garnish with fresh rosemary and thyme sprigs.
- Drizzle honey over goat cheese or brie for a sweet touch. Scatter dark chocolate chunks in empty spaces. Add crackers last to keep them crisp.
- Let the board sit at room temperature for about 15 minutes before serving to enhance flavors. Keep small plates, napkins, and utensils nearby.
Notes
Keep knives sharp for easy slicing. Wipe board with lemon slice after serving to remove odors. Let cheeses sit at room temperature before serving for best flavor. Add olive oil-soaked slices or mustard if meats look dry. Place crackers last to avoid sogginess. Use separate knives for each cheese to avoid mixing flavors.
Nutrition
- Serving Size: Approximately 1/8th
- Calories: 350
- Sugar: 8
- Sodium: 600
- Fat: 25
- Saturated Fat: 10
- Carbohydrates: 15
- Fiber: 3
- Protein: 12
Keywords: charcuterie board, graduation party, easy appetizer, crowd-pleaser, meats and cheeses, party food, quick snack, celebration food