
Oh, the smell of buttery Danish pastry baking in the oven—there’s honestly nothing quite like it. The scent of warm, flaky layers mingling with sweet fruit filling drifts through the kitchen, tempting everyone nearby. The first time I made this perfect Danish pastry with flaky buttery layers and fruit filling, I was instantly hooked. I remember that pause—when you take a bite, close your eyes, and just smile because you know you’ve stumbled onto something truly special. It was one of those “why haven’t I made this before?” moments that stick with you.
Years ago, when I was knee-high to a grasshopper, my grandma used to make these on rainy weekends. They were the kind of treats that made the house feel cozy and alive. I always wished I’d learned the recipe sooner, but, you know, better late than never. My family couldn’t stop sneaking them off the cooling rack (and I can’t really blame them!).
Let’s face it: this perfect Danish pastry with flaky buttery layers and fruit filling is dangerously easy to make and offers pure, nostalgic comfort. Whether you’re looking to brighten up your Pinterest cookie board or impress guests at a brunch, these pastries are the answer. Tested multiple times (in the name of research, of course), they’ve become a staple for family gatherings and gifting. Honestly, you’re going to want to bookmark this one for those special moments that call for something sweet and impressive.
Why You’ll Love This Recipe
From my countless kitchen experiments and family feedback, this Danish pastry recipe stands out for many reasons. It’s not just another fruit-filled pastry—it’s your best version, crafted for flaky, buttery perfection every time.
- Quick & Easy: Comes together in under 3 hours, including rising and chilling—perfect for weekend baking or holiday mornings.
- Simple Ingredients: No fancy grocery trips needed; you probably have what you need right in your pantry and fridge.
- Perfect for Brunch & Potlucks: These pastries impress without stress, making any gathering feel special.
- Crowd-Pleaser: Kids and adults alike rave about the combination of flaky layers and sweet fruit filling.
- Unbelievably Delicious: The texture is next-level flaky, while the flavor strikes a perfect balance of buttery richness and fresh fruit brightness.
What makes this recipe different? The secret lies in the folding technique and the choice of butter, which create those iconic layers that practically melt in your mouth. Plus, the fruit filling is just the right amount of sweet and tangy—never overpowering. This isn’t just good—it’s the kind of pastry that makes you close your eyes after the first bite. It brings back childhood memories while feeling fresh and homemade. Whether you’re impressing guests or treating yourself, this recipe hits all the right notes.
What Ingredients You Will Need
This recipe uses simple, wholesome ingredients to deliver bold flavor and satisfying texture without the fuss. Most are pantry staples, and substitutions are easy if you’re catering to dietary needs.
- For the Dough:
- All-purpose flour – 3 ½ cups (420 g), sifted for lightness
- Granulated sugar – ¼ cup (50 g), for slight sweetness
- Salt – 1 tsp, to balance flavors
- Active dry yeast – 2 ¼ tsp (1 packet), for rise and fluffiness
- Whole milk – ¾ cup (180 ml), warmed (about 110°F/43°C) for activating yeast
- Unsalted butter – 1 cup (225 g), cold and cubed for layering
- Large eggs – 2, room temperature, for richness and structure
- Vanilla extract – 1 tsp, for a hint of warmth
- For the Fruit Filling:
- Fruit preserves or jam (apricot, raspberry, or your favorite) – ½ cup (160 g), choose a high-quality brand like Bonne Maman for best flavor
- Fresh fruit (optional) – ½ cup, chopped (blueberries, strawberries, or apples work well)
- For the Glaze:
- Powdered sugar – 1 cup (120 g)
- Milk or lemon juice – 2-3 tbsp, to thin the glaze
- Vanilla extract – ½ tsp
For a gluten-free option, you can swap all-purpose flour with a gluten-free blend, but texture will vary slightly. Use dairy-free milk and vegan butter to make this recipe dairy-free. I’ve found that using cold unsalted butter straight from the fridge is key to those flaky layers, so don’t skip chilling it!
Equipment Needed
- Stand mixer with dough hook attachment (optional but helpful for kneading; you can knead by hand if you prefer)
- Rolling pin – essential for creating those flaky layers
- Pastry brush – for applying egg wash and glaze
- Baking sheet lined with parchment paper – prevents sticking and easy cleanup
- Sharp knife or pizza cutter – to cut dough into neat squares
- Large mixing bowls
- Plastic wrap or clean kitchen towel – for covering dough during rising
- Cooling rack – to let pastries cool evenly
If you don’t have a stand mixer, don’t worry—this recipe is very manageable by hand. For rolling, a non-stick rolling pin or a lightly floured wooden one works best. I keep my rolling pin in the fridge before starting to keep the butter cold longer. Budget-friendly silicone pastry brushes are great and easy to clean, so I recommend picking one up if you don’t have one already.
Preparation Method
- Activate the yeast: In a small bowl, combine warm milk (110°F/43°C) with sugar and yeast. Stir gently and let sit for 5-10 minutes until foamy. If it doesn’t foam, your yeast might be old—start over with fresh yeast.
- Make the dough: In a large bowl or stand mixer, whisk together flour and salt. Add eggs, vanilla extract, and the yeast mixture. Mix on low speed until dough starts to come together (about 2 minutes).
- Knead the dough: Knead with dough hook or by hand on a floured surface for 8-10 minutes until smooth and elastic. The dough should be slightly tacky but not sticky. If too sticky, add a tablespoon of flour at a time.
- First rise: Form dough into a ball, place in a greased bowl, cover with plastic wrap or towel, and let rise in a warm spot until doubled in size (about 1 ½ to 2 hours).
- Prepare the butter block: While dough rises, place the cold butter between two sheets of parchment paper. Using a rolling pin, bash and roll it into a rectangle about 7×9 inches (18×23 cm). Keep it chilled until the dough is ready.
- Roll and fold: On a floured surface, roll the dough into a 12×20 inch (30×50 cm) rectangle. Place the butter block in the center and fold the dough edges over, enclosing the butter completely. Seal edges gently.
- Laminate the dough: Roll the dough again into a 12×20 inch rectangle. Fold into thirds like a letter (this is called a “turn”). Wrap in plastic and chill for 30 minutes. Repeat this rolling and folding process two more times, chilling 30 minutes between each turn. This creates those beautiful layers.
- Shape the pastries: After the final chill, roll dough to about ¼ inch (6 mm) thick. Cut into 3×3 inch (7.5×7.5 cm) squares. Place a teaspoon of fruit preserves and a few pieces of fresh fruit (if using) in the center of each square. Fold corners toward the center, pinching gently to seal.
- Second rise: Place pastries on a parchment-lined baking sheet, cover with a towel, and let rise for 30-45 minutes until puffy.
- Bake: Preheat oven to 375°F (190°C). Brush pastries with beaten egg (egg wash) for shine. Bake 15-20 minutes until golden brown and puffed. Watch closely towards the end to avoid burning.
- Glaze and cool: Mix powdered sugar, vanilla, and milk or lemon juice to make a smooth glaze. Drizzle over warm pastries once slightly cooled on a wire rack.
Pro tip: Don’t rush the chilling steps; cold butter is the secret to flaky layers. If the butter starts melting, pop the dough back in the fridge. The dough should feel cool and firm before rolling each time. Also, keep your workspace lightly floured but avoid adding too much flour, or the dough can get tough.
Cooking Tips & Techniques
Let me share some tips that make all the difference when baking these perfect Danish pastries. First, patience is key. The chilling and folding process might seem long, but it’s what creates those flaky layers you crave. Don’t skip or shorten this step—you’ll regret it!
Use cold butter straight from the fridge and keep your dough well-chilled between turns. If your kitchen’s warm, I often pop everything back in the fridge between steps. It’s better to be slow and steady here.
One mistake I made early on was overworking the dough after adding the butter. That can cause the butter to blend too much and lose the layering effect. Gently roll and fold without pressing too hard.
When shaping, keep your cuts clean and even. Uneven edges can cause uneven baking. Using a sharp knife or pizza cutter helps a lot.
Timing your baking is another trick. Ovens vary, so start checking pastries around 15 minutes. They’re done when golden brown and puffed. If you see them browning too fast, tent loosely with foil.
Finally, multitask by prepping the glaze while pastries bake. That way, you can drizzle it right away for a beautiful, glossy finish.
Variations & Adaptations
This recipe is flexible, so you can tailor it to your tastes or dietary needs.
- Dietary: Swap all-purpose flour for a gluten-free blend like Bob’s Red Mill 1-to-1 for a gluten-free version. Use vegan butter and dairy-free milk to make it vegan-friendly.
- Seasonal: Change up the fruit filling with fresh berries in summer, spiced apple chutney in fall, or even lemon curd for a bright twist.
- Flavor twists: Add a sprinkle of cinnamon or cardamom to the dough for a warm spice note. Or, mix cream cheese with fruit preserves for a luscious filling.
I once tried a chocolate-hazelnut spread filling (you know, Nutella!)—dangerously good and perfect for a quick dessert. Just keep in mind the moisture content varies, so adjust baking time slightly if needed.
Serving & Storage Suggestions
Serve these Danish pastries warm or at room temperature. They’re perfect alongside a cup of coffee or a fresh fruit salad for a balanced brunch. For presentation, dust them lightly with powdered sugar or drizzle the glaze generously for that Pinterest-worthy look.
Store leftover pastries in an airtight container at room temperature for up to 2 days or refrigerate for up to 5 days. To refresh, warm them in a 300°F (150°C) oven for about 5-7 minutes—it brings back that fresh-baked feeling.
You can freeze unbaked shaped pastries on a tray, then transfer them to a freezer bag. Bake directly from frozen, adding a few extra minutes to the baking time. Flavors tend to deepen when stored, so they taste even better the next day.
Nutritional Information & Benefits
Each Danish pastry (based on 12 servings) contains approximately 320 calories, 15 grams of fat (mostly from butter), 35 grams of carbohydrates, and 5 grams of protein. The fruit filling adds natural sweetness and a small boost of vitamins.
While this treat is indulgent, using real butter and fresh ingredients makes it a wholesome choice compared to store-bought alternatives packed with preservatives. You can also adjust sugar levels in the filling and glaze to suit your dietary preferences.
This recipe is naturally free from artificial additives and can be adapted for gluten-free or vegan diets. Just be mindful of allergens such as dairy, eggs, and gluten if serving guests with restrictions.
Conclusion
So, there you have it—the perfect Danish pastry with flaky buttery layers and fruit filling that’s bound to impress. It’s a recipe that feels like a warm hug from your childhood but with a fresh homemade touch. You can customize it easily, making it your own signature treat for any occasion.
I love this recipe because it marries simple ingredients with a little patience and technique to create something truly special. Give it a try, and don’t hesitate to tweak the fillings and spices to suit your mood.
When you bake this, please come back and share your results or any creative twists you tried—I’d love to hear about your pastry adventures! Happy baking, friends, and remember: good things come to those who fold with care.
FAQs
Can I use frozen fruit in the filling?
Yes! Just make sure to thaw and drain excess liquid before using to avoid soggy pastries.
How do I know when the yeast is active?
If the yeast mixture bubbles and becomes foamy within 10 minutes, it’s active. If not, your yeast may be expired or the water too hot/cold.
Can I make these pastries ahead of time?
Absolutely. You can shape and freeze them before baking, then bake fresh when ready. Or bake them and store leftovers refrigerated or frozen.
What’s the best butter to use for flaky layers?
Use high-quality unsalted butter with around 80% fat content. European-style butter like Plugrá or Kerrygold works beautifully.
How do I prevent the butter from melting during rolling?
Work quickly, keep your dough and butter cold, and chill the dough between folds. If butter softens too much, pop the dough in the fridge to firm up.
Pin This Recipe!

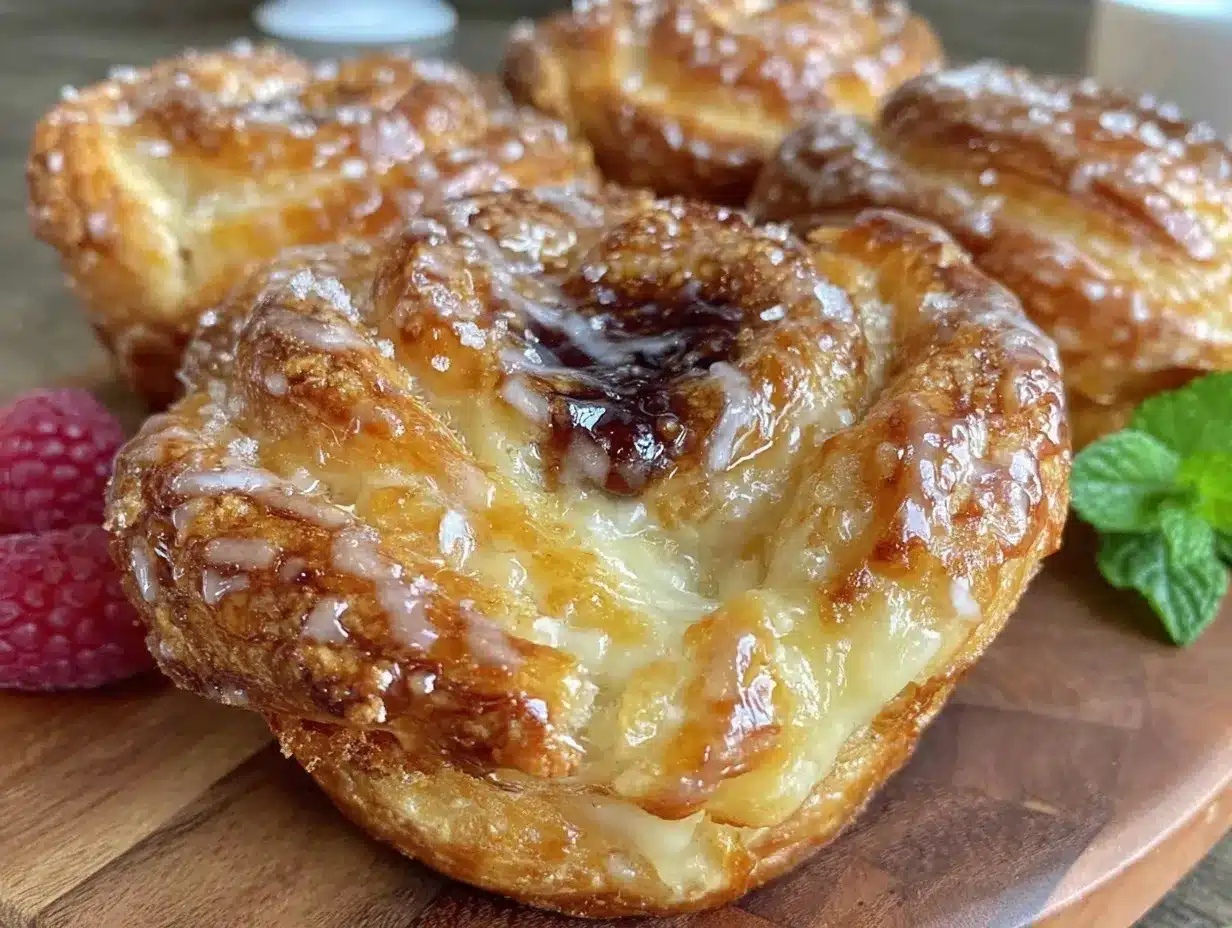
Perfect Danish Pastry Recipe Easy Flaky Buttery Layers with Fruit Filling

This Danish pastry recipe delivers flaky, buttery layers with a sweet fruit filling, perfect for brunch or special occasions. It combines simple ingredients with a folding technique to create irresistible pastries.
- Prep Time: 45 minutes
- Cook Time: 20 minutes
- Total Time: 3 hours
- Yield: 12 servings 1x
- Category: Dessert
- Cuisine: European
Ingredients
- 3 ½ cups (420 g) all-purpose flour, sifted
- ¼ cup (50 g) granulated sugar
- 1 tsp salt
- 2 ¼ tsp (1 packet) active dry yeast
- ¾ cup (180 ml) whole milk, warmed to about 110°F (43°C)
- 1 cup (225 g) unsalted butter, cold and cubed
- 2 large eggs, room temperature
- 1 tsp vanilla extract
- ½ cup (160 g) fruit preserves or jam (apricot, raspberry, or favorite)
- ½ cup fresh fruit, chopped (optional; blueberries, strawberries, or apples)
- 1 cup (120 g) powdered sugar
- 2–3 tbsp milk or lemon juice (for glaze)
- ½ tsp vanilla extract (for glaze)
Instructions
- Activate the yeast: In a small bowl, combine warm milk (110°F/43°C) with sugar and yeast. Stir gently and let sit for 5-10 minutes until foamy.
- Make the dough: In a large bowl or stand mixer, whisk together flour and salt. Add eggs, vanilla extract, and the yeast mixture. Mix on low speed until dough starts to come together (about 2 minutes).
- Knead the dough: Knead with dough hook or by hand on a floured surface for 8-10 minutes until smooth and elastic. The dough should be slightly tacky but not sticky.
- First rise: Form dough into a ball, place in a greased bowl, cover with plastic wrap or towel, and let rise in a warm spot until doubled in size (about 1 ½ to 2 hours).
- Prepare the butter block: Place cold butter between two sheets of parchment paper. Using a rolling pin, bash and roll it into a 7×9 inch (18×23 cm) rectangle. Keep chilled until dough is ready.
- Roll and fold: On a floured surface, roll dough into a 12×20 inch (30×50 cm) rectangle. Place butter block in center and fold dough edges over, enclosing butter completely. Seal edges gently.
- Laminate the dough: Roll dough again into 12×20 inch rectangle. Fold into thirds like a letter (a “turn”). Wrap in plastic and chill for 30 minutes. Repeat rolling, folding, and chilling two more times.
- Shape the pastries: After final chill, roll dough to about ¼ inch (6 mm) thick. Cut into 3×3 inch (7.5×7.5 cm) squares. Place a teaspoon of fruit preserves and some fresh fruit (if using) in center of each square. Fold corners toward center and pinch to seal.
- Second rise: Place pastries on parchment-lined baking sheet, cover with towel, and let rise for 30-45 minutes until puffy.
- Bake: Preheat oven to 375°F (190°C). Brush pastries with beaten egg for shine. Bake 15-20 minutes until golden brown and puffed.
- Glaze and cool: Mix powdered sugar, vanilla, and milk or lemon juice to make glaze. Drizzle over warm pastries once slightly cooled on wire rack.
Notes
Use cold unsalted butter straight from the fridge for flaky layers. Chill dough between folds to prevent butter from melting. If butter softens, refrigerate dough before continuing. Avoid overworking dough after adding butter to maintain layers. Check pastries at 15 minutes to avoid burning; tent with foil if browning too fast. You can freeze shaped pastries and bake from frozen, adding a few extra minutes to baking time.
Nutrition
- Serving Size: 1 Danish pastry
- Calories: 320
- Fat: 15
- Carbohydrates: 35
- Protein: 5
Keywords: Danish pastry, flaky pastry, fruit filling, buttery layers, brunch, baking, homemade pastry


