The first time I made chicken pinwheels, it was one of those chaotic weekday evenings where dinner needed to come together fast but still feel special. You know the kind, right? The moment these golden, flaky pinwheels hit the table, they vanished in minutes. Between the creamy filling and savory chicken, they became an instant family favorite. And here’s the best part—this recipe is so simple, anyone can whip it up in no time. Whether you’re juggling work, school, or just life in general, these chicken pinwheels are about to become your go-to dinner solution.
With a handful of everyday ingredients and minimal prep, you’ll create a dish that’s not only delicious but also downright fun to eat. Perfect for busy nights or when you want something comforting without spending hours in the kitchen. Trust me, once you try these irresistible chicken pinwheels, you’ll never look back!
Why You’ll Love This Recipe
- Quick & Easy: Ready in under 30 minutes, this recipe is a lifesaver for hectic evenings.
- Simple Ingredients: Everything you need is likely already in your kitchen—no fancy shopping required!
- Kid-Friendly: These pinwheels are picky-eater-approved and perfect for little hands.
- Versatile: Great for dinner, lunchboxes, or even as party snacks.
- Make-Ahead Friendly: Prep ahead and bake when ready for ultimate convenience.
What sets this recipe apart is its balance of flavors—the juicy chicken, creamy cheese, and herby seasoning all wrapped in buttery, flaky pastry. It’s the kind of meal that makes you pause to savor every bite. Plus, the presentation of these pinwheels is so pretty, they’ll impress guests without requiring fancy culinary skills. Whether you’re hosting a casual get-together or just treating yourself, this recipe has you covered.
What Ingredients You Will Need
This recipe uses simple, wholesome ingredients to create a dish that’s flavorful, satisfying, and easy to make. Here’s what you’ll need:
- Cooked chicken, shredded: Rotisserie or leftover chicken works perfectly.
- Cream cheese, softened: Adds creaminess and binds the filling together.
- Shredded cheddar cheese: For a melty, cheesy finish.
- Green onions, chopped: Adds a fresh burst of flavor.
- Garlic powder: Enhances the savory notes.
- Dried parsley: For a pop of color and subtle herbiness.
- Salt and pepper: To taste, for seasoning perfection.
- Refrigerated crescent dough: The star of the show—makes rolling and baking a breeze.
- Egg wash (1 egg + water): Gives the pinwheels that golden, shiny finish.
If you’re missing an ingredient, don’t worry! You can easily swap in alternatives. For example, use mozzarella instead of cheddar, or add a dash of paprika for extra flavor. These pinwheels are incredibly forgiving, which makes them ideal for busy cooks.
Equipment Needed
Here’s everything you’ll need to make these chicken pinwheels:
- Mixing bowls: To combine the filling ingredients.
- Rolling pin: Optional, for smoothing out the crescent dough.
- Baking sheet: A standard sheet pan works perfectly.
- Parchment paper: For easy cleanup and non-stick baking.
- Pastry brush: For applying the egg wash (a spoon works too in a pinch).
If you don’t have parchment paper, lightly greasing your baking sheet will do the trick. And if your rolling pin is hiding in the back of the cupboard, you can gently press the dough out with your hands—no need for perfection!
Preparation Method
Follow these simple steps to make your irresistible chicken pinwheels:
- Preheat the oven: Set your oven to 375°F (190°C) and line a baking sheet with parchment paper.
- Prepare the filling: In a mixing bowl, combine the shredded chicken, cream cheese, cheddar cheese, chopped green onions, garlic powder, parsley, salt, and pepper. Stir until fully combined.
- Roll out the dough: Unroll the crescent dough on a lightly floured surface. If needed, press the seams together to create one large sheet.
- Spread the filling: Evenly spread the chicken mixture over the dough, leaving about ½ inch around the edges.
- Roll and slice: Starting from one side, roll the dough tightly into a log. Use a sharp knife to slice the log into 1-inch pinwheels.
- Arrange on the baking sheet: Place the pinwheels cut-side down on the parchment-lined sheet, leaving space between each for even baking.
- Apply egg wash: Brush the tops of the pinwheels with egg wash for that golden, shiny finish.
- Bake: Bake for 12-15 minutes, or until the pinwheels are golden brown and puffed.
- Cool slightly and serve: Let them rest for 2-3 minutes before enjoying warm.
If your pinwheels aren’t browning evenly, rotate the baking sheet halfway through cooking. And if the dough tears while rolling, don’t sweat it—just pinch it back together. These little imperfections won’t affect the taste!
Cooking Tips & Techniques
Want to make sure your chicken pinwheels turn out perfectly every time? Here are my tried-and-true tips:
- Don’t overfill: Too much filling can make the dough harder to roll and seal.
- Chill the dough: If the dough gets too soft while working, pop it in the fridge for 5 minutes.
- Use a sharp knife: A clean, sharp blade will make slicing the pinwheels easier and prevent squishing.
- Customize flavors: Add a pinch of red pepper flakes for heat or swap parsley for Italian seasoning.
- Double the batch: These pinwheels disappear fast, so make extras to freeze for later!
These little tricks can save the day, whether you’re a seasoned cook or new to the kitchen. Trust me, I’ve learned them from a few messy attempts!
Variations & Adaptations
Here are some creative ways to adapt this recipe to suit your tastes or dietary needs:
- Low-carb option: Swap crescent dough for low-carb tortillas and bake as wraps instead.
- Vegetarian version: Replace chicken with sautéed spinach and mushrooms.
- Seasonal twist: Add roasted red peppers or sun-dried tomatoes for a burst of flavor.
- Cheese swap: Try pepper jack for a spicy kick or gouda for a smoky flavor.
- Gluten-free alternative: Use gluten-free pastry dough or rice paper wraps.
One of my favorite variations is adding chopped jalapeños to the filling for a bit of heat—it’s always a hit at gatherings!
Serving & Storage Suggestions
Wondering how best to serve and store these chicken pinwheels? Here’s what you need to know:
- Serving temperature: Serve warm for the best flavor and texture.
- Presentation: Arrange on a platter with a sprinkle of fresh parsley for a pop of color.
- Pairings: Serve with a crisp green salad or a side of marinara sauce for dipping.
- Storage: Store leftovers in an airtight container in the refrigerator for up to 3 days.
- Freezing: Freeze uncooked pinwheels in a single layer, then transfer to a bag for up to 2 months. Bake directly from frozen, adding 2-3 minutes to the cooking time.
Reheating is easy—just pop them in the oven at 350°F (175°C) for 5-7 minutes or until warmed through. The flavors actually deepen over time, making leftovers extra tasty!
Nutritional Information & Benefits
Here’s a quick breakdown of the nutritional benefits this recipe offers:
- Protein-packed: Shredded chicken provides a hearty dose of protein.
- Calcium-rich: Cheese adds essential calcium for strong bones.
- Low in sugar: A great option for those watching their sugar intake.
- Customizable nutrition: Choose reduced-fat cheese and low-sodium seasoning to make it even healthier.
These pinwheels are a balanced meal option that’s both comforting and satisfying. Just be mindful of allergens like dairy or gluten if serving to a crowd!
Conclusion
These irresistible chicken pinwheels are everything you need in a quick dinner recipe—easy to make, packed with flavor, and guaranteed to please everyone at the table. Whether you’re cooking for your family, hosting friends, or just treating yourself, this dish is a winner.
Feel free to get creative and customize the filling or dough based on your preferences. That’s the beauty of this recipe—it’s as flexible as it is delicious. Personally, I love the way it turns simple ingredients into something so fun and satisfying.
Give it a try tonight and let me know how it goes! Drop your thoughts in the comments below or share your own variations. I can’t wait to see how you make these your own. Happy cooking!
FAQs
Can I use store-bought rotisserie chicken?
Yes, store-bought rotisserie chicken is perfect for this recipe and saves time!
Can I make these pinwheels ahead of time?
Absolutely! You can prep the pinwheels and refrigerate them uncooked until ready to bake.
What can I serve with chicken pinwheels?
Pair them with a green salad, roasted veggies, or marinara sauce for dipping.
Can I freeze these pinwheels?
Yes, you can freeze uncooked pinwheels and bake them straight from the freezer.
How do I reheat leftovers?
Reheat in the oven at 350°F (175°C) for 5-7 minutes or until warmed through.
Pin This Recipe!

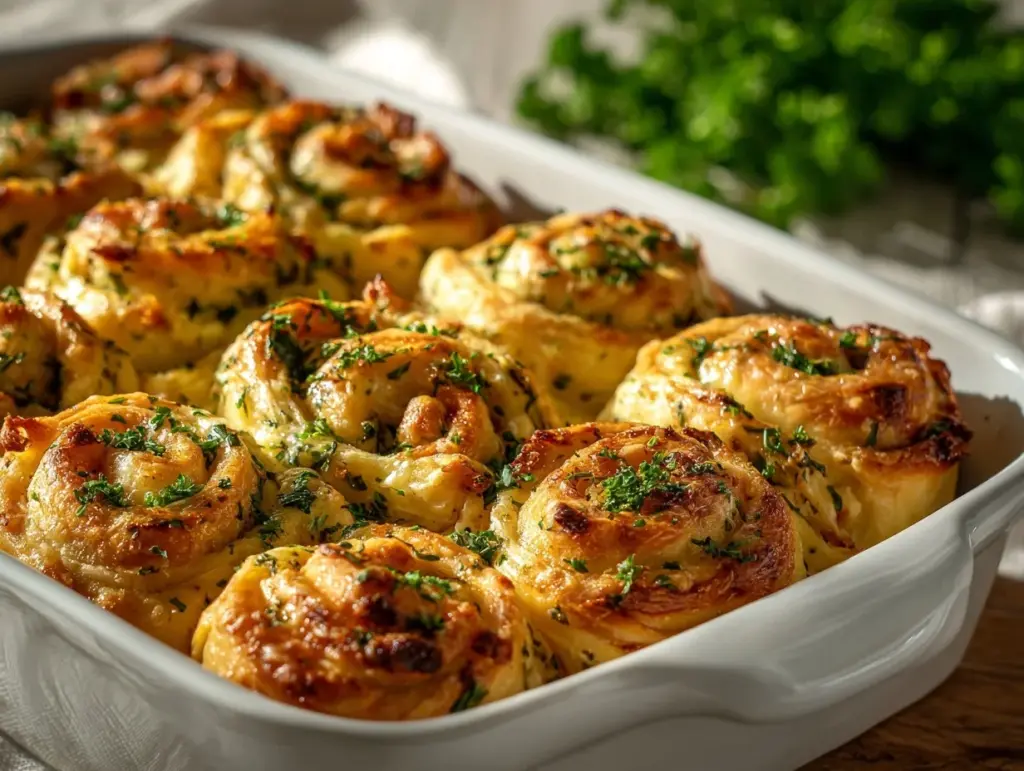
Irresistible Chicken Pinwheels

These golden, flaky chicken pinwheels are quick, easy, and packed with creamy, savory flavors—perfect for busy nights or casual gatherings.
- Prep Time: 10 minutes
- Cook Time: 15 minutes
- Total Time: 25 minutes
- Yield: 4 servings 1x
- Category: Main Course
- Cuisine: American
Ingredients
- 2 cups cooked chicken, shredded
- 4 ounces cream cheese, softened
- 1 cup shredded cheddar cheese
- 2 green onions, chopped
- 1 teaspoon garlic powder
- 1 teaspoon dried parsley
- Salt and pepper to taste
- 1 package refrigerated crescent dough
- 1 egg + 1 tablespoon water (for egg wash)
Instructions
- Preheat the oven to 375°F (190°C) and line a baking sheet with parchment paper.
- In a mixing bowl, combine shredded chicken, cream cheese, cheddar cheese, chopped green onions, garlic powder, parsley, salt, and pepper. Stir until fully combined.
- Unroll the crescent dough on a lightly floured surface. Press the seams together to create one large sheet if needed.
- Spread the chicken mixture evenly over the dough, leaving about ½ inch around the edges.
- Roll the dough tightly into a log and slice into 1-inch pinwheels using a sharp knife.
- Place the pinwheels cut-side down on the parchment-lined baking sheet, leaving space between each for even baking.
- Brush the tops of the pinwheels with egg wash for a golden, shiny finish.
- Bake for 12-15 minutes, or until the pinwheels are golden brown and puffed.
- Let them rest for 2-3 minutes before serving warm.
Notes
Don’t overfill the dough to avoid tearing. Chill the dough if it becomes too soft while working. Use a sharp knife for clean slices.
Nutrition
- Serving Size: 2-3 pinwheels per pe
- Calories: 250
- Sugar: 2
- Sodium: 450
- Fat: 15
- Saturated Fat: 8
- Carbohydrates: 18
- Fiber: 1
- Protein: 12
Keywords: chicken pinwheels, quick dinner, easy recipe, kid-friendly, party snacks


