The first time I bit into one of these pumpkin protein balls, I swear it felt like autumn had taken over my kitchen—cozy aromas, a soft hint of cinnamon, and that unmistakable pumpkin flavor. You know the kind of snack that makes you want to wrap up in a blanket and put on your favorite fall playlist? That’s exactly what these little bites deliver. If you’ve ever found yourself craving something sweet, healthy, and quick (especially when the leaves start turning), this pumpkin protein balls recipe is about to be your new seasonal favorite.
I stumbled across the idea for these during a blustery October afternoon when my kids needed an after-school snack and I needed a post-workout pick-me-up. After a few trial runs (and plenty of taste testing—no complaints there!), I landed on a combo that checks every box: nutrient-packed, easy to make, and so delicious you’ll want to make a double batch. Whether you’re a busy parent, a fitness enthusiast, or just someone who loves pumpkin spice everything, this recipe brings a healthy punch of protein with all the nostalgia of your favorite fall treats.
Trust me, I’ve made these pumpkin protein balls at least a dozen times over the past three years. They’re a staple in our snack rotation, especially during sweater weather. Plus, there’s something so satisfying about whipping up a batch in 20 minutes or less—no baking, no fuss. So, if you’re ready for a healthy fall snack that feels like a treat (but totally supports your goals), let’s get rolling with this pumpkin protein balls recipe!
Why You’ll Love This Pumpkin Protein Balls Recipe
- Quick & Easy: Ready in under 20 minutes—no oven required, no complicated steps.
- Simple Ingredients: Everything you need is likely already in your pantry or fridge. No need for specialty health food stores.
- Perfect for Fall: With pumpkin puree, warm spices, and a hint of maple, these protein balls basically taste like autumn in a bite. They’re fantastic for lunchboxes, road trips, or pre-gym snacking.
- Crowd-Pleaser: My family devours these, and friends have texted me for the recipe after just one taste. Even picky eaters can’t resist!
- Unbelievably Delicious: Think pumpkin pie meets energy bite—soft, chewy, and just sweet enough. You won’t believe they’re healthy.
What truly sets this pumpkin protein balls recipe apart is the smooth blend of creamy pumpkin, hearty oats, and a scoop of your favorite protein powder. I always blend the oats for a finer texture (trust me, it makes a difference). The spices are balanced, not overpowering, and the addition of mini chocolate chips makes each bite feel like a treat.
Honestly, these are more than just another “healthy snack.” They’re the kind of thing you’ll crave when you want something cozy yet energizing. They’re also super customizable—swap in your favorite nuts, or change up the protein powder flavor for a new twist. The best part? No guilt whatsoever. These pumpkin protein balls are healthy enough for breakfast but tasty enough for dessert. Once you try them, you’ll see why they’re always the first snack to disappear at my house!
What Ingredients You Will Need
This pumpkin protein balls recipe is all about simple, wholesome ingredients that deliver on both taste and nutrition. You won’t find anything weird or hard to pronounce—just pantry staples and a dash of fall magic. Here’s what you’ll need:
- Old-fashioned rolled oats (1 cup / 90g) – The hearty base for structure and fiber. I go for Bob’s Red Mill, but any brand works.
- Vanilla or unflavored protein powder (1/2 cup / 60g) – Whey, pea, or brown rice protein all blend well. Pick your favorite; vanilla gives a cozy, sweet note.
- Pumpkin puree (1/2 cup / 120g) – Not pumpkin pie filling! Pure pumpkin only. Canned is easiest, but homemade is great too.
- Nut butter (1/3 cup / 80g) – Almond, peanut, or cashew butter. I like creamy almond butter for a subtle taste, but peanut butter brings more richness.
- Maple syrup (2-3 tablespoons / 30-45ml) – For natural sweetness and that classic autumn flavor. Honey or agave works in a pinch.
- Mini chocolate chips (1/4 cup / 40g) – Optional, but highly recommended! Dark or semi-sweet both work—I always toss in a little extra for fun.
- Chia seeds or flaxseed meal (1 tablespoon / 12g) – Adds a nutrition boost and helps bind the mixture.
- Pumpkin pie spice (1 1/2 teaspoons) – Or mix your own with cinnamon, nutmeg, ginger, and cloves.
- Ground cinnamon (1/2 teaspoon) – For extra warmth and spice.
- Sea salt (1/4 teaspoon) – Don’t skip this! It brings the flavors together.
- Optional add-ins: Chopped walnuts, pecans, shredded coconut, or dried cranberries.
Ingredient Tips: If you’re gluten-free, make sure your oats are certified GF. For vegan protein balls, use plant-based protein powder and maple syrup. The nut butter can be swapped for sunflower seed butter for a nut-free version. Fresh pumpkin puree is great, but canned is honestly just as good here (and way faster).
I’ve played around with a bunch of brands—Orgain protein powder works well, and Trader Joe’s pumpkin puree is my go-to. Don’t stress if you’re missing one or two mix-ins; these pumpkin protein balls are super forgiving. In summer, I sometimes swap out the pumpkin for mashed ripe banana, but for fall, pumpkin is unbeatable.
Equipment Needed
- Mixing bowls: At least one medium-sized bowl—glass or stainless steel both work. If you’re doubling the recipe, grab a bigger one.
- Measuring cups and spoons: Accurate measurements matter for consistency; I love my old Pyrex set, but anything will do.
- Food processor or blender (optional): If you prefer a smoother texture, pulse the oats first. Otherwise, you can use them whole for more bite.
- Rubber spatula or wooden spoon: For mixing everything together—get in there and scrape the sides!
- Cookie scoop or tablespoon: To portion out evenly sized balls. Rolling by hand works, but a scoop is less messy (and the balls look more uniform).
- Baking sheet or plate: For setting the balls before chilling. I usually use a parchment-lined sheet to keep things tidy.
Budget Tip: No need for fancy equipment. If you don’t have a food processor, just use a sturdy spoon and a little elbow grease. My first batches were all hand-mixed, and they turned out great! Just remember, a damp spatula makes mixing sticky dough a breeze. And if you’re tight on space, a simple dinner plate lined with wax paper is perfect for chilling the finished pumpkin protein balls.
How to Make Pumpkin Protein Balls
-
Prep your workspace (2 minutes):
Gather all your ingredients and equipment. Line a baking sheet or plate with parchment or wax paper. This will prevent sticking when you chill the balls later. -
Blend the oats (optional, 1 minute):
For a finer texture, pulse the rolled oats in a food processor or blender for 10-15 seconds. (I usually do this for a softer, more “cookie dough” feel.) If you like more chew, skip this step. -
Combine dry ingredients (2 minutes):
In your mixing bowl, add the oats, protein powder, chia seeds (or flaxseed), pumpkin pie spice, cinnamon, and salt. Stir to mix thoroughly.
Tip: If your protein powder is clumpy, sift it first for even mixing. -
Add wet ingredients (3 minutes):
Add the pumpkin puree, nut butter, and maple syrup. Mix well using a spatula or spoon. The mixture should be thick but slightly sticky.
Troubleshooting: If the dough feels too dry (sometimes happens with certain protein powders), add 1 tablespoon water or extra pumpkin puree. If too wet, stir in a bit more oats or protein powder. -
Fold in mix-ins (2 minutes):
Stir in the mini chocolate chips and any optional add-ins (nuts, coconut, dried fruit). Don’t overmix—just enough to distribute everything. -
Scoop and shape (5 minutes):
Use a cookie scoop or tablespoon to portion out dough. Roll each portion between your palms to form balls about 1 inch (2.5cm) in diameter. Place on the prepared sheet.
Tip: If the dough sticks to your hands, lightly dampen your palms with water. -
Chill (5-10 minutes):
Place the tray in the fridge for at least 10 minutes to help the pumpkin protein balls set. (You can eat them right away, but they get firmer and more flavorful after chilling.) -
Enjoy or store (1 minute):
Serve immediately, or transfer to an airtight container for later snacking.
Personal Note: I once tried adding extra pumpkin for more moisture, but it made the dough too sticky to roll. A little goes a long way! Don’t be afraid to adjust the sweetness or spice to match your taste—this recipe is super forgiving.
Cooking Tips & Techniques
You’d think no-bake recipes are foolproof, but after making pumpkin protein balls dozens of times, I’ve learned a few tricks that really change the game:
- Texture is key: Blending the oats creates a smoother, cookie-dough-like ball. If you want more bite, leave the oats whole. I like a mix—half blended, half whole—for the best of both worlds.
- Don’t overdo the pumpkin: More pumpkin puree can make the mixture hard to roll and too soft to set. Stick to the recipe’s measurements, and add extra oats if things get sticky.
- Sweetness check: Protein powders vary a lot in sweetness. Taste the mixture before rolling—sometimes I add an extra splash of maple syrup if my protein powder is super plain.
- Chill time matters: Even 10-15 minutes in the fridge helps the balls firm up and lets flavors meld. If you’re in a hurry, pop them in the freezer for 5 minutes.
- Consistency is everything: If your dough seems crumbly, add a bit of nut butter or a teaspoon of water. If it’s too soft, extra oats or protein powder will fix it.
- Batch prepping: Double the recipe and freeze half for grab-and-go energy balls all week.
I once rushed a batch and skipped the chill—big mistake! They tasted great but were way too sticky. Also, don’t use pumpkin pie filling by accident (been there, done that)—it’s too sweet and throws the flavor off.
For multitasking, I mix up the dough while prepping my morning coffee. By the time I’m cleaned up, the pumpkin protein balls are chilled and ready to go. It’s a little fall magic, all before 9 a.m.
Variations & Adaptations
This pumpkin protein balls recipe is a starting point—there are so many ways to make it your own (and believe me, I’ve tried a bunch!). Here are some of my favorite tweaks:
- Vegan option: Use plant-based protein powder and swap honey for maple syrup. Almond or sunflower seed butter keeps it totally dairy- and nut-free.
- Nut-free version: Sunflower seed butter or tahini work great in place of almond or peanut butter. Just note, the flavor will be slightly more earthy.
- Chocolate lovers’ dream: Add 2 tablespoons unsweetened cocoa powder to the base, then load up on mini chocolate chips. It’s like pumpkin-chocolate fudge!
- Spice it up: For a spicier kick, add a pinch of ground ginger or allspice. I love tossing in extra cinnamon when I want a more robust flavor.
- Different protein powders: Try chocolate or chai-flavored protein powder for a twist. Each flavor totally changes the vibe—I’m obsessed with chai in the fall!
One of my favorite personal variations is adding chopped pecans and a handful of dried cranberries for a festive, chewy texture. If you want to bake them, shape into flat discs and bake at 325°F (165°C) for 10-12 minutes for a soft pumpkin cookie. The possibilities are endless—don’t be afraid to experiment!
Serving & Storage Suggestions
These pumpkin protein balls are best served chilled—something about the cold, chewy texture makes them extra satisfying. I love piling them onto a rustic wooden board for a fall snack spread, or tucking a couple into my kids’ lunchboxes.
- Pairings: Enjoy with hot coffee, chai tea, or a cozy glass of oat milk. They’re a great snack before a workout or as a mid-afternoon pick-me-up.
- Storing: Keep in an airtight container in the fridge for up to 1 week. For longer storage, freeze in a zip-top bag for up to 2 months. (Just thaw in the fridge overnight or on the counter for 20 minutes.)
- Reheating: No need to reheat, but if you like them soft, let them sit at room temperature for 5-10 minutes before eating.
- Flavor note: The pumpkin spice flavors get even better after a day or two in the fridge—it’s like letting a stew develop overnight.
Honestly, I’ve never had a batch last more than three days at my house. If you’re making ahead for a party, shape and chill the balls, then roll them in extra cinnamon or cocoa powder just before serving for a pretty, Pinterest-worthy touch.
Nutritional Information & Benefits
Each pumpkin protein ball (assuming 16 per batch) has roughly:
- 80-100 calories
- 4-6g protein
- 2g fiber
- 4g healthy fats
- 6-7g net carbs
The real power here comes from the blend of protein powder, fiber-rich oats, and healthy fats from nut butter and seeds. Pumpkin is packed with vitamin A, beta-carotene, and potassium, while chia seeds add antioxidants and omega-3s.
This pumpkin protein balls recipe is naturally gluten-free (with GF oats), easily dairy-free, and low in added sugar if you use a low-carb syrup. Allergens to note: nuts (if using nut butter), and dairy (if using whey protein).
From a personal wellness perspective, these protein balls keep my energy stable and cravings in check—especially during hectic fall days. They’re a smarter alternative to processed snacks, with all the cozy flavors of pumpkin pie!
Conclusion
If you’re searching for an easy fall snack that’s as nourishing as it is crave-worthy, this pumpkin protein balls recipe should absolutely be on your list. They’re quick, versatile, and taste like autumn in every bite—plus, they’re perfect for busy days, meal prep, or sharing with friends.
I love how customizable they are—so don’t be afraid to riff on the basic formula and make them your own. Whether you’re chasing a healthy snack, a little comfort, or just want to impress at your next gathering, these pumpkin protein balls truly deliver.
Give them a try, and let me know how you tweak them! Leave a comment below with your favorite add-ins, or tag me on social with your fall snack creations. Happy (healthy) snacking, and here’s to a cozier, more delicious autumn!
FAQs about Pumpkin Protein Balls Recipe
How long do pumpkin protein balls last in the fridge?
They’ll stay fresh for up to 1 week in an airtight container in the fridge. For best flavor and texture, enjoy them within 3-4 days.
Can I make pumpkin protein balls without protein powder?
Yes! Just add 1/4 cup extra oats and a tablespoon more nut butter. The texture will be a bit softer but still delicious.
Are these pumpkin protein balls gluten-free?
They can be! Just use certified gluten-free rolled oats and ensure your protein powder is GF as well.
Can I freeze pumpkin protein balls?
Absolutely. Place them in a freezer-safe bag or container for up to 2 months. Thaw in the fridge overnight before eating.
What’s the best protein powder for this recipe?
Any vanilla or unflavored protein powder works. I like using plant-based powders for a dairy-free option, but whey protein gives a creamier texture. Just avoid powders with strong artificial sweeteners—they can overpower the pumpkin flavor.
Pin This Recipe!
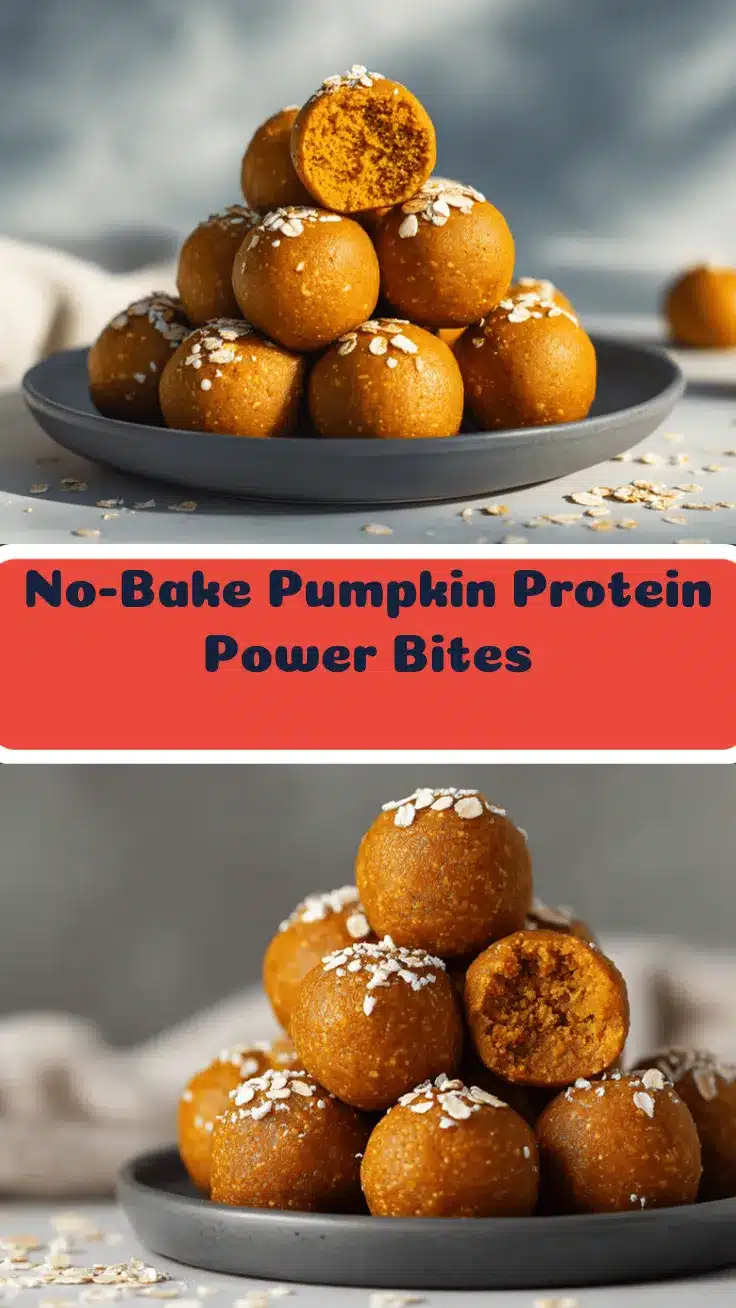
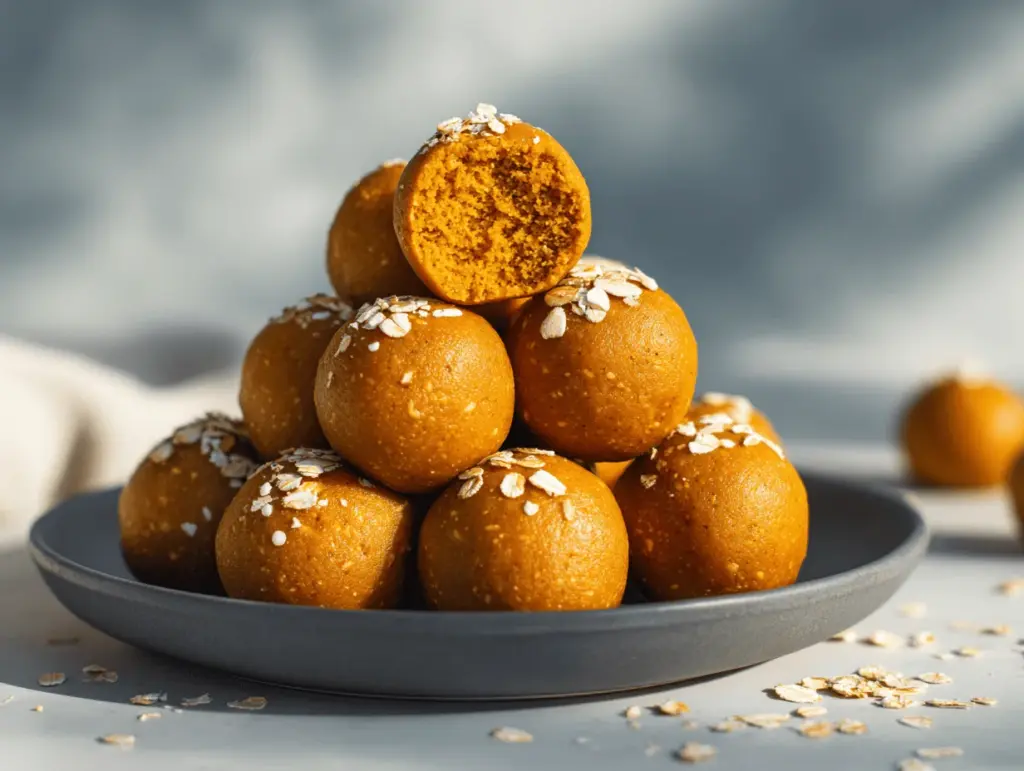
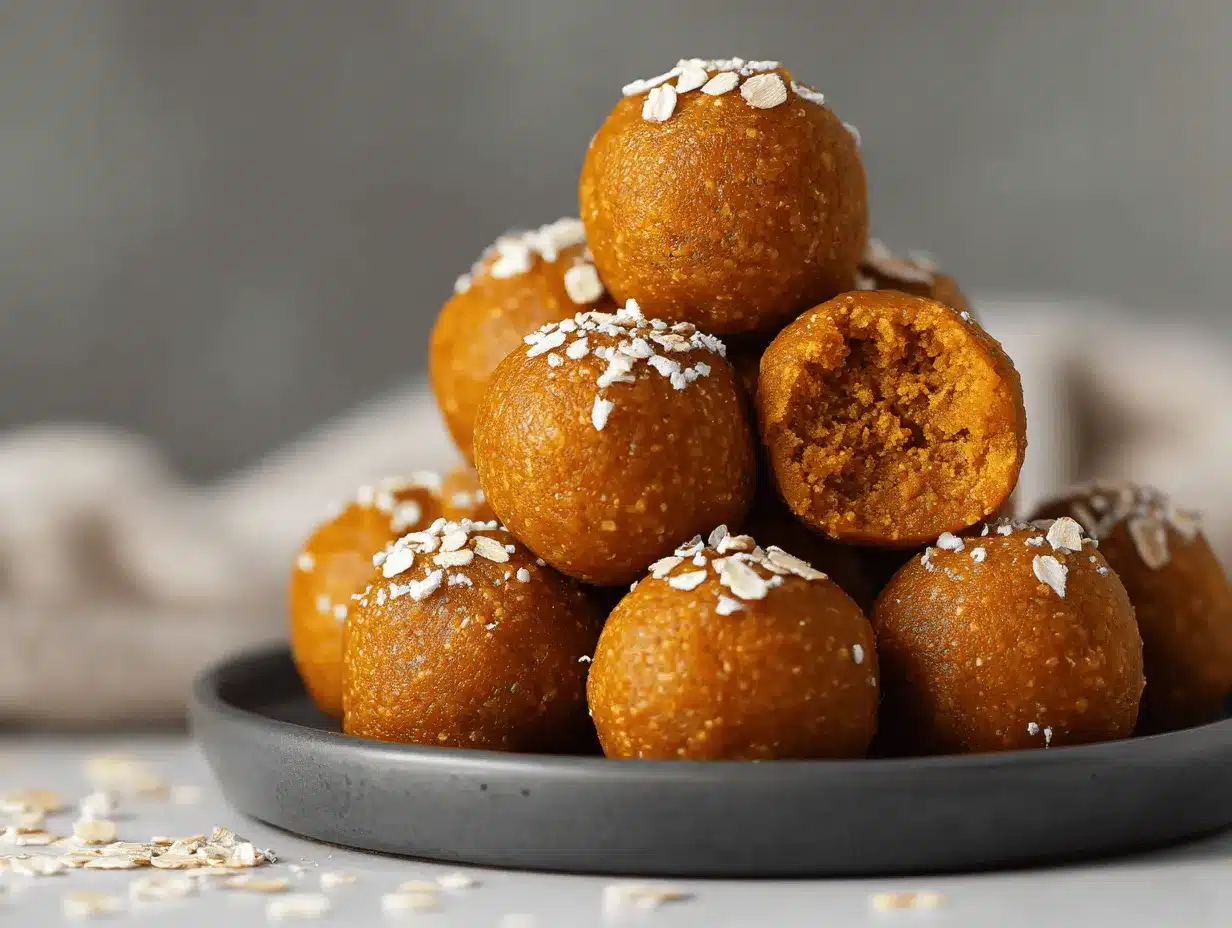
Pumpkin Protein Balls

These no-bake pumpkin protein balls are a quick, healthy, and delicious fall snack packed with cozy pumpkin spice flavor, protein, and wholesome ingredients. Ready in under 20 minutes, they’re perfect for meal prep, lunchboxes, or a post-workout treat.
- Prep Time: 10 minutes
- Cook Time: 0 minutes
- Total Time: 20 minutes
- Yield: 16 balls 1x
- Category: Snack
- Cuisine: American
Ingredients
- 1 cup old-fashioned rolled oats (90g)
- 1/2 cup vanilla or unflavored protein powder (60g)
- 1/2 cup pumpkin puree (120g, not pumpkin pie filling)
- 1/3 cup nut butter (almond, peanut, or cashew; 80g)
- 2–3 tablespoons maple syrup (30-45ml)
- 1/4 cup mini chocolate chips (40g, optional)
- 1 tablespoon chia seeds or flaxseed meal (12g)
- 1 1/2 teaspoons pumpkin pie spice
- 1/2 teaspoon ground cinnamon
- 1/4 teaspoon sea salt
- Optional add-ins: chopped walnuts, pecans, shredded coconut, or dried cranberries
Instructions
- Prep your workspace: Gather all ingredients and equipment. Line a baking sheet or plate with parchment or wax paper.
- Blend the oats (optional): For a finer texture, pulse the rolled oats in a food processor or blender for 10-15 seconds. Skip if you prefer more chew.
- Combine dry ingredients: In a mixing bowl, add oats, protein powder, chia seeds or flaxseed, pumpkin pie spice, cinnamon, and salt. Stir to mix thoroughly.
- Add wet ingredients: Add pumpkin puree, nut butter, and maple syrup. Mix well with a spatula or spoon until thick and slightly sticky.
- Fold in mix-ins: Stir in mini chocolate chips and any optional add-ins (nuts, coconut, dried fruit) until just combined.
- Scoop and shape: Use a cookie scoop or tablespoon to portion out dough. Roll each portion between your palms to form 1-inch balls. Place on prepared sheet.
- Chill: Refrigerate for at least 10 minutes to set. (They can be eaten right away, but chilling improves texture and flavor.)
- Enjoy or store: Serve immediately, or transfer to an airtight container for storage.
Notes
For a smoother texture, blend the oats before mixing. Adjust sweetness to taste depending on your protein powder. If the dough is too sticky, add more oats or protein powder; if too dry, add a splash of water or extra pumpkin. Store in the fridge for up to 1 week or freeze for up to 2 months. Use certified gluten-free oats for a gluten-free version. For vegan, use plant-based protein powder and maple syrup.
Nutrition
- Serving Size: 1 ball
- Calories: 80100
- Sugar: 3
- Sodium: 40
- Fat: 4
- Saturated Fat: 0.5
- Carbohydrates: 79
- Fiber: 2
- Protein: 46
Keywords: pumpkin protein balls, healthy snack, no-bake, fall snack, energy balls, gluten-free, vegan option, meal prep, pumpkin spice, protein bites


