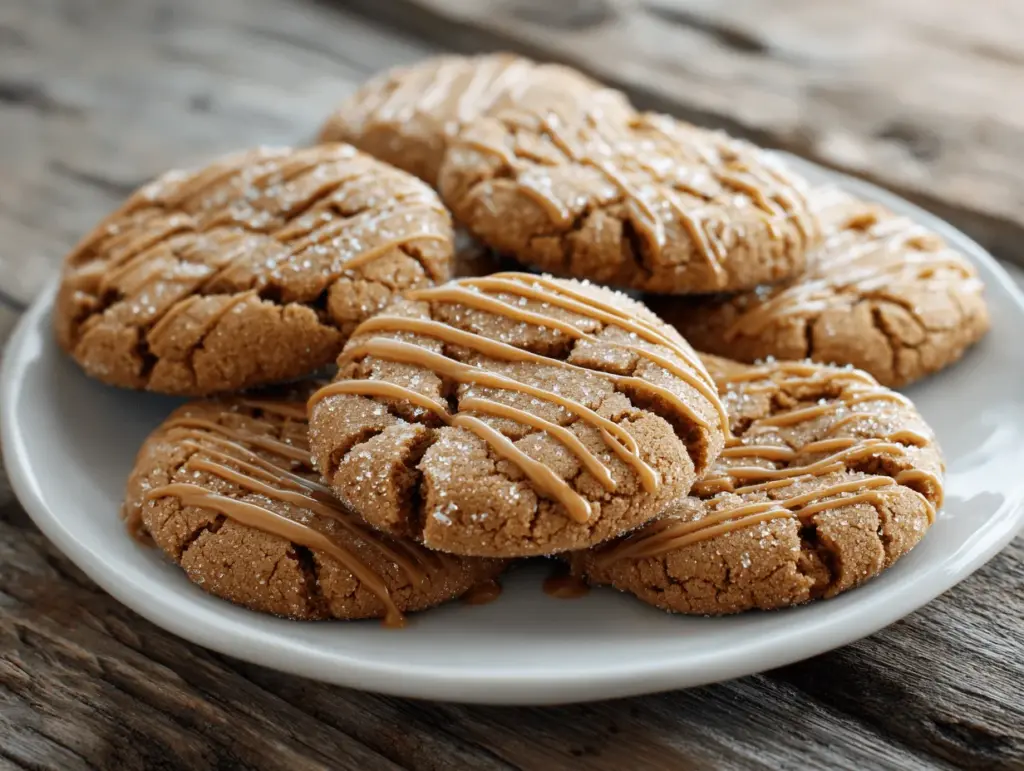
The scent of maple and brown sugar melting together in the oven is honestly one of my favorite things about baking. I’m not exaggerating when I say these chewy maple brown sugar cookies are downright irresistible—think bakery-style cookies, but even better because they’re coming out of your own kitchen. The first time I made these, I was aiming for a cookie that had the softness of a classic chocolate chip cookie, but with that deep, cozy sweetness from maple syrup and brown sugar. Let’s just say, the results didn’t disappoint!
This recipe has become my go-to whenever I want to impress guests or just treat myself after a long week. There’s something about biting into a thick, chewy cookie with a crinkly top and gooey center that feels like the ultimate comfort snack. And, trust me, if you love those bakery cookies that look almost too perfect to eat, you’ll be amazed at how easy it is to make these at home. No fancy mixers, no rare ingredients—just a few pantry staples and a little bit of maple magic.
Honestly, I’ve lost count of how many times I’ve tweaked and tested this recipe. It’s always a hit at family gatherings, bake sales, and even as a sweet surprise in my kids’ lunchboxes. If you’re searching for the best chewy maple brown sugar cookies recipe, you’re in the right spot. These cookies are rich, soft, and have that perfect hit of maple flavor—without being overpowering. Whether you’re baking for a crowd or just for yourself (no judgment here!), these cookies will definitely become a staple in your home. Let’s get into why you’re going to fall in love with them.
Why You’ll Love This Chewy Maple Brown Sugar Cookies Recipe
- Quick & Easy: These cookies come together in just about 30 minutes from start to finish. You don’t need to chill the dough—unless you want extra thick cookies (I’ll share more on that later!).
- Simple Ingredients: Everything you need is probably sitting in your pantry right now. No obscure baking supplies—just the basics, plus a splash of real maple syrup for that signature flavor.
- Perfect for Any Occasion: Whether it’s a cozy movie night, holiday cookie swap, or just a Tuesday pick-me-up, these chewy maple brown sugar cookies always fit the bill.
- Crowd-Pleaser: I’ve yet to meet anyone (kids or adults) who can resist these. They have that “just one more” quality—don’t say I didn’t warn you!
- Unbelievably Delicious: The combination of brown sugar and maple syrup creates a rich, caramel-like flavor, while the chewy center and crisp edges give you that classic bakery-style texture at home.
What sets this recipe apart? Well, for starters, I use both dark brown sugar and pure maple syrup to create layers of flavor you won’t find in your average cookie. There’s also a little trick with baking soda and an extra egg yolk that keeps the cookies ultra-chewy—like, you-can-bend-them chewy! And you know what? The maple flavor isn’t just a whisper; it’s the star, but without being cloying.
If you’ve ever struggled to get that bakery-style crinkly top or deep flavor at home, this recipe has you covered. I’ve baked dozens of batches, tested different flours, and even tried vegan swaps (more on that down below). This is my best version—tested, approved, and ready for your kitchen. These cookies are the kind that make you close your eyes for a second with the first bite. They’re comforting, nostalgic, and a little bit fancy, yet totally approachable. Trust me, they’ll be your new favorite treat!
What Ingredients You Will Need
This chewy maple brown sugar cookies recipe keeps things real simple. The ingredients all work together to give you that crave-worthy chew, a rich maple flavor, and a lovely golden color. Don’t worry—if you don’t have something on hand, I’ve got suggestions for swaps too.
- Unsalted butter, softened (113g/½ cup) – Room temperature butter gives cookies the best texture. I like to use Kerrygold or store-brand if I’m baking a big batch.
- Dark brown sugar, packed (200g/1 cup) – For that deep, molasses-y flavor and extra chewiness. Light brown sugar works in a pinch, but dark is best!
- Granulated sugar (50g/¼ cup) – Balances the flavor and helps with those crinkly tops.
- Pure maple syrup (60ml/¼ cup) – The real deal! Don’t use pancake syrup here—it just isn’t the same. Grade A or B both work. Maple extract is a decent backup if you’re out of syrup (use ½ teaspoon and add an extra tablespoon of brown sugar).
- Large egg + 1 egg yolk – Room temperature eggs mix in easier and give the cookies a richer, chewier finish. The extra yolk is my secret for ultra-chewiness.
- Vanilla extract (1 tsp) – Adds warmth and rounds out the maple flavor.
- All-purpose flour (240g/2 cups) – King Arthur and Gold Medal are my go-tos. Spoon and level for accuracy, or weigh if you have a scale.
- Baking soda (1 tsp) – Helps the cookies spread just the right amount and keeps them soft.
- Kosher salt (½ tsp) – Balances the sweet and deepens every flavor note.
- Optional: Chopped pecans or walnuts (½ cup/60g) – For crunch and a nutty twist, but they’re totally optional. Toast them for extra flavor!
- Optional: Maple sugar or turbinado sugar for topping – Sprinkling a bit on top before baking gives a gorgeous sparkle and a touch of crunch.
If you need to make this recipe gluten-free, swap in a cup-for-cup gluten-free all-purpose flour blend (I like Bob’s Red Mill). For dairy-free cookies, plant-based butter works just fine (I’ve used Earth Balance with great results). And if you want to get festive, mix in a handful of white chocolate chips or dried cranberries. These cookies are forgiving—feel free to experiment!
Equipment Needed
- Large mixing bowl – You’ll need plenty of space to cream the butter and sugar together. If you have a stand mixer, that works too, but a sturdy hand mixer is all you really need.
- Electric hand mixer or stand mixer – For creaming butter and sugar. You can use a wooden spoon and a little elbow grease if you don’t have a mixer, but it takes more time.
- Baking sheets – Heavy-duty or light-colored sheets prevent cookies from over-browning. I use my old warped ones all the time, just line them with parchment paper!
- Parchment paper or silicone baking mat – Keeps cookies from sticking and makes for easy clean-up. I’m a parchment fan—no scrubbing pans here.
- Cookie scoop (2-tablespoon size) – For uniform cookies. If you don’t have one, just use a regular spoon and eyeball it. I’ve done both many times!
- Wire cooling rack – Lets the cookies cool evenly and keeps the bottoms from getting soggy.
- Measuring cups and spoons – Accuracy matters for that perfect texture. If you have a kitchen scale, even better.
If you’re missing a fancy scoop or mat, don’t sweat it. I’ve made these on just about every surface—foil, old cookie sheets, you name it! Just grease the pan lightly if you’re skipping parchment. For best results, keep your mixer clean and dry after each use, and store your baking sheets flat (they warp less that way). Budget tip: I picked up my favorite baking sheet at a thrift store for $2. Works like a charm.
Preparation Method
-
Preheat the oven: Set your oven to 350°F (175°C). Line 2 baking sheets with parchment paper or silicone mats.
Tip: Starting with a hot oven helps your cookies set on the edges but stay soft inside. -
Cream the butter and sugars: In a large bowl, cream together ½ cup (113g) softened unsalted butter, 1 cup (200g) dark brown sugar, and ¼ cup (50g) granulated sugar. Mix on medium speed for 2-3 minutes, until the mixture looks fluffy and pale.
Sensory cue: It should smell sweet and look creamy, not greasy or separated. -
Add wet ingredients: Pour in ¼ cup (60ml) pure maple syrup, 1 large egg, 1 egg yolk, and 1 teaspoon vanilla extract. Mix until totally combined, scraping down the sides as needed.
Warning: Don’t rush this step—if the mixture looks curdled, keep mixing until it smooths out. -
Combine dry ingredients: In a separate bowl, whisk together 2 cups (240g) all-purpose flour, 1 teaspoon baking soda, and ½ teaspoon kosher salt.
If adding nuts, toss them into the dry mix now to keep them from sinking. -
Mix dry and wet: Add the flour mixture to the wet ingredients in two parts, mixing on low or by hand. Stop as soon as there are no streaks of flour—don’t overmix or your cookies might turn out tough.
Sensory cue: Dough should be thick and sticky but not dry. If it’s too stiff, add a teaspoon of milk or maple syrup. - Stir in add-ins: If using, fold in ½ cup (60g) chopped nuts or white chocolate chips. I like to use a spatula for this step.
-
Scoop the dough: Using a 2-tablespoon cookie scoop or spoon, place dough balls 2 inches apart on the prepared baking sheets. For extra bakery-style flair, sprinkle a little maple or turbinado sugar on top.
Prep note: If you want thicker cookies, chill the dough for 15-30 minutes. Totally optional, but it helps them keep their shape. -
Bake: Bake one sheet at a time for 10-12 minutes, until edges are golden and centers look just set (they’ll firm up as they cool).
Warning: Don’t overbake! The cookies should look a bit underdone in the middle when you take them out. -
Cool: Let the cookies cool on the baking sheet for 5 minutes, then transfer to a wire rack.
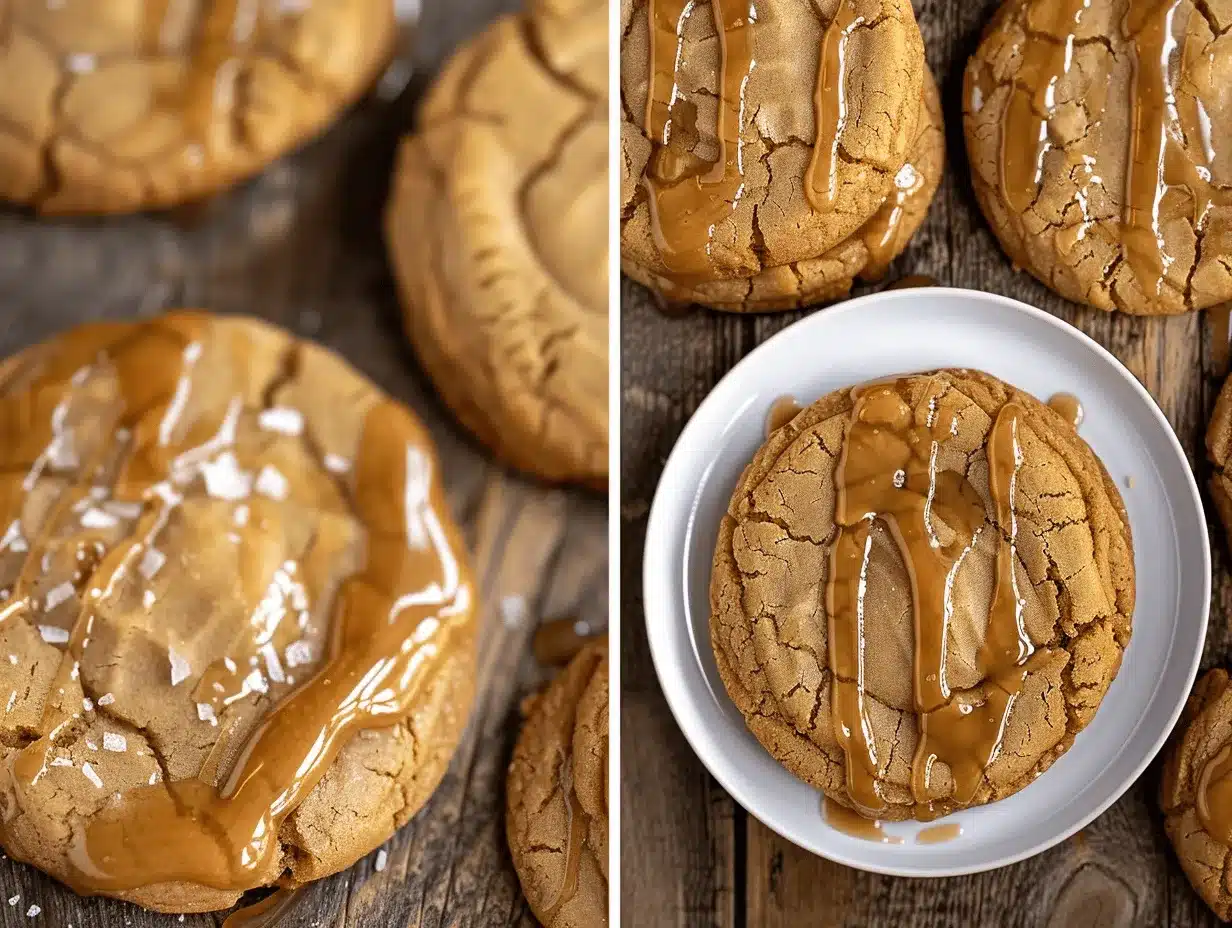
Sensory cue: They’ll be soft and chewy with crinkled tops and a deep, maple aroma. - Serve and enjoy: Dig in while they’re warm or let them cool completely for that classic chewy texture.
If you notice your cookies spreading too much, chill the dough longer. If they’re too puffy, flatten them slightly before baking. Honestly, don’t stress—these cookies are pretty forgiving, and a little imperfection just means they’re homemade!
Cooking Tips & Techniques
- Use real maple syrup: I know, the good stuff isn’t cheap, but trust me—pancake syrup just won’t give you that rich, natural maple flavor. The difference is huge!
- Don’t overmix: Once the flour goes in, mix gently. Overworking the dough leads to tough cookies. I’ve made that mistake when distracted, and it’s always a letdown.
- Watch your baking time: Every oven bakes a little differently. The key is to pull the cookies when the edges are set but the centers look a touch underbaked. They’ll finish setting as they cool, staying super chewy.
- Room temperature ingredients: This isn’t just a pro-baker thing—it really does help everything blend smoothly, giving you that perfect texture.
- Customize the size: For bakery-sized cookies, scoop larger balls and bake a minute or two longer. For bite-sized treats, make them half the size and check them early.
Common mistakes? Overbaking is the big one—if you wait until the cookies look totally set, they’ll end up dry. Also, using margarine or a low-quality butter can make the cookies spread too much or taste flat. I’ve learned the hard way that chilling the dough (even if just for 10 minutes) helps prevent spreading and makes the flavor pop. And, if you’re baking multiple sheets, rotate your pans halfway through for even browning—my old oven bakes hotter in the back!
Last tip: If you want perfectly round cookies, swirl a drinking glass or biscuit cutter around them right after baking (while they’re still hot and soft). It’s a fun trick that gives you picture-perfect results every time.
Variations & Adaptations
- Gluten-Free: Swap the all-purpose flour for a cup-for-cup gluten-free blend. I’ve used Bob’s Red Mill with great results—just make sure it contains xanthan gum for structure.
- Vegan/Dairy-Free: Use vegan butter and a flax egg (1 tbsp ground flaxseed + 2.5 tbsp water, let sit for 5 minutes) for the egg. The cookies come out a bit softer but still chewy.
- Seasonal Add-Ins: Stir in ½ cup dried cranberries or chopped dried apricots for a fall twist. In winter, sprinkle with cinnamon-sugar before baking for extra warmth.
- Nut-Free: Skip the nuts entirely, or add sunflower seeds for a little crunch. I’ve made these nut-free for kids’ parties, and they’re always a hit.
- Maple Espresso: Add 1 teaspoon instant espresso powder to the dry ingredients for a subtle coffee kick that pairs perfectly with maple.
My personal favorite? Swapping half the butter for browned butter gives these cookies a toasty, nutty depth that’s almost too good. And for a fun twist, sandwich two cookies with maple buttercream for an indulgent dessert. Don’t be afraid to make this recipe your own—there’s plenty of room to play!
Serving & Storage Suggestions
These chewy maple brown sugar cookies are best served slightly warm, when the centers are gooey and the edges are crisp. For a bakery-worthy presentation, arrange them on a pretty platter and sprinkle with a tiny pinch of flaked sea salt or extra maple sugar.
Pair with a mug of hot coffee, spiced chai, or even a glass of cold milk. They’re awesome for brunches, lunchbox treats, or as a sweet finish to a cozy dinner.
- Storage: Keep cookies in an airtight container at room temperature for up to 5 days. Layer with parchment to prevent sticking.
- Freezer: Freeze baked cookies (or unbaked dough balls) in zip-top bags for up to 3 months. Bake dough straight from the freezer—just add 2-3 minutes to the baking time.
- Reheating: Warm cookies in the microwave for 10 seconds to bring back that fresh-baked softness.
The maple flavor deepens after a day or two, making leftovers even better. If you’re gifting, wrap these cookies in parchment and tie with baker’s twine for a rustic, homemade touch.
Nutritional Information & Benefits
Each cookie (based on 24 cookies per batch) has approximately:
- Calories: 160
- Fat: 7g
- Carbs: 24g
- Protein: 2g
- Sugar: 14g
The brown sugar and real maple syrup provide trace minerals and antioxidants—nothing too dramatic, but every little bit counts! If you use whole wheat flour, you’ll add a little extra fiber. These cookies can easily be made nut-free and dairy-free, so they’re great for a variety of diets. Just be aware of allergens in the butter, eggs, or nuts if you’re sharing with friends. Honestly, I consider these a special treat that also brings a little bit of comfort and joy—totally worth it in my book!
Conclusion
In the world of homemade cookies, these chewy maple brown sugar cookies are the ones I reach for again and again. They’re easy, packed with warm maple flavor, and have that bakery-style texture everyone craves. Plus, you can make them your own with tons of variations!
I truly love how these cookies bring people together—from my kitchen to yours. Whether you’re baking for a party or just because, you’ll be glad you tried this recipe. If you give them a go, I’d love to hear how they turn out—leave a comment below, share your photos, or tag me in your baking adventures. Don’t be shy about adding your own twist, either. Happy baking, and may your kitchen smell like maple heaven soon!
Frequently Asked Questions
Can I use maple extract instead of maple syrup?
Yes, you can, but the flavor will be a bit different. Use ½ teaspoon maple extract in place of the syrup, and add an extra tablespoon of brown sugar to keep the dough moist.
Why did my cookies turn out flat?
This usually happens if the butter was too soft or the dough got too warm. Try chilling the dough for 20-30 minutes before scooping next time.
Can I freeze the dough for later?
Absolutely! Scoop the dough into balls, freeze on a baking sheet, then transfer to a zip-top bag. Bake from frozen, just adding 2-3 extra minutes to the bake time.
What’s the best way to make these cookies gluten-free?
Swap the all-purpose flour for a 1:1 gluten-free flour blend. Make sure it contains xanthan gum for best texture.
How do I get perfectly round cookies?
As soon as the cookies come out of the oven, use a round cookie cutter or glass to gently swirl around the edges. It’s an easy trick for bakery-worthy cookies!
Pin This Recipe!
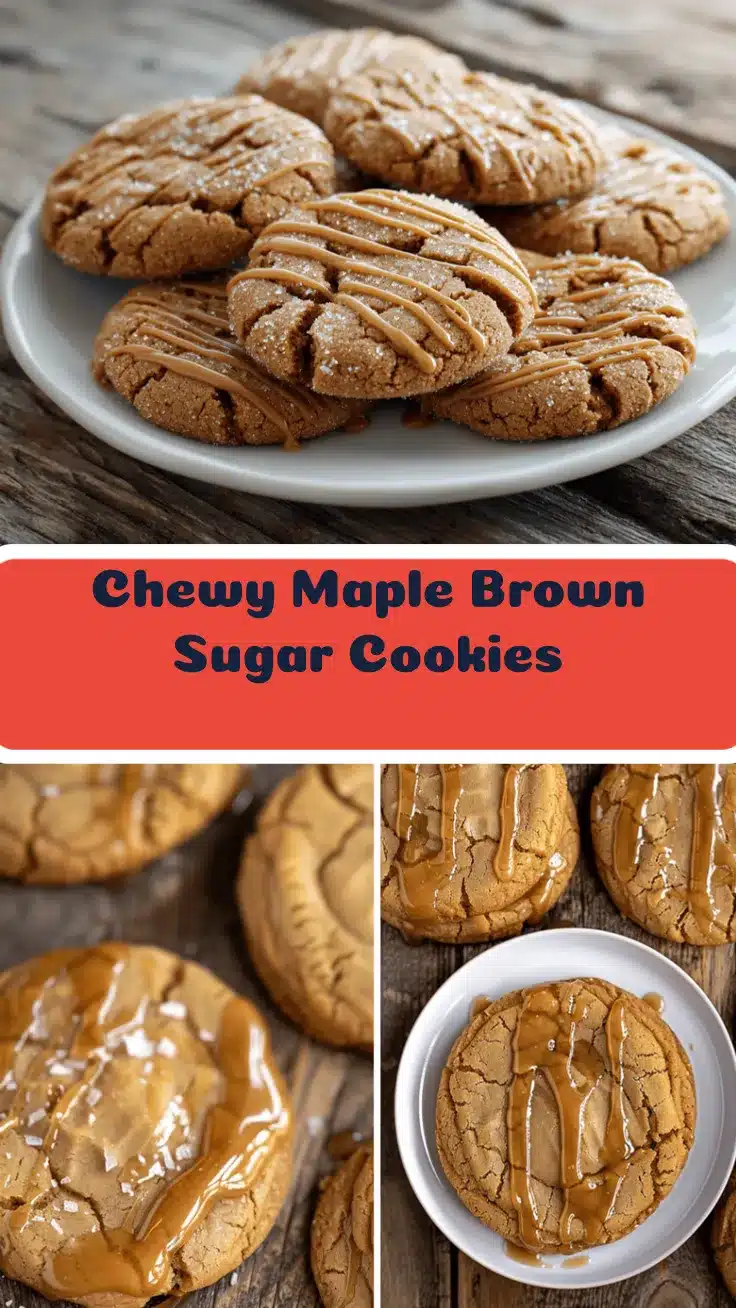
Chewy Maple Brown Sugar Cookies

These bakery-style chewy maple brown sugar cookies are rich, soft, and packed with deep maple flavor. Easy to make with pantry staples, they’re perfect for any occasion and sure to impress family and friends.
- Prep Time: 15 minutes
- Cook Time: 12 minutes
- Total Time: 27 minutes
- Yield: 24 cookies 1x
- Category: Dessert
- Cuisine: American
Ingredients
- 1/2 cup (113g) unsalted butter, softened
- 1 cup (200g) dark brown sugar, packed
- 1/4 cup (50g) granulated sugar
- 1/4 cup (60ml) pure maple syrup
- 1 large egg
- 1 egg yolk
- 1 teaspoon vanilla extract
- 2 cups (240g) all-purpose flour
- 1 teaspoon baking soda
- 1/2 teaspoon kosher salt
- Optional: 1/2 cup (60g) chopped pecans or walnuts
- Optional: Maple sugar or turbinado sugar for topping
Instructions
- Preheat the oven to 350°F (175°C). Line 2 baking sheets with parchment paper or silicone mats.
- In a large bowl, cream together the softened butter, dark brown sugar, and granulated sugar with a mixer on medium speed for 2-3 minutes until fluffy and pale.
- Add the maple syrup, egg, egg yolk, and vanilla extract. Mix until fully combined, scraping down the sides as needed.
- In a separate bowl, whisk together the flour, baking soda, and kosher salt. If using nuts, toss them in now.
- Add the dry ingredients to the wet mixture in two parts, mixing on low or by hand until just combined. Do not overmix.
- Fold in optional add-ins like nuts or white chocolate chips with a spatula.
- Scoop dough using a 2-tablespoon cookie scoop or spoon, placing balls 2 inches apart on prepared baking sheets. Sprinkle with maple or turbinado sugar if desired.
- Bake one sheet at a time for 10-12 minutes, until edges are golden and centers look just set.
- Let cookies cool on the baking sheet for 5 minutes, then transfer to a wire rack to cool completely.
- Serve warm for gooey centers or let cool for classic chewy texture.
Notes
For extra thick cookies, chill the dough for 15-30 minutes before baking. Use real maple syrup for best flavor. Do not overbake—cookies should look slightly underdone in the center when removed from the oven. For gluten-free, use a 1:1 gluten-free flour blend. For dairy-free, use plant-based butter. Store in an airtight container for up to 5 days or freeze for up to 3 months.
Nutrition
- Serving Size: 1 cookie
- Calories: 160
- Sugar: 14
- Sodium: 90
- Fat: 7
- Saturated Fat: 4
- Carbohydrates: 24
- Protein: 2
Keywords: maple cookies, brown sugar cookies, chewy cookies, bakery style cookies, easy cookie recipe, maple dessert, fall cookies, homemade cookies


