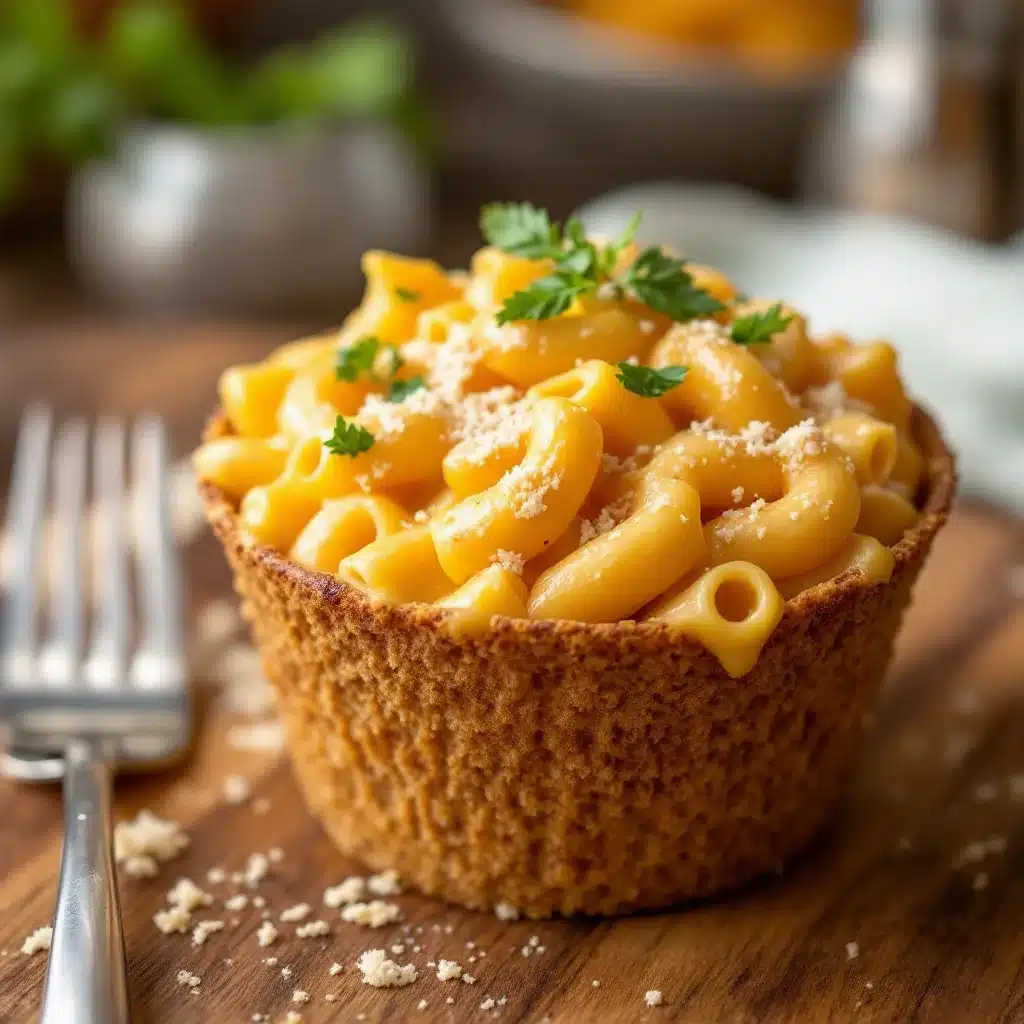
My son came home from third grade one Tuesday looking like he had survived a cafeteria war. He pushed his lunchbox across the counter and said, “Mom, the thermos leaked again. And the noodles were cold by second period.” That was the day I decided I wasn’t going to let another thermos defeat me. I had tried all sorts of things—preheating the thermos with hot water, wrapping it in a towel, even sending soup that was practically boiling. Nothing worked. The noodles always ended up sad and clumpy.
So I went back to the drawing board. I thought about what actually holds up in a thermos for hours. The answer wasn’t more complicated—it was simpler. I needed a sauce that stayed creamy without separating, pasta that didn’t turn to mush, and a method that didn’t require me to wake up at dawn. After about six failed attempts (one where the cheese sauce turned into a solid brick, I’m not kidding), I landed on this recipe. These easy thermos-ready mac and cheese cups for school are the result of pure trial and error, and honestly, they changed our lunch routine completely.
Now my son actually looks forward to opening his thermos at lunch. He says the kid next to him always asks for a bite. That’s the kind of win you don’t forget. These cups are creamy, cheesy, and somehow still perfect four hours later. No reheating required. No leaks. No complaints. If you’ve been struggling with thermos lunches like I was, this is the recipe that finally works.
Why You’ll Love This Recipe
I tested this recipe on my own kids, my neighbor’s kids, and even a picky nephew who only eats beige food. Everyone gave it a thumbs up. Here’s why this one stands out from every other mac and cheese recipe you’ve tried:
- Stays Creamy for Hours: The secret is in the sauce-to-pasta ratio and a little trick with the cheese. No more dry, clumpy noodles at lunchtime.
- Thermos-Friendly Design: Every element of this recipe was built to survive the thermos test. The pasta is cooked just shy of al dente so it finishes cooking in the hot thermos without turning to mush.
- 10 Minutes Total Prep: From start to finish, you can have these cups assembled and ready to go in about ten minutes. That’s faster than most school drop-off lines.
- Simple Pantry Ingredients: You don’t need fancy cheese or specialty pasta. Regular elbow macaroni, sharp cheddar, and a few pantry staples are all you need.
- Customizable for Picky Eaters: You can add broccoli, peas, or even some crispy bacon on top. Or keep it plain. The recipe works either way.
- Budget-Friendly: This costs way less than those store-bought thermos meals, and it tastes about a hundred times better.
What makes this recipe different from all the other mac and cheese recipes out there? It’s the method. Most recipes tell you to cook the pasta fully and then add the sauce. That’s a disaster for a thermos. Instead, I undercook the pasta by a full minute, use a slightly thicker cheese sauce, and layer everything in the thermos in a specific order. It sounds fussy, but it takes no extra time. And the result is mac and cheese that tastes like you just made it, even after sitting in a backpack for three hours.
This is the kind of recipe that makes you feel like you’ve got this whole lunch thing figured out. It’s comfort food that actually works for real life.
What Ingredients You Will Need
This recipe uses simple, everyday ingredients that you probably already have in your kitchen. The magic is in how they come together. Here’s what you’ll need to make these easy thermos-ready mac and cheese cups for school:
- Elbow Macaroni (1 cup / 100g): I use regular elbow macaroni because it fits nicely in a thermos and holds the sauce well. You can use any small pasta shape like shells, rotini, or ditalini. Just avoid very large shapes that might not heat evenly.
- Sharp Cheddar Cheese (1 cup shredded / 100g): Sharp cheddar gives the most flavor. I prefer block cheese that I shred myself—pre-shredded cheese has anti-caking agents that make the sauce grainy. Tillamook or Cabot are my go-to brands for consistent melting.
- Milk (1/2 cup / 120ml): Whole milk gives the creamiest sauce, but 2% works fine. Don’t use skim milk—the sauce won’t be rich enough to hold up in the thermos.
- Unsalted Butter (2 tablespoons / 28g): Butter adds richness and helps create a smooth roux base for the sauce.
- All-Purpose Flour (2 tablespoons / 16g): This thickens the sauce so it stays creamy instead of separating in the thermos. No substitutions here—coconut flour or almond flour won’t work the same way.
- Salt (1/2 teaspoon): I use fine sea salt. Adjust to taste.
- Dry Mustard Powder (1/4 teaspoon): This is the secret ingredient. It doesn’t make the mac and cheese taste like mustard—it just enhances the cheesy flavor and helps the sauce stay stable. Trust me on this one.
- Garlic Powder (1/4 teaspoon): Adds a subtle savory note without being overpowering.
- Optional Mix-Ins: Cooked broccoli florets, steamed peas, crumbled bacon, or a sprinkle of paprika on top.
For the thermos assembly, you’ll also need a good quality insulated thermos. I use a stainless steel one with a wide mouth—it makes filling and eating so much easier. More on that in the equipment section.
One thing I learned the hard way: don’t use pre-shredded cheese. I did it once when I was in a hurry, and the sauce turned out gritty and separated by lunchtime. The anti-caking powders really do mess with the texture. Take the extra two minutes to shred your own cheese. Your thermos will thank you.
Equipment Needed
You don’t need a lot of fancy equipment for this recipe, which is part of why I love it. Here’s what you’ll need:
- Medium Saucepan: For cooking the pasta and making the cheese sauce. A 3-quart saucepan is perfect.
- Whisk: Essential for making a smooth roux and cheese sauce without lumps.
- Box Grater or Food Processor: For shredding the cheese. I use a box grater because it’s quick and easy to clean.
- Measuring Cups and Spoons: For accurate measurements.
- Wide-Mouth Thermos (8-10 oz / 240-300ml capacity): This is the most important piece of equipment. I use a Thermos brand stainless steel food jar. The wide mouth makes it easy to fill and eat from. Make sure to preheat it with hot water before adding the mac and cheese.
- Small Bowl: For mixing the cheese sauce before adding it to the thermos.
- Spatula: For scraping every last bit of cheese sauce into the thermos. Waste not, want not.
If you don’t have a wide-mouth thermos, you can use a regular thermos, but it’s harder to fill and eat from. I found mine at a thrift store for three dollars, so you don’t need to spend a lot. Just make sure it’s insulated and has a tight seal.
Preparation Method
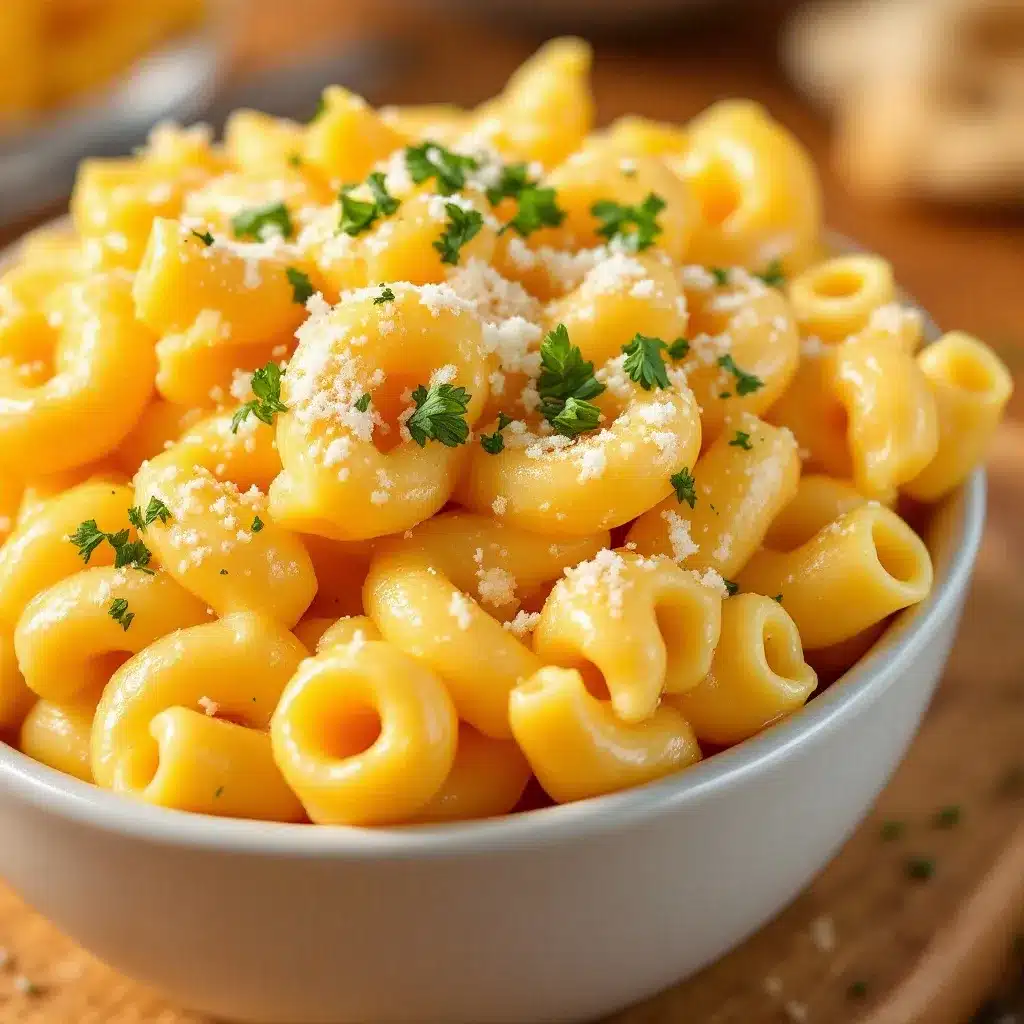
This method is designed to be fast, efficient, and thermos-friendly. Follow these steps exactly, and you’ll have perfect mac and cheese cups ready in about ten minutes.
- Preheat Your Thermos: Fill your thermos with boiling water and let it sit while you prepare everything. This is the most important step for keeping the mac and cheese hot for hours. Don’t skip it.
- Cook the Pasta: Bring a medium pot of salted water to a boil. Add the elbow macaroni and cook for 1 minute less than the package directions. For most brands, that’s about 6-7 minutes. You want the pasta to be slightly firm—it will continue cooking in the hot thermos. Drain the pasta and set it aside.
- Make the Roux: In the same pot, melt the butter over medium heat. Once it’s foamy, whisk in the flour. Cook for 1-2 minutes, stirring constantly, until the mixture is golden and smells slightly nutty. This gets rid of the raw flour taste.
- Add the Milk: Slowly pour in the milk while whisking constantly. Keep whisking until the mixture thickens, about 2-3 minutes. It should be thick enough to coat the back of a spoon but still pourable.
- Season the Sauce: Stir in the salt, dry mustard powder, and garlic powder. These seasonings make the cheese flavor pop and help the sauce stay stable in the thermos.
- Add the Cheese: Reduce the heat to low. Add the shredded cheddar cheese a handful at a time, stirring until each addition is fully melted before adding the next. This prevents the sauce from becoming grainy. Once all the cheese is melted, the sauce should be smooth and glossy.
- Combine Pasta and Sauce: Add the cooked pasta to the cheese sauce and stir until every piece is coated. The sauce will be thicker than regular mac and cheese—that’s exactly what you want.
- Assemble the Thermos: Empty the hot water from your thermos. Use a spatula to transfer the mac and cheese into the thermos, pressing it down gently to eliminate air pockets. Fill it all the way to the top—less air means less heat loss.
- Seal and Store: Close the thermos tightly. Let it sit for 5 minutes before putting it in the lunchbox. This allows the heat to distribute evenly. Don’t open it again until lunchtime.
A few things I’ve learned from making this dozens of times: If the sauce seems too thick when you’re mixing it with the pasta, don’t worry. It will loosen up slightly as it sits in the thermos. Also, make sure your pasta is well-drained before adding it to the sauce. Excess water can make the sauce watery and cause separation. I give the colander a good shake to get rid of any lingering water.
Cooking Tips & Techniques
I’ve made plenty of mistakes with thermos lunches, so you don’t have to. Here are the tips that made the biggest difference:
The Undercook Rule: Cook your pasta 1 minute less than al dente. I know it feels wrong, but the pasta will continue cooking in the hot thermos. If you cook it fully, you’ll end up with mushy noodles by lunchtime. I learned this the hard way when my son came home and said his mac and cheese was “squishy.” Never again.
Preheat Like Your Lunch Depends On It: Fill the thermos with boiling water and let it sit for at least 5 minutes while you make the mac and cheese. This step alone can add an extra hour of hotness to your lunch. I pour the water in right when I start cooking, and by the time I’m done, the thermos is nice and toasty.
Thicker is Better: Your cheese sauce should be noticeably thicker than what you’d serve for dinner. Think of it as a coating consistency rather than a pouring consistency. The thicker sauce holds up better in the thermos and doesn’t separate.
Don’t Overfill the Thermos: Leave about a half-inch of space at the top. This allows for steam expansion without creating so much pressure that the thermos leaks. I’ve had a few leaky lunchboxes, and they are not fun to clean up.
Use a Wide-Mouth Thermos: I can’t stress this enough. A wide-mouth thermos makes filling, eating, and cleaning so much easier. My son can eat directly from his thermos with a spoon without making a mess. Regular thermoses are harder to eat from and harder to clean.
Test Your Timing: Make the mac and cheese as close to lunchtime as possible. If you make it the night before, it won’t stay hot. I make it in the morning while my son eats breakfast, and it’s still warm when he opens it at noon.
Variations & Adaptations
This recipe is surprisingly flexible. Here are some variations I’ve tried and loved:
Broccoli and Cheddar: Steam some broccoli florets and chop them small. Stir them into the mac and cheese before adding it to the thermos. My son actually eats broccoli this way—he says the cheese sauce makes it taste like a treat.
Bacon Lover’s Version: Cook 2-3 strips of bacon until crispy, crumble them, and sprinkle on top of the mac and cheese in the thermos. The bacon stays crunchy for a surprising amount of time. I’ve also used bacon bits in a pinch, but real bacon is better.
Gluten-Free Option: Use gluten-free elbow pasta and a gluten-free all-purpose flour blend for the roux. The recipe works exactly the same way. I’ve tested this with my gluten-sensitive niece, and she couldn’t tell the difference.
Vegan Version: Use plant-based butter, unsweetened oat milk, and a good quality vegan cheddar shreds. The sauce won’t be as creamy, but it still holds up well in the thermos. I’ve made this for a school potluck, and it was a hit with the vegan kids.
Spicy Kick: Add a pinch of cayenne pepper or a few dashes of hot sauce to the cheese sauce. My husband loves this version for his work lunches. It adds a nice warmth without being overwhelming.
Protein Boost: Stir in some shredded rotisserie chicken or cooked ground beef. This turns the mac and cheese into a more substantial meal. I do this on days when I know my son has a long afternoon ahead.
Serving & Storage Suggestions
These mac and cheese cups are designed to be eaten straight from the thermos at room temperature or slightly warm. They don’t need reheating, which is the whole point.
Serving Temperature: The mac and cheese will be hot when you pack it and will gradually cool to warm by lunchtime. If your child prefers it hotter, preheat the thermos with boiling water for a full 10 minutes instead of 5. That extra time makes a noticeable difference.
What to Serve With It: These cups are a complete meal on their own, but you can add some sides. I like to pack some baby carrots, apple slices, or a small container of grapes. A crispy broccoli salad with bacon and cranberries would also be a great side if you have leftovers. For a treat, a small cookie or a piece of fruit works well.
Storage Instructions: If you’re making these for the next day, you can prepare the mac and cheese, let it cool completely, and store it in an airtight container in the refrigerator. The next morning, reheat it on the stovetop with a splash of milk to loosen the sauce, then transfer it to a preheated thermos. I don’t recommend making it more than a day ahead—the texture suffers.
Freezer Option: You can freeze the mac and cheese without the thermos. Portion it into freezer-safe containers and freeze for up to 2 months. To use, thaw overnight in the refrigerator, reheat on the stovetop with a splash of milk, and pack in a preheated thermos. The texture won’t be quite as good as fresh, but it’s still pretty darn tasty.
Flavor Development: The mac and cheese actually tastes better after sitting in the thermos for an hour or two. The flavors meld together, and the sauce thickens to a perfect consistency. So don’t worry if you pack it a little early—it only gets better.
Nutritional Information & Benefits
Here’s the approximate nutritional breakdown for one serving of these easy thermos-ready mac and cheese cups for school (based on the recipe as written, without mix-ins):
- Calories: 420
- Protein: 18g
- Fat: 22g
- Carbohydrates: 40g
- Fiber: 2g
- Calcium: 350mg (35% DV)
- Iron: 2mg (11% DV)
This recipe provides a good source of protein and calcium, thanks to the milk and cheese. The pasta provides carbohydrates for energy, which is perfect for active school days. If you add broccoli or peas, you’ll also get some fiber and vitamins.
For dietary considerations: This recipe contains dairy and gluten. For a dairy-free version, use plant-based butter, oat milk, and vegan cheese. For a gluten-free version, use gluten-free pasta and flour. The recipe is naturally nut-free and egg-free, which makes it safe for many school allergy policies.
I personally love that this recipe gives my son a warm, comforting meal that actually fills him up. He used to come home from school starving and cranky. Now he has enough energy to make it through the afternoon without a meltdown. That’s a win in my book.
Conclusion
These easy thermos-ready mac and cheese cups for school have genuinely changed our lunch routine. No more sad, cold noodles. No more leaky thermoses. No more complaints. Just creamy, cheesy goodness that stays perfect for hours.
I love that this recipe is simple enough to make on a busy morning but special enough that my son actually looks forward to lunch. It’s the kind of recipe that feels like a win for everyone—kids get a warm, delicious meal, and parents get the satisfaction of knowing their child is eating something homemade and nourishing.
If you’ve been struggling with thermos lunches, I really encourage you to give this recipe a try. It might take one or two attempts to get the timing right for your thermos, but once you do, you’ll wonder how you ever managed without it.
I’d love to hear how it works for you! Drop a comment below and let me know if your kids loved it, what mix-ins you tried, or if you have any questions. And if you’re looking for more easy lunch ideas, check out this crispy samosa-spiced roasted potatoes recipe that works great as a warm thermos lunch too. Happy cooking!
Frequently Asked Questions
Can I use pre-shredded cheese?
I don’t recommend it. Pre-shredded cheese has anti-caking agents that make the sauce grainy and can cause it to separate in the thermos. Shredding your own cheese from a block takes just a couple of minutes and makes a huge difference in texture.
How long will the mac and cheese stay hot in the thermos?
With proper preheating (filling the thermos with boiling water for 5-10 minutes before adding the mac and cheese), it should stay warm for about 4-5 hours. It won’t be piping hot, but it will be pleasantly warm. If your child eats lunch earlier in the day, it will still be quite warm.
Can I make this recipe in advance?
You can make the mac and cheese a day ahead and store it in the refrigerator. Reheat it on the stovetop with a splash of milk before packing it in a preheated thermos. I don’t recommend making it more than a day ahead because the texture starts to decline.
What if my child doesn’t like sharp cheddar?
You can use mild cheddar, colby jack, or even a combination of cheeses. Just avoid very soft cheeses like mozzarella—they don’t create a stable sauce for the thermos. A good melting cheese like gouda or fontina would also work well.
Can I double this recipe for multiple thermoses?
Absolutely. The recipe scales perfectly. Just make sure you have a large enough pot to cook the pasta and make the sauce. You’ll also need to preheat each thermos individually before filling them. I’ve made this for three kids at once, and it works great.
Pin This Recipe!

Easy Thermos-Ready Mac and Cheese Cups Made in 10 Minutes

Creamy, cheesy mac and cheese that stays perfect for hours in a thermos. No reheating required, no leaks, and ready in just 10 minutes.
- Prep Time: 5 minutes
- Cook Time: 5 minutes
- Total Time: 10 minutes
- Yield: 4 servings 1x
- Category: Main Course
- Cuisine: American
Ingredients
- 1 cup (100g) elbow macaroni
- 1 cup (100g) sharp cheddar cheese, shredded
- 1/2 cup (120ml) whole milk
- 2 tablespoons (28g) unsalted butter
- 2 tablespoons (16g) all-purpose flour
- 1/2 teaspoon fine sea salt
- 1/4 teaspoon dry mustard powder
- 1/4 teaspoon garlic powder
- Optional mix-ins: cooked broccoli florets, steamed peas, crumbled bacon, or paprika
Instructions
- Preheat your thermos: Fill it with boiling water and let it sit while you prepare everything.
- Cook the pasta: Bring a medium pot of salted water to a boil. Add the elbow macaroni and cook for 1 minute less than the package directions (about 6-7 minutes). Drain and set aside.
- Make the roux: In the same pot, melt the butter over medium heat. Once foamy, whisk in the flour and cook for 1-2 minutes until golden and nutty.
- Add the milk: Slowly pour in the milk while whisking constantly. Continue whisking until the mixture thickens, about 2-3 minutes.
- Season the sauce: Stir in the salt, dry mustard powder, and garlic powder.
- Add the cheese: Reduce heat to low. Add the shredded cheddar a handful at a time, stirring until each addition is fully melted before adding the next.
- Combine pasta and sauce: Add the cooked pasta to the cheese sauce and stir until every piece is coated.
- Assemble the thermos: Empty the hot water from the thermos. Transfer the mac and cheese into the thermos, pressing down gently to eliminate air pockets. Fill to the top.
- Seal and store: Close the thermos tightly. Let it sit for 5 minutes before putting it in the lunchbox. Do not open until lunchtime.
Notes
Cook pasta 1 minute less than al dente to prevent mushiness. Preheat thermos with boiling water for at least 5 minutes. Use block cheese shredded yourself for best texture. Sauce should be thicker than usual to hold up in thermos. Leave about 1/2 inch space at top of thermos for steam expansion.
Nutrition
- Serving Size: 1 serving
- Calories: 420
- Sugar: 4
- Sodium: 480
- Fat: 22
- Saturated Fat: 13
- Carbohydrates: 40
- Fiber: 2
- Protein: 18
Keywords: thermos mac and cheese, school lunch, easy mac and cheese, thermos-friendly, kid-friendly lunch