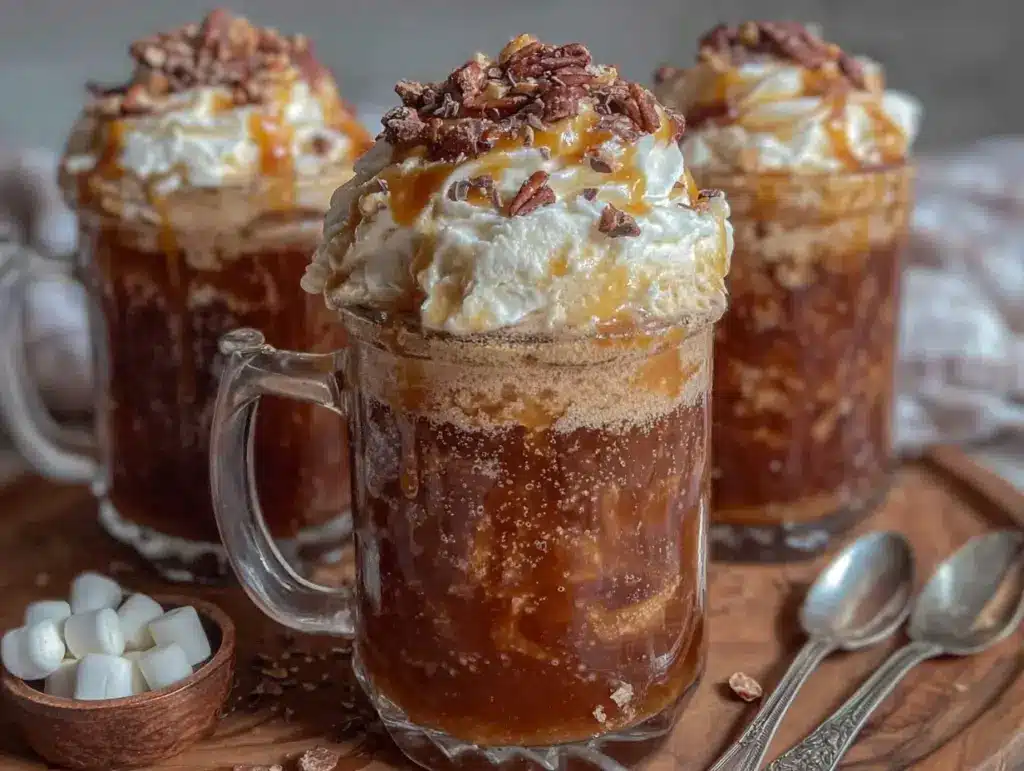
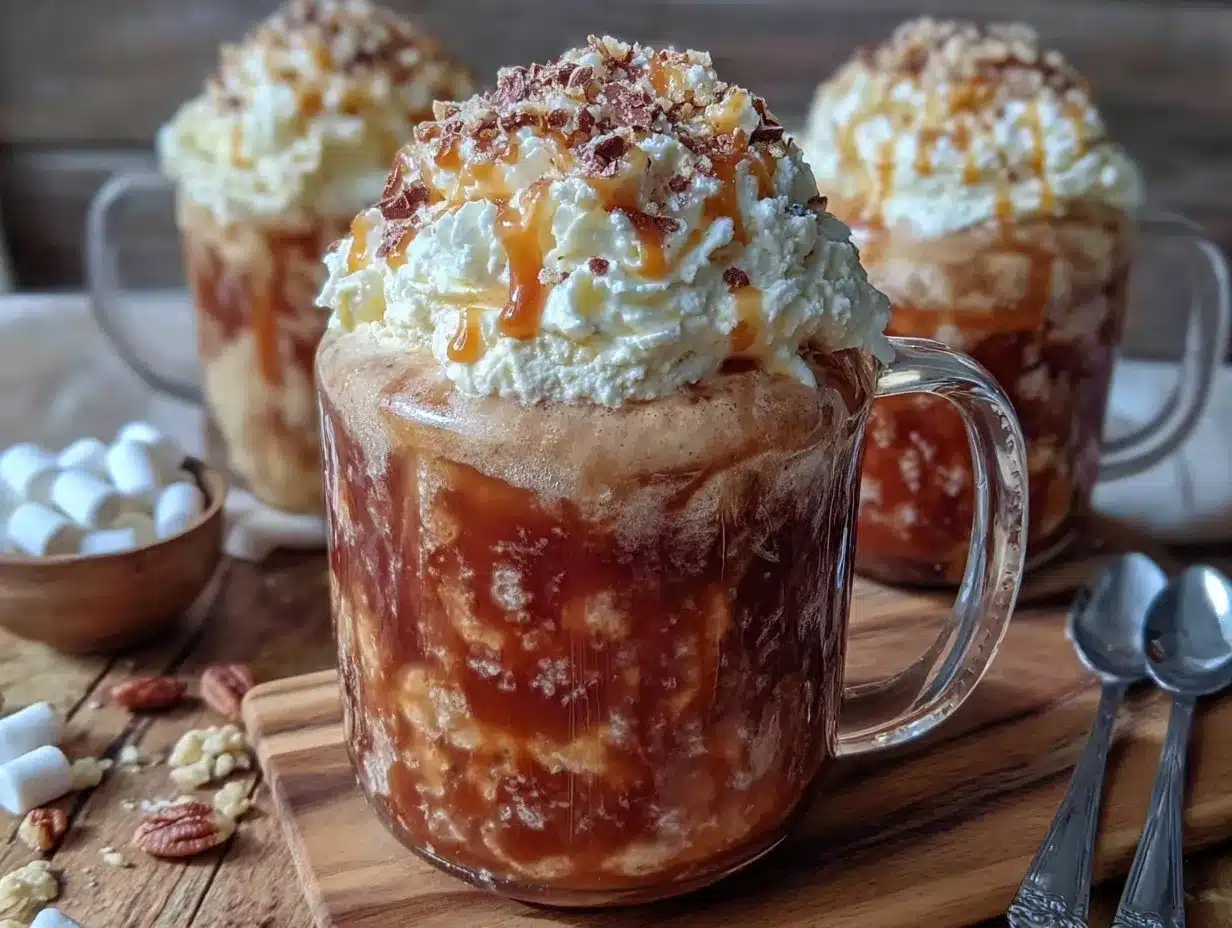
“You want a root beer float that’s not just your average scoop and fizz?” That’s what my sister said over the phone one rainy afternoon, just as I was rummaging through the freezer for something sweet. I had been craving that nostalgic, creamy combo, but honestly, the usual way felt a bit… meh. So, I set out to craft what I now call the Ultimate Creamy Root Beer Float Bar with Vanilla Bean Ice Cream.
It all started as a quick fix on a lazy weekend—no fancy ingredients, no fuss. Just a couple of bottles of root beer, a tub of the good vanilla bean ice cream I’d picked up from the local creamery, and a hunch that layering these flavors and textures could be more fun than the usual pour-and-dip routine. After a few experiments—with the ice cream melting too quickly or the root beer losing fizz—I landed on a method that locks in that creamy, fizzy magic every time.
Honestly, this float bar became my go-to for when friends drop by unexpectedly or when I just want to treat myself without diving into a complicated recipe. The rich vanilla bean notes from the ice cream play perfectly against the spicy sweetness of the root beer, creating a little celebration in every bite. So yeah, it’s that kind of recipe that sticks with you and makes you pause for a moment—sweet, simple, and just a bit indulgent.
Why You’ll Love This Recipe
Having whipped up the Ultimate Creamy Root Beer Float Bar with Vanilla Bean Ice Cream more times than I can count, I’ve learned a thing or two about why it’s a keeper. Here’s the scoop:
- Quick & Easy: The whole thing comes together in under 15 minutes, which is a lifesaver when you want dessert without the wait.
- Simple Ingredients: No need for a special grocery run—just root beer, vanilla bean ice cream, and a few pantry staples.
- Perfect for Casual Gatherings: Whether it’s an impromptu backyard hang or a cozy movie night, this float bar fits right in.
- Crowd-Pleaser: Kids, adults, picky eaters—everyone’s asking for seconds (or thirds).
- Unbelievably Delicious: The silky texture of homemade vanilla bean ice cream melts into the fizzy root beer, creating a creamy, dreamy treat.
This isn’t just any root beer float recipe. The secret lies in layering and chilling the components just right—plus using real vanilla bean ice cream instead of generic vanilla. It makes all the difference. Plus, I’ve found that assembling the floats in a bar style gets everyone involved, which always leads to a good time.
Honestly, if you’re the kind of person who loves simple yet elegant treats or enjoys crafting quick delights with a nostalgic twist, this recipe will feel like a little slice of happiness every single time.
What Ingredients You Will Need
This recipe keeps things straightforward with ingredients you likely have or can easily find. Each one plays a key role in delivering that creamy, fizzy goodness:
- Root Beer: 4 cups (950 ml) of your favorite brand—Barq’s or A&W work great for that classic, spicy kick.
- Vanilla Bean Ice Cream: About 1 quart (950 ml). I recommend a quality brand that uses real vanilla beans for that rich, aromatic flavor. You can even make your own if you’re feeling adventurous!
- Heavy Whipping Cream: 1 cup (240 ml), whipped to soft peaks. Adds extra creaminess and a luscious mouthfeel.
- Powdered Sugar: 2 tablespoons (optional), mixed into the whipped cream for a touch of sweetness.
- Vanilla Extract: 1 teaspoon for boosting the vanilla bean ice cream flavor.
- Chocolate Shavings or Sprinkles: Optional, for garnish and a bit of textural contrast.
- Ice Cubes: A handful, to keep the float bar chilled without watering it down too fast.
For a little variation, you can swap the heavy cream with coconut cream to make it dairy-free, or use sugar-free root beer if you want to cut down on sugar without losing fizz. If you prefer a more intense vanilla taste, a scrape of fresh vanilla bean seeds is a lovely addition.
Equipment Needed
- Large Glass or Plastic Serving Tray: To hold the float bar components and keep everything organized.
- Mixing Bowls: For whipping cream and mixing vanilla extract.
- Electric Hand Mixer or Stand Mixer: Highly recommended for whipping cream quickly and to the perfect consistency.
- Spoons and Small Ladles: For scooping ice cream and root beer easily.
- Clear Drinking Glasses or Mason Jars: For serving individual floats, adding to the fun presentation.
- Ice Cream Scoop: A sturdy scoop helps portion the ice cream neatly.
If you don’t have an electric mixer, a whisk and some patience will do the trick for whipping cream, but it’s definitely a workout for the arm! For a budget-friendly option, consider using a chilled metal bowl to speed up the whipping process and keep the cream cool.
Preparation Method
- Chill Your Equipment: Place your mixing bowl and beaters in the freezer for about 10 minutes. Cold tools help whip the cream faster and fluffier.
- Whip the Cream: Pour 1 cup (240 ml) of heavy whipping cream into the chilled bowl. Add 2 tablespoons (15 g) of powdered sugar and 1 teaspoon (5 ml) vanilla extract. Beat on medium speed for 3-5 minutes until soft peaks form. Be careful not to overwhip—stop when the cream holds gentle peaks but still looks smooth.
- Prepare Your Float Bar Tray: Arrange your serving tray with the chilled root beer, whipped cream, vanilla bean ice cream, and any garnishes like chocolate shavings or sprinkles. Keep a handful of ice cubes nearby to keep everything cold without diluting the flavors.
- Scoop Ice Cream: Using a firm ice cream scoop, place 1 to 2 generous scoops (about ½ cup or 120 ml each) of vanilla bean ice cream into each serving glass or jar. This amount balances well with the root beer.
- Add Root Beer: Slowly pour approximately 1 cup (240 ml) of root beer over the ice cream in each glass. Pour gently to preserve the fizz and prevent overflow.
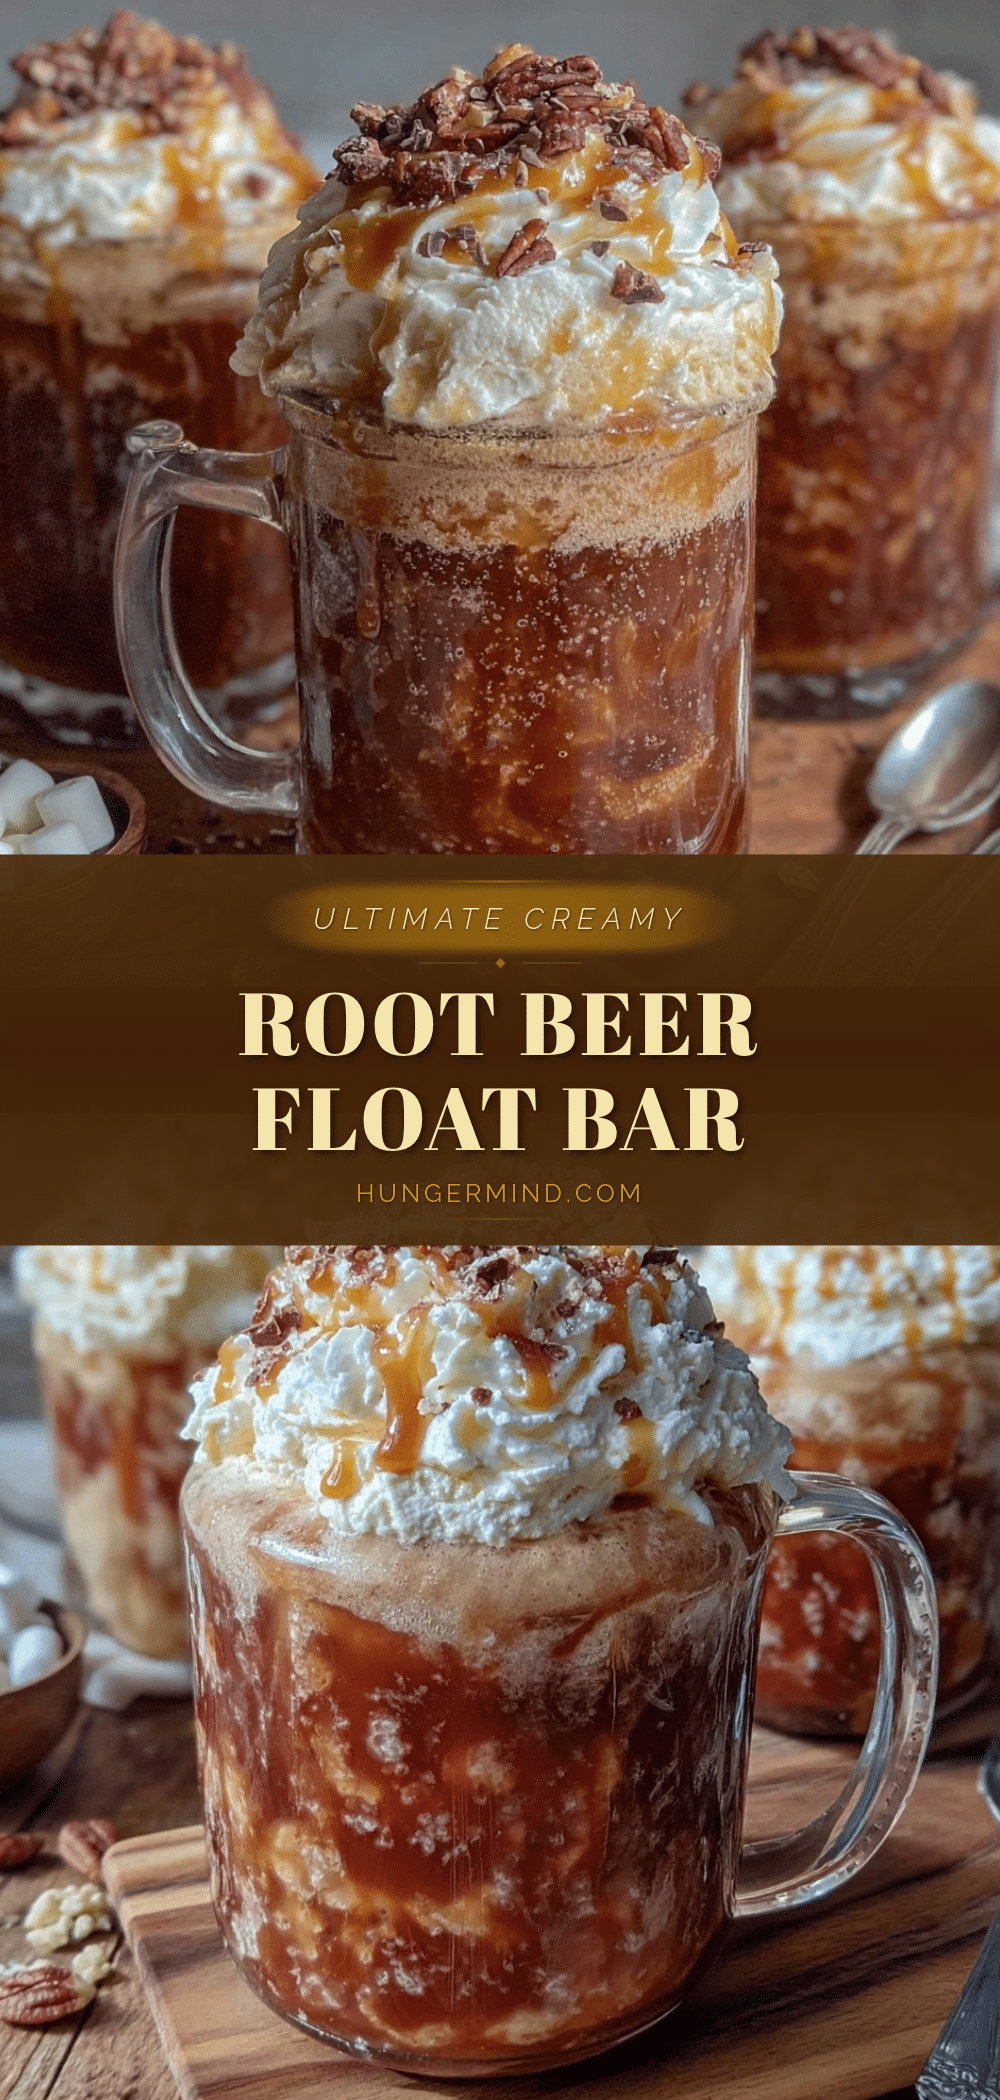
- Top with Whipped Cream: Spoon a dollop of the vanilla whipped cream on top of each float. This adds a creamy layer that softens the bubble burst of root beer.
- Garnish and Serve: Sprinkle with chocolate shavings or sprinkles if desired. Serve immediately with a straw and spoon.
If you want to prep in advance, you can whip the cream and scoop the ice cream into serving glasses, then refrigerate the whipped cream and freeze the scooped ice cream until ready to assemble. Just pour root beer at the last minute to keep the bubbles alive.
Cooking Tips & Techniques
Getting the perfect creamy root beer float isn’t just about tossing ingredients together. Some little tricks make all the difference:
- Keep Everything Cold: The fizz disappears quickly if the ingredients warm up, so chill glasses and ingredients beforehand. I learned this the hard way when my floats flattened in minutes during a summer party!
- Slow Pour Root Beer: Pour slowly over the ice cream to control the foam and avoid spills. A gentle tilt of the glass helps keep the bubbles in check.
- Whip Cream to Soft Peaks: Stop whipping as soon as you see soft peaks—going further risks turning it into butter, which definitely messes with the float’s texture.
- Use Real Vanilla Bean Ice Cream: The little black flecks and natural vanilla aroma make a huge flavor difference compared to plain vanilla or artificial versions.
- Layer Creatively: For a fun twist, alternate scoops of ice cream and root beer in tall glasses, finishing with whipped cream and garnish.
Once, I tried freezing an assembled float overnight (don’t do it!). The root beer lost all its sparkle and the ice cream turned icy. So trust me, fresh assembly is key here.
Variations & Adaptations
This float bar is a great canvas for your creativity. Here are some ways you can switch things up:
- Dietary Swap: Use coconut milk ice cream and sugar-free root beer to make a vegan and lower-sugar version. You’ll still get that creamy fizz combo but with a subtle coconut twist.
- Flavor Boost: Add a splash of bourbon or rum for an adult-friendly float. A sprinkle of cinnamon or nutmeg on top adds a warm spice note that pairs beautifully with vanilla bean.
- Seasonal Twist: During summer, try swapping root beer with cream soda or a lightly flavored ginger beer for a refreshing change. Or add fresh berries on top for a fruity pop.
- Ice Cream Alternatives: For a lighter option, try frozen yogurt or gelato with vanilla bean specks. The texture is a bit different but still delicious.
- Personal Favorite: I once tried layering a little homemade salted caramel sauce under the ice cream before pouring root beer—unexpectedly incredible!
Serving & Storage Suggestions
The Ultimate Creamy Root Beer Float Bar is best enjoyed fresh and cold. Serve immediately after assembling to keep the fizz lively and the cream smooth. Presentation-wise, clear glasses or mason jars really showcase the layers, making it as pretty as it is tasty.
This float pairs wonderfully with salty snacks or light bites—think crispy spiced potatoes or even a fresh salad like the Autumn Harvest Salad with Maple Vinaigrette to balance the sweetness.
If you have leftovers, the whipped cream and ice cream can be stored separately in airtight containers for up to 2 days in the fridge and freezer, respectively. Root beer should stay sealed and chilled. Avoid mixing leftovers to prevent losing fizz and creamy texture.
Reheat root beer floats isn’t really a thing, but if you want to revive a slightly flat root beer, chilling it and adding a splash of fresh soda can perk it back up before serving.
Nutritional Information & Benefits
A typical serving of this root beer float bar clocks in around 300-350 calories, depending mostly on the ice cream and whipped cream quantities. It provides a good dose of calcium and vitamin D from the dairy, plus a little protein.
Vanilla bean ice cream contains antioxidants from the real vanilla, and the carbonation in root beer can aid digestion, though the sugar content is something to watch if you’re mindful of intake.
For gluten-free eaters, this recipe is naturally safe as it contains no wheat ingredients. You can also customize it for lower sugar or dairy-free diets without losing the core indulgence.
I like to think of this as a treat that pairs joy with just a touch of nostalgia and simplicity—perfect for those moments when you want a dessert that feels like a hug.
Conclusion
The Ultimate Creamy Root Beer Float Bar with Vanilla Bean Ice Cream isn’t just a recipe; it’s a little celebration of simple pleasures. It’s the kind of treat you make when you want to impress without stress or when a craving hits unexpectedly (you know, that 3 pm slump moment).
Feel free to tweak the toppings, swap out ingredients, or adjust serving sizes to suit your mood or guests. This float bar adapts well to your style and still delivers that dreamy creamy-fizzy punch every time.
I keep coming back to this recipe because it’s as comforting as it is fun, and honestly, it always brings a smile. If you’ve tried it, I’d love to hear how you made it your own—drop your thoughts or variations in the comments and let’s keep the conversation bubbling.
Here’s to many more sweet, fizzy moments!
Frequently Asked Questions
- Can I make the float bar ahead of time?
You can prep the whipped cream and scoop ice cream in advance, but assemble the floats just before serving to keep the root beer fizzy. - What’s the best root beer brand for this recipe?
I like using Barq’s or A&W for their bold flavor and good carbonation, but any quality root beer works. - Can I use regular vanilla ice cream instead of vanilla bean?
You can, but vanilla bean ice cream adds a richer, more aromatic flavor that really shines here. - Is there a dairy-free version of this float bar?
Yes! Use coconut milk ice cream and coconut whipped cream, plus sugar-free or regular root beer depending on your preference. - How do I prevent the float from getting watery?
Keep ingredients chilled and pour root beer slowly over ice cream. Using a float bar setup helps everyone assemble fresh servings without melting too fast.
Pin This Recipe!
Ultimate Creamy Root Beer Float Bar Recipe with Vanilla Bean Ice Cream

A nostalgic and creamy root beer float bar featuring real vanilla bean ice cream and whipped cream, perfect for casual gatherings and quick indulgence.
- Prep Time: 15 minutes
- Cook Time: 0 minutes
- Total Time: 15 minutes
- Yield: 4 servings 1x
- Category: Dessert
- Cuisine: American
Ingredients
- 4 cups (950 ml) root beer (Barq’s or A&W recommended)
- 1 quart (950 ml) vanilla bean ice cream
- 1 cup (240 ml) heavy whipping cream, whipped to soft peaks
- 2 tablespoons powdered sugar (optional)
- 1 teaspoon vanilla extract
- Chocolate shavings or sprinkles (optional, for garnish)
- Ice cubes (a handful)
Instructions
- Chill your mixing bowl and beaters in the freezer for about 10 minutes.
- Pour 1 cup (240 ml) heavy whipping cream into the chilled bowl. Add 2 tablespoons powdered sugar and 1 teaspoon vanilla extract. Beat on medium speed for 3-5 minutes until soft peaks form.
- Arrange your serving tray with chilled root beer, whipped cream, vanilla bean ice cream, and garnishes like chocolate shavings or sprinkles. Keep ice cubes nearby to keep everything cold.
- Using an ice cream scoop, place 1 to 2 generous scoops (about ½ cup or 120 ml each) of vanilla bean ice cream into each serving glass or jar.
- Slowly pour approximately 1 cup (240 ml) of root beer over the ice cream in each glass, pouring gently to preserve fizz and prevent overflow.
- Spoon a dollop of the vanilla whipped cream on top of each float.
- Sprinkle with chocolate shavings or sprinkles if desired. Serve immediately with a straw and spoon.
Notes
Keep all ingredients and glasses chilled to preserve fizz and prevent melting. Pour root beer slowly over ice cream to control foam. Whip cream to soft peaks only to avoid butter formation. Assemble floats fresh for best texture and fizz. For dairy-free version, use coconut milk ice cream and coconut whipped cream with sugar-free root beer.
Nutrition
- Serving Size: 1 float (about 1 gla
- Calories: 325
- Sugar: 32
- Sodium: 150
- Fat: 18
- Saturated Fat: 11
- Carbohydrates: 38
- Protein: 4
Keywords: root beer float, vanilla bean ice cream, creamy float, easy dessert, nostalgic treat, float bar, whipped cream, summer dessert